

Posted on 23/11/2013 at 18:24
Tribute to Krapo Bleu
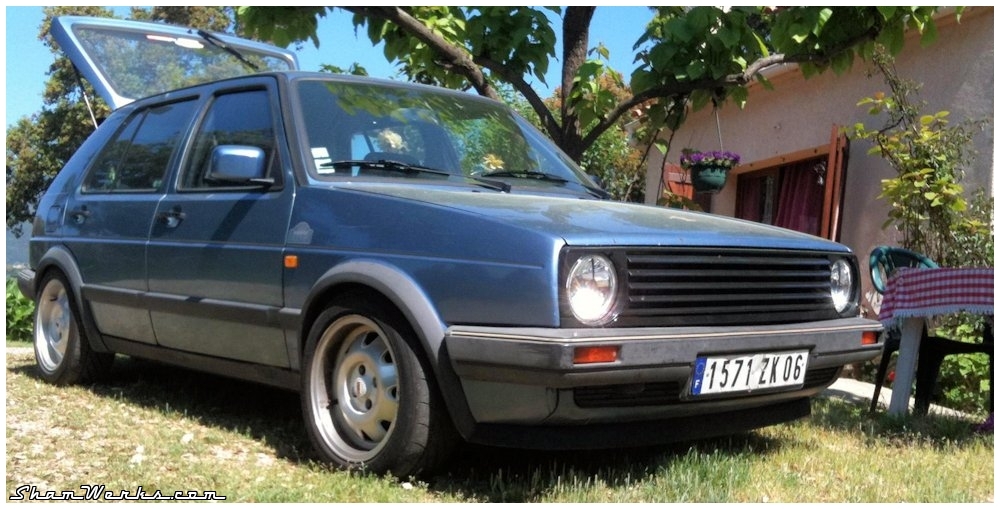
 Precisely 25 years ago today, on November 23rd 1988, was put into circulation my daily driver, aka "Krapo Bleu"! (that would translate as "Blue Toad")
I thought it was the perfect time for a small tribute, to celebrate its quarter-of-a-century, including 16 years (and 120.000km) at my service : I bought that car in august 1997 for a whopping 23.000 Francs (around 3500 €)!
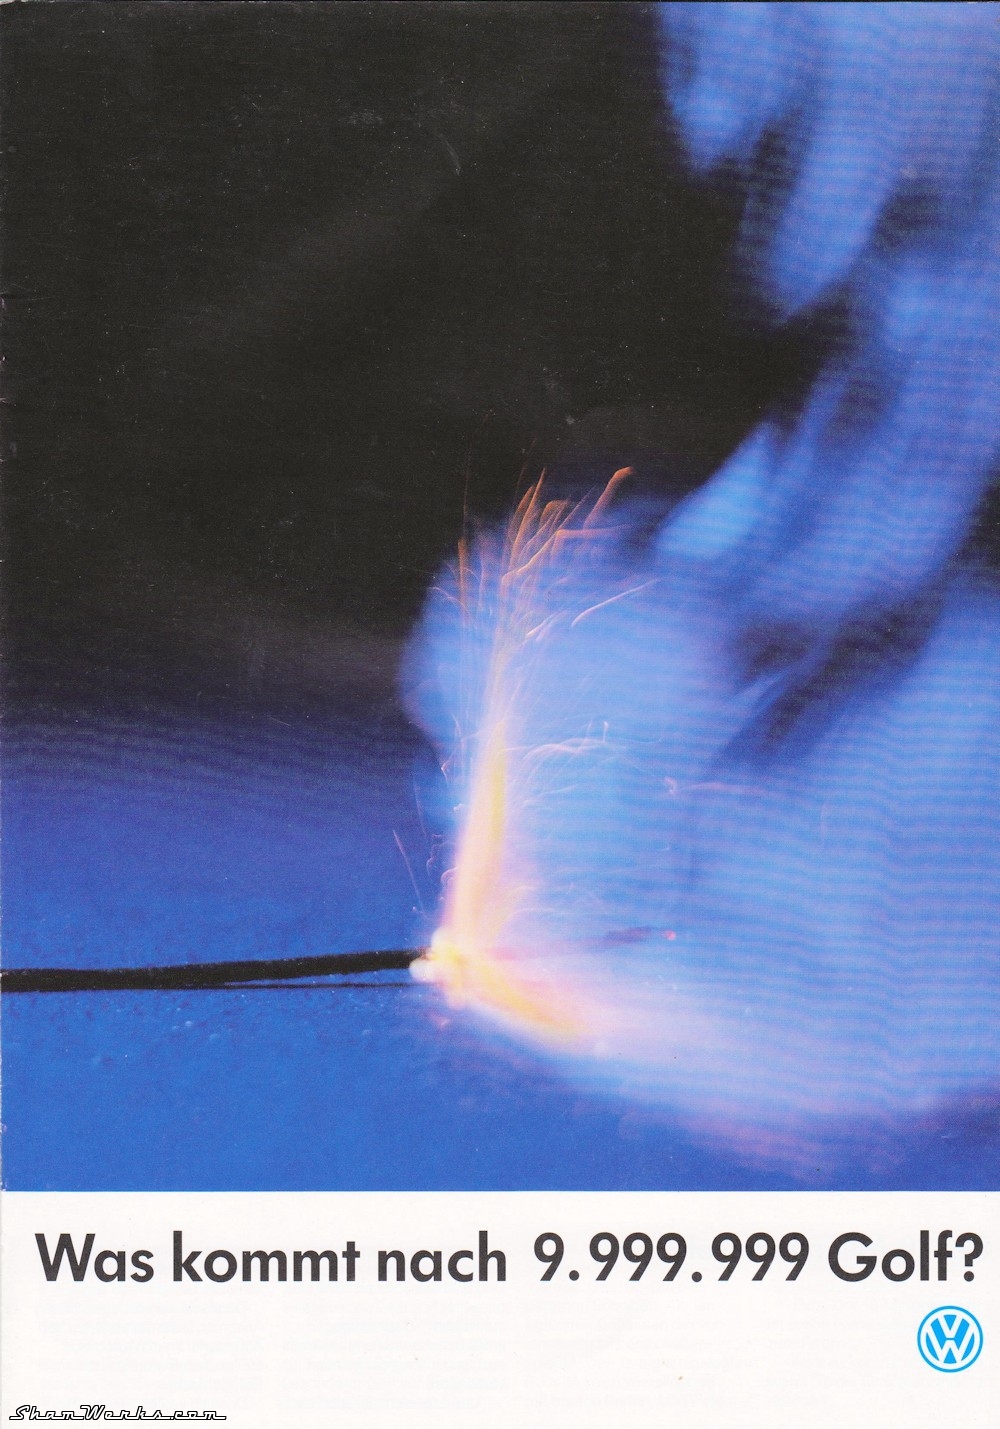
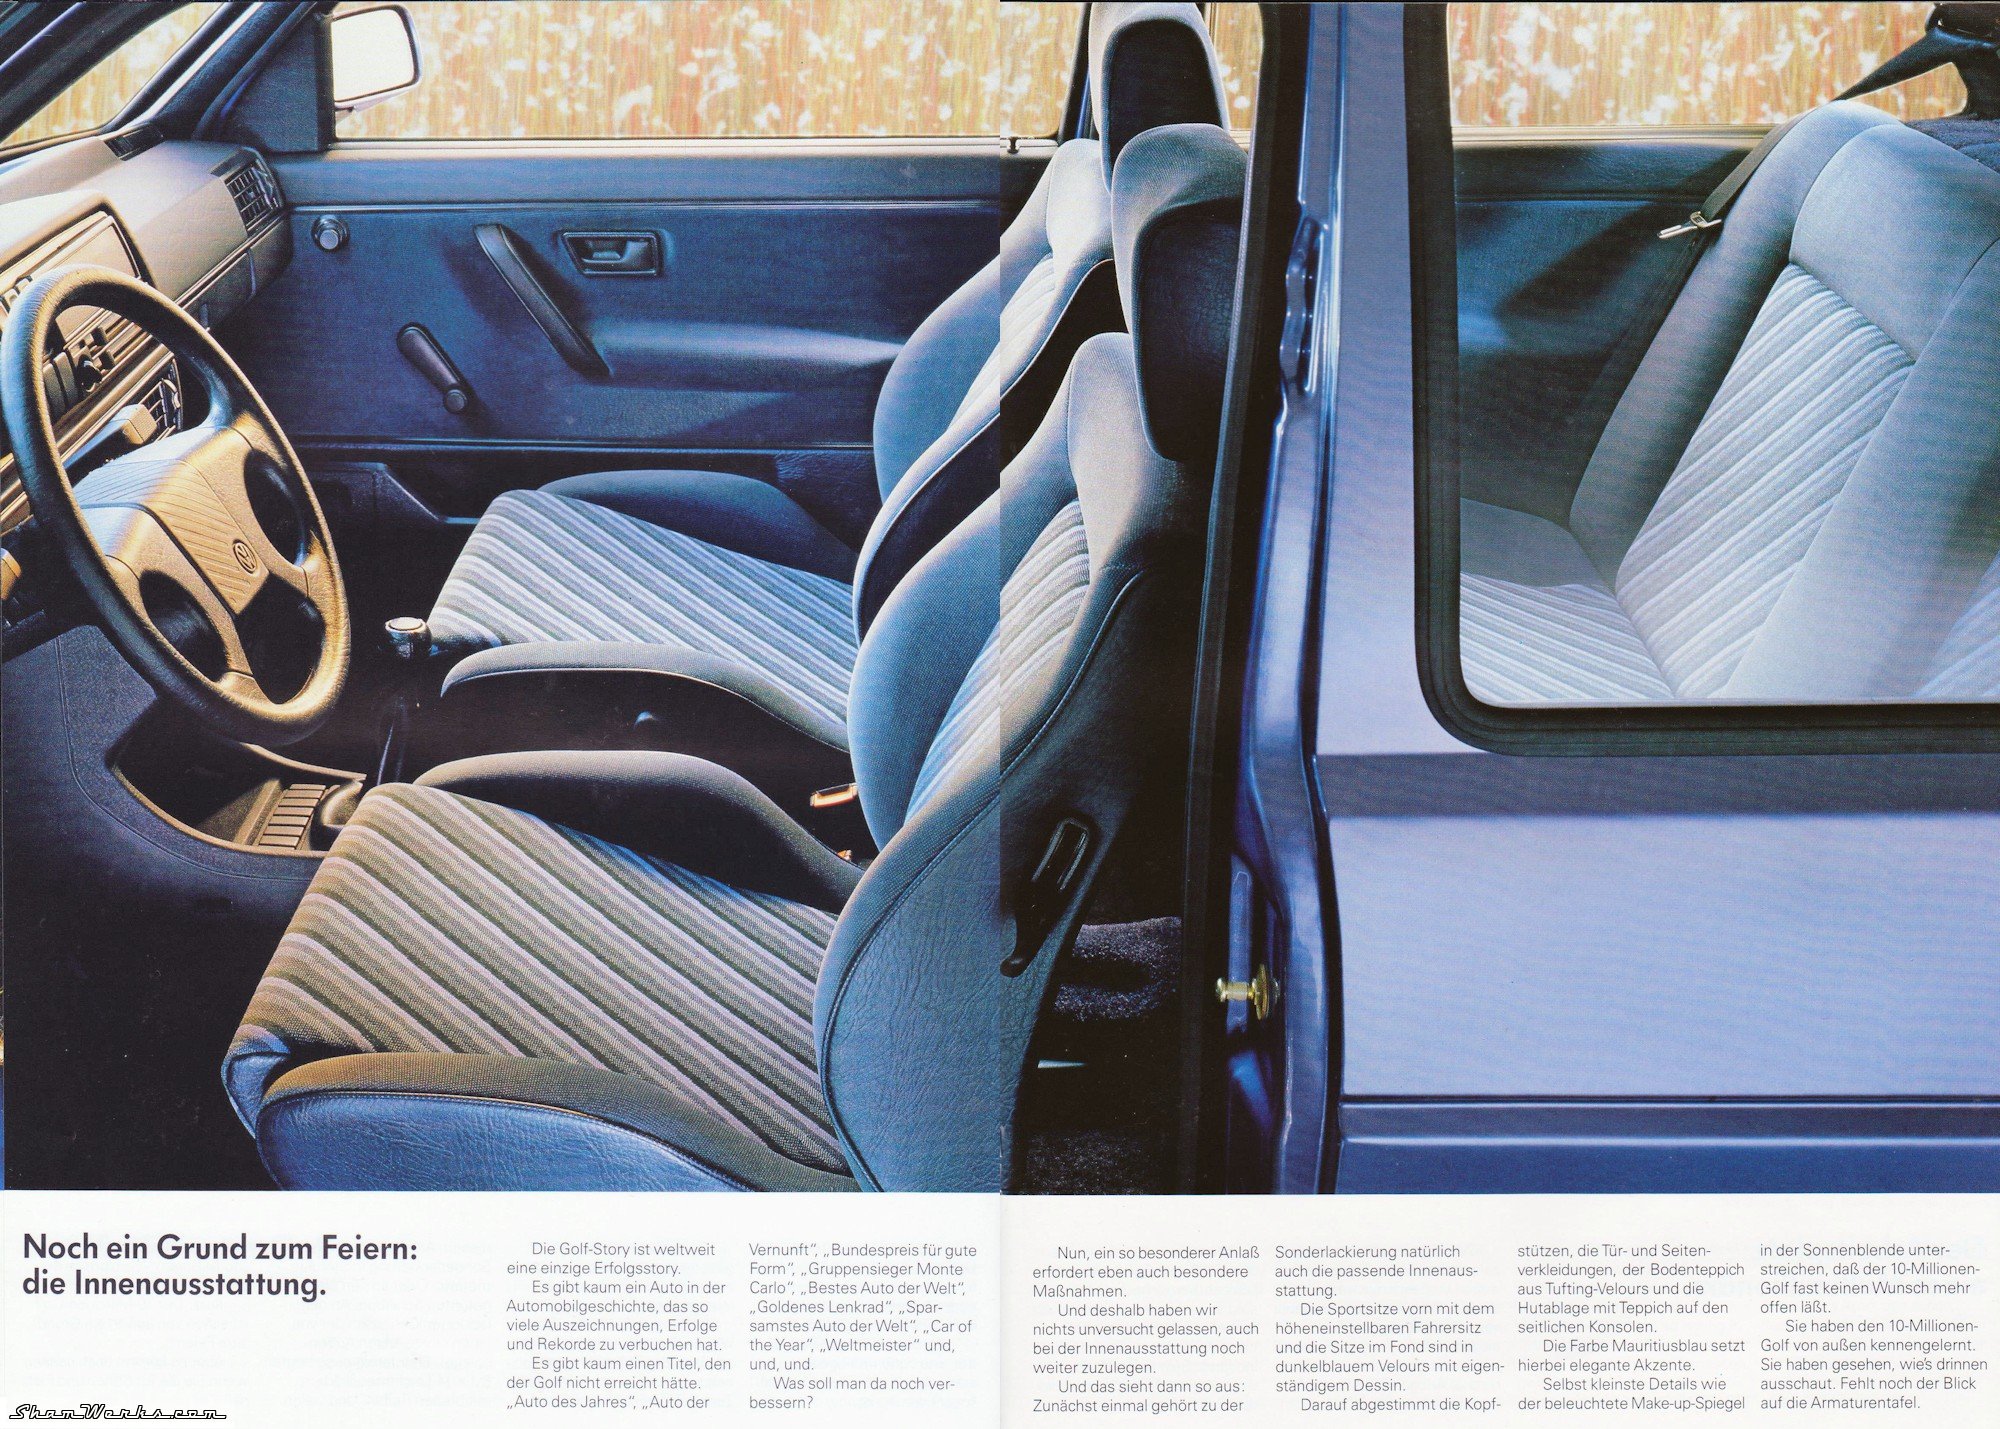
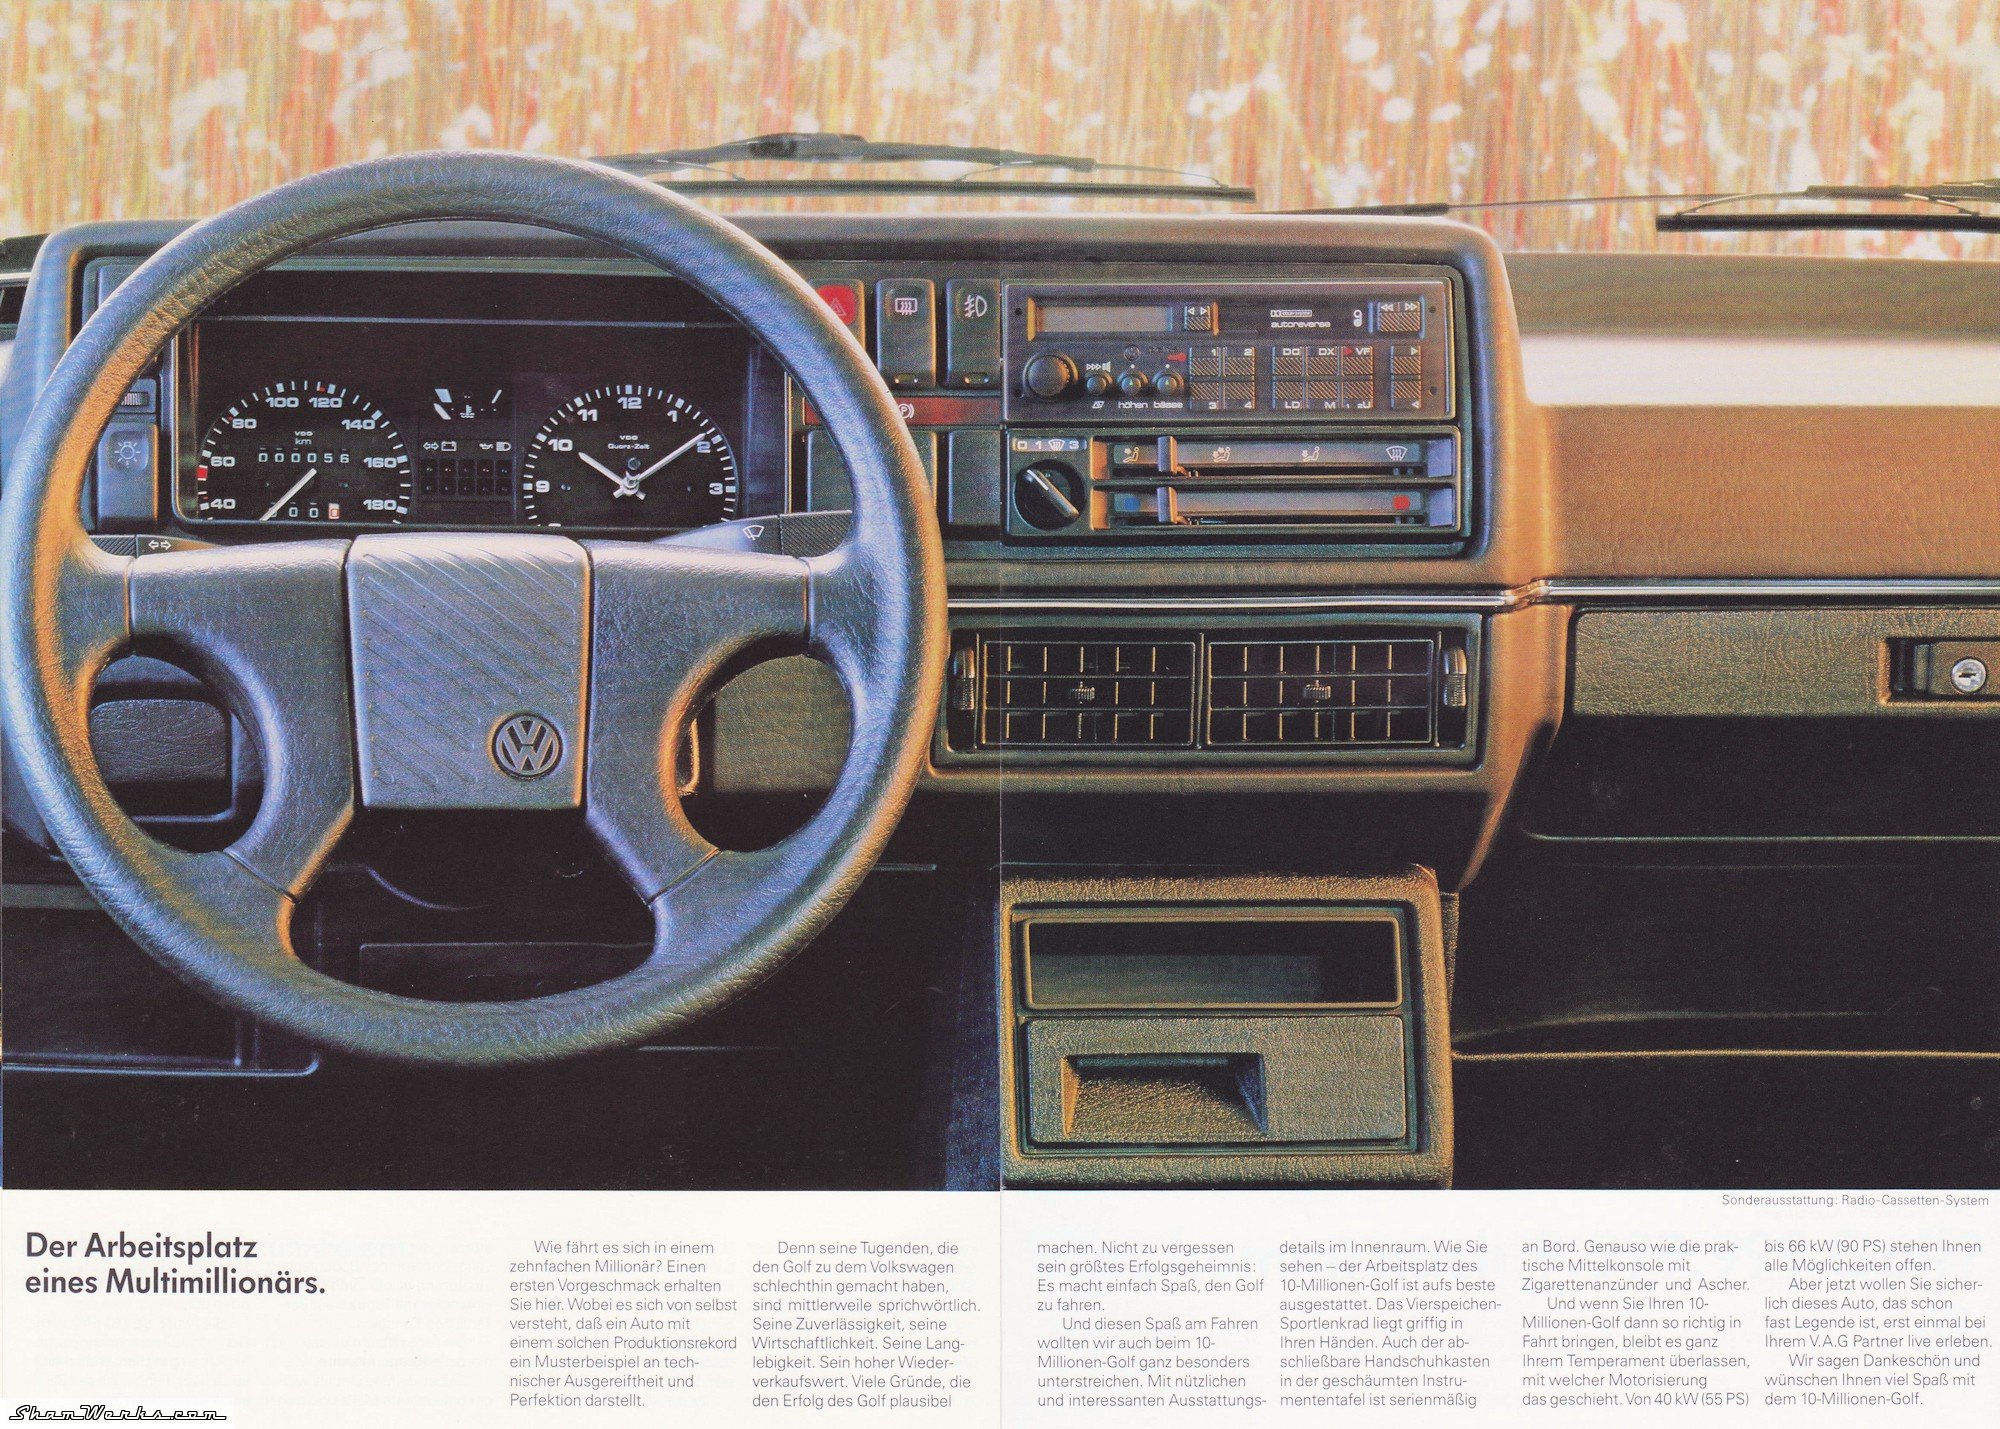
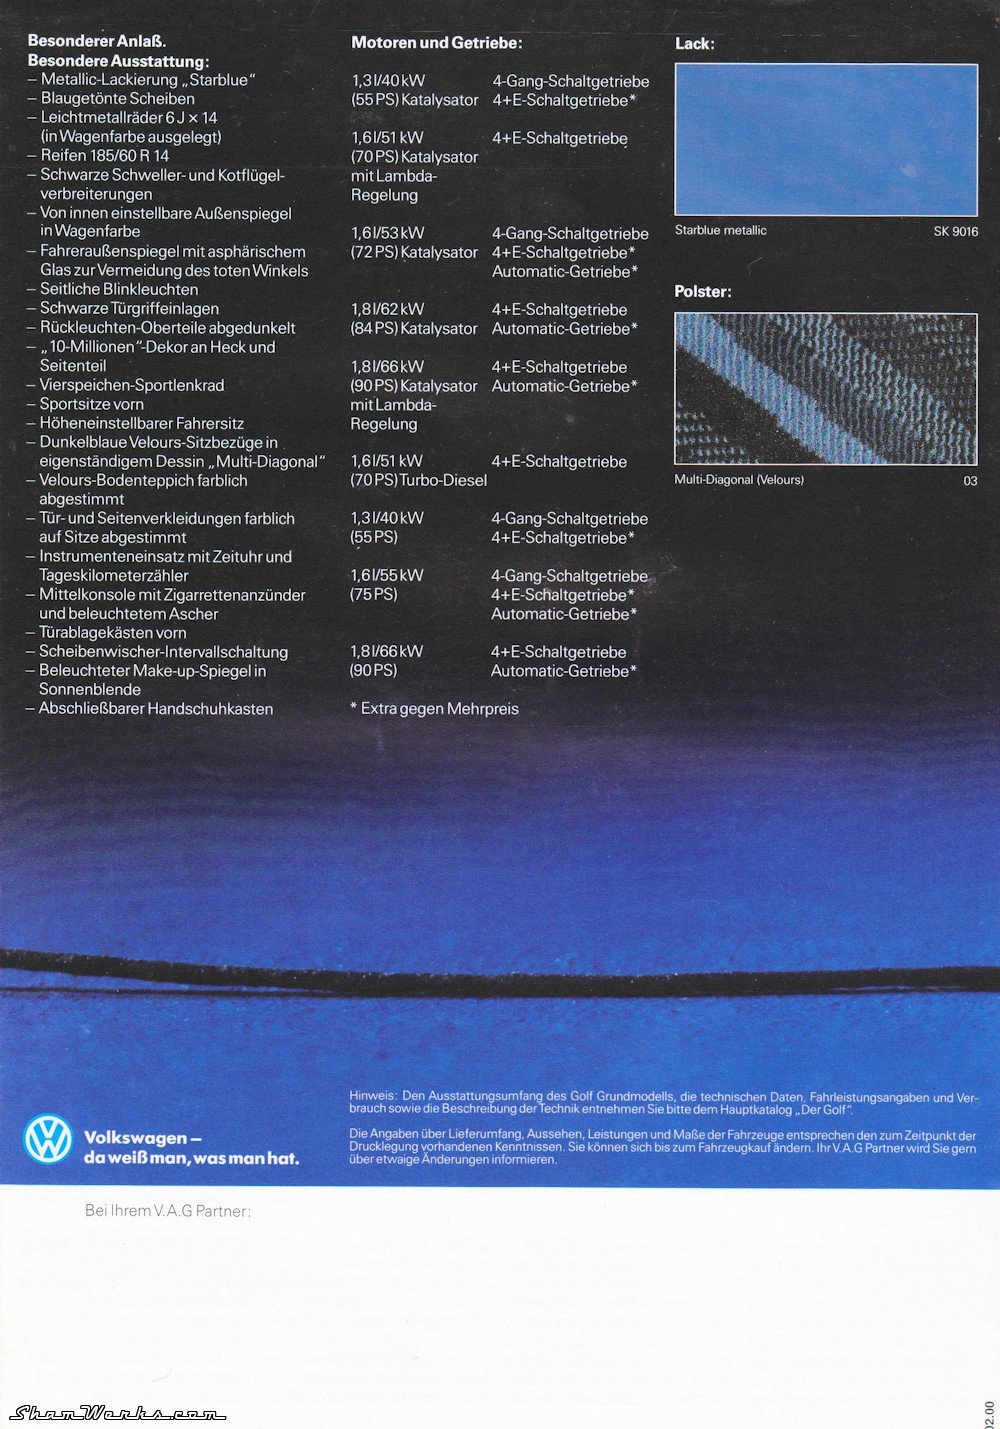
My "old friend" as I call her, is a Golf (it might be a "Rabbit" in your country) Mk.2, a limited edition created in 1988 to celebrate the production of the 10 millionth Golf, and named for the occasion "10 Millionen" (but renamed "Champ" for the French market, go figure)...
It featured specific rims, paint color, blue tainted windows and upholstery, that's quite a rare model! I recently managed to get my hands on the original brochure available at the time in the german concessions (collector!) :

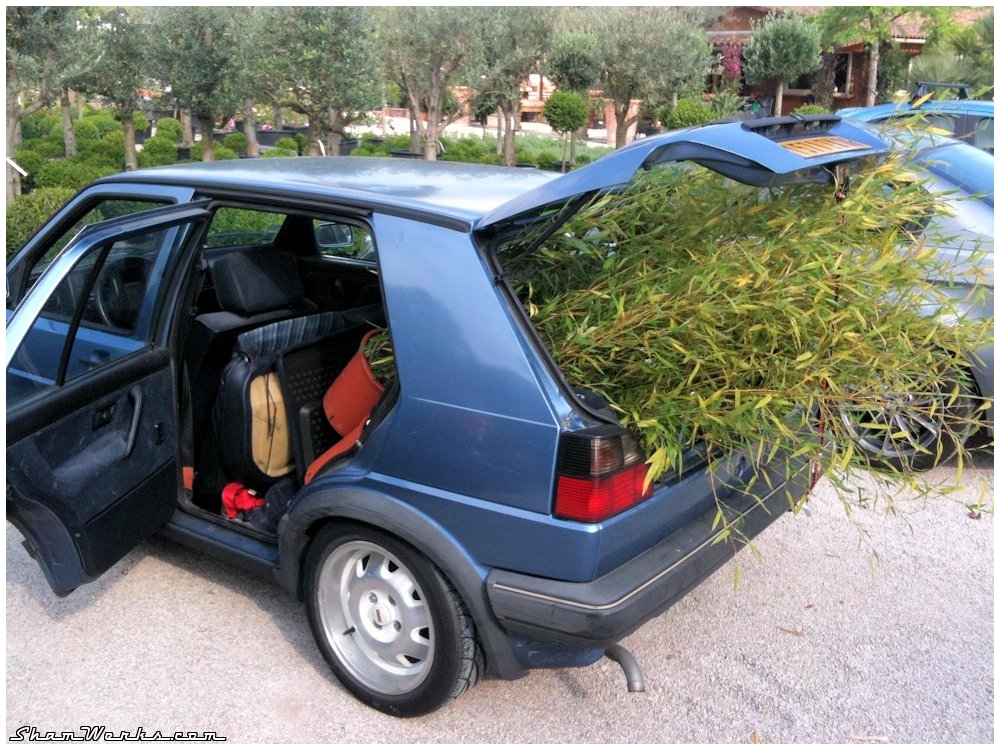
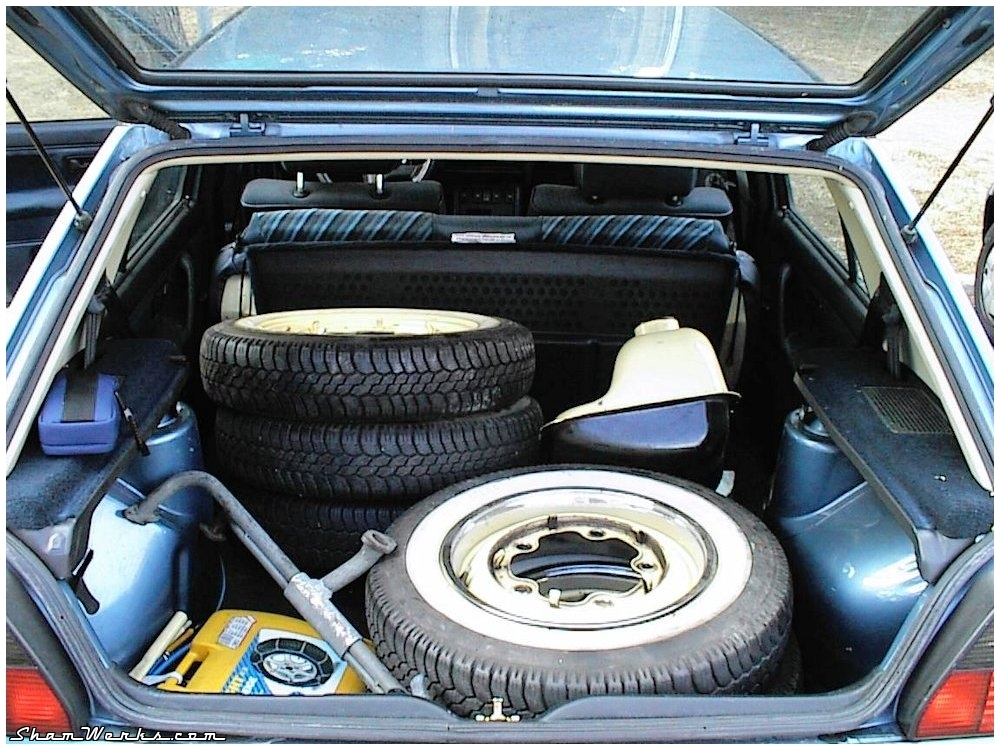
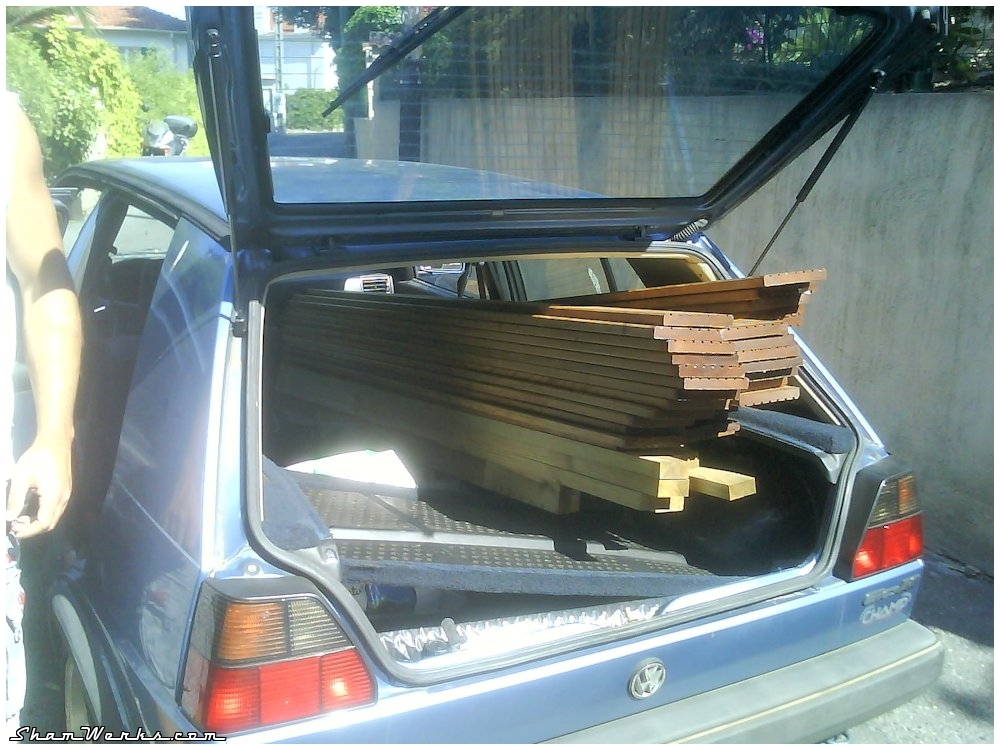
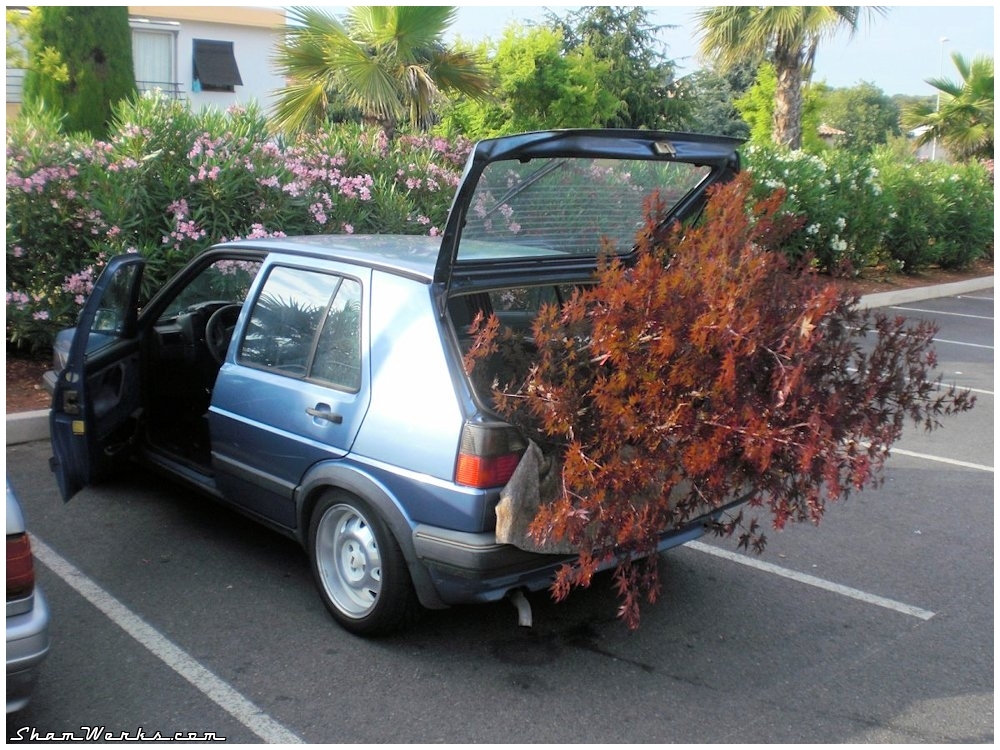
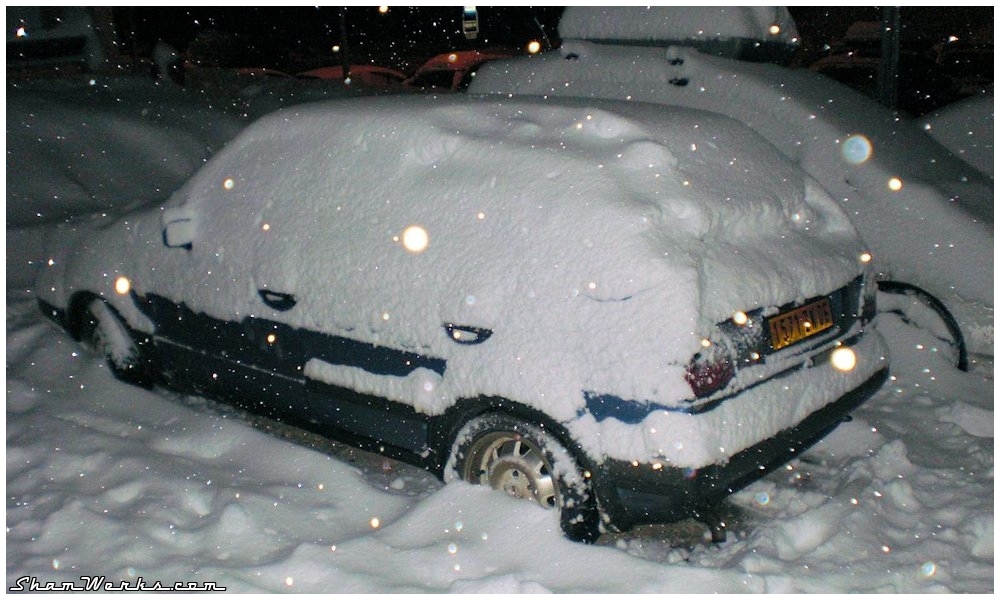
I really did everything this one, and I transported just about anything with it!
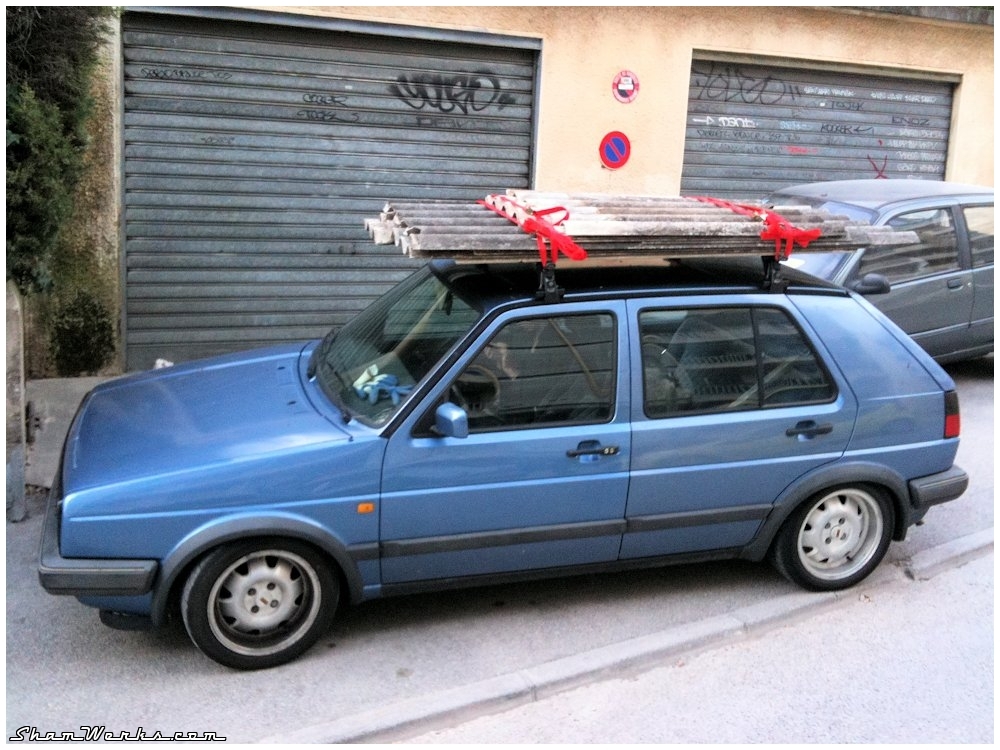
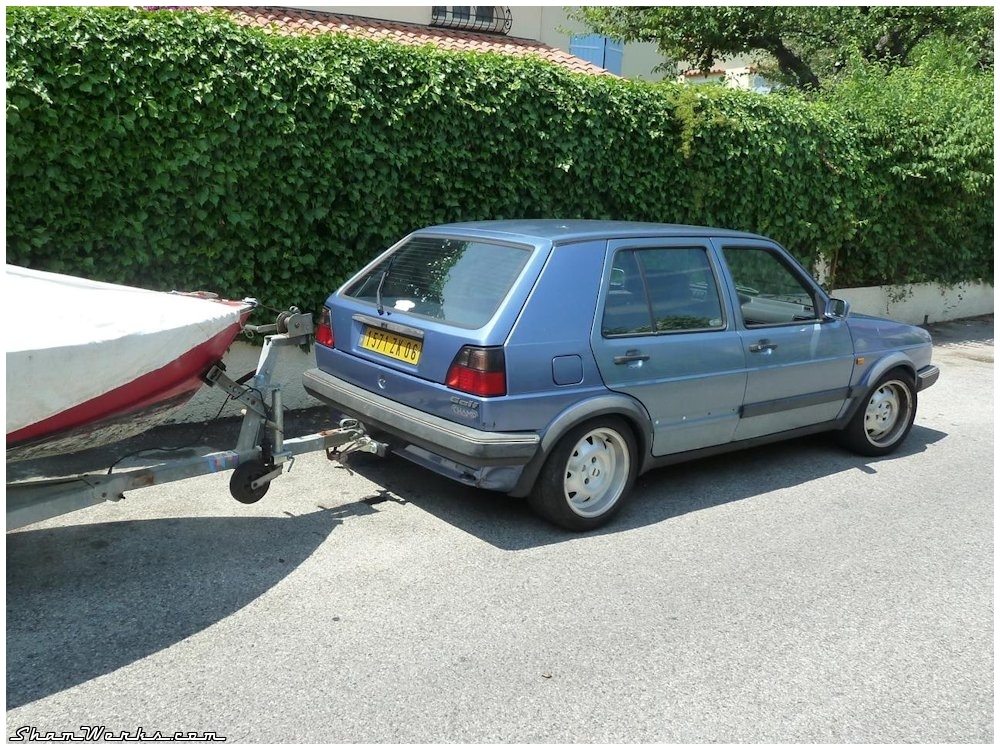

The original, model-specific 14" wheels were badly corroded, so I replaced them with a set of 15" ATS Cup (found brand new on eBay Germany, with their original VW/TÜV certification papers!), mounted on Yokohama Parada 195/50/15 (great tires, and affordable with that! I highly recommend them!). It has quite a impressive road handling capabilities!
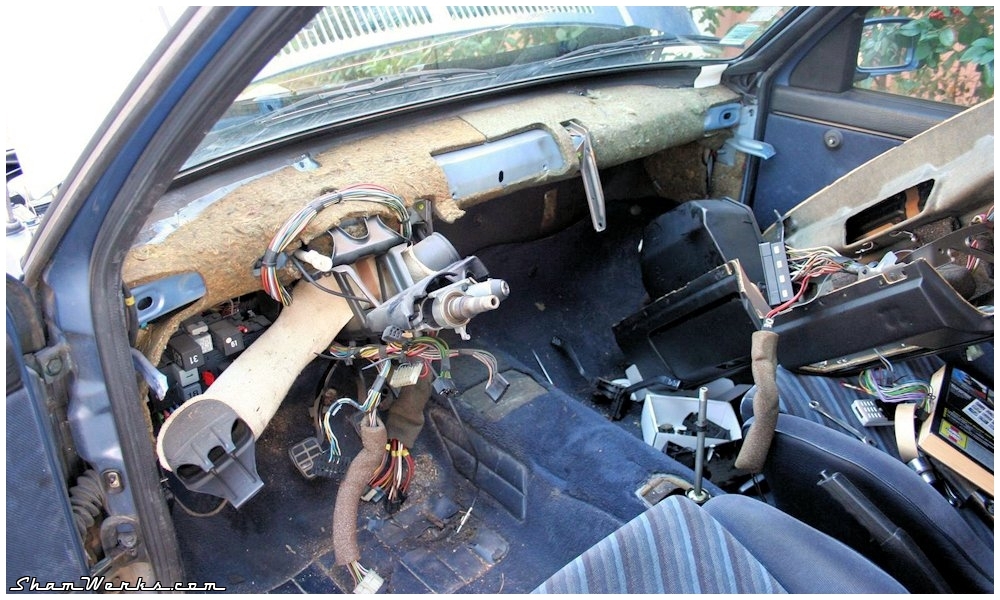
But well, it's getting old, I'll need to plan for a coat of paint one day or another... And if one of you had a spare 1.8l engine (carb 90hp) with not too many kilometers on it, I'm interested!
Happy Birthday Blue Toad!
Posted on 18/10/2013 at 16:32
Kitty Injection : Hardware

INJECTION
HARDWARE
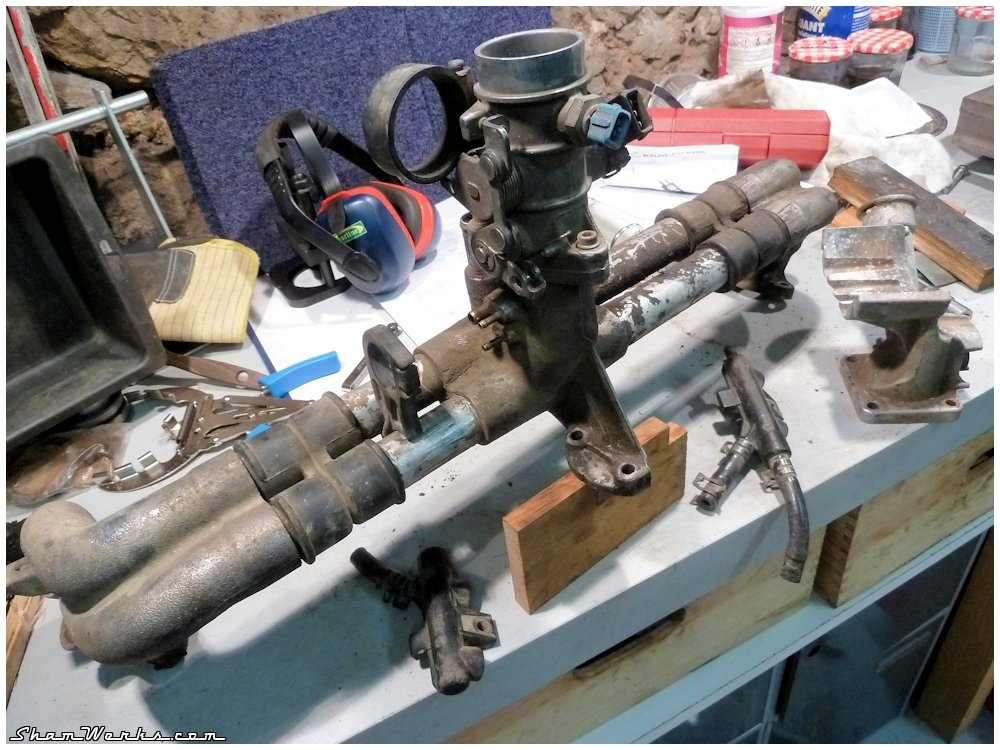
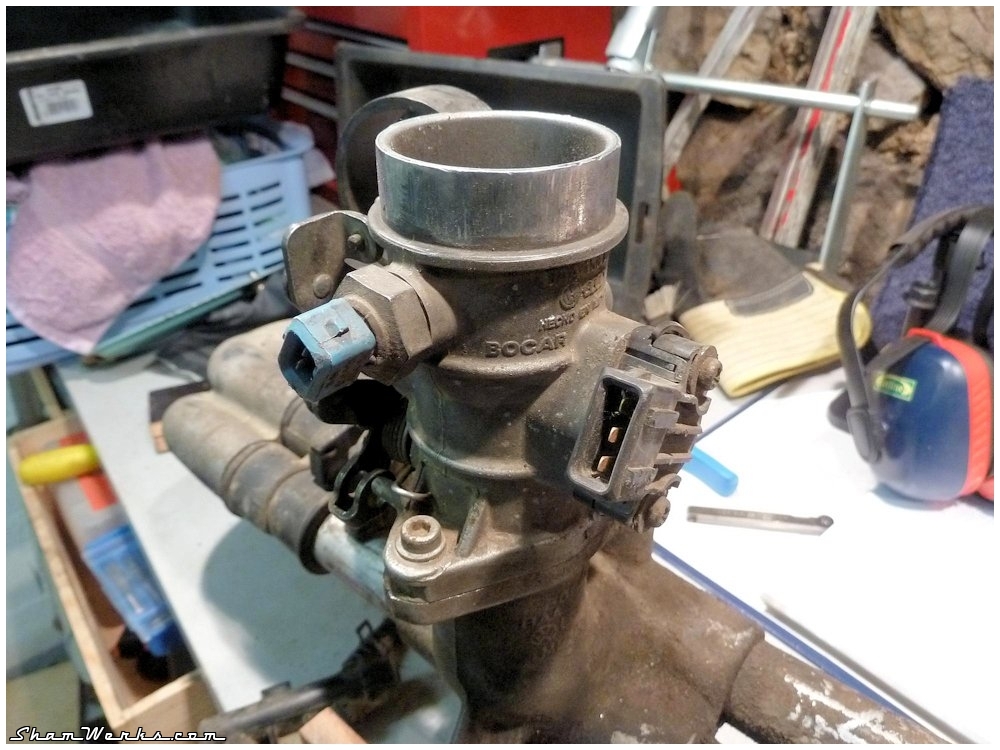
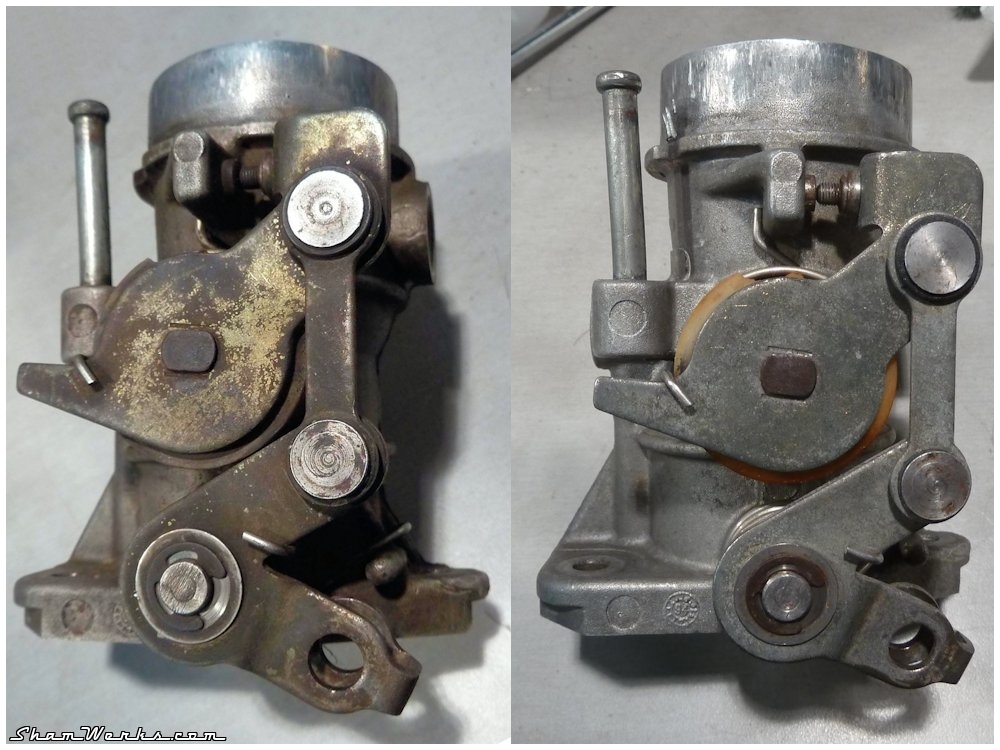
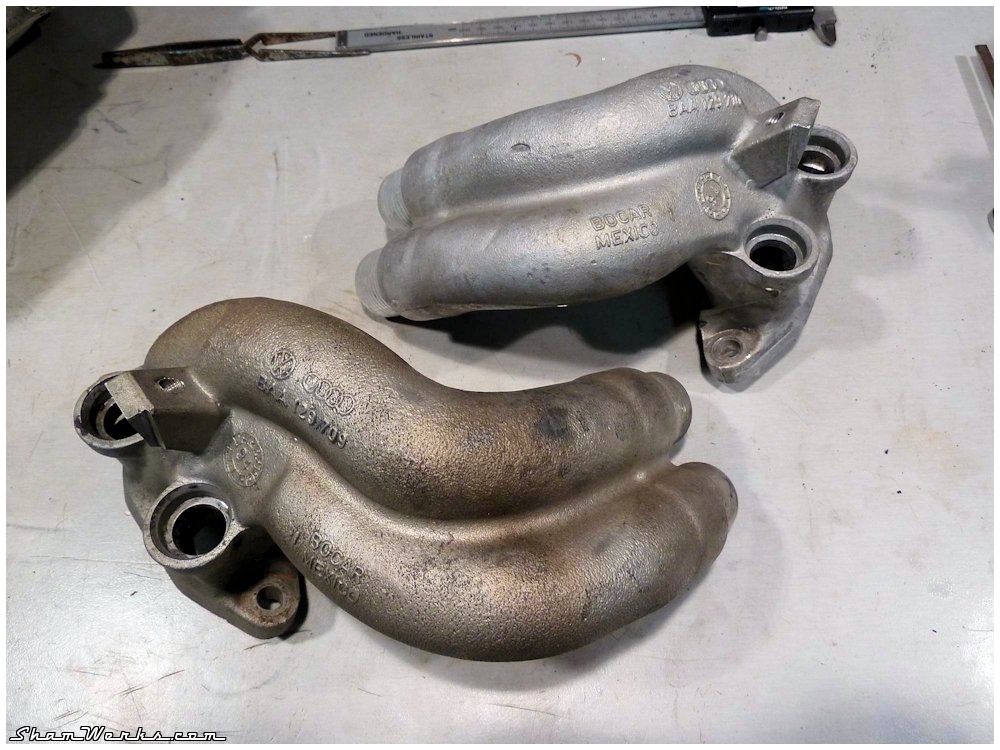
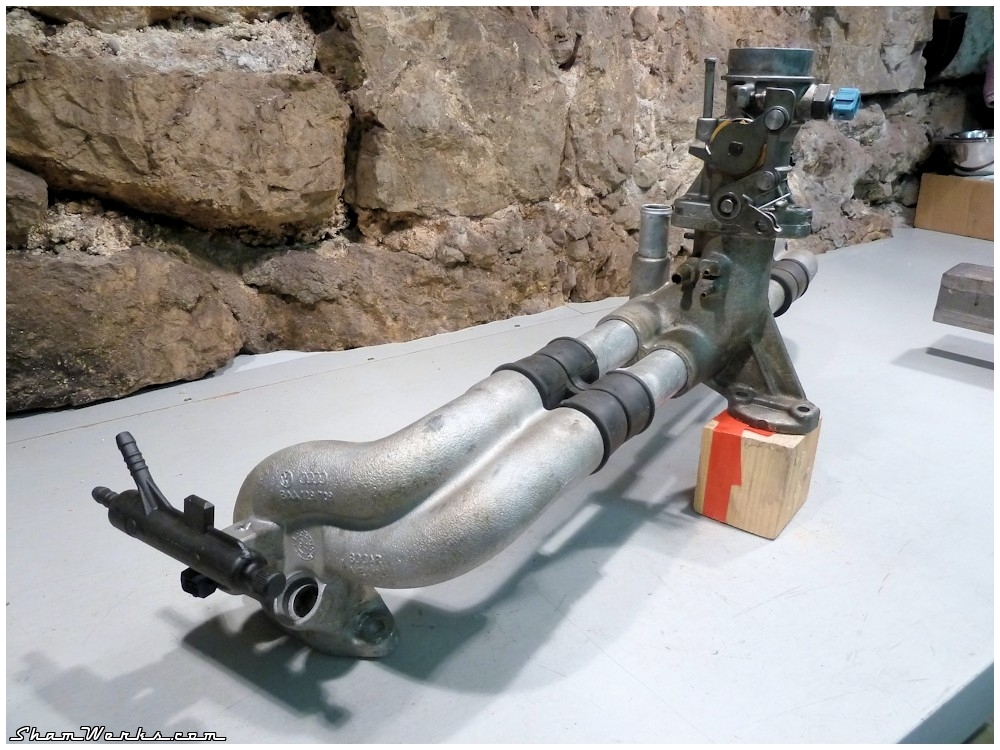
Intake :
On the intake side, I'm using parts from the 1600i engines that were installed on the last Mexican Beetles : complete intake manifold/plenum, throttle body, and alternator stand. (thanks Laurent!)A thorough cleaning (beadblasting or ultrasound bath, depending on the parts), a couple of new gaskets, and it's ready to go!
I've ordered a few new parts directly from Mexico (fuel rails, manifold boots and injector gaskets), via a vendor on TheSamba (Antonio Trejo, very good contact!).


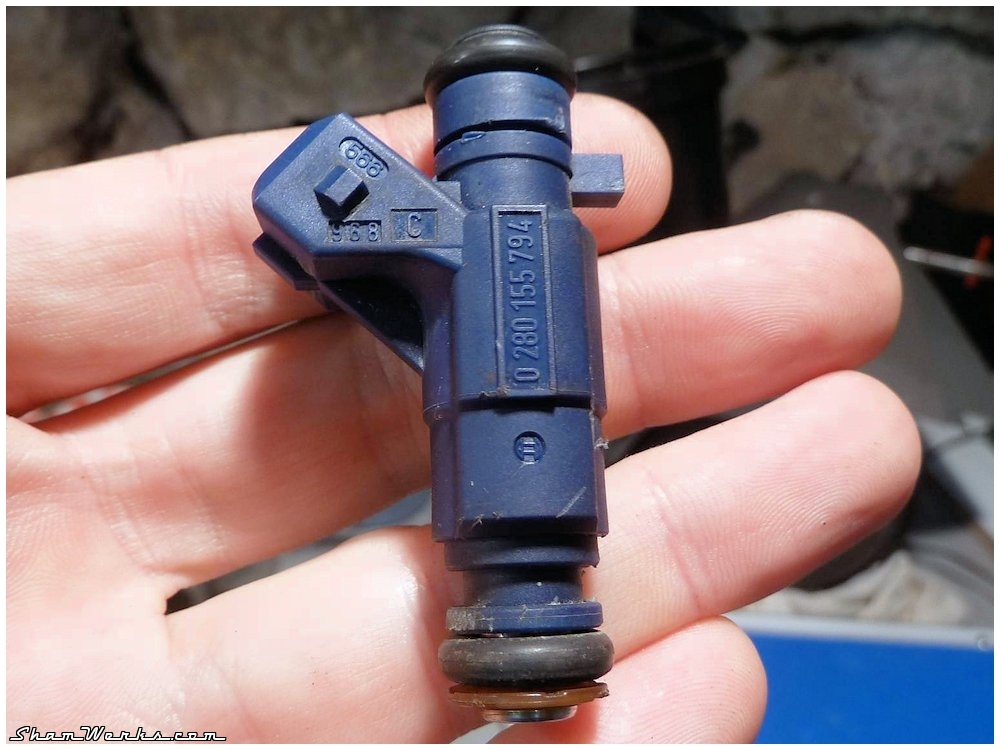
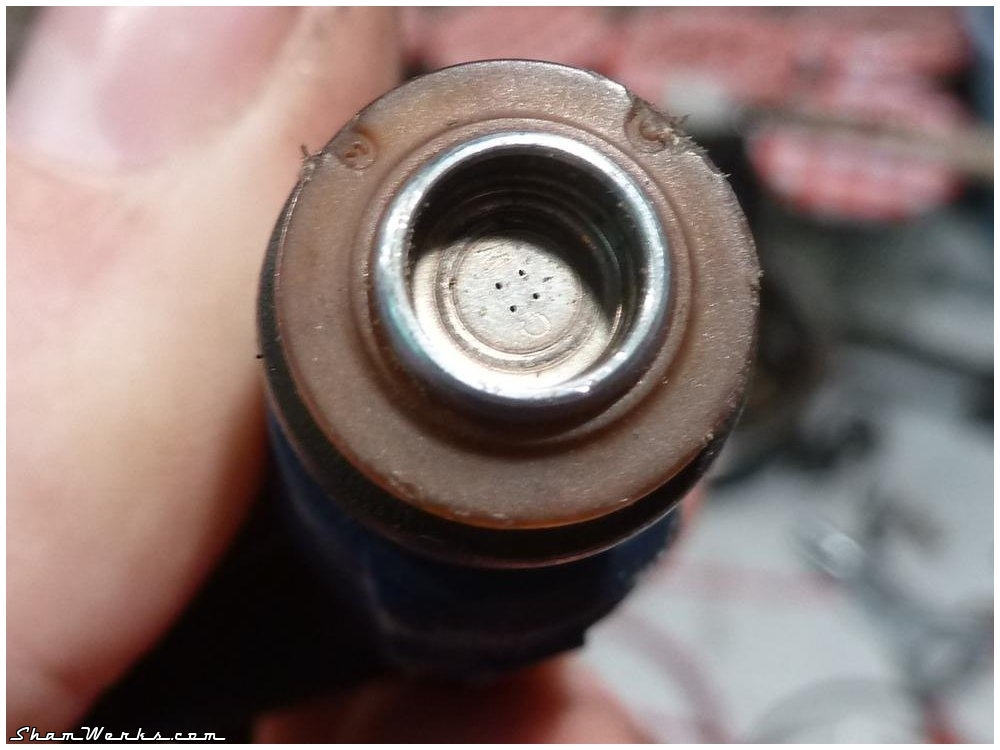
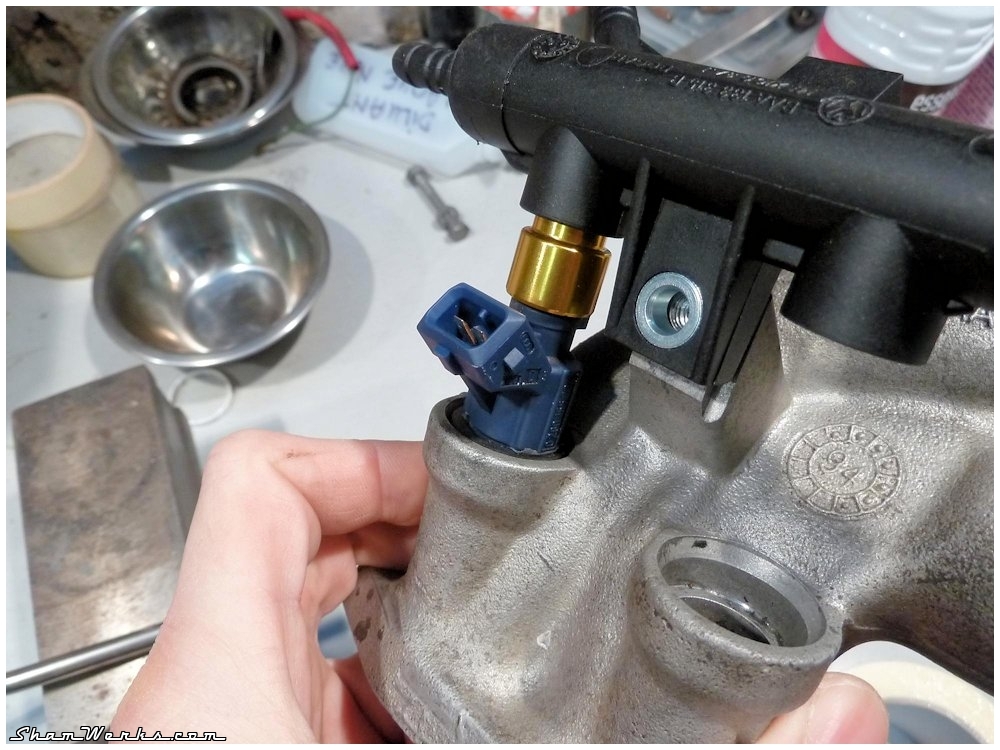
Injectors :
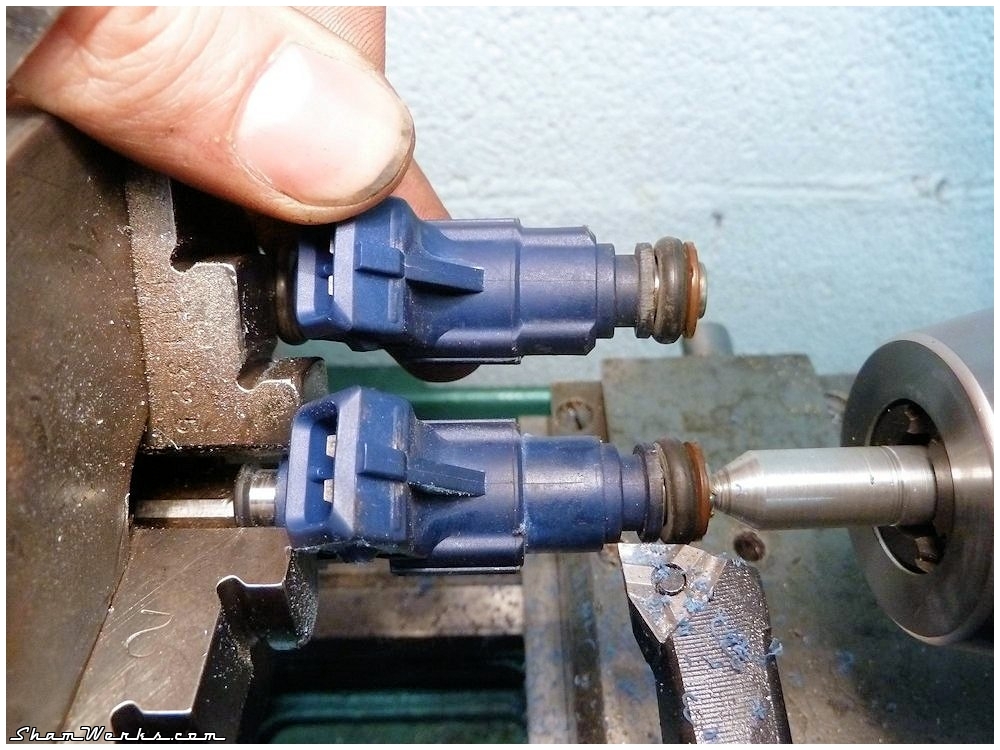
The original Mex injector were "EV1", an old generation of injectors, which output flow looks like one of a supersoaker water gun (single hole output)... I wanted to switch to EV6 (multiple holes output) to get a better air-fuel mix (see this video to understand the flow between these two generations).Not that easy to find from smaller engines. Finally, I ended up adapting injectors from a Citroën Saxo VTR (Bosch ref.0280155794, 135cc @3bar) which look pretty good to me, and you can find used ones for cheap.
Fuel System:
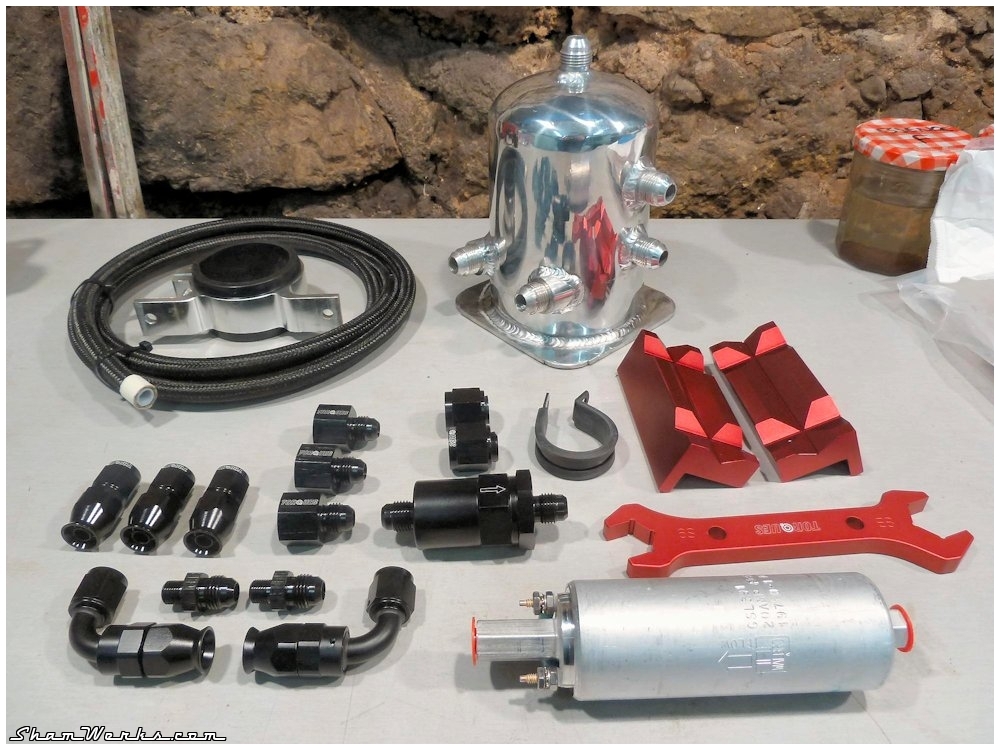
The injection pump is a Walbro, weel known brand : GSL391 model, 190l/h, way more than necessary for my small 1600.The mandatory fuel pressure regulator is a cheap generic model (40€ from VA MotorSports, or on eBay UK). I have friends who use it on a daily basis without any issue, but I'll keep an eye on it nonetheless...
I wanted to avoid having to drill/weld my fuel tank for the return line, so I went for a 1 liter surge tank (swirl pot), installed right below my fuel tank, and gravity fed (found on eBay UK at Demon Motorsports, for something like 40€). It should avoid the pump from sucking air in sharp turns when fuel tank level is getting low. Well I guess I'll see how it turns out in driving conditions...
I've ordered all the N-6 fittings, and the high-pressure fuel filter on eBay UK, from Torques UK : nice prices (well, compared to others, 'cuz these fittings will keep costing you an arm and a leg at the end!), fast delivery, and a very complete offer. Keep that address.

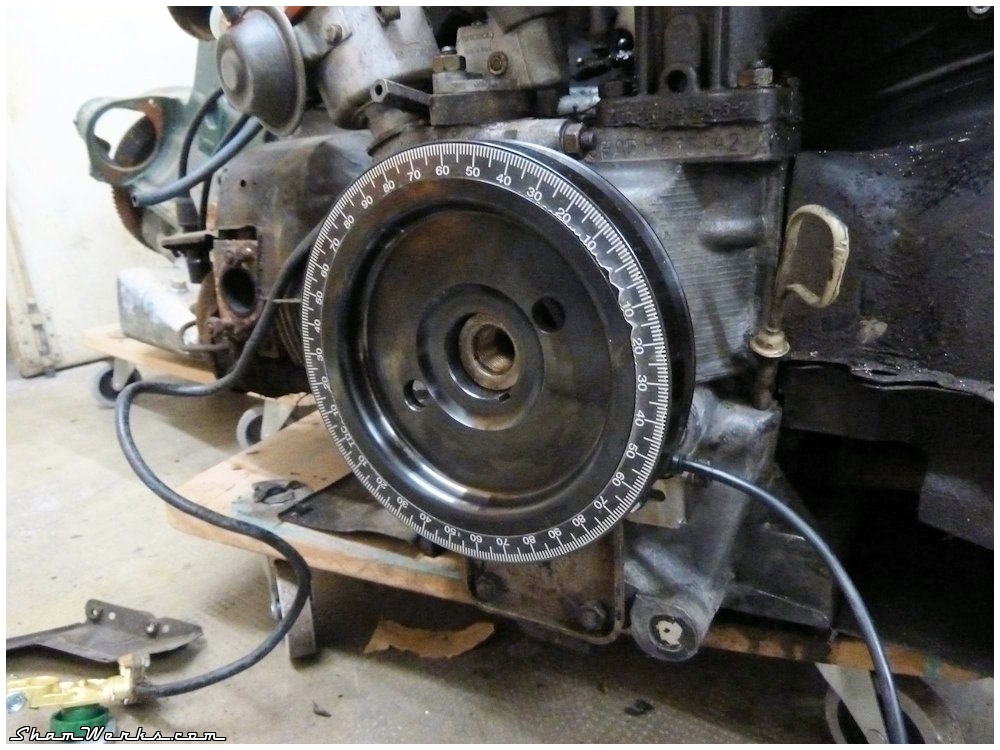
TDC sensor :
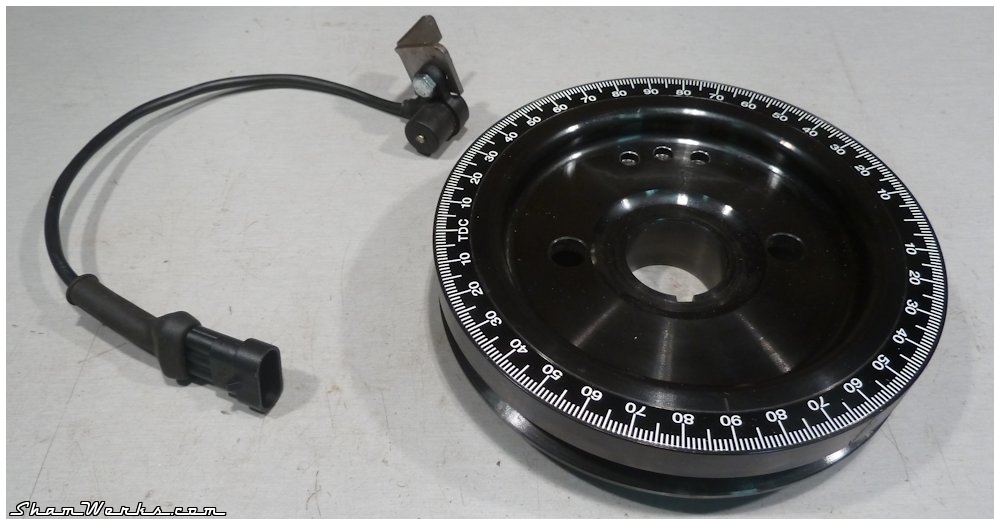
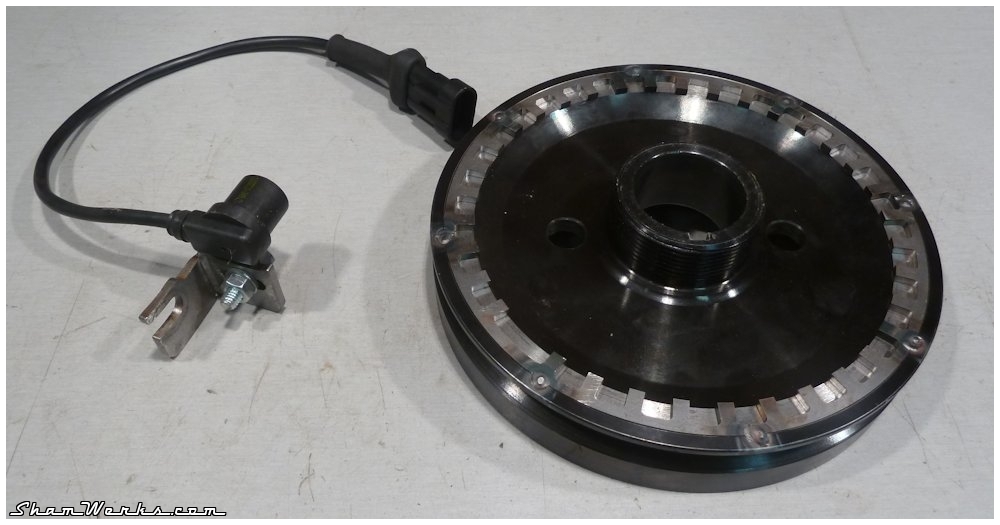
One of the tricky points of the whole install is the having an accurate, reliable (and possibly stealth) TCD sensor.I went with TheDubShop's solution (excellent contact with Mario Velotta), with the damper pulley (Black Equalizer 2.6kg/5.5lb) that I got balanced (Feller Service). It's installed with a longer screw from Gene Berg.
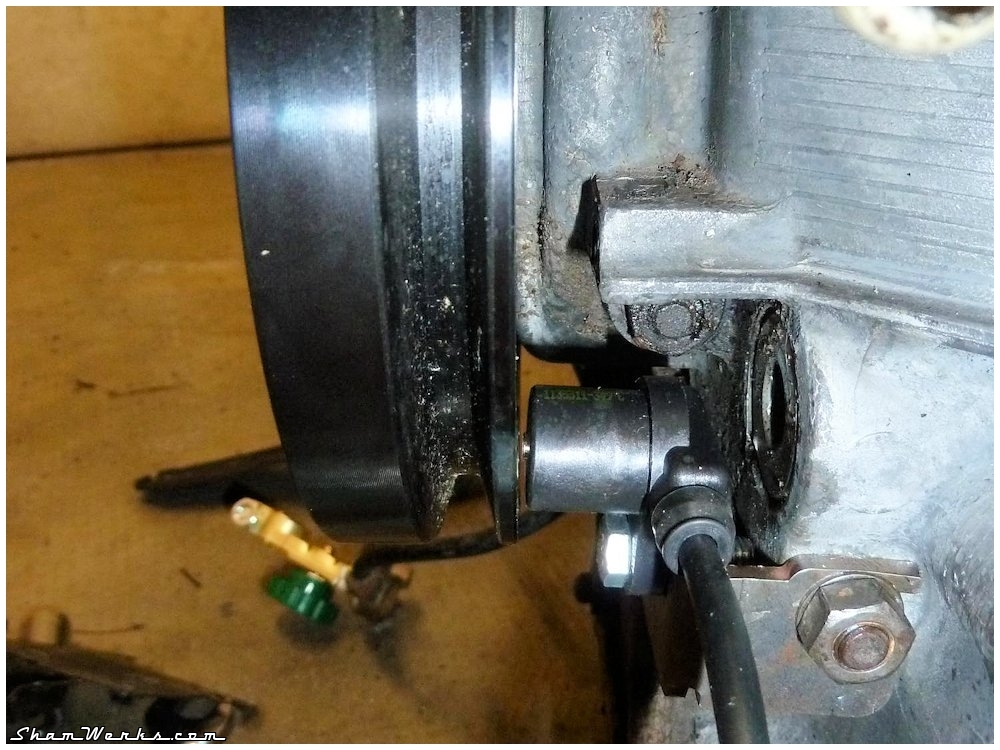
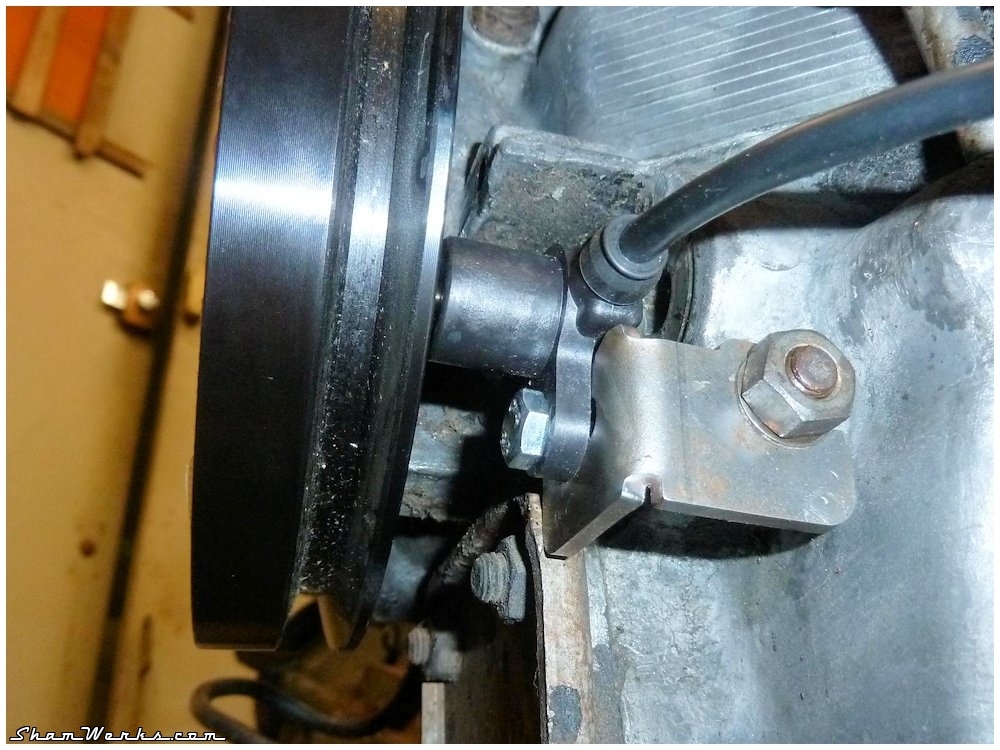
The VR sensor is tightly bolted on the case, hidden behind the pulley, you just need to drill a hole in the tin for the sensor to peek through. Pretty clean solution...
I just replaced the original connector with a more widely, waterproof model : it connects on the shielded cable running to the MS box.
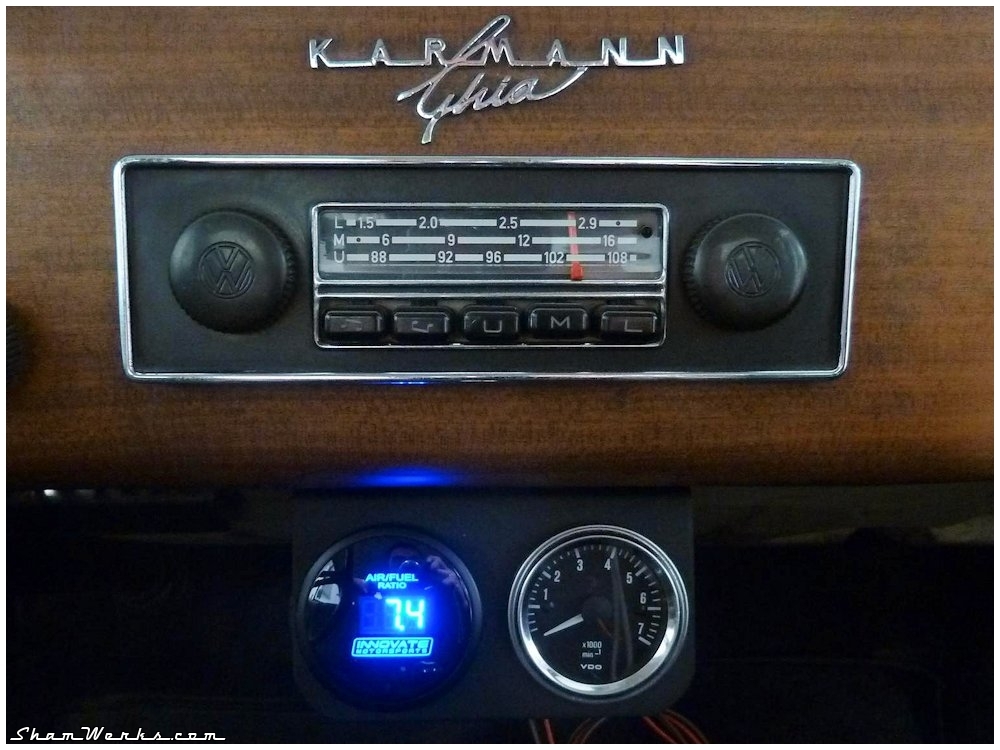
O2 sensor :
To be able to control my air/fuel ratio, and properly tune the VE tables on my MS, I install a wideband O2 sensor : Innovate LC1, ith its tach below the dashboard to keep an eye on it.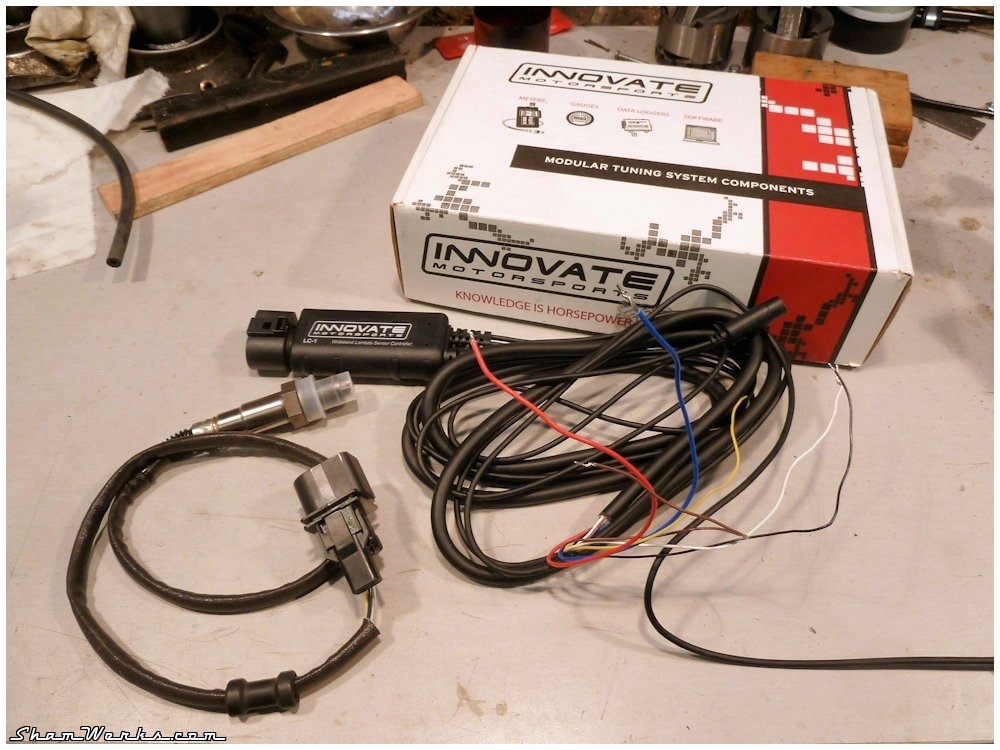
Ignition :
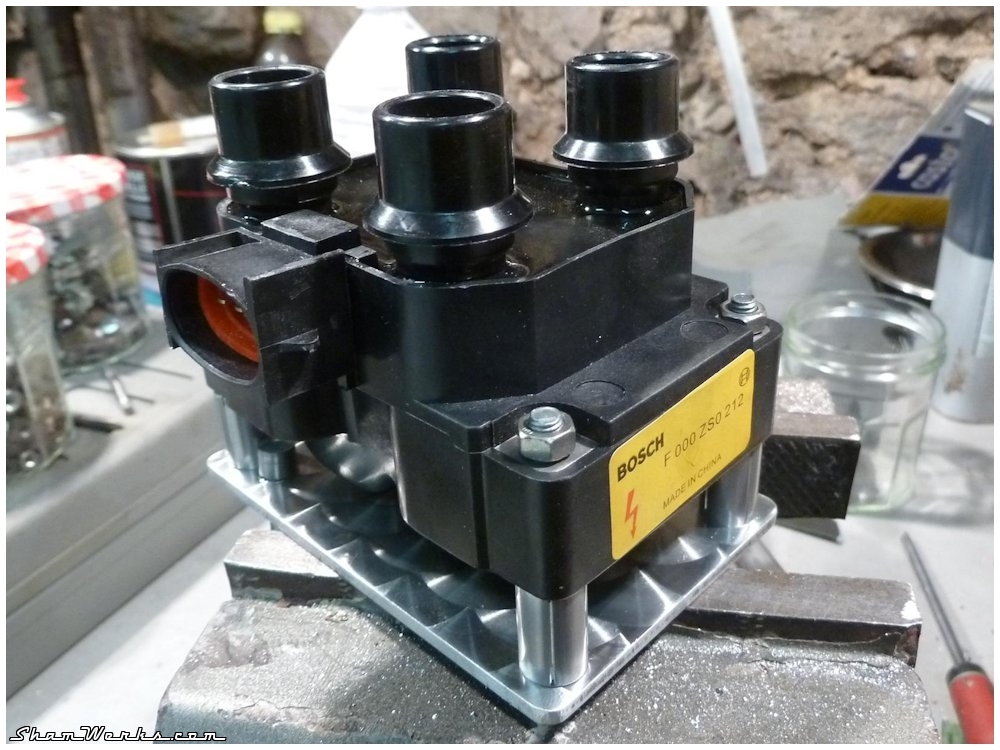
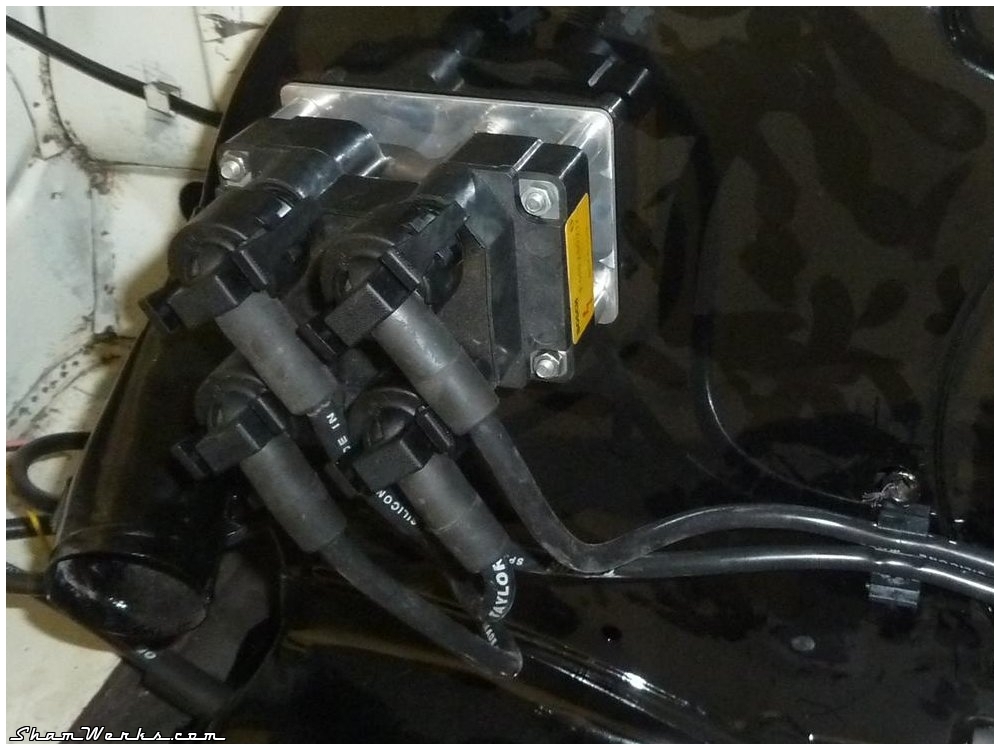
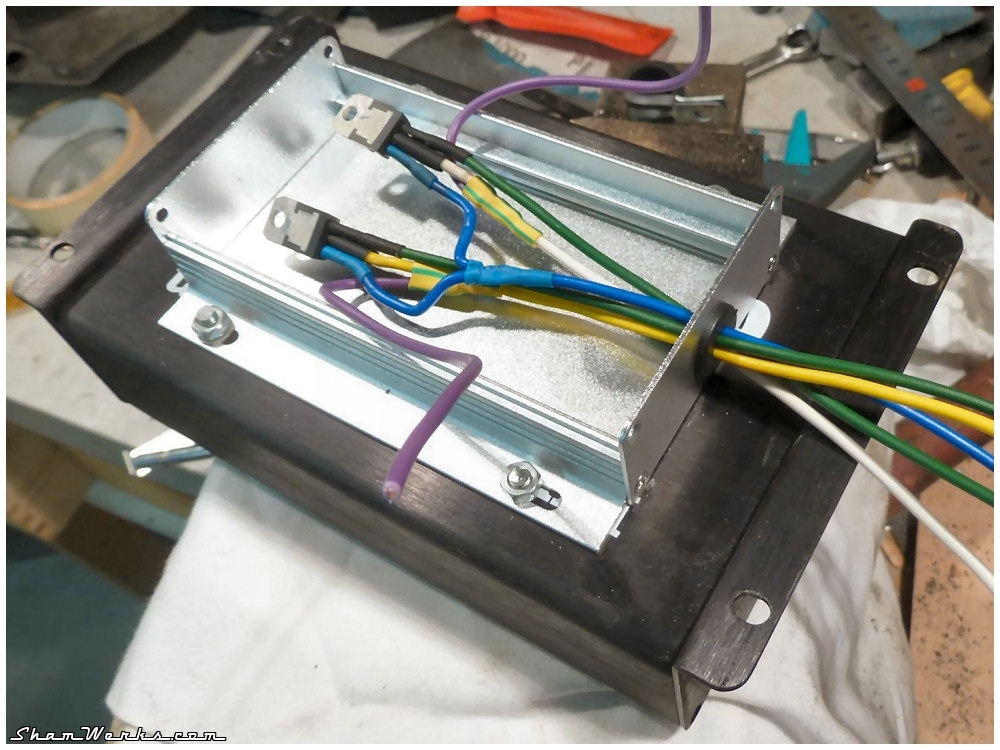
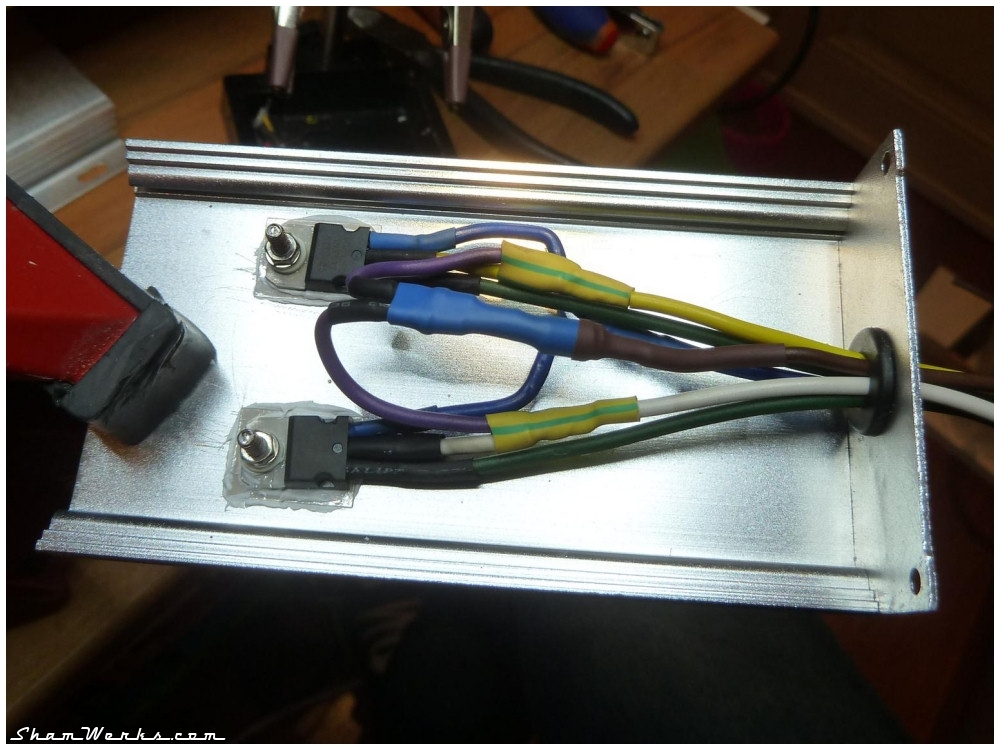
My ignition will rely on a dual-coil (wasted spark), directly controled by the MS : no Ford EDIS module in the middle, so that I can control the Dwell from my MS... And more important, no more distributor!I use a Ford dual coil (originally installed in Fiesta/Escort models, ref. Bosch F000ZS0212), but it needs specific clips to fit the wires on it... So I make a set of lead wires by taking a set of clips from Ford Fiesta wires, and grafting them on a VW Taylor 8mm set of wires.
Be extra carefull when taking apart the Ford clips, they're pretty fragile... I broke one, but managed to silver-weld it back together.


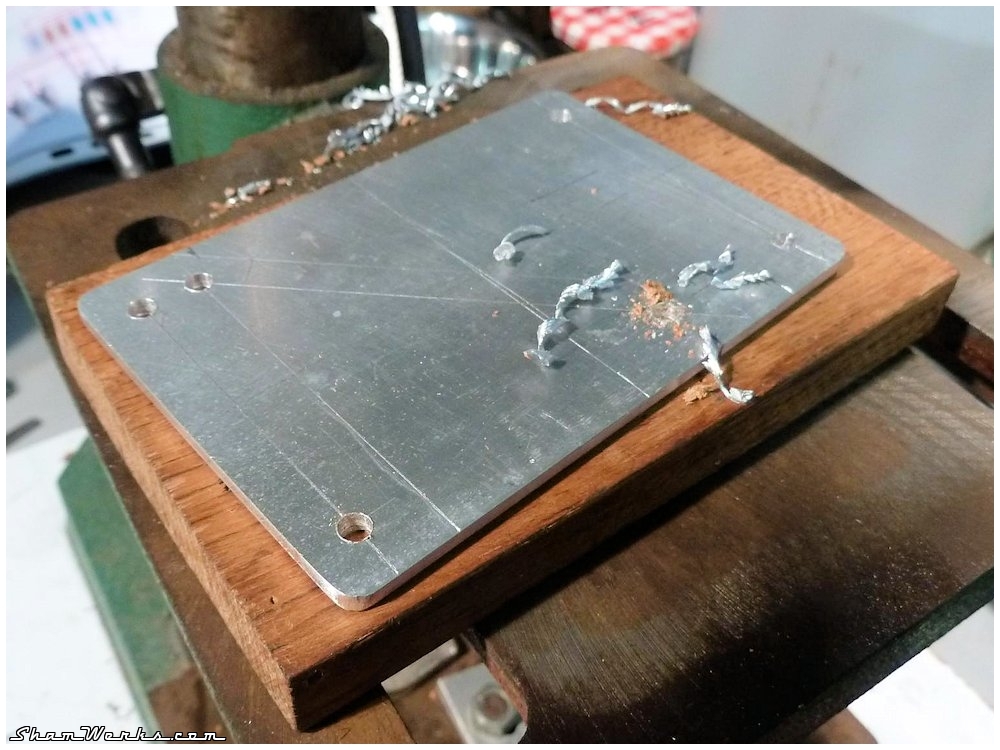

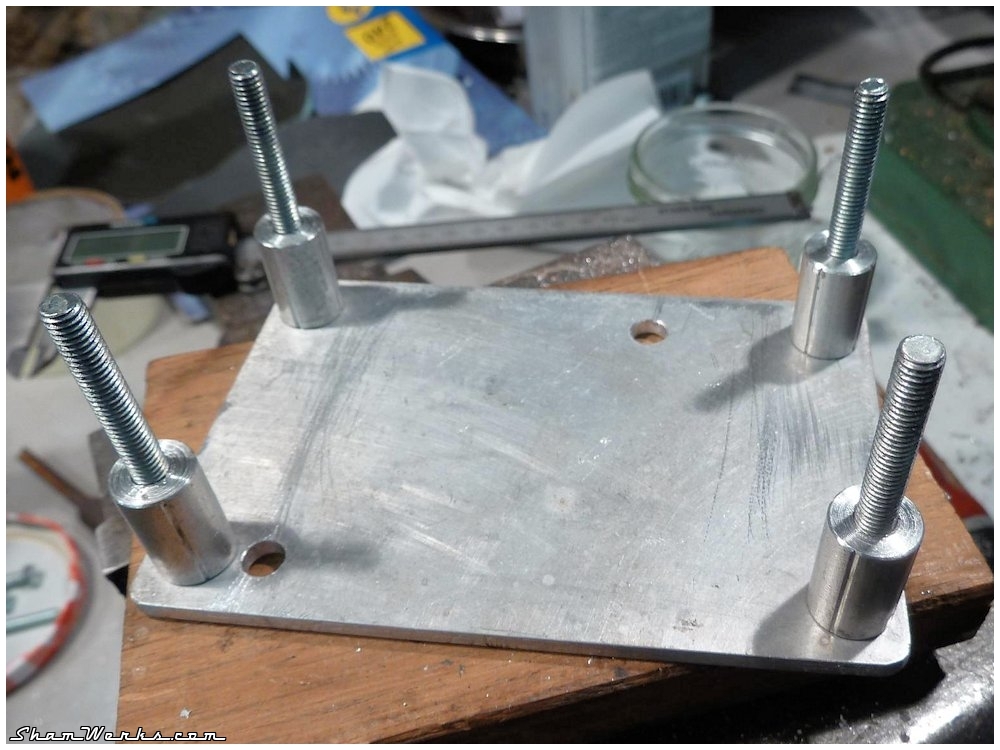
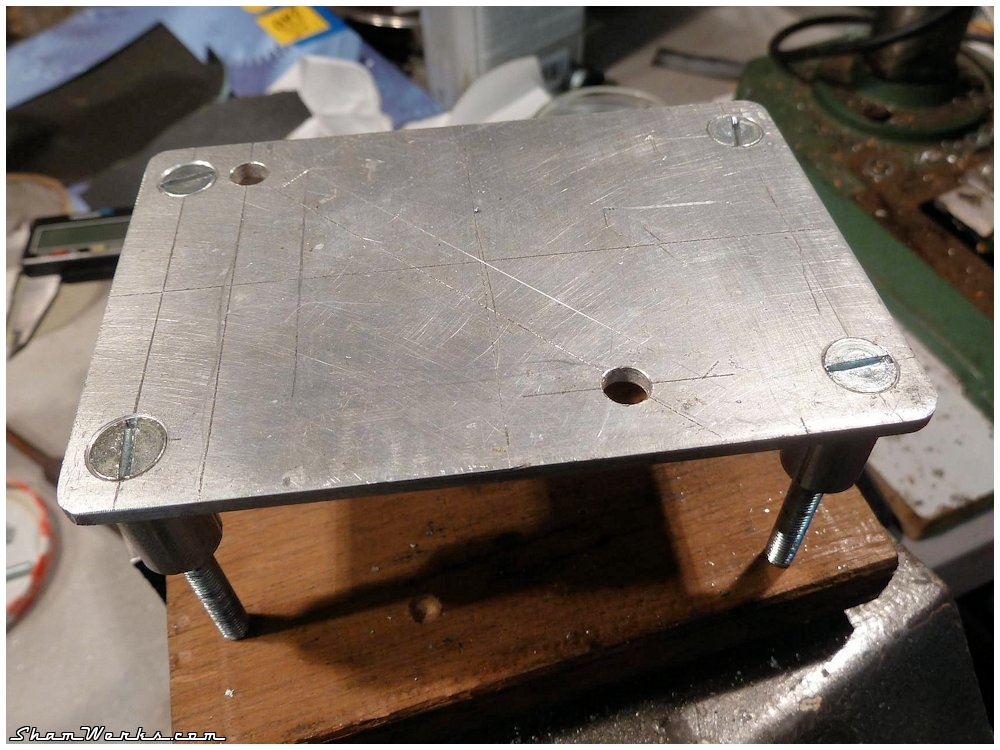
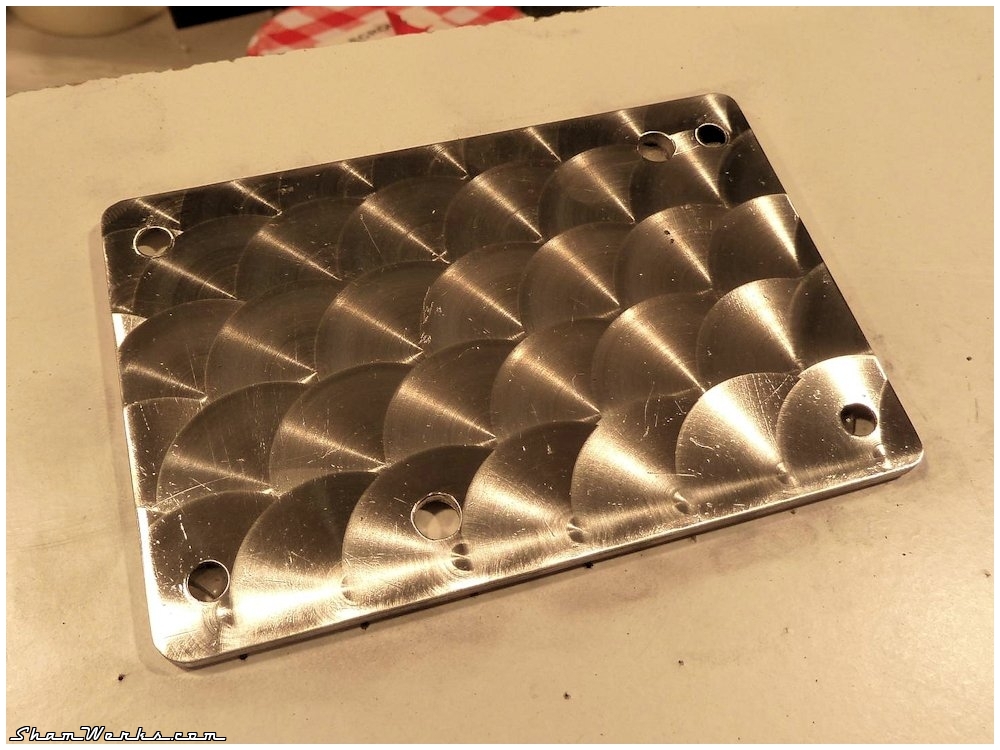
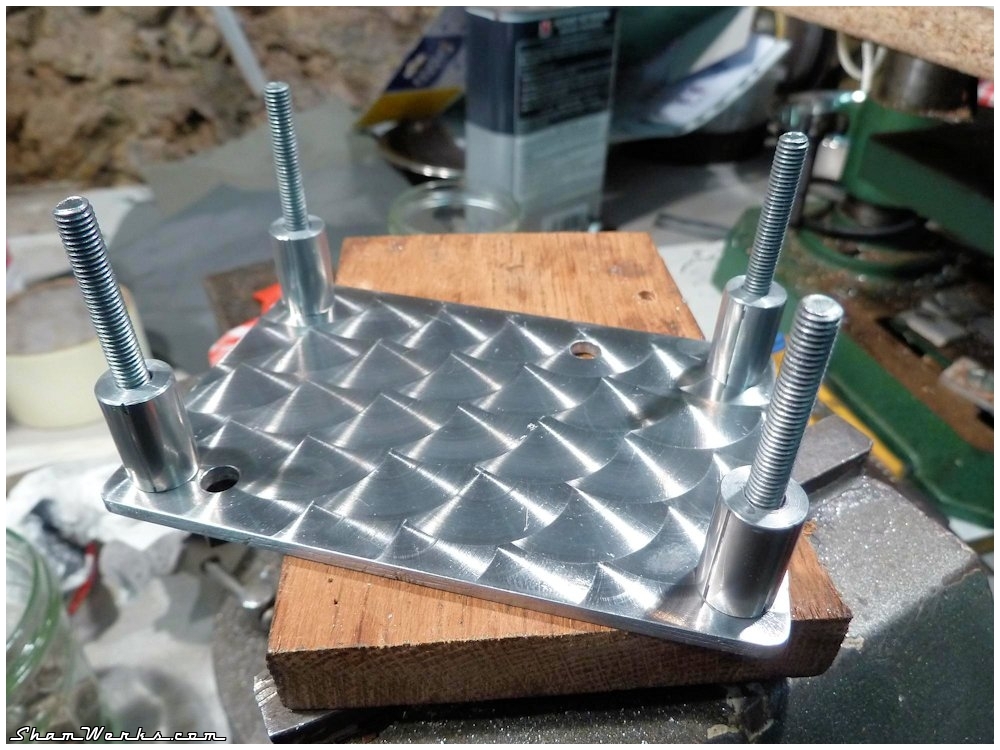
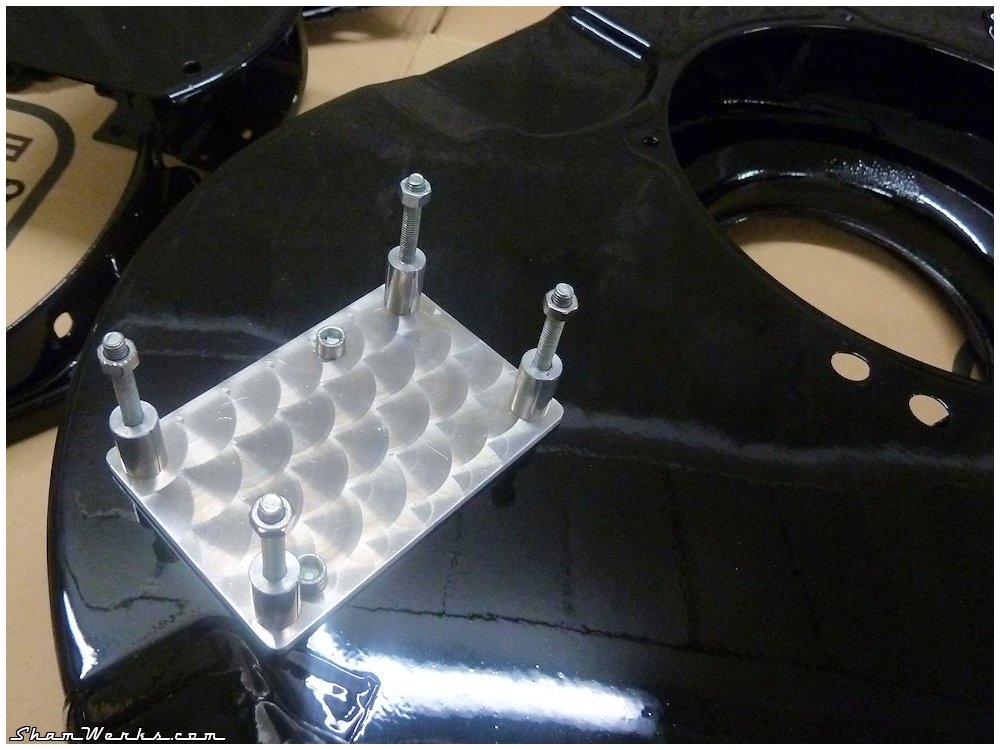
Yep, maybe, but I like it! I made the machine-turning finish with the template I made a few month ago for the lathe, so it did not take more than a couple of minutes to achieve.
The spark plugs will now be NGK models, spark gap set at 0.8mm, but I should be able to push it a bit more : since the Dwell is doubled with the dual coil, I get a big fat spark!
That's it for the hardware... Now let's install/plug all of that in the car!
Posted on 29/09/2013 at 16:11
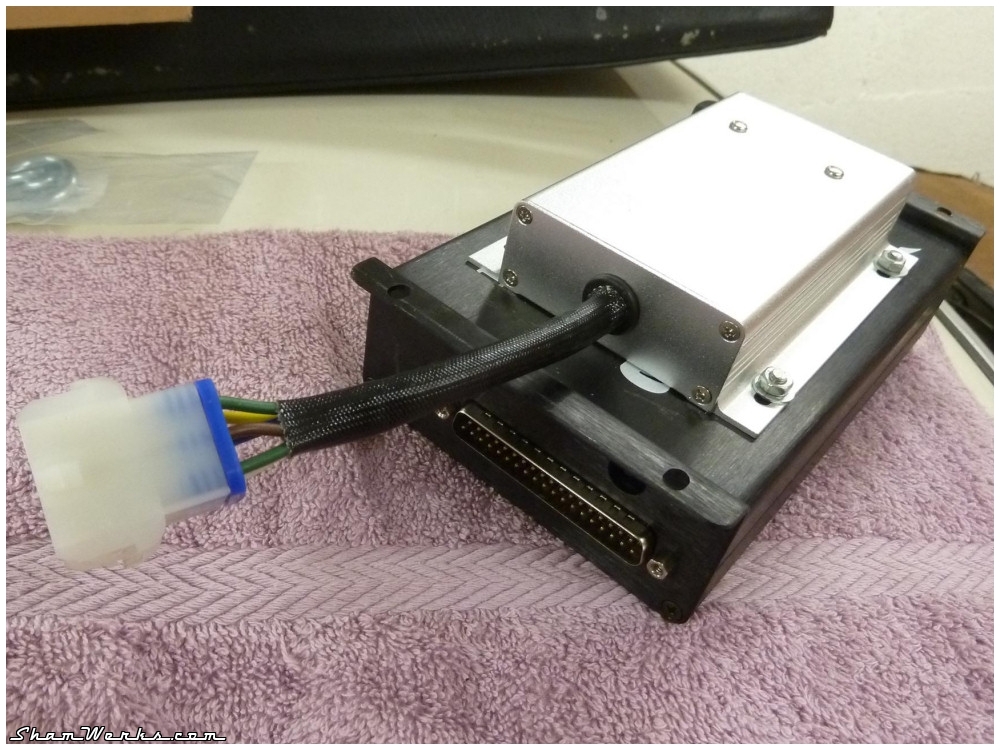
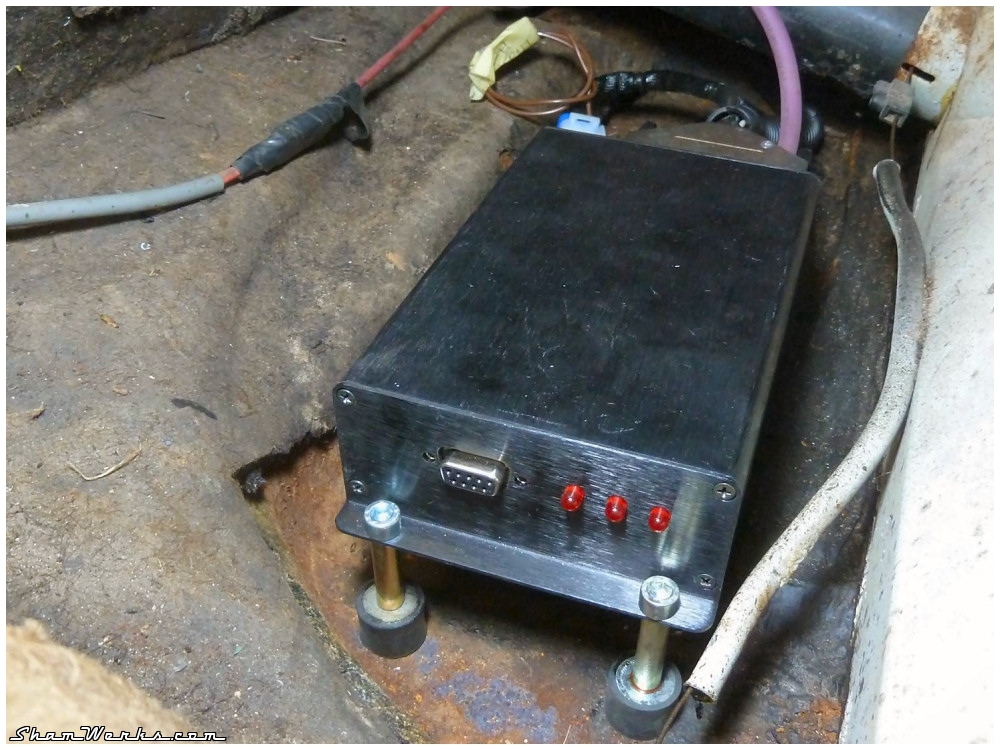
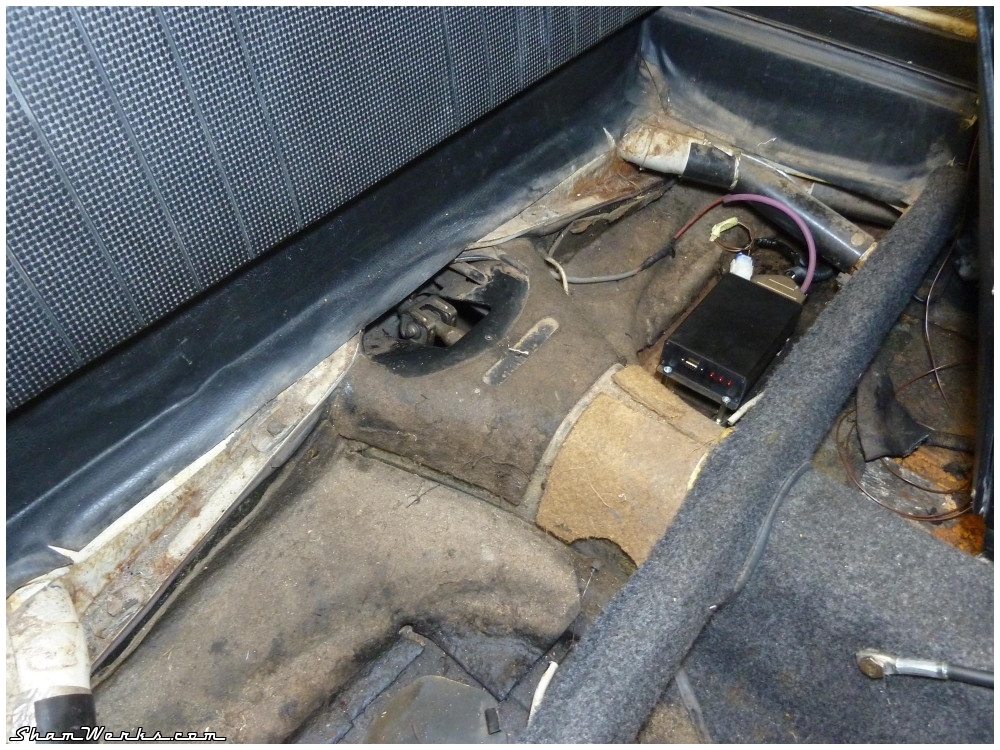
Kitty Injection : Electronics
INJECTION
ELECTRONICS
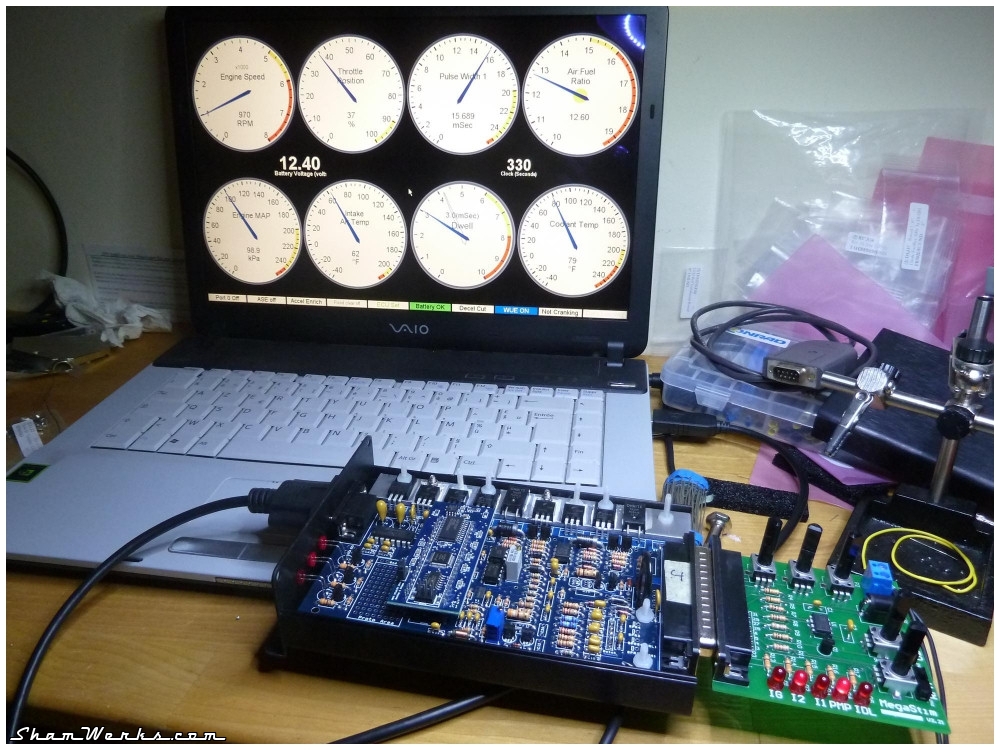
For those of you who don't know about it, the Megasquirt is an Engine Control Unit (ECU) able to deal with almost everything you can imagine : engines from 1 up to 12 cylinders, naturally aspirated or supercharged, staged/semi-sequential/full-sequential injection, wasted spark or sequential ignition, Dwell, NOS, lambda, water injection, additional air valve, etc... Obviously I'll use only a slimited set of these options.
The ECU is tuned with a PC computer, via a dedicated software (details to come in the "software" section). You can make modifications live to your engine setup, without even having to shut it down!
The Megasquirt takes in different inputs from sensors on the engine :
- Crank/TDC position sensor (VR sensor)
- Manifold Air Pressure (MAP)
- Throttle Position Sensor (TPS)
- Air Intake Temperature (IAT)
- Coolant Temperature (CLT)
- Lambda/Air Fuel Ratio (AFR)
Depending on these data the MS manages the engine : fuel pump, injectors, ignition, idle valve... And maybe a couple more on my setup!
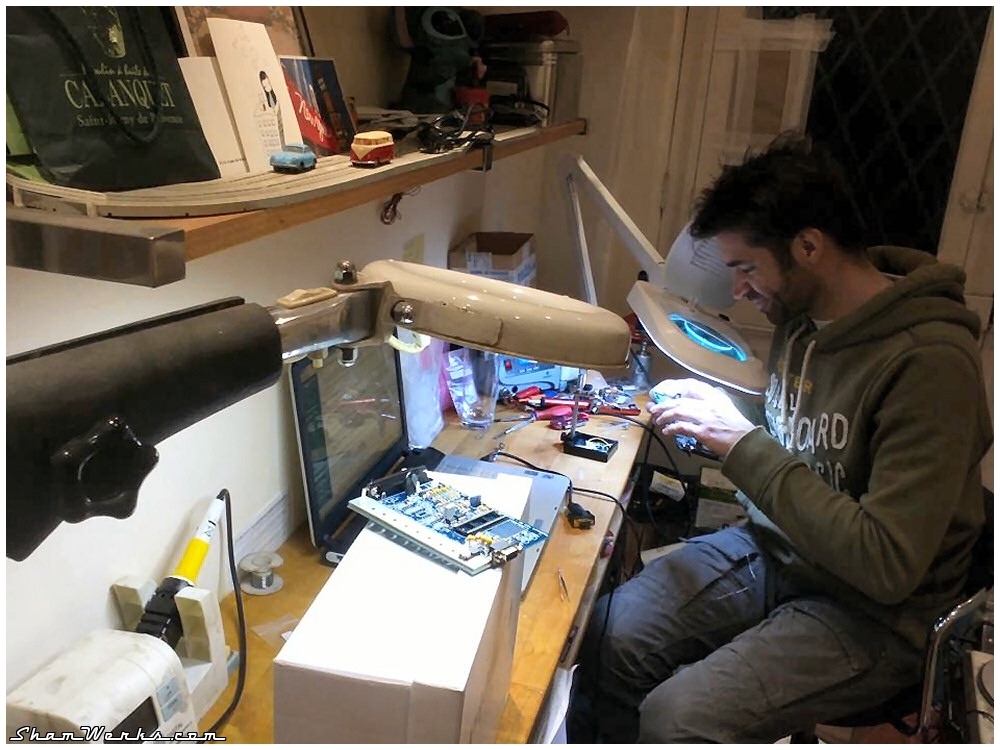
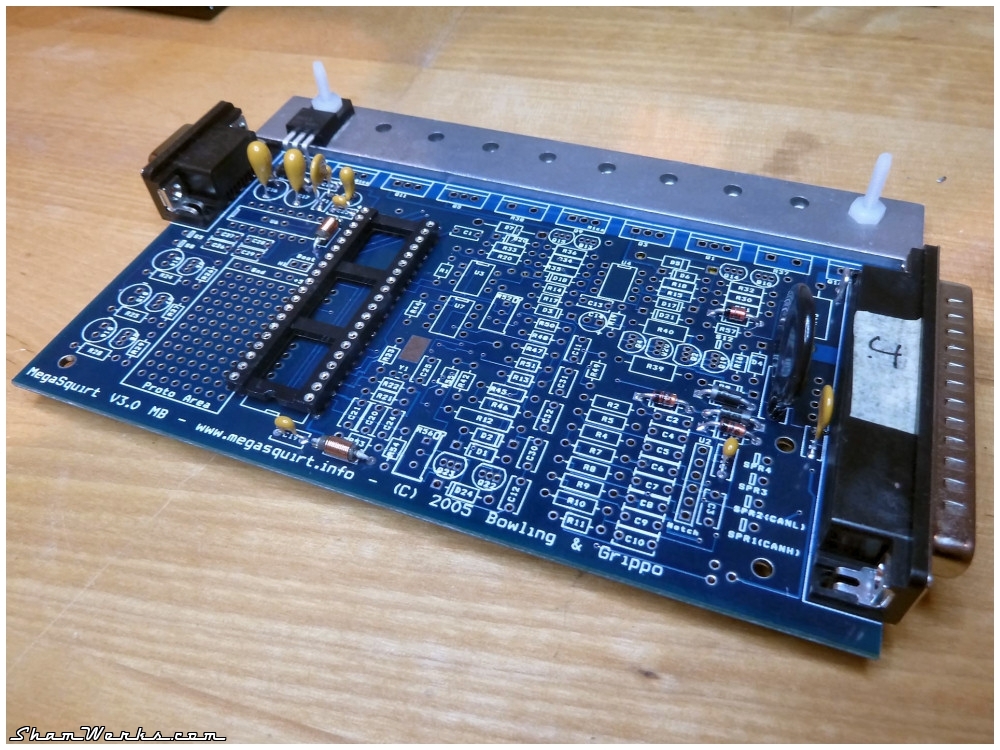
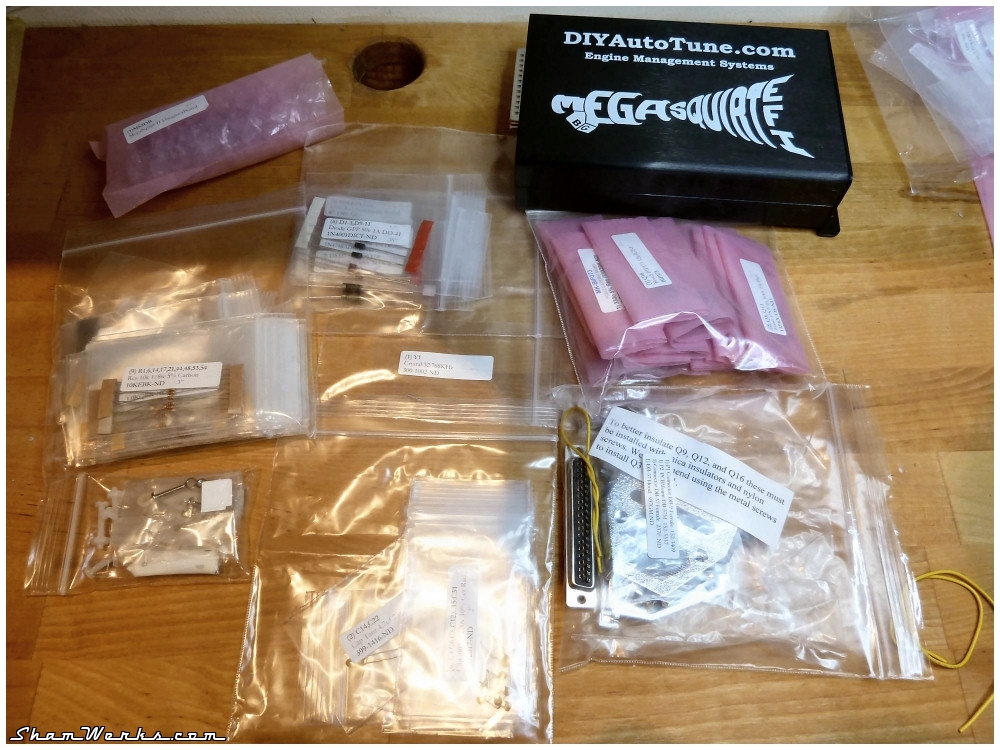
I bought the ECU from DIYAutoTune as a DIY kit. Not that difficult if you can handle a soldering iron (well, get a proper temperature-controlled soldering station, and a good magnifying lamp), but it still took me 12 hours to complete it! To be fair, it can be done in much less time than that, but I was doing it in parallel with a freind whom I had to micro-manage (his first PCB soldering experience! Come on Franck, you gotta install your MS now!). I guess this can be done in less than 6 hours ; the kit is very well made, each and every component is labelled in its own individual plastic bag, you just have to follow the build manual.
I strongly believe it is recommended to assemble/solder your Megasquirt yourself, not only for financial reasons, but it helps a lot to understand how everything works together!
I've made a couple of modification to the standard design (everything is very well documented for that purpose) of my Megasquirt : I've flashed the firmware to MSExtra (more options), I've added a transistor to control the idle valve (additional air, the original 1600i on the Mexico beetles had one), and I've wired two outputs for the wasted spark ignition coil.
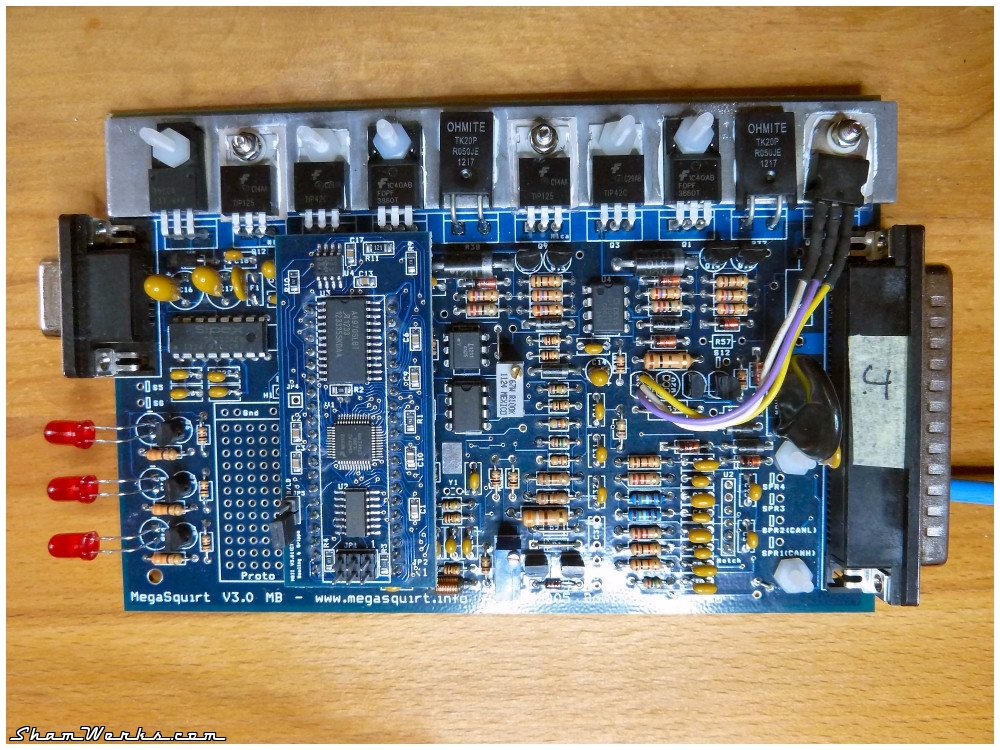
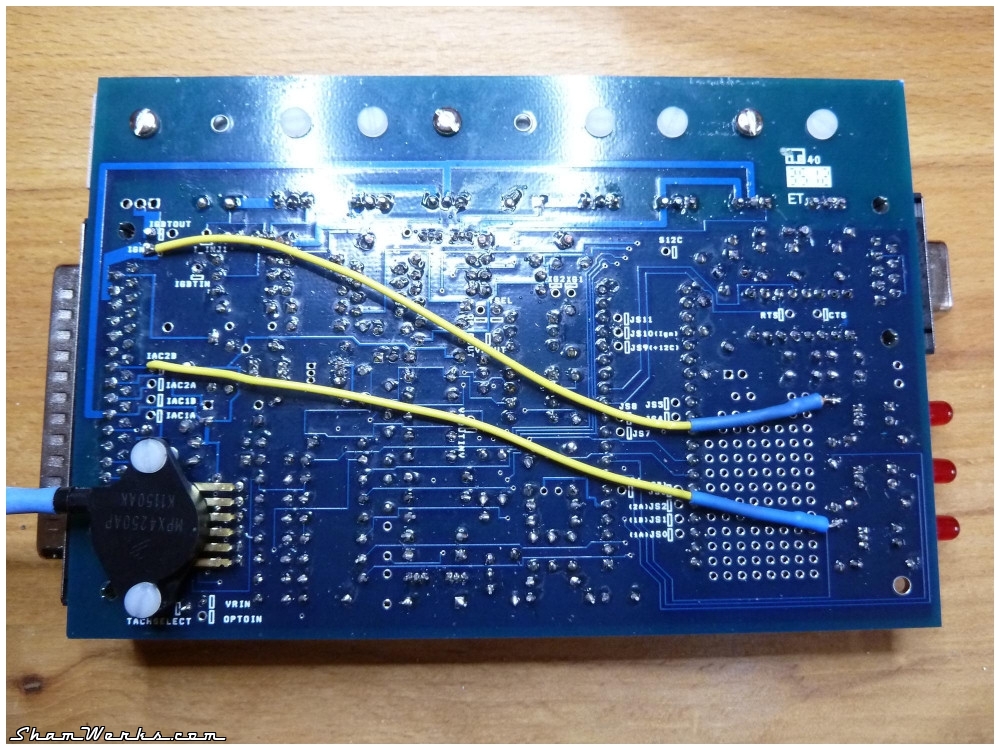
In the very same spark box I install the three diodes that allow me to extract a proper signal for my tachometer (Tach Output).
The whole thing is then installed in the car, below the back seat, on the driver's side, on a set of silent-blocs.

Posted on 21/09/2013 at 02:32
Kitty Injection!
Upgrade
Injection Time
Most of the VW community sees that as some sort of blasphemy, but come on, you gotta live with the times : fuel injection offers easy driving, the engine is available at any RPM, increased mileage, reduced pollution, no more carburetors that you got to adjust after 500km... Same goes for the ignition, which I intend to control with the same control unit as for the injection...
So, after test-driving Laurent's 1303 (check here : 1303.skynetblogs.be - link to Archive.org as SkynetBlog has since disappeared), I was convinced. And I went for some parts hunting!
For those of you interested by this setup, I'll go through the differetn modifications in full details during the next days/weeks, explaining the technical choices I've made :
Electronics
Hardware
Electricity
Fuel system
Software
Engine
But before I even started installing anything, I first wanted to have a clean engine compartment - which was in dire need of TLC. I first tried ordering a firewall/tarboard insulation kit from West Coast Metrics (via Slide Perf) : really nice product, but I wasn't satisfied with the final aspect.
So I finally went the hard way to remove all traces of glue : 6 hours of work with 5 liters of aceton (heavy duty gloves and gas mask mandatory, this produces some nasty fumes!)... But at least, it's finally clean

To be continued... Real soon!
Posted on 18/09/2013 at 01:27
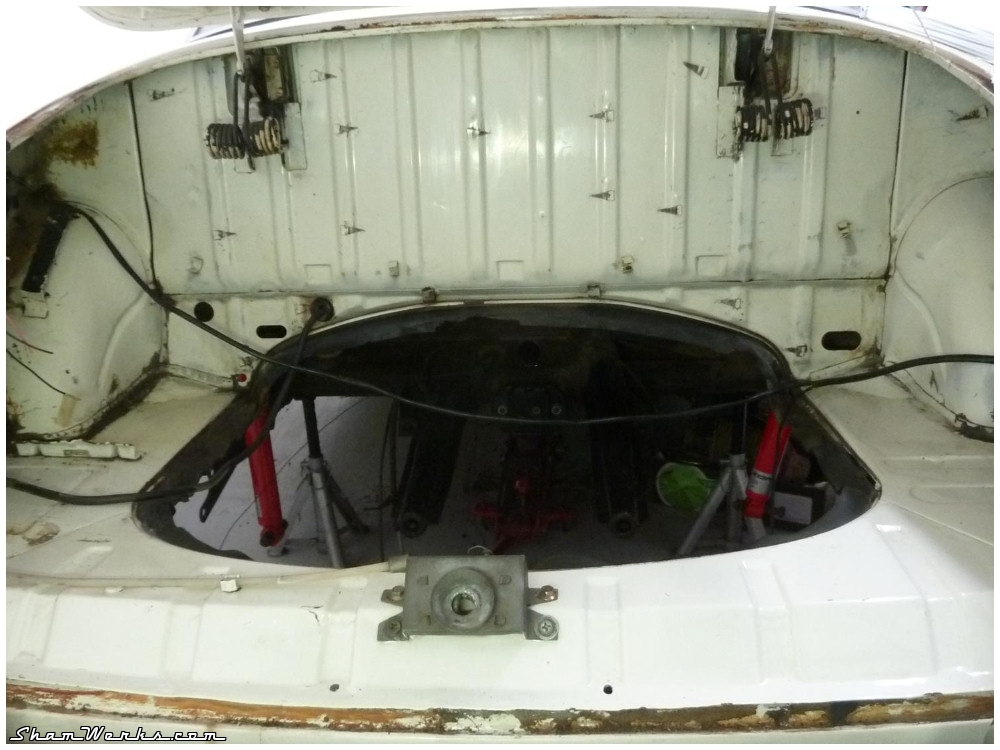
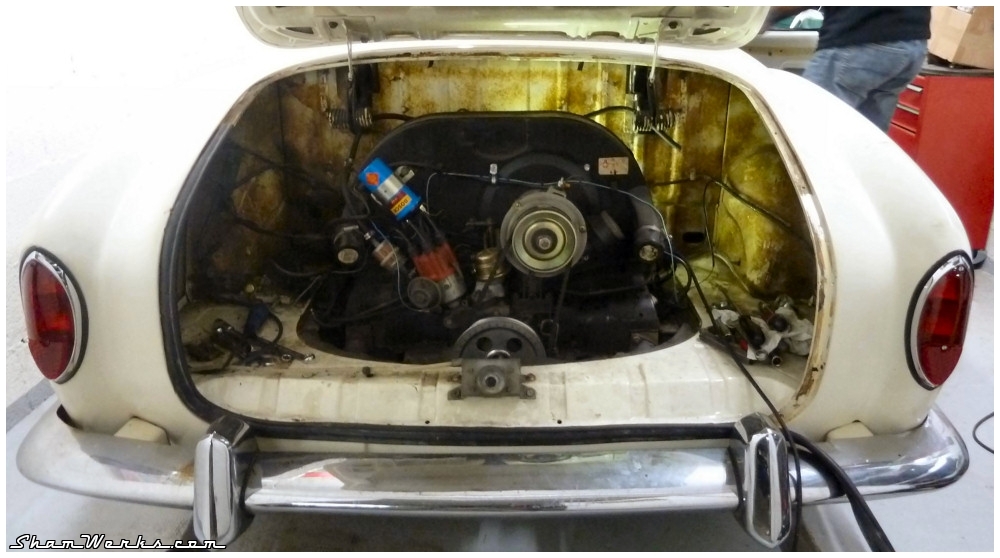
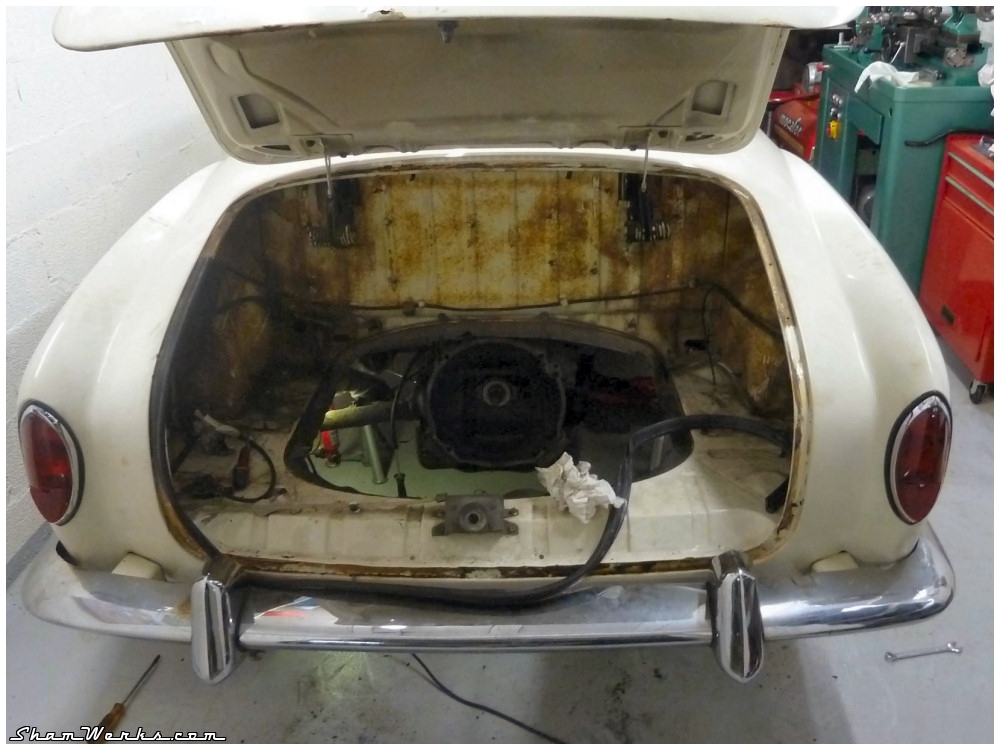
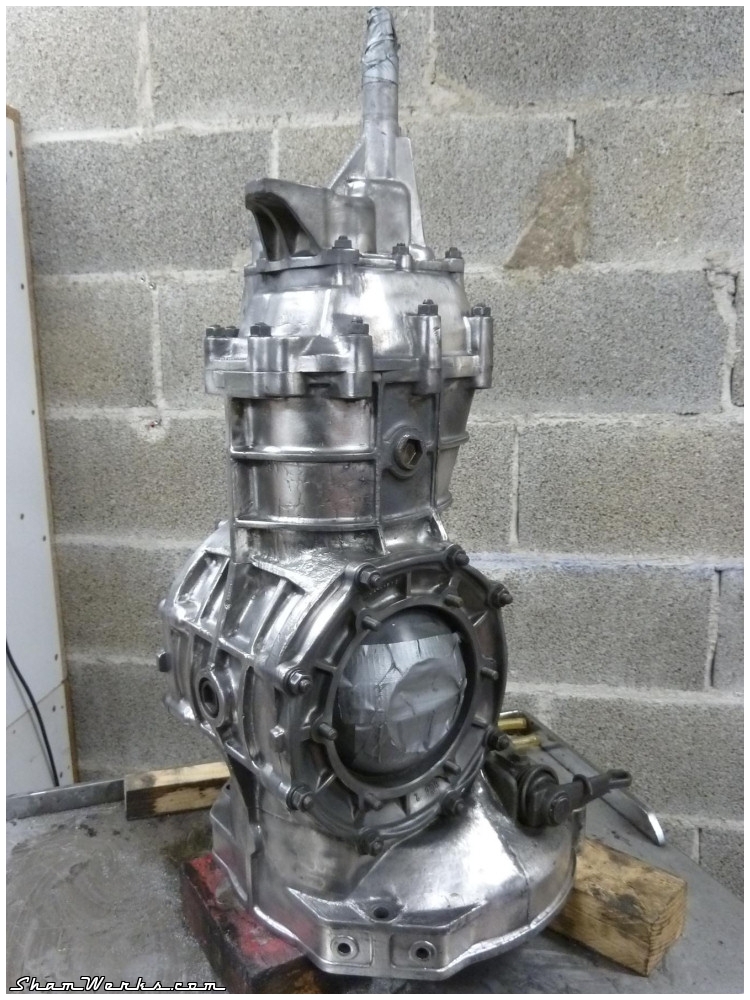
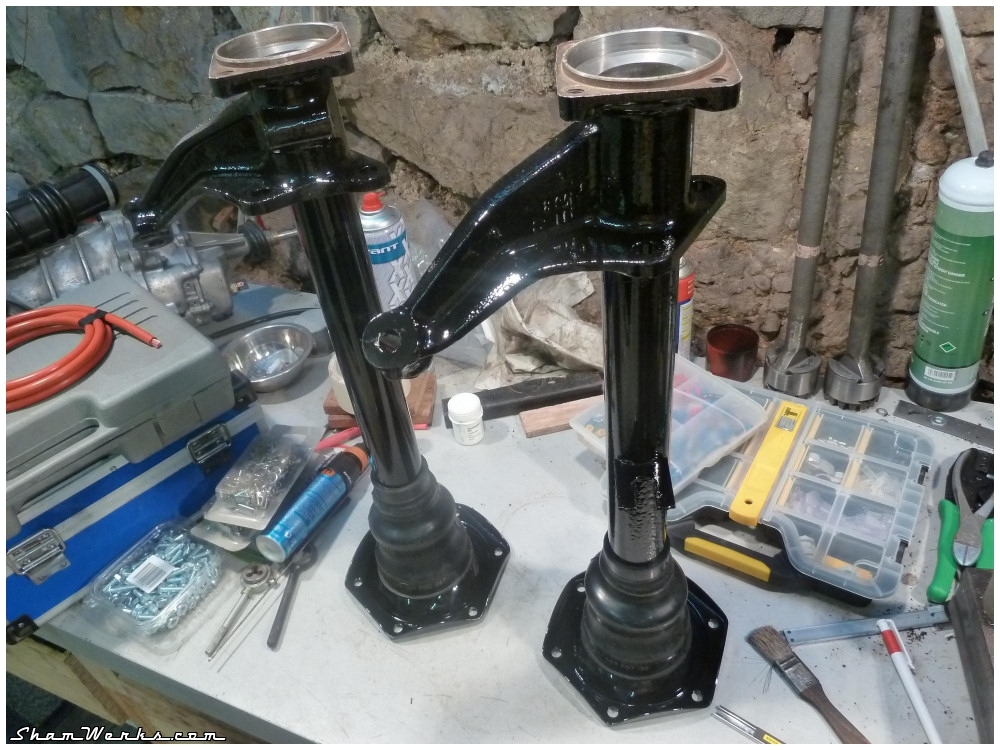
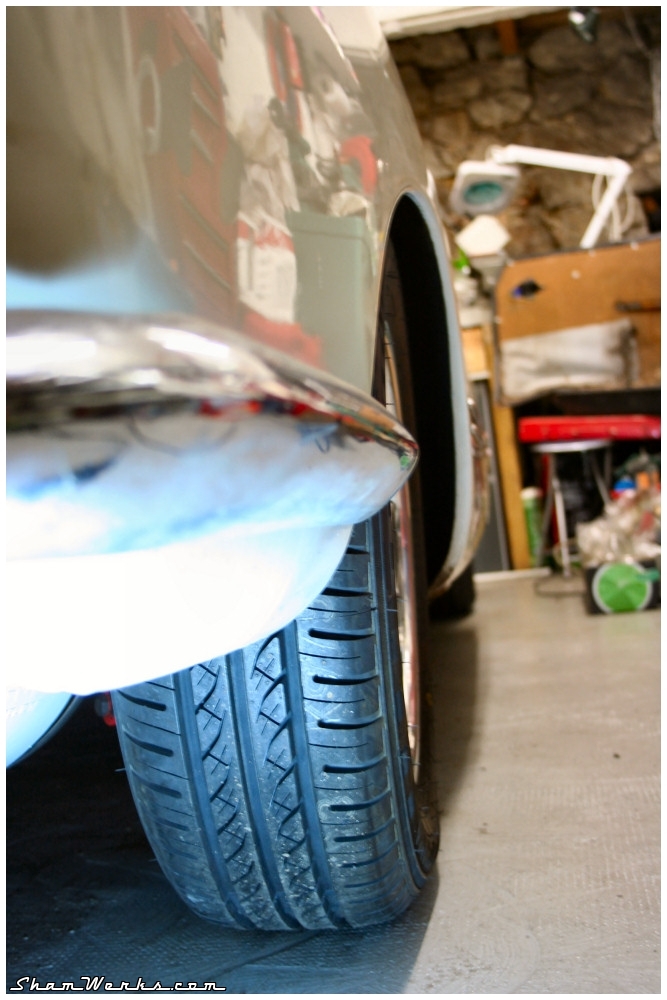
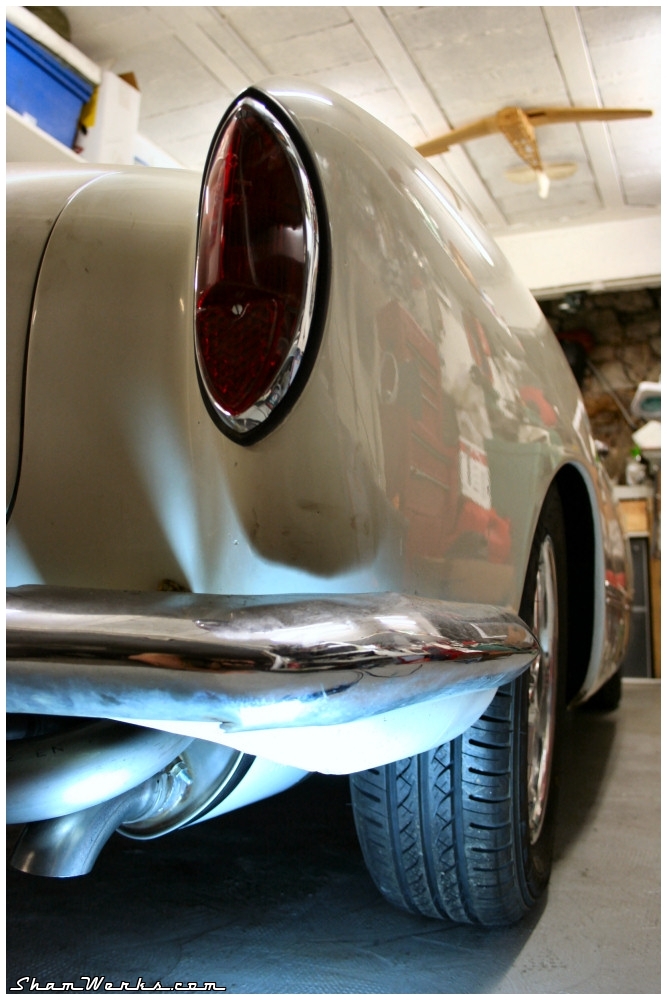
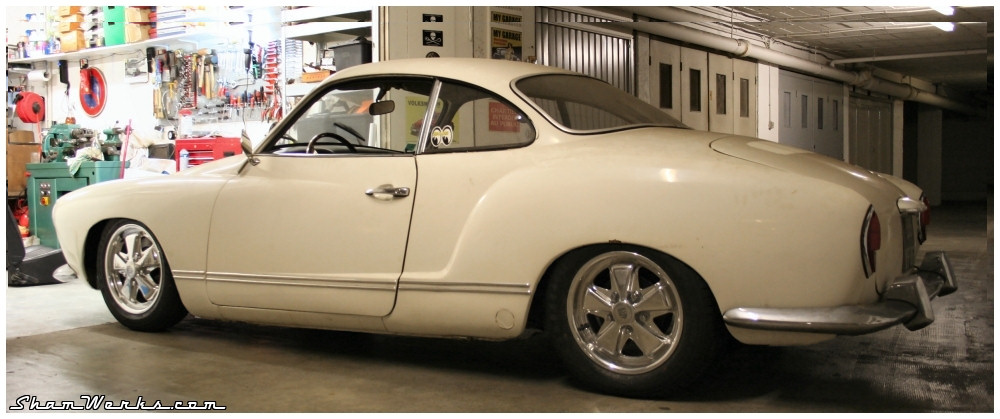
Kitty Upgrade : Short Swing Axle Swap

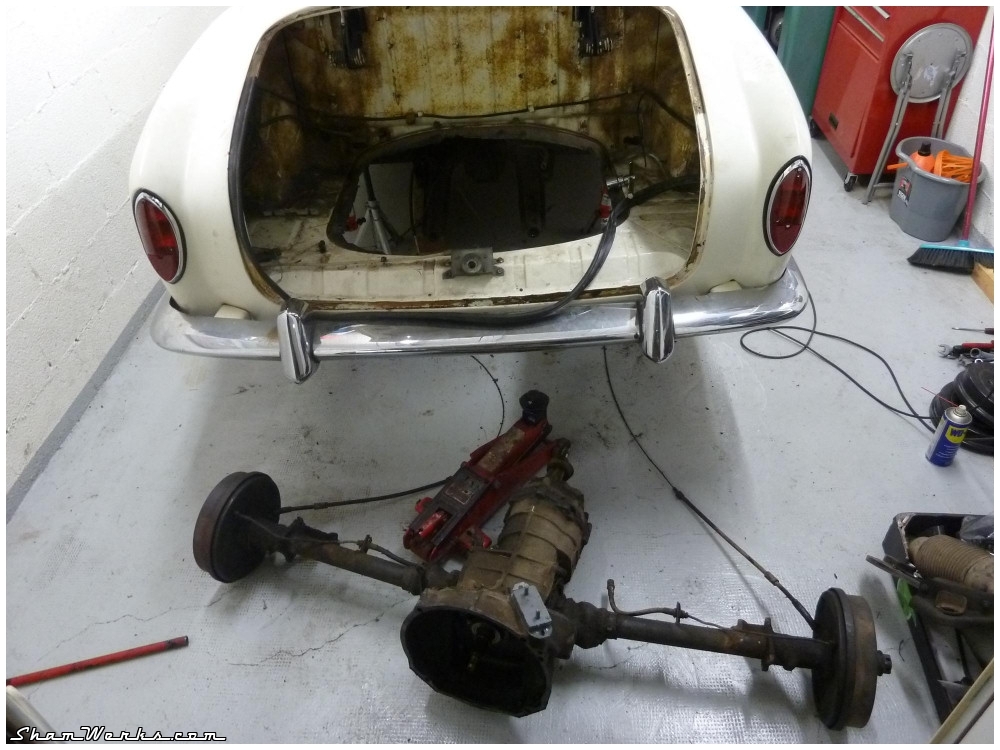
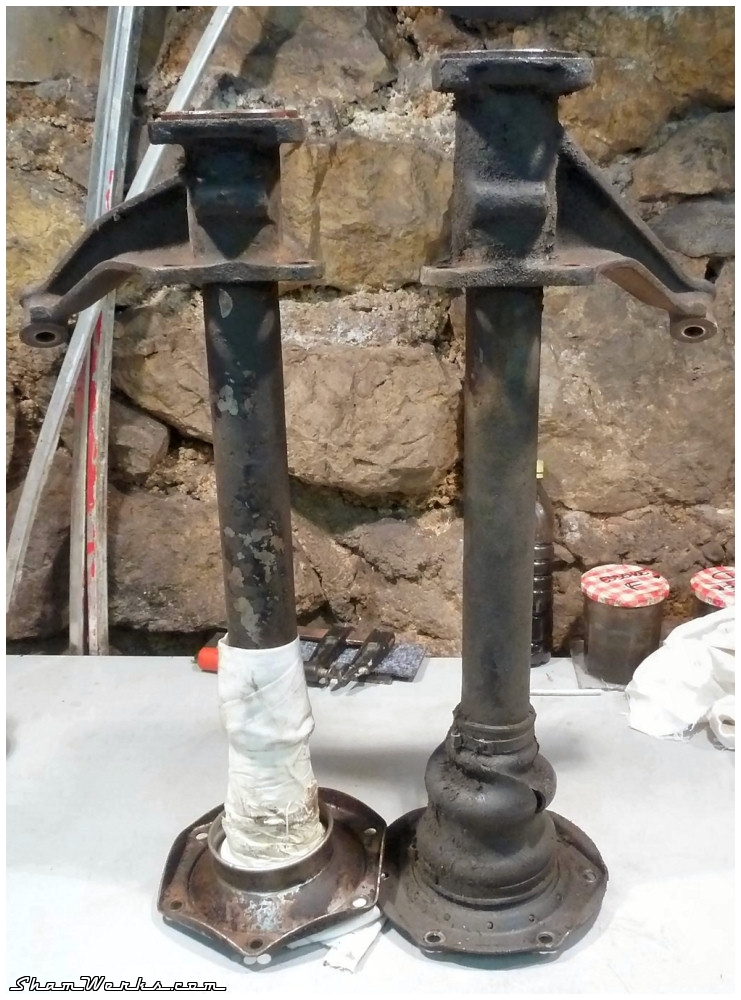
My Ghia being a '68 model, it features the late "wide" rear axle ; by switching it for a narrow version, I'd get around 3cm on each side... So here I go, I hunt a set of narrow axles and I'm good to go!
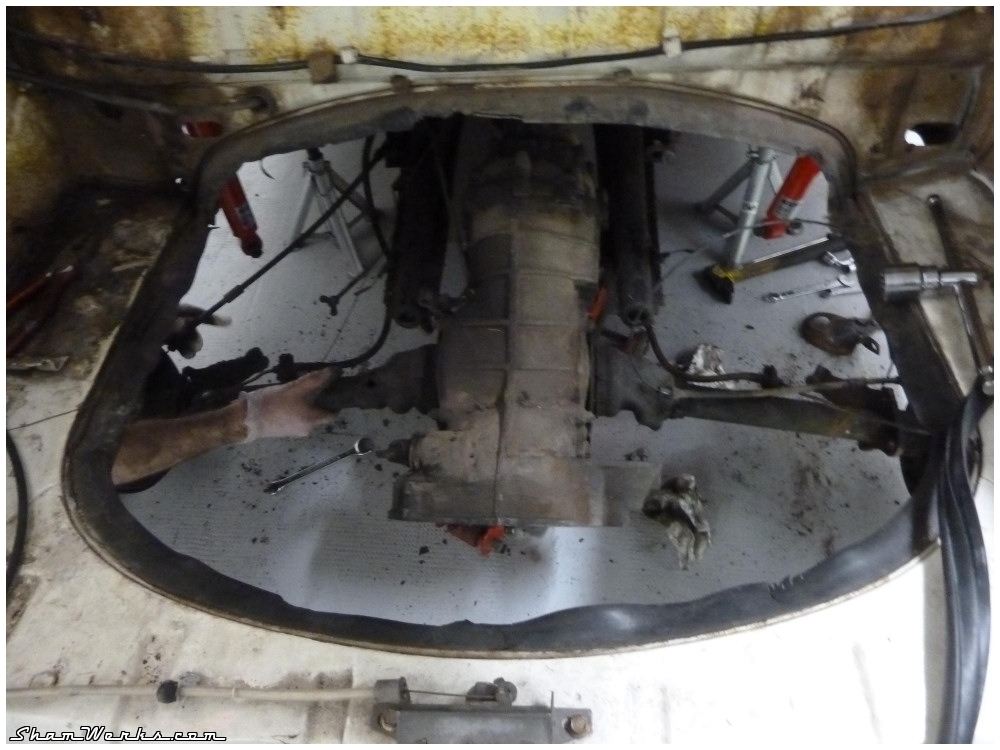
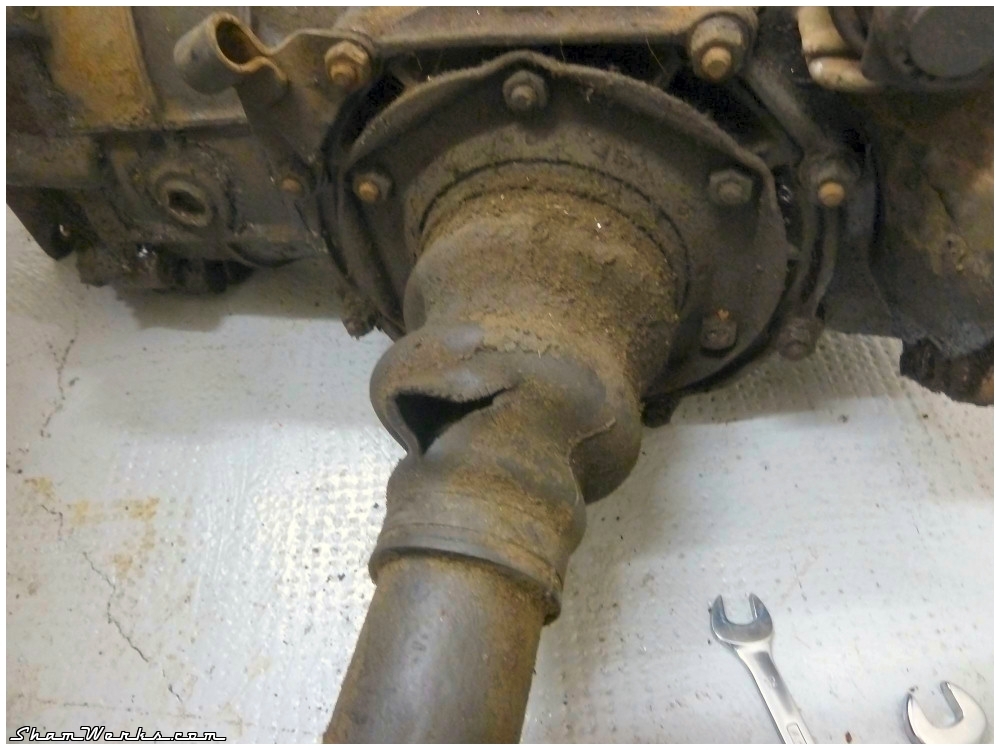
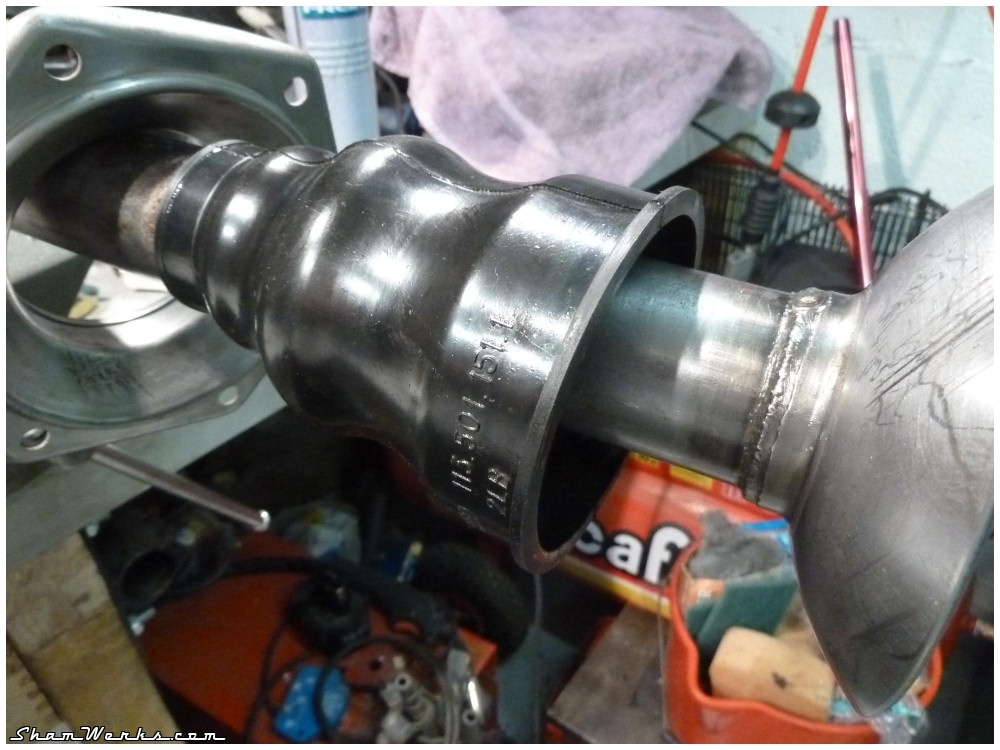
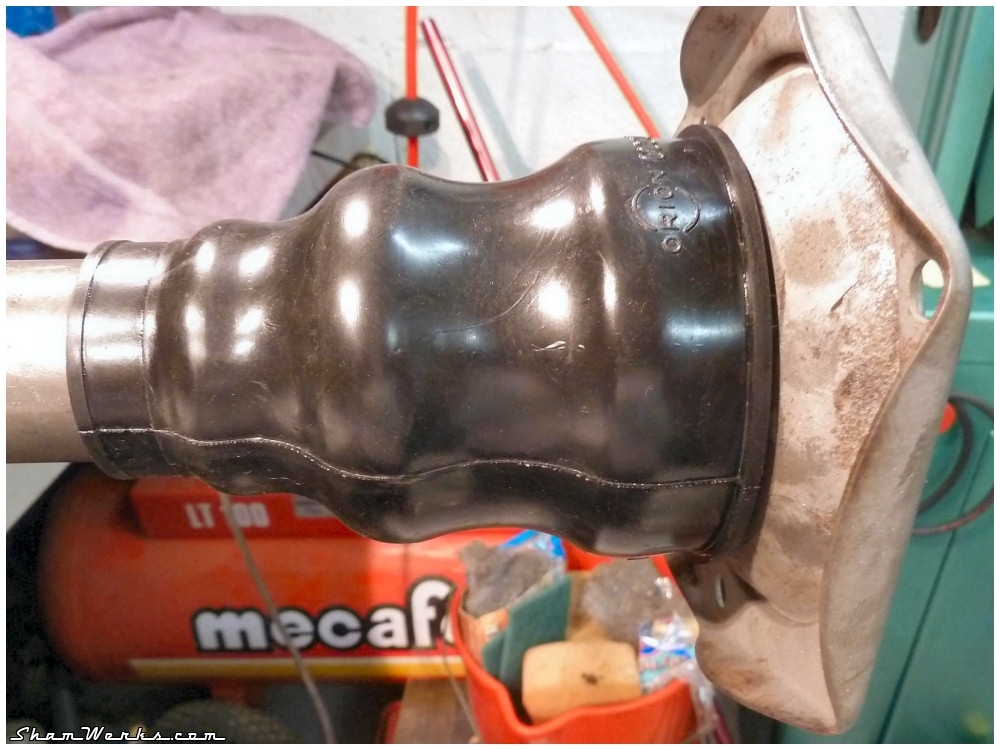
The engine is taken out of the car without too much hassle (thanks Flo for your help!), except for that one exhaust nut rust-welded. I had to saw the exhaust away ; I had planned to change the exhaust anyway.
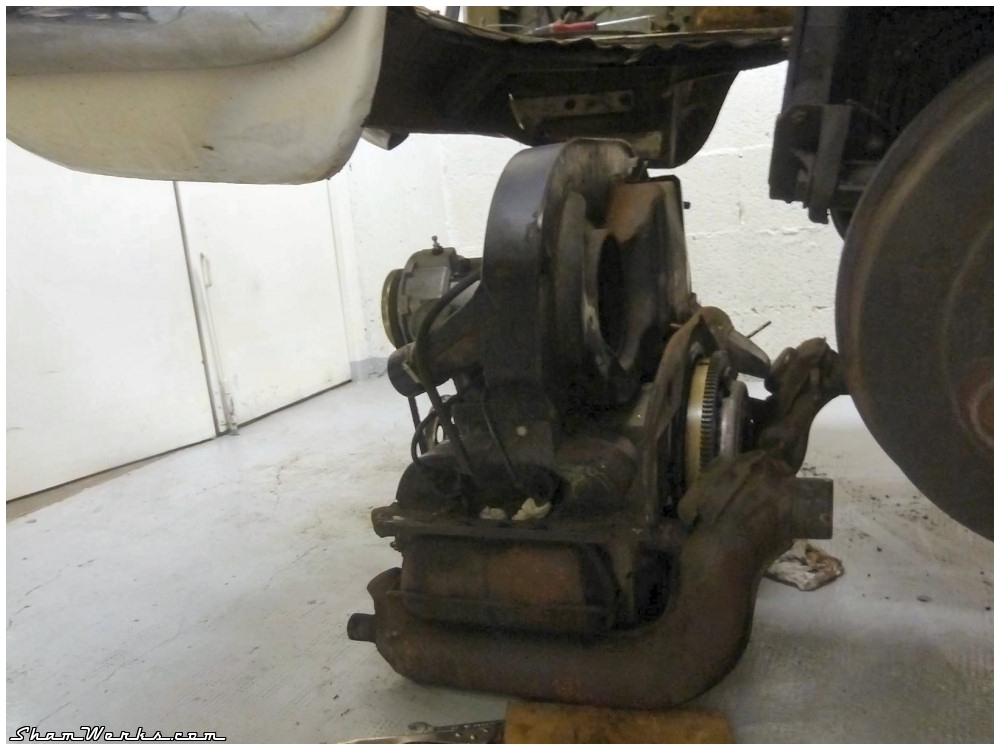

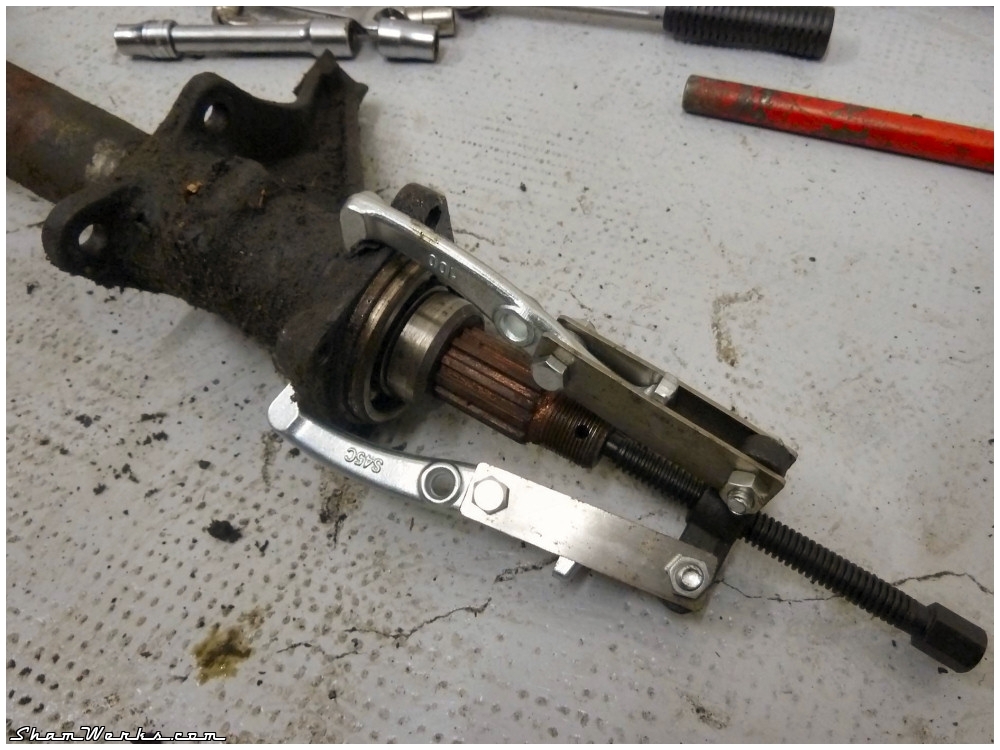
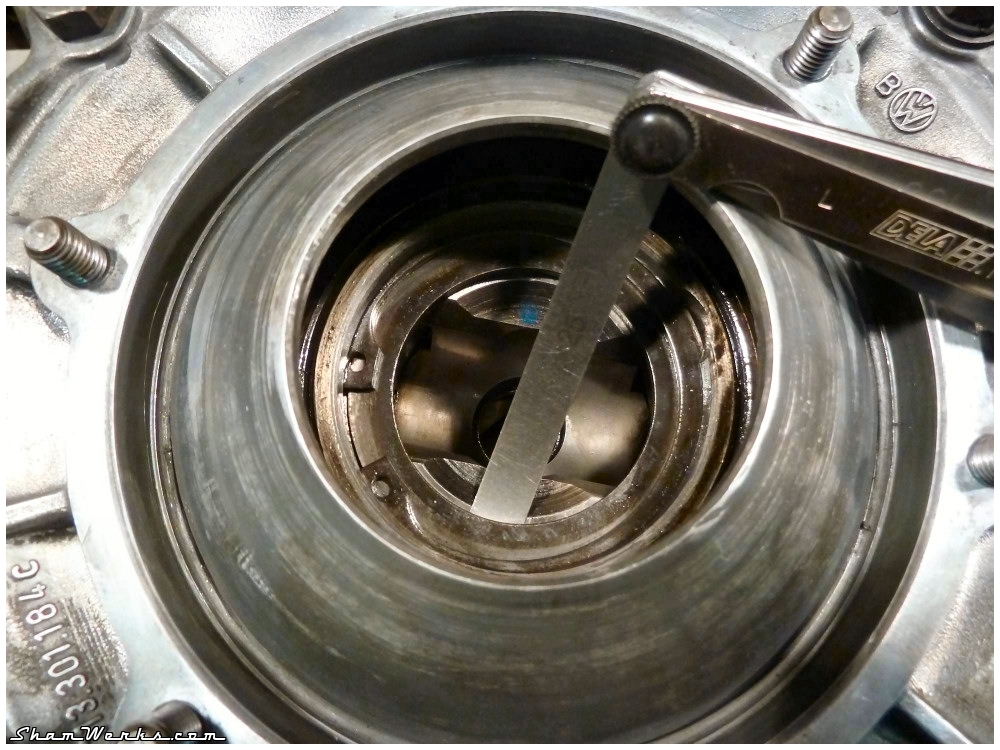
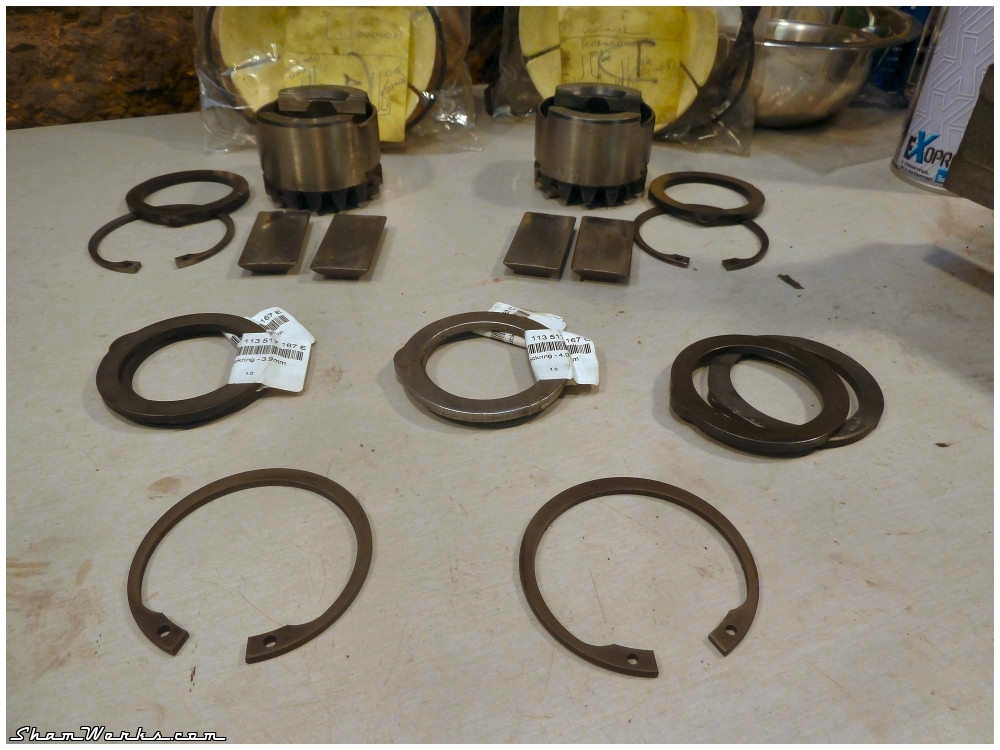
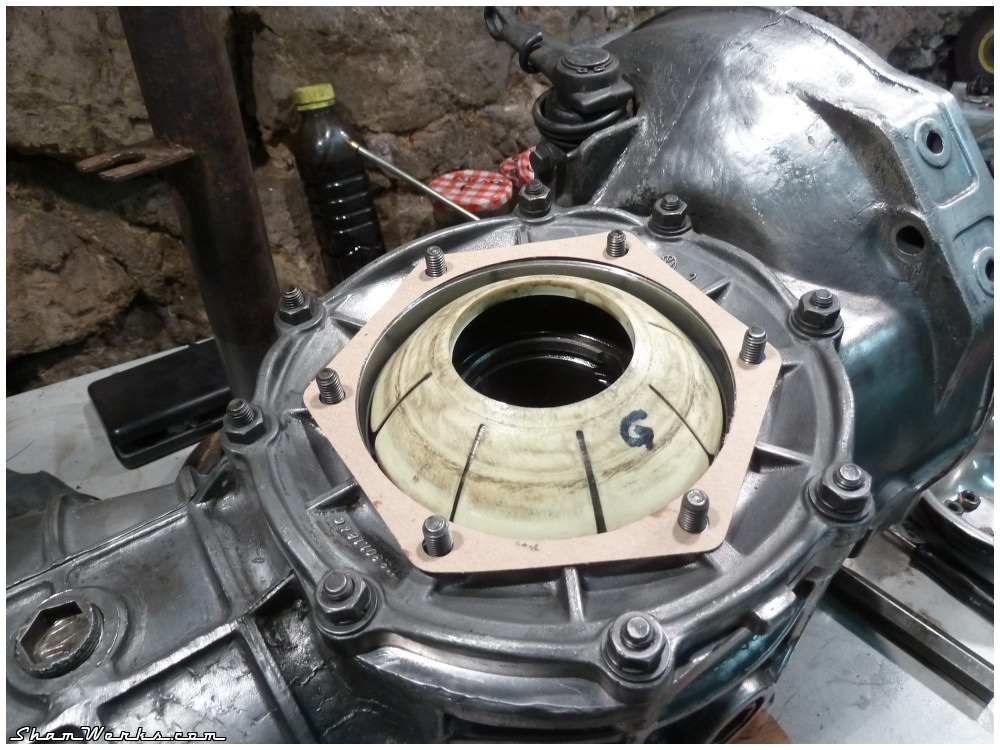
Then I remove the axles from the gearbox using a modified extractor. The rubber boots are dead and desperately need replacement...
The planetary gears are extracted, not an easy task since the end play had not been correctly adjusted when the gearbox was swapped : the snap ring moved in its housing, which created a small metal bur around it... I used a Dremel with a cutting disk to ever so slightly remove that bur from the lip of the housing, freeing the planetary gear...


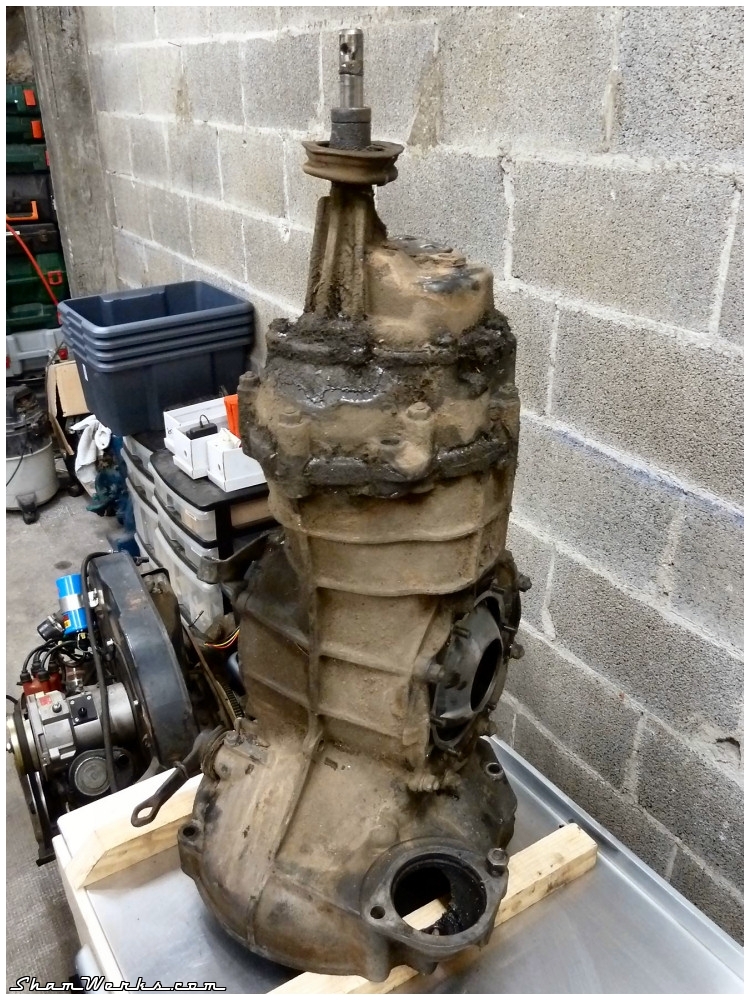
The differential holes were blocked with duct tape to avoid getting any cr*p inside during the cleaning process.

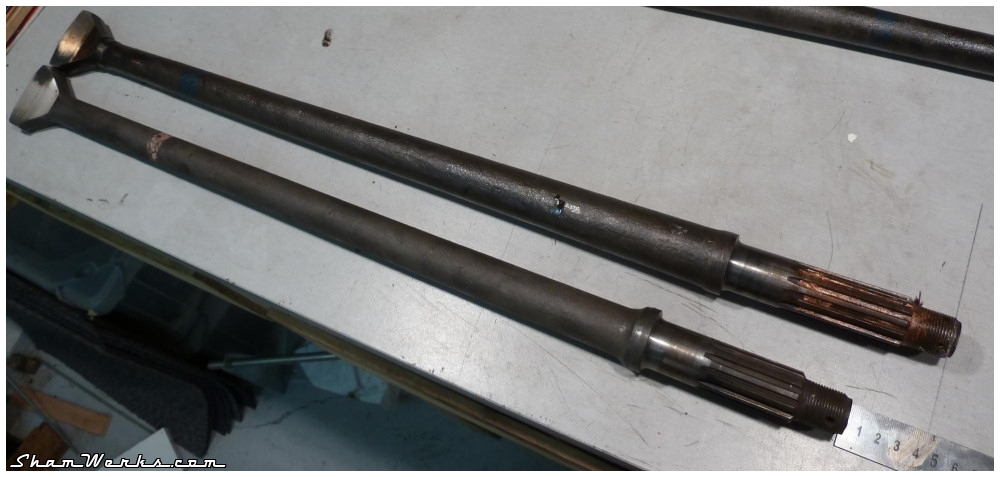
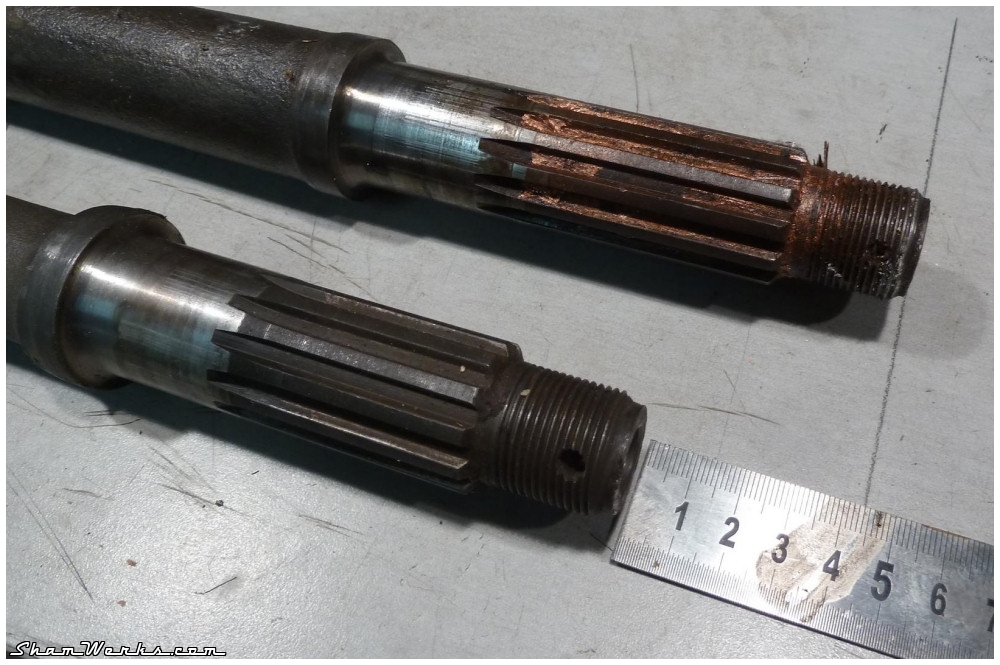
The short version is more or less 30mm shorter ; but the transmission axles are actually 45mm shorter : the difference comes from the splined section, which is 15mm shorter... Which means you need to lathe down 15mm from your brake drums to be able to fit them on!
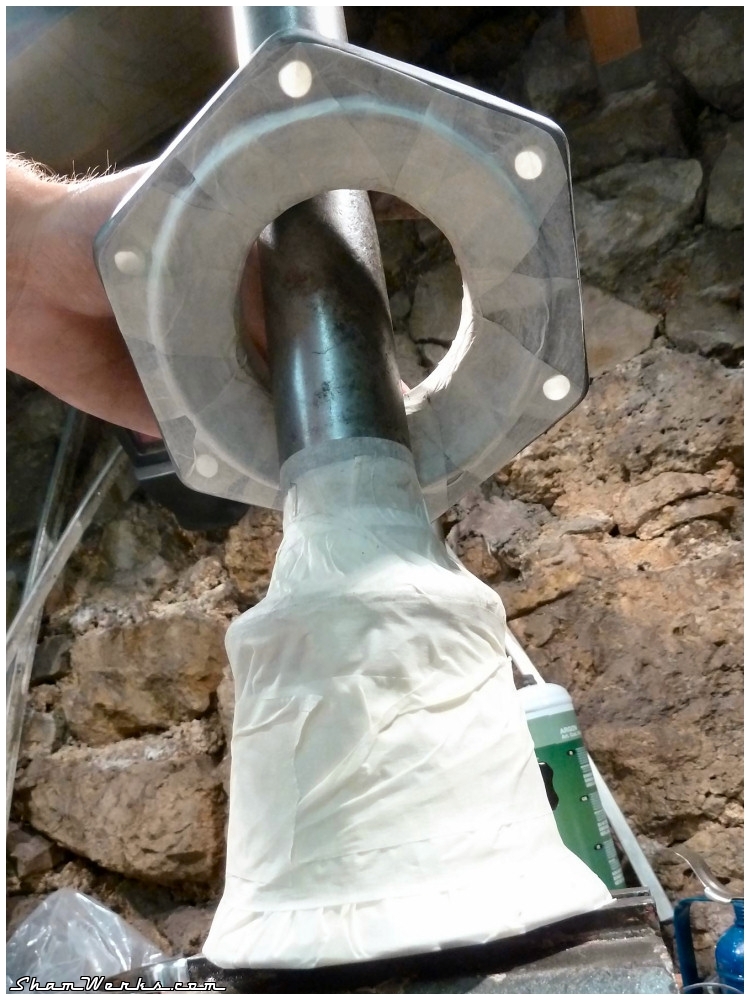
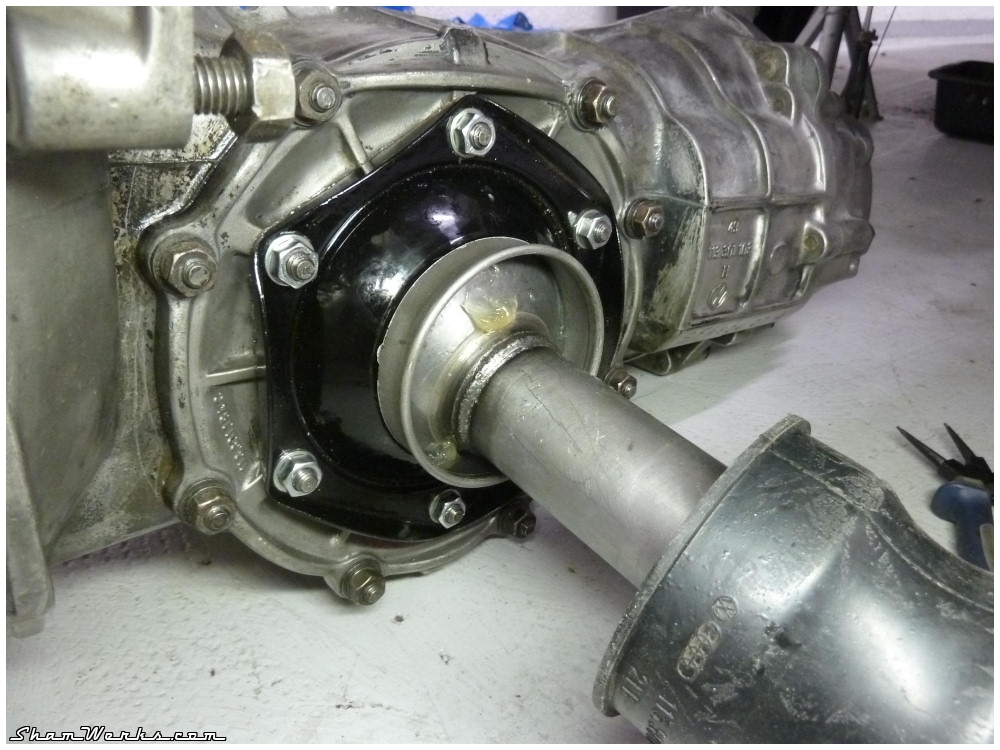
To install them, there's two ways : either you remove the end casting (on the wheel side) with an hydraulic press, to fit the boot from there (after grinding away the rake line support). After what you re-install the end casting with the very same hydraulic press.
Or, if you don't have a press (I don't), you can use the solution described in the VW workshop manual ; it may look tricky, but it quite easy to do actually.
I've made a short video to show you how to do it... And how not to do it, I managed to rip one!


So here the result : pretty neat, uh?
Inspecting the boot I ripped, I could see that it broke along the "mold seam", there's probably a weakness in the matter there, and that's precisely where I forced with my screwdriver... So if you give it a try, do not make the same mistake!

A few days later... TAAAADAAAAA!


As said earlier the planetary gears play had not been set correctly. Time to do it correctly...
There is 3 different plays to check on the planetary gears, the VW workshop manual gives the tolerances :
- between the sides of the "fish tail" end of the axle and the planetary gear body : you're supposed to have between 0.03mm and 0.1mm, with a preference for a tight fitting. My thinnest thickness gauge, 0.04mm, goes in tight on the right axle, while I have 0.05mm on the left one. That's perfect as far as I'm concerned.
- between the flat side of the "fish tail" end of the axle and the fulcrum plates : you need between 0.1mm and 0.3mm, the ideal range being 0.15mm/0.20mm. I measure 0.15mm on the left one, and 0.16mm on the right one : bull's eye.
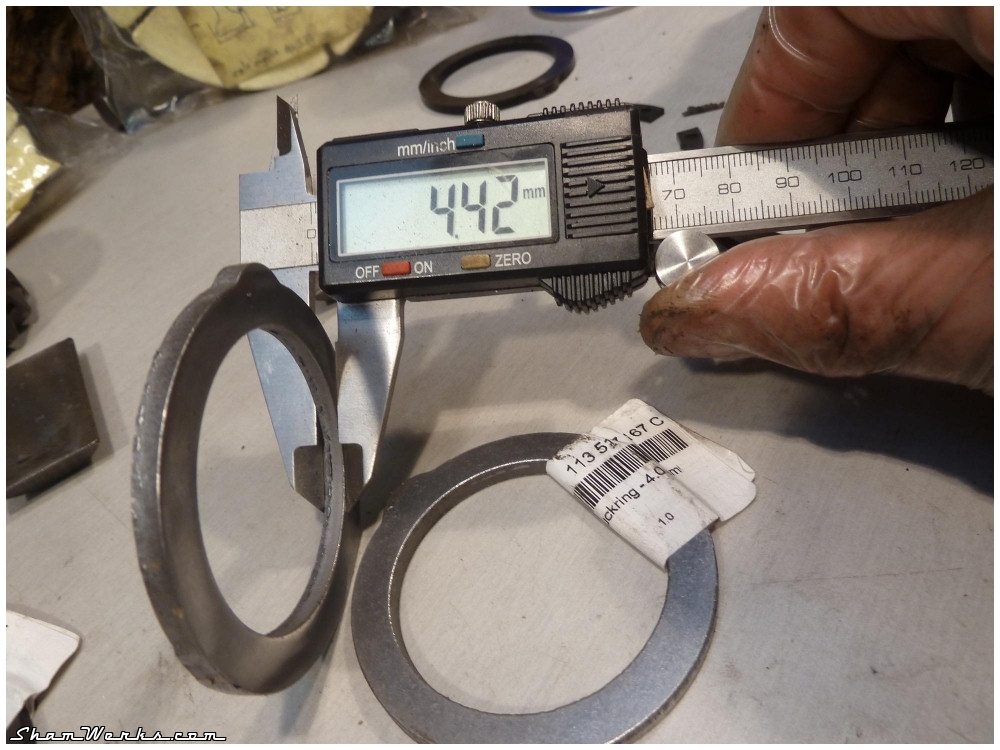
- and now things get a bit more complex : planetary gear inside the differential, with its thrust washer and snap ring in place, you should have between 0.05mm and 0.2mm of end play, with a preference for the tighter end of that range. Unfortunately, I have 0.27mm on the right and 0.25mm on the left... No bueno.


Plan B it is then, I order thickness-calibrated thrust washers from VW Classics (2 months delay, one gotta be patient... I ordered new snap rings as well to have a reliable setup), in 3.9mm, 4.0mm and 4.2mm (thickest size available), hoping to have the right one for my assembly. Besides, upon inspection there are two distinct finish qualities : the 3.9mm and 4.2mm are precisely calibrated, with a nice smooth finish ; on the other hand, the 4.0mm actually are 4.42mm thick!
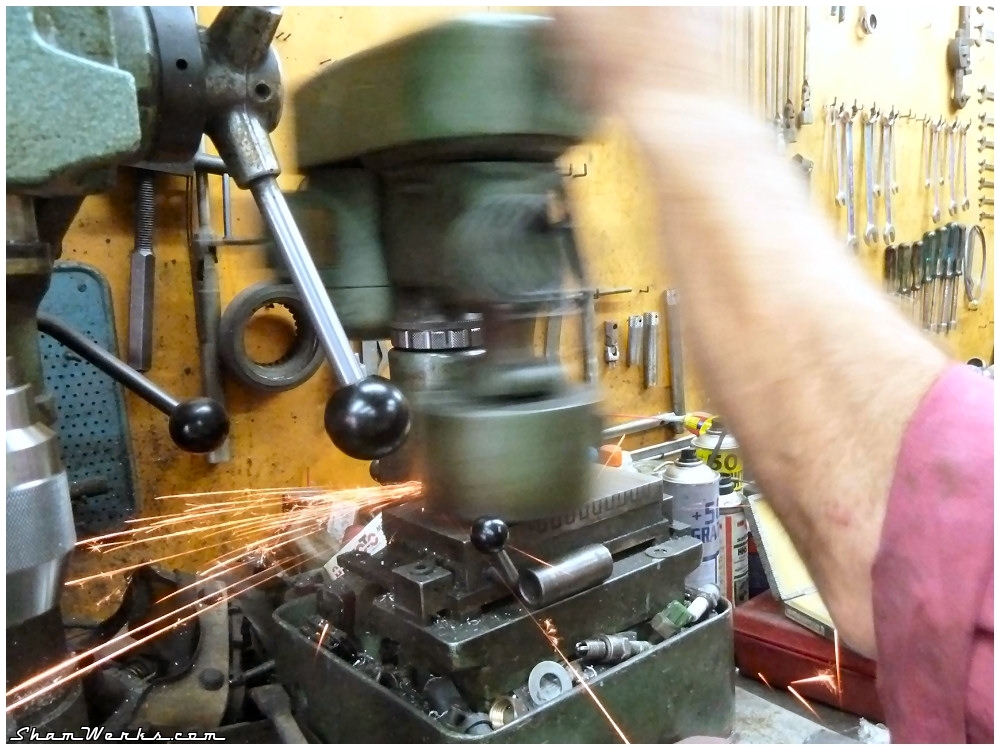
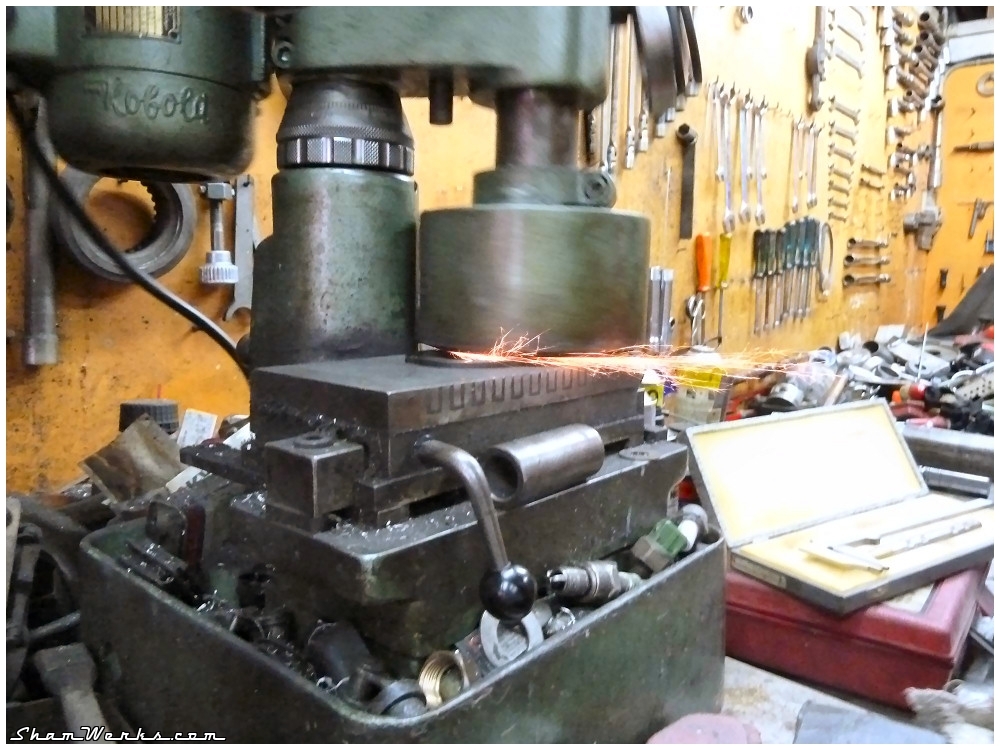
So I head up to JLC's (thanks Jean-Louis) to adjust the thickness with his surface grinding machine... And here it goes, perfect fit, almost tight, it will be just perfect after driving it a few kilometers!

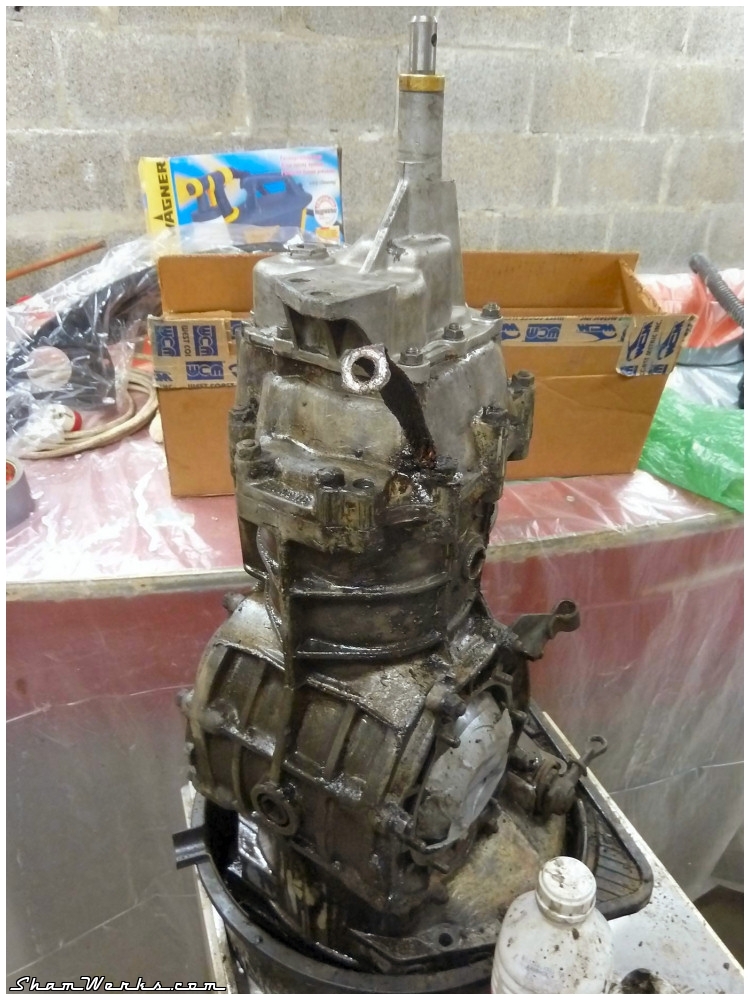
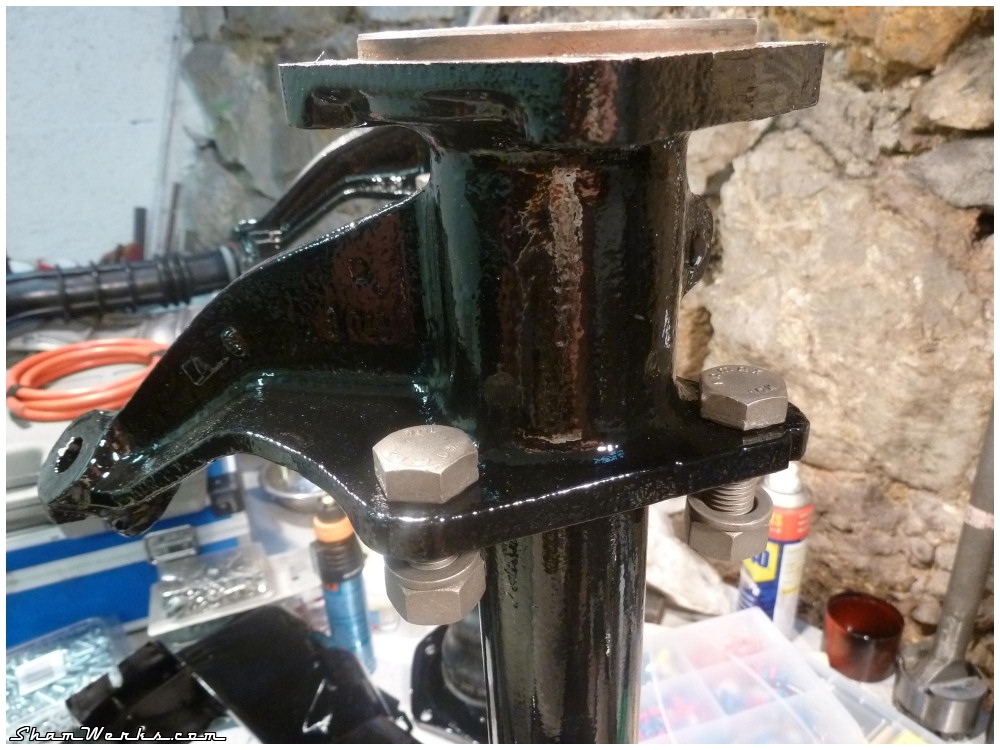
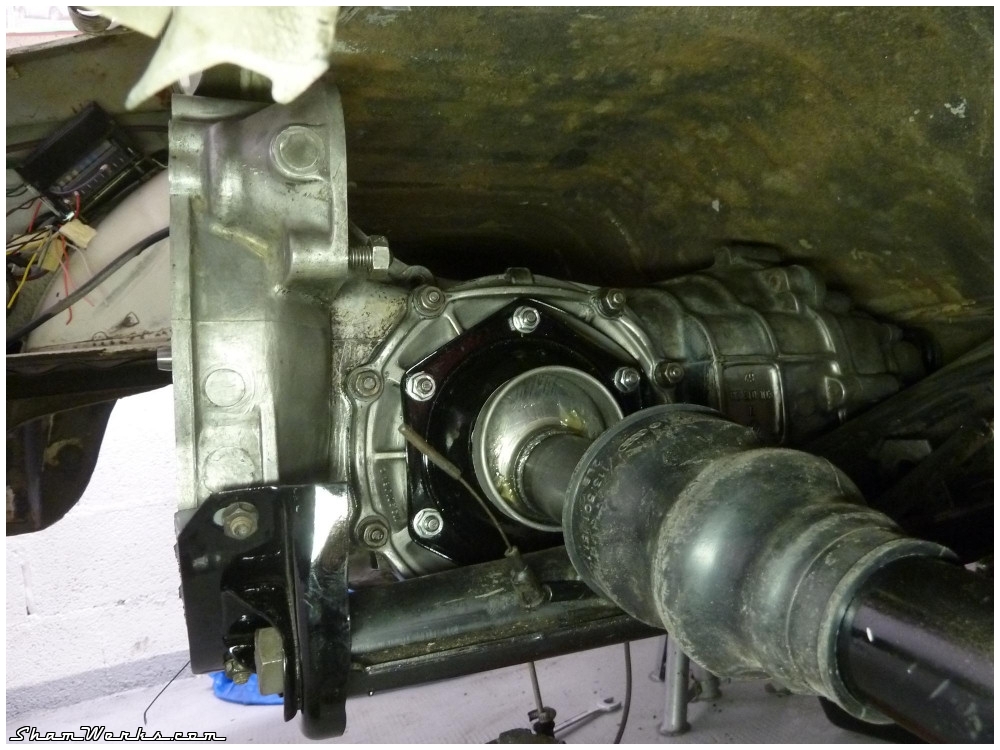
I can now finally push the gearbox back into the car!
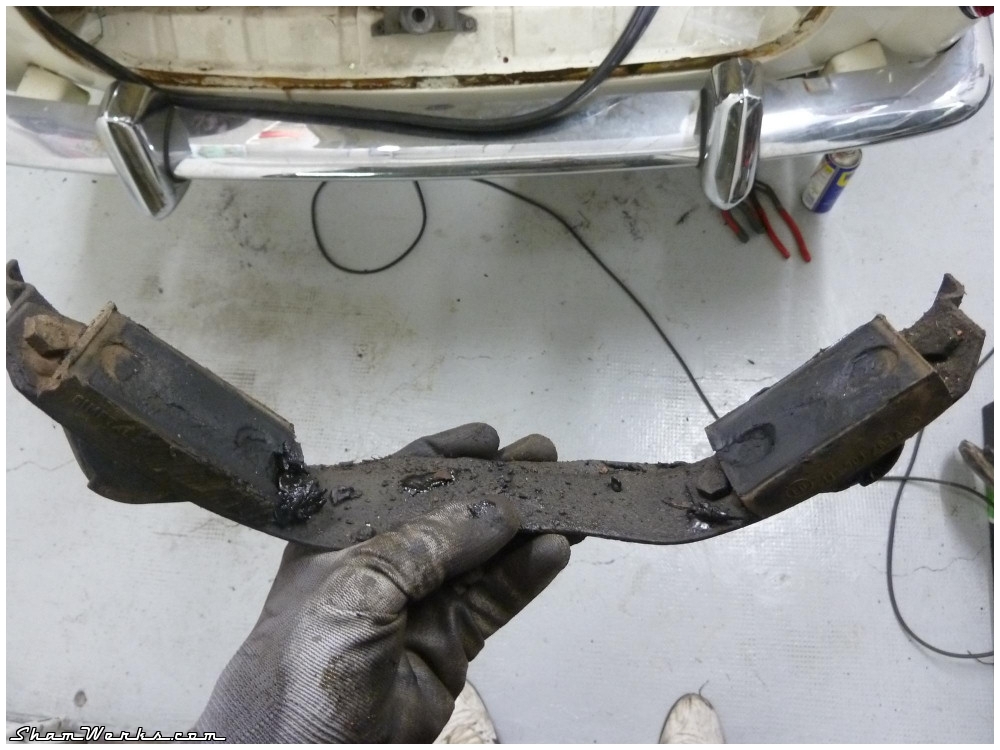
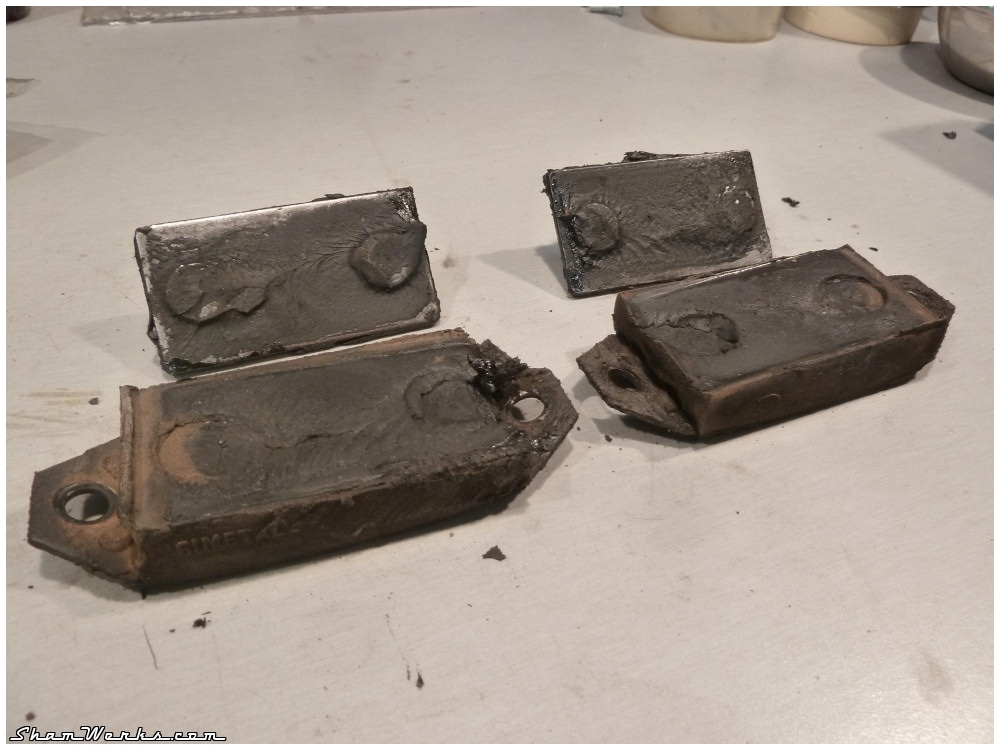
I install new mounts (harder ones), new bearings and gaskets/seals on the wheel side...


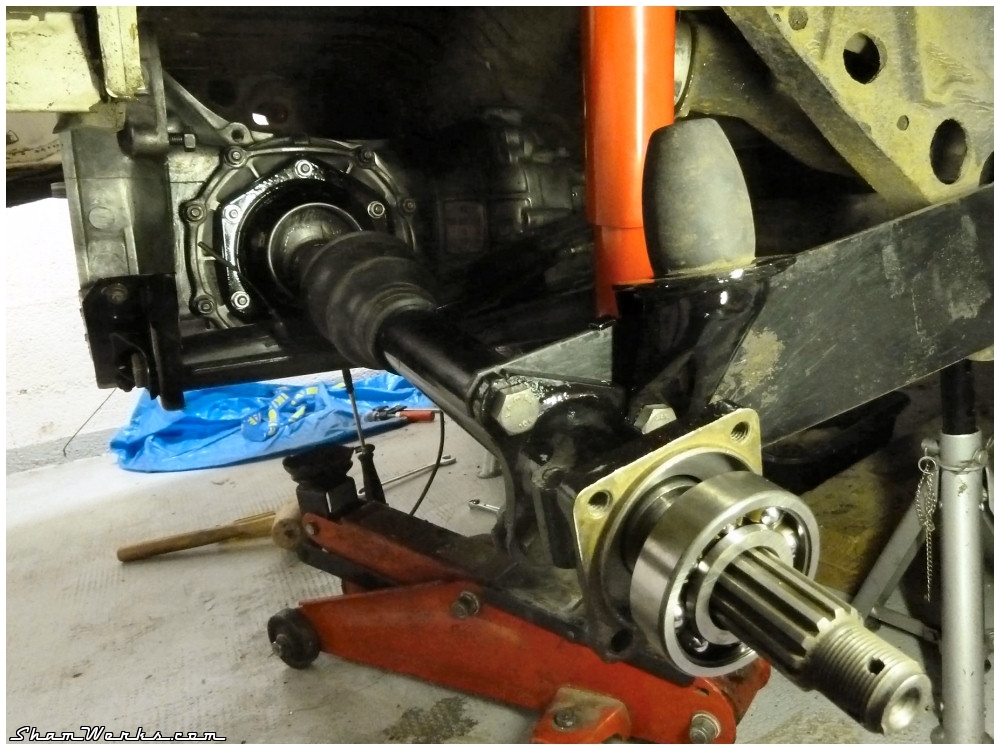
The rear wheels fit comfortably under the fenders, I may even be able to put slightly thicker spacers behind the rims (I currently have 8mm ones).

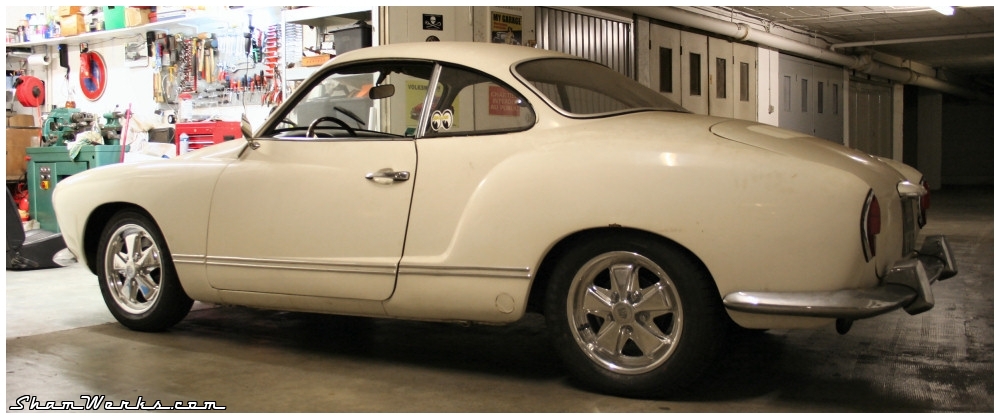
I couldn't help making a quick Photoshop to see how it would look like!
Pretty good, but it'll have to wait for now!