

Posted on 30/06/2014 at 22:41
Kitty Injection : Engine : 1776 part. 2

1776 / Part. 2
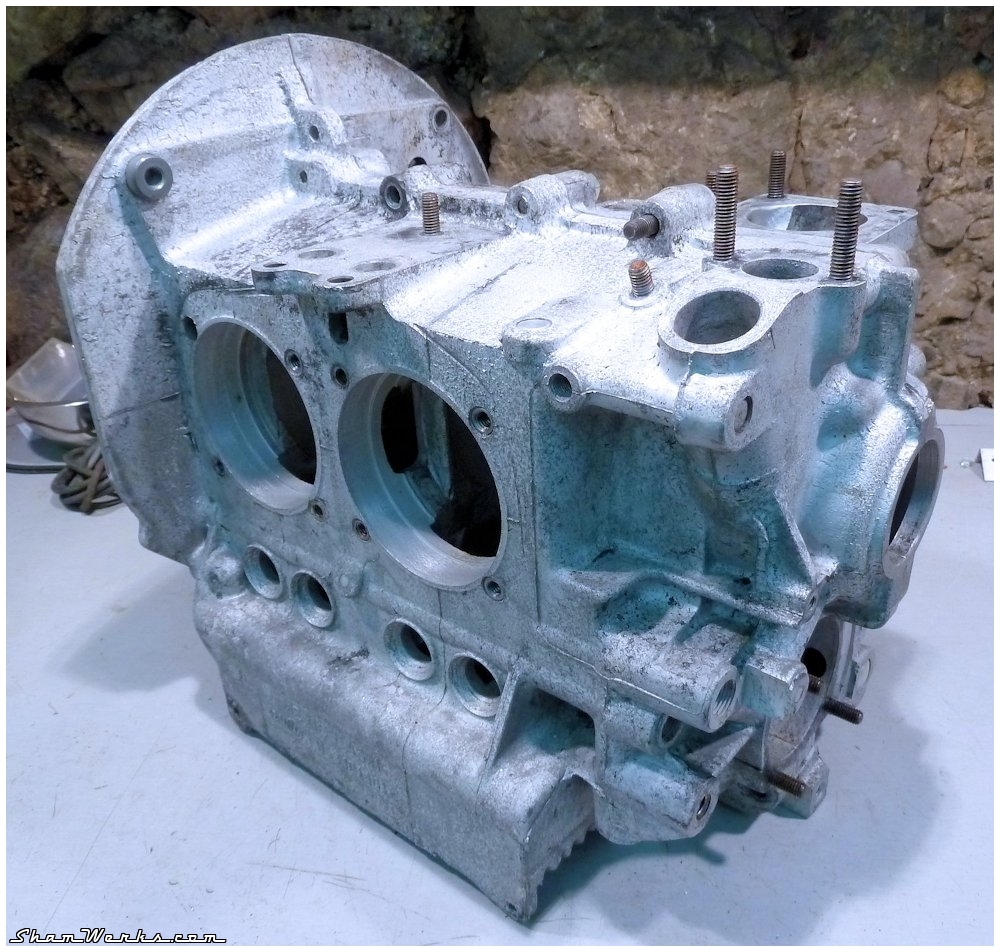
Case Prepping
Crankcase
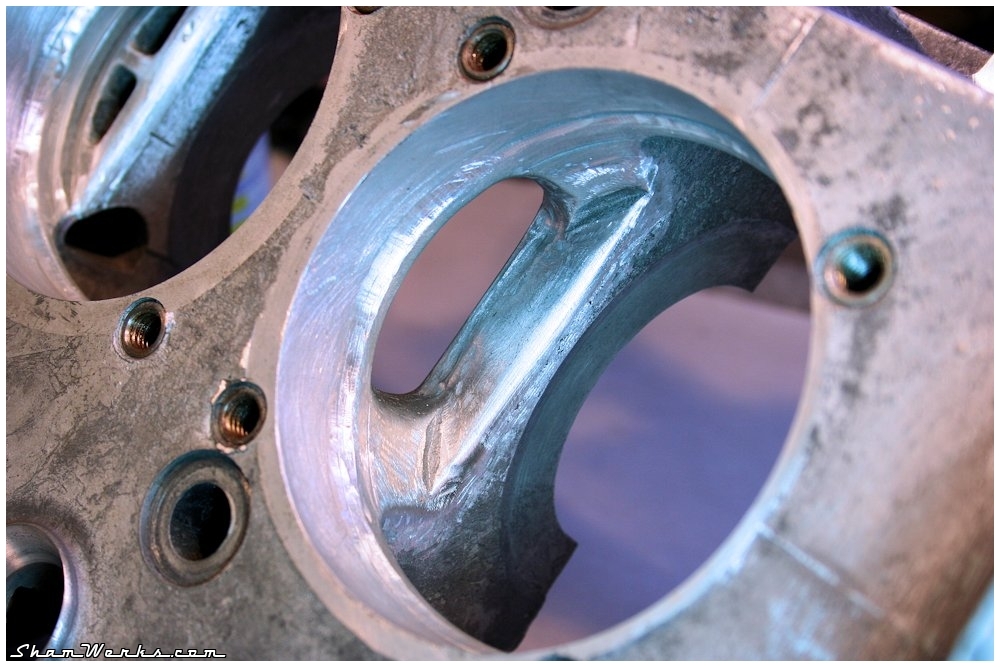
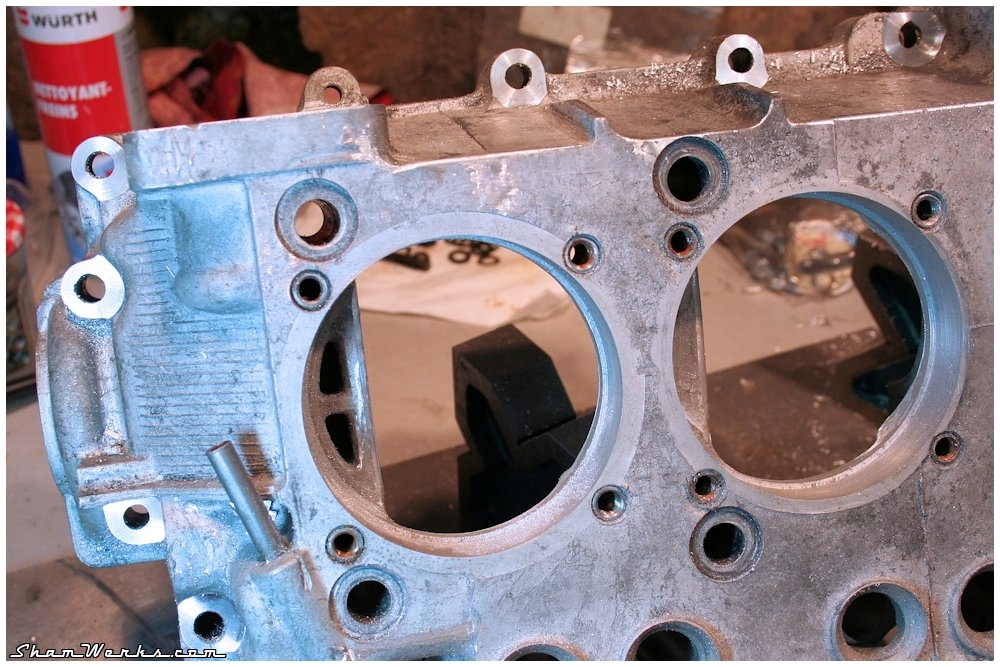
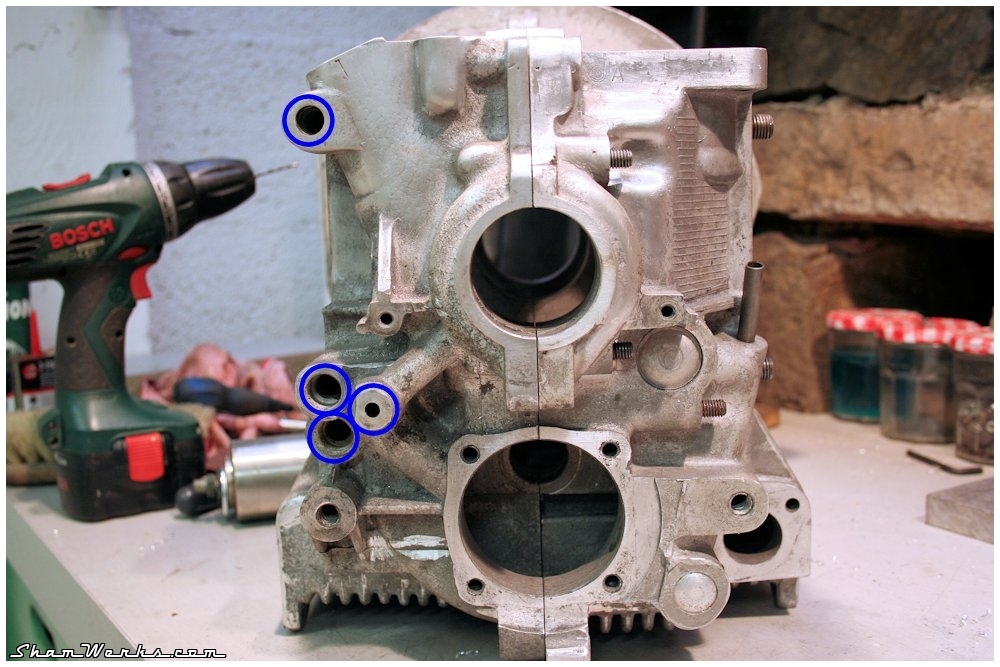
I kept working on the case :- All edges are smoothed,
- Casting marks are removed,
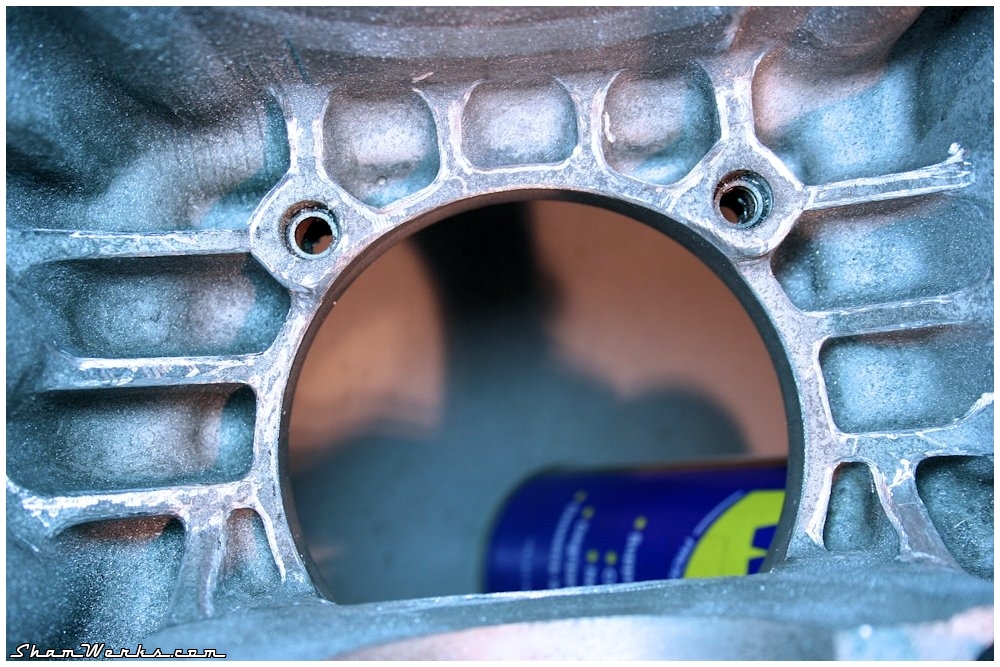
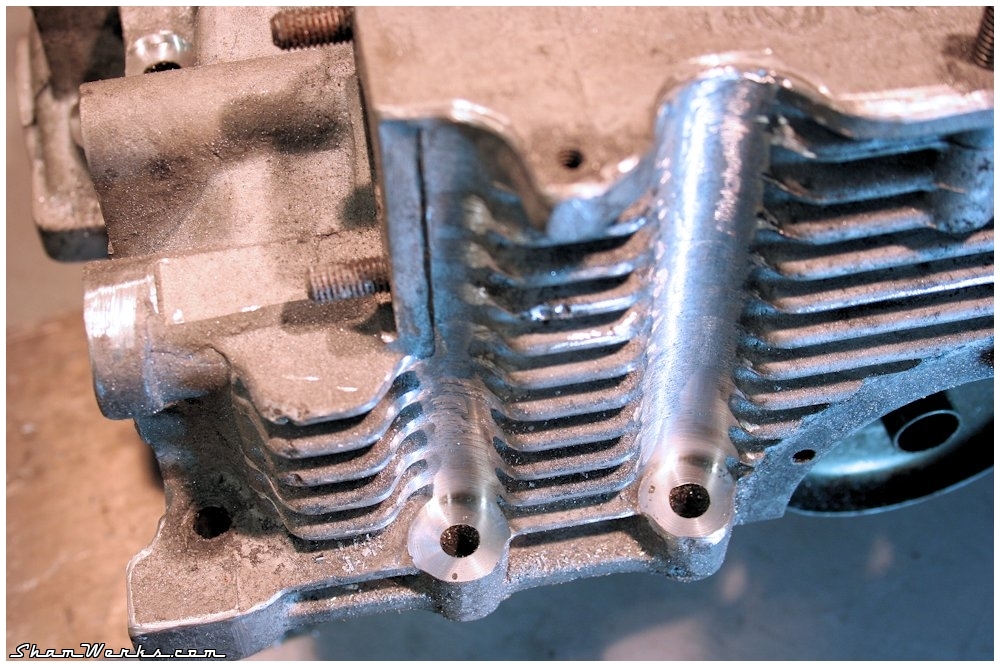
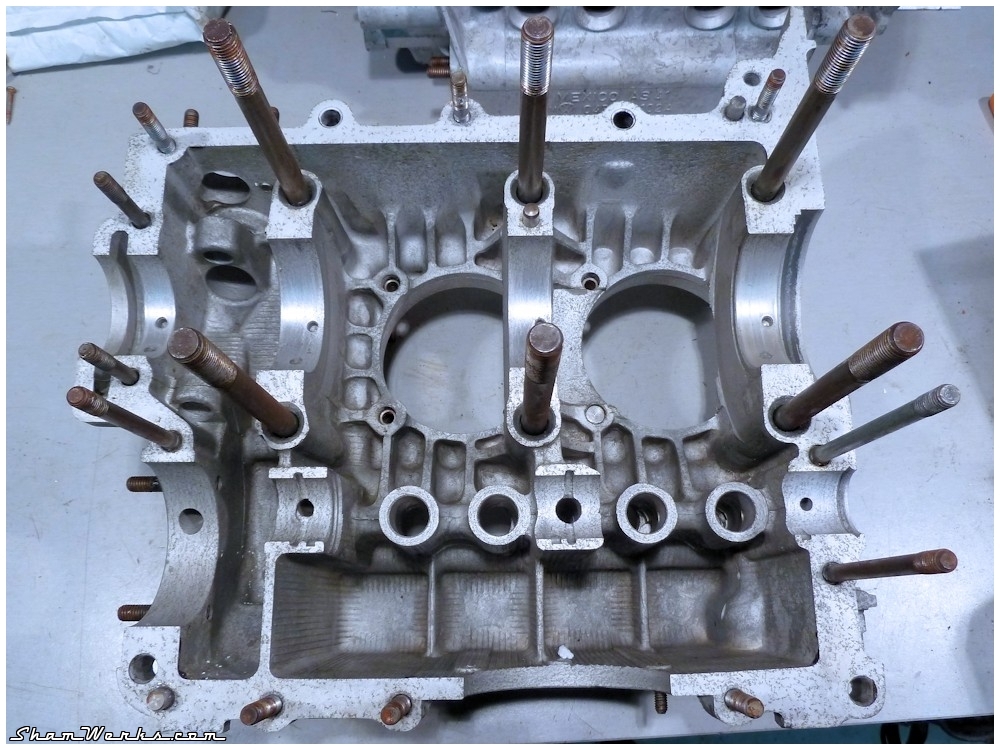
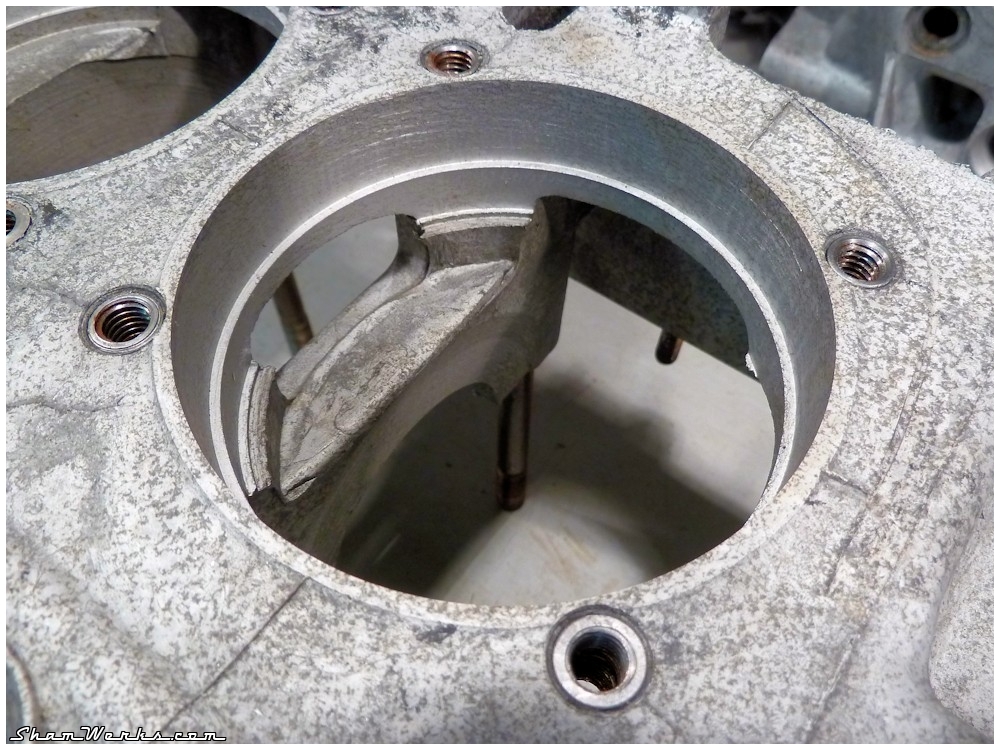
- The ventilation holes between cylinders 1&2 / 3&4 are widened (the three fingers rule!) and smoothed,
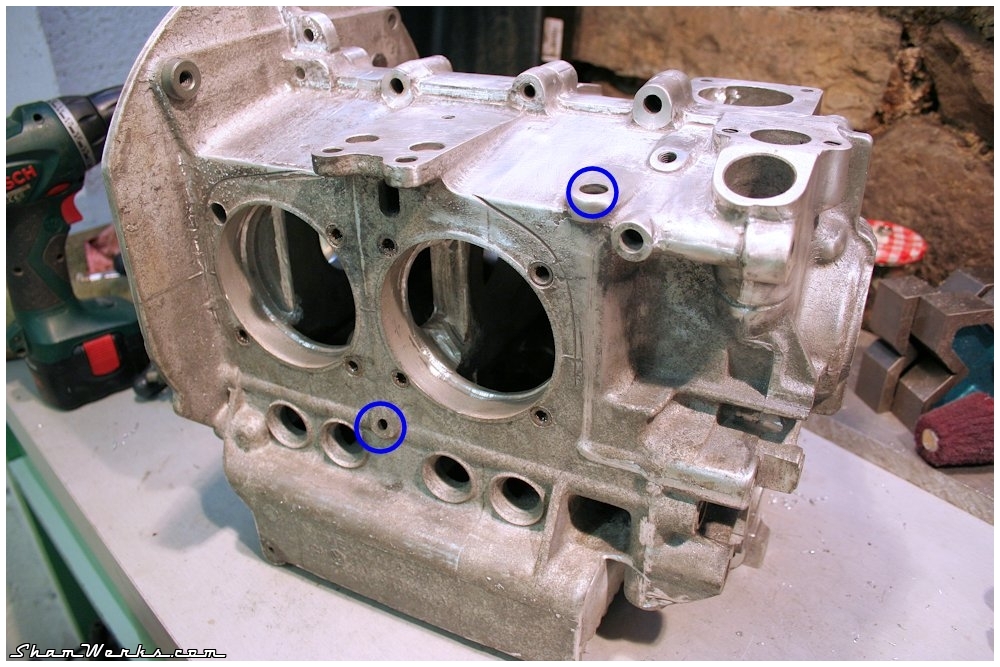
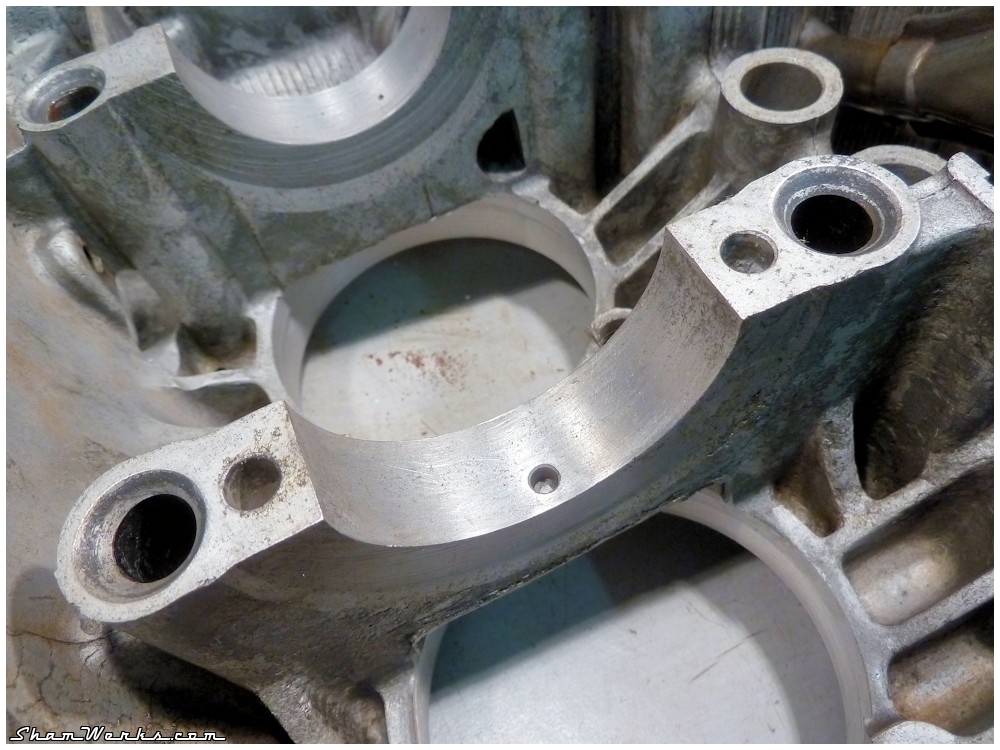
- the oil return hole at the bottom of the partition with the distribution gears is enlarged,
- the ventilation above the central bearing is enlarged.
The global idea is twofold : first, enhance the air flow inside the crankcase to avoid over-pressure, second, ease the return of the oil to the bottom of the case, in order for it to go back in the oil circuit (the oil remaining on the inner faces of the case is useless!).
Smoothing the edges also helps preventing concentration of constraints in the material, and the cracks that could result from them. Well, to be honest, I'm not really too concerned about that on my little 1776!
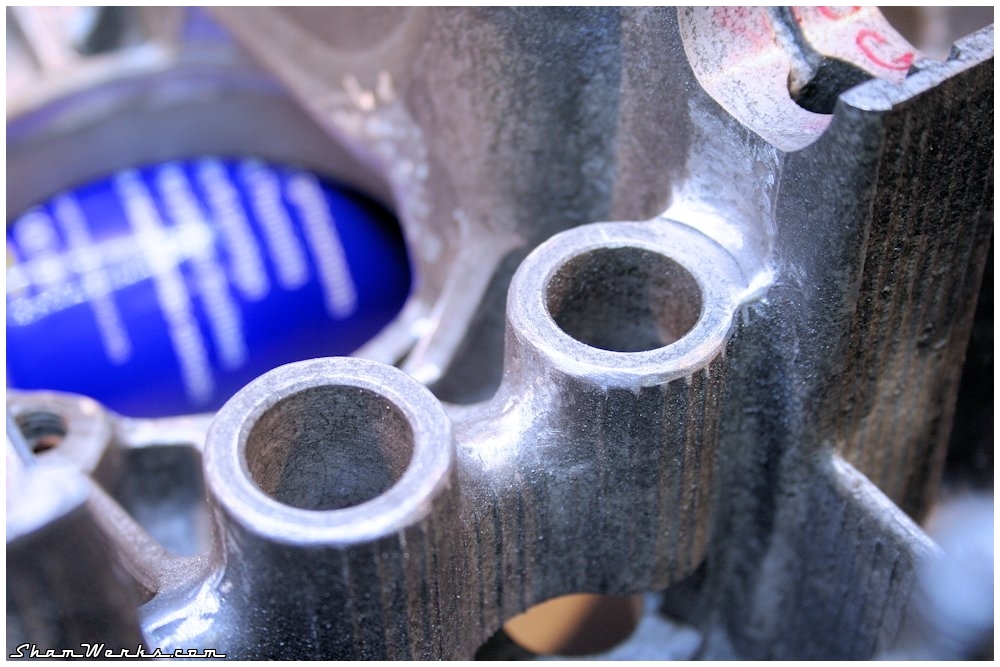
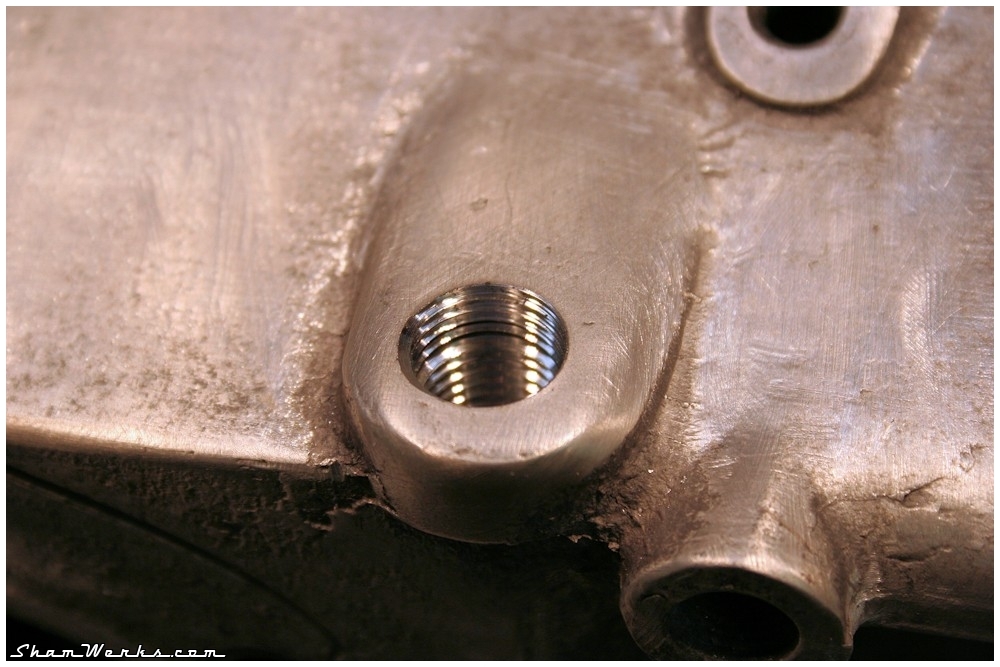
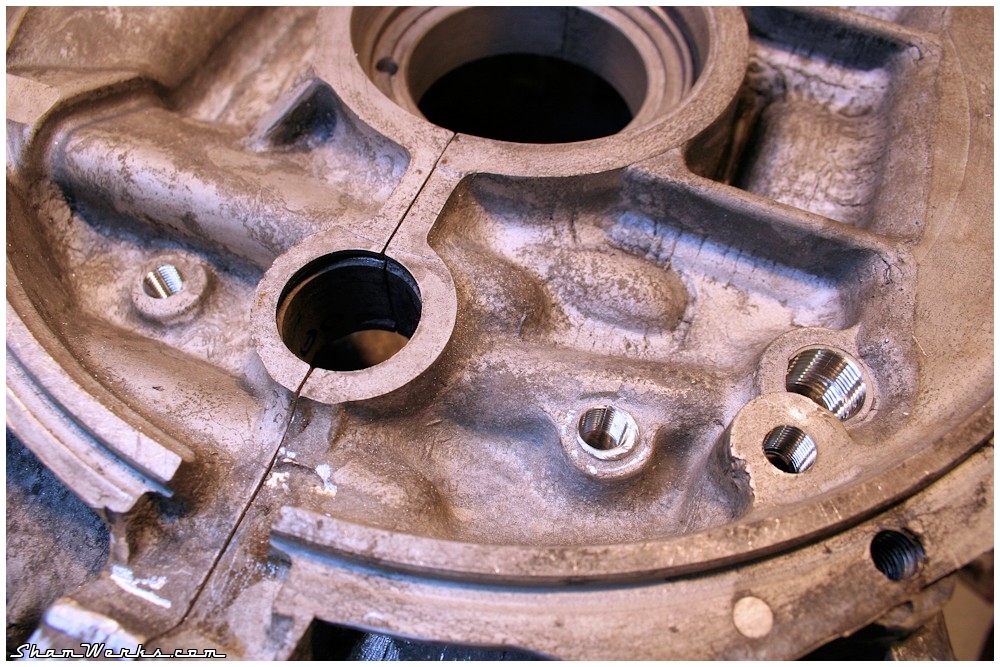
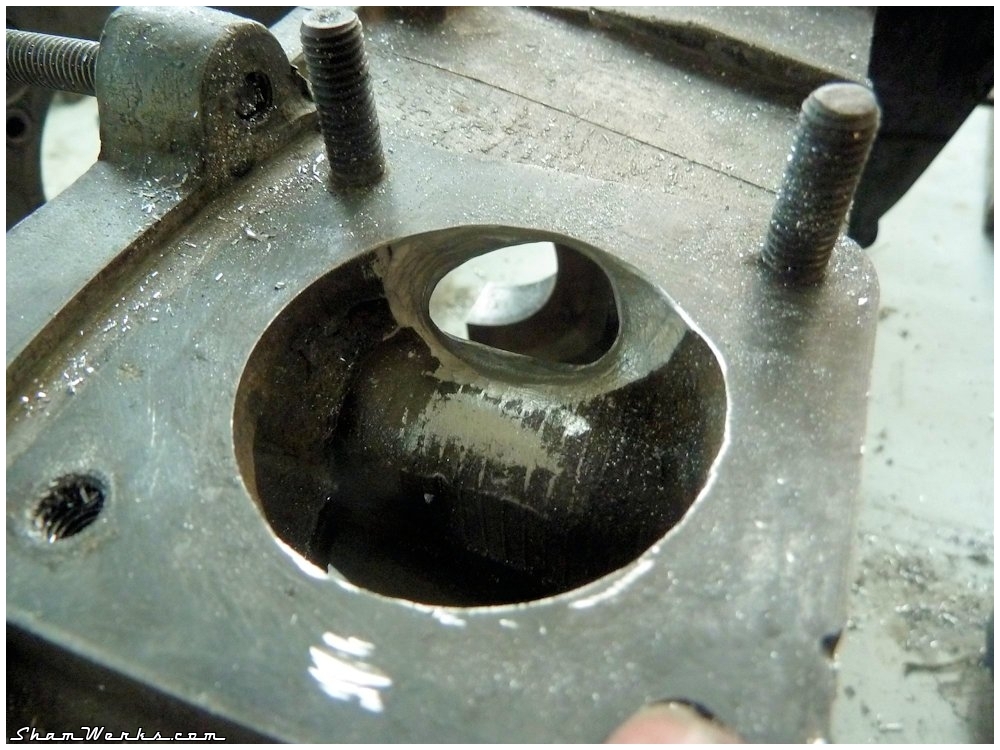
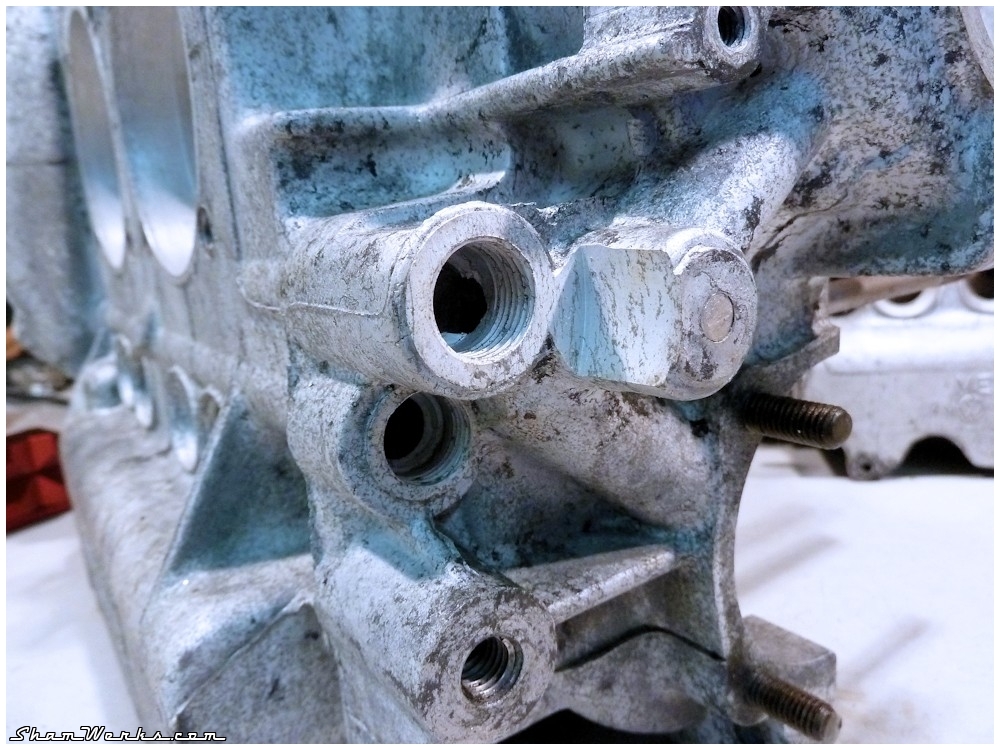
As a comparison, here is one of the ventilation ports before smoothing...


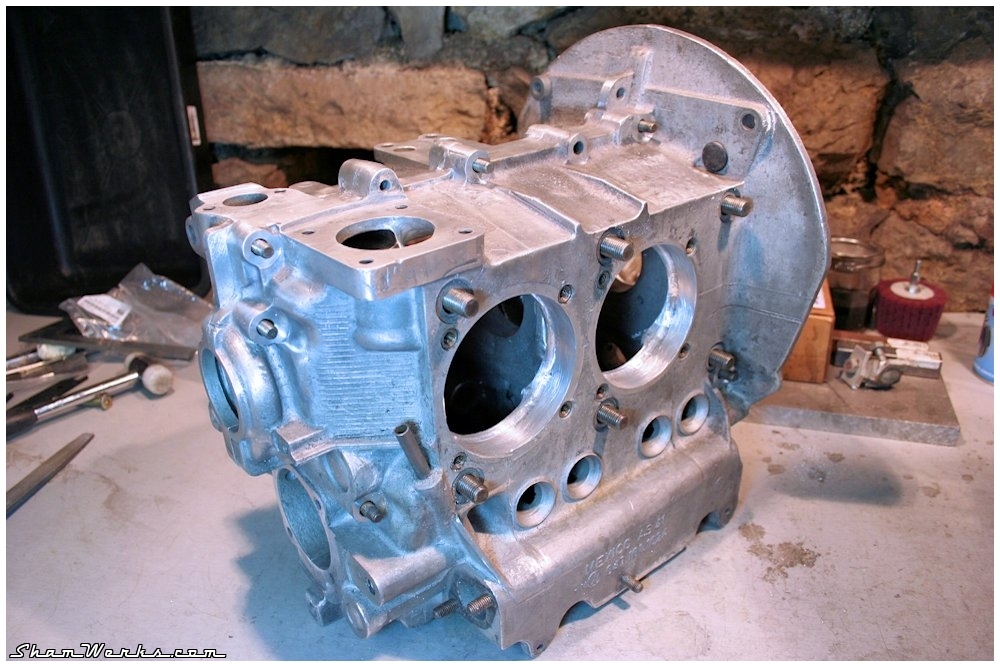
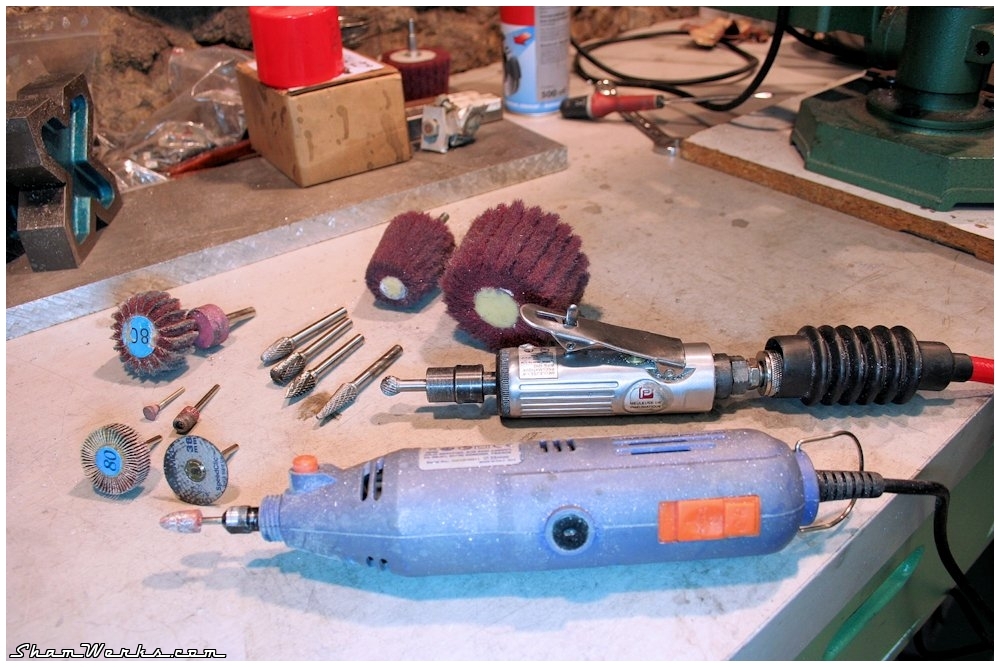
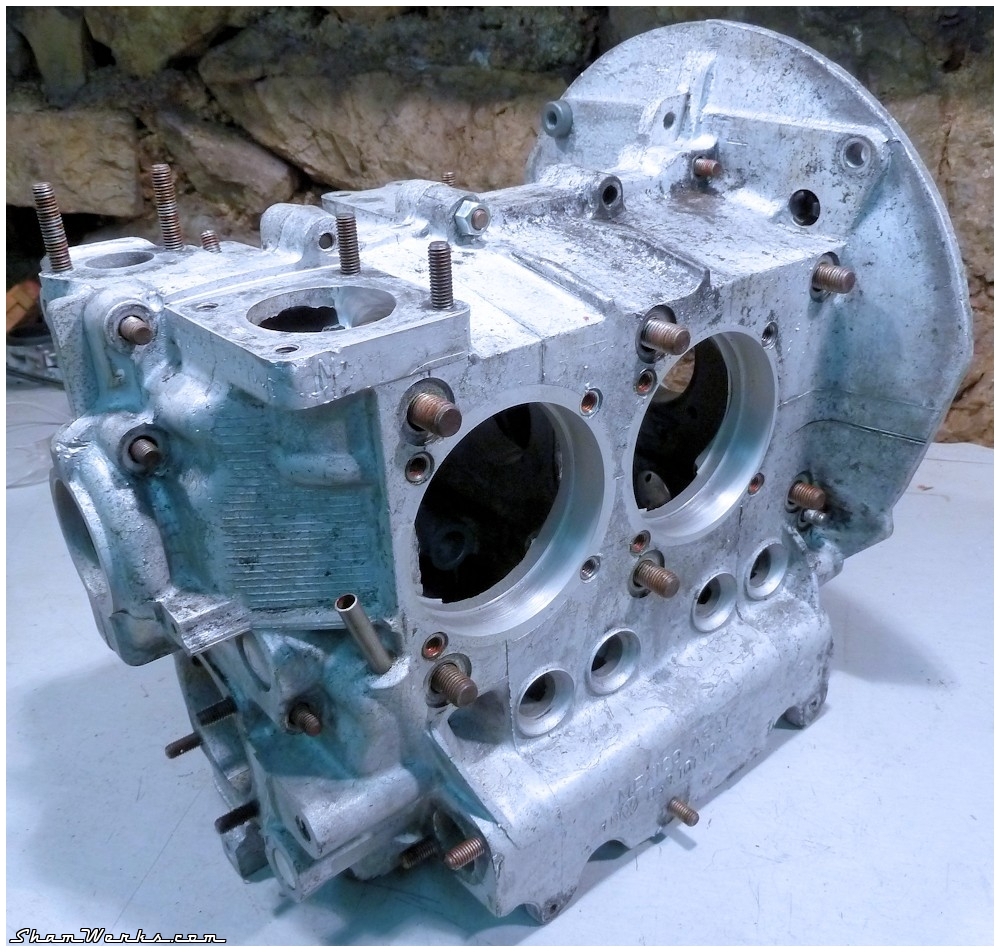
For the case's exterior finish, I used a fine rotary abrasive brush (on the pneumatic grinder, this baby gotta turn fast!). The objective was just to remove the oxidization and remaining muck after its previouss chemical cleansing...
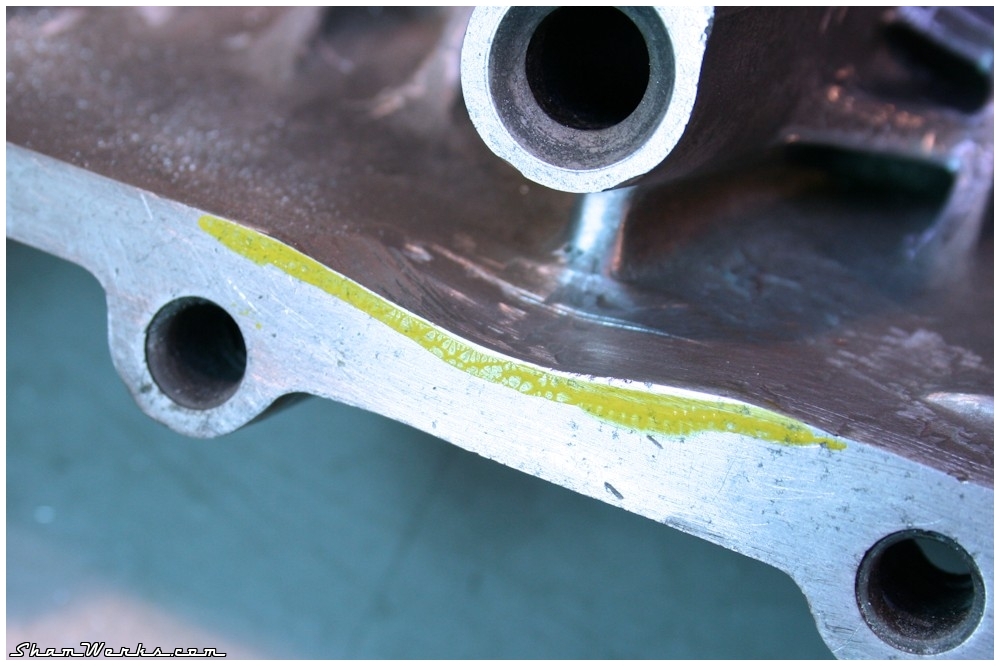
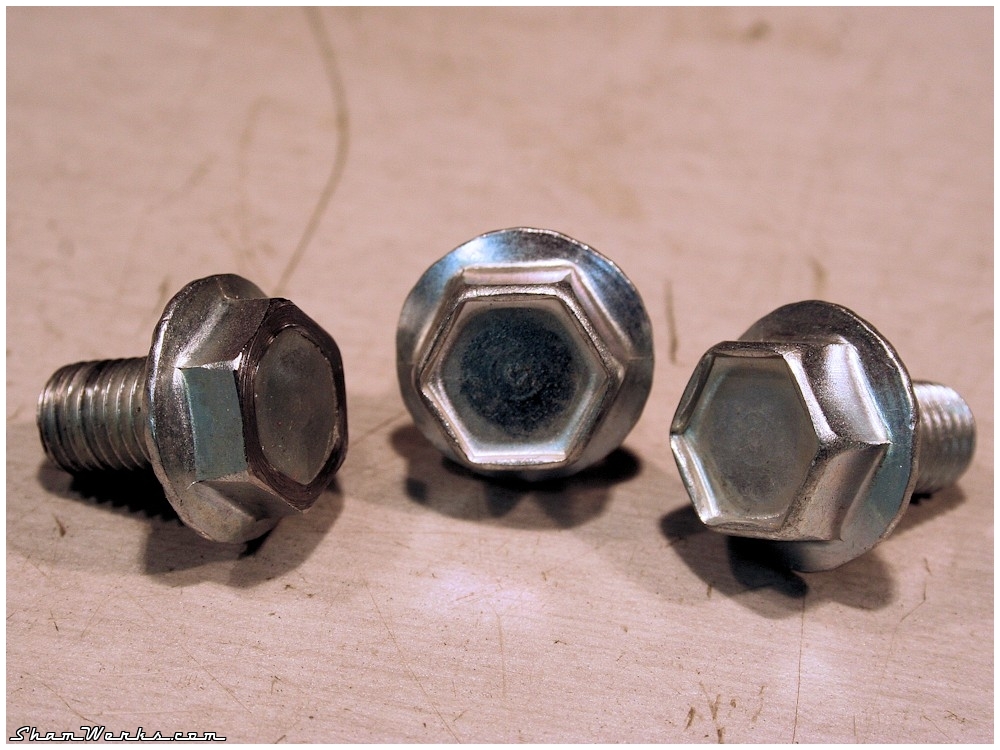
Berg Conversion
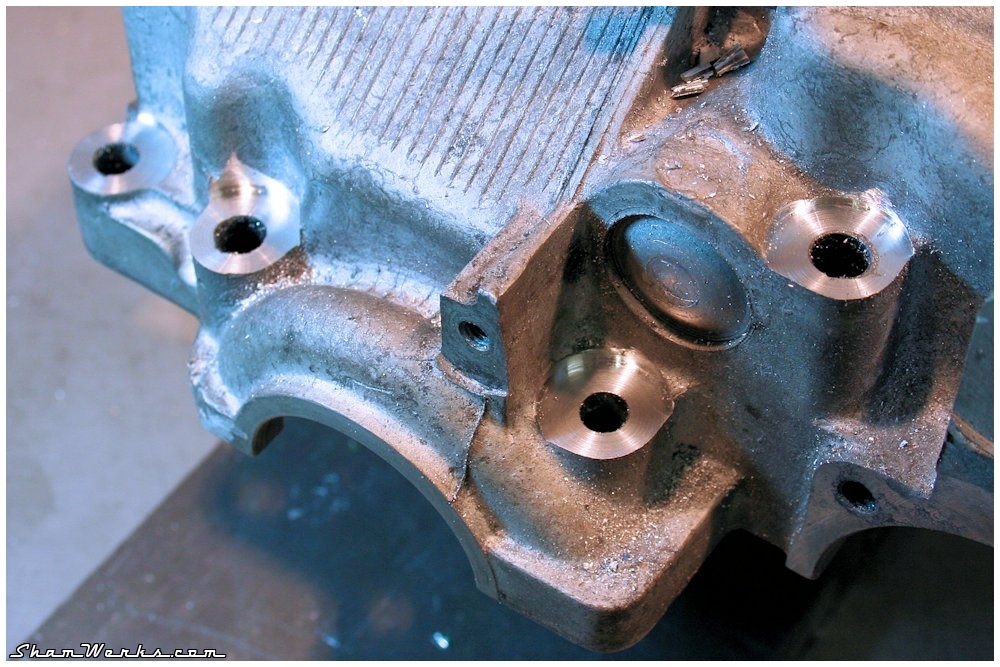
I had my mind set onto using head washers an nuts around the case ("Gary Berg conversion") : the thick washers (4mm) and the 15mm nuts allow a tighter torquing of the case perimeter (2.7mkg instead of the origin 2mkg), leading to a more rigid crankcase.But to do so, one needs first to spot face the case for the washers to lay flat on the material... As I did not really want to go
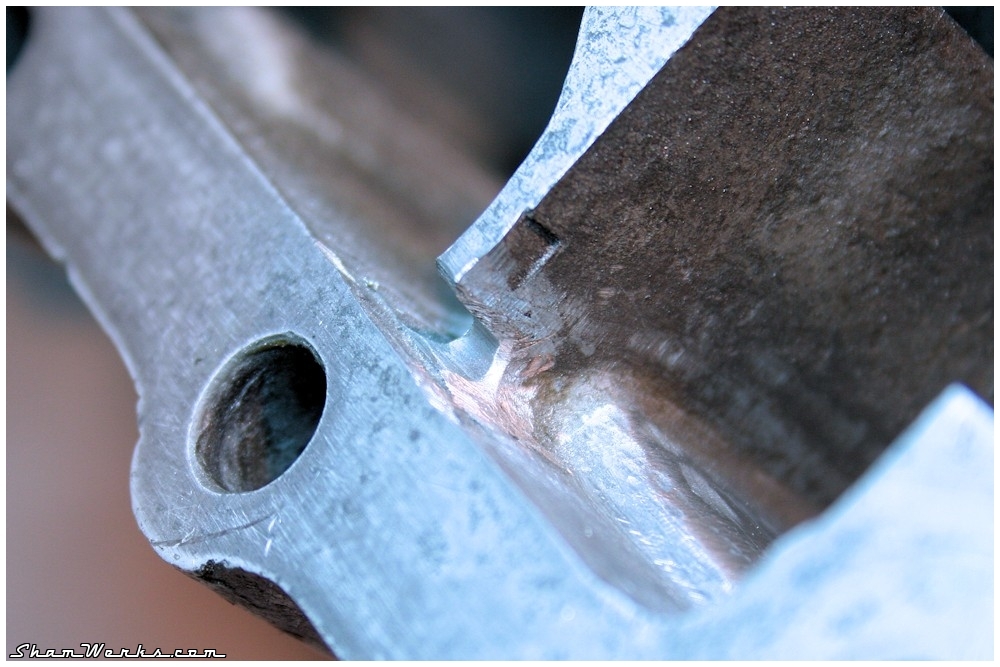
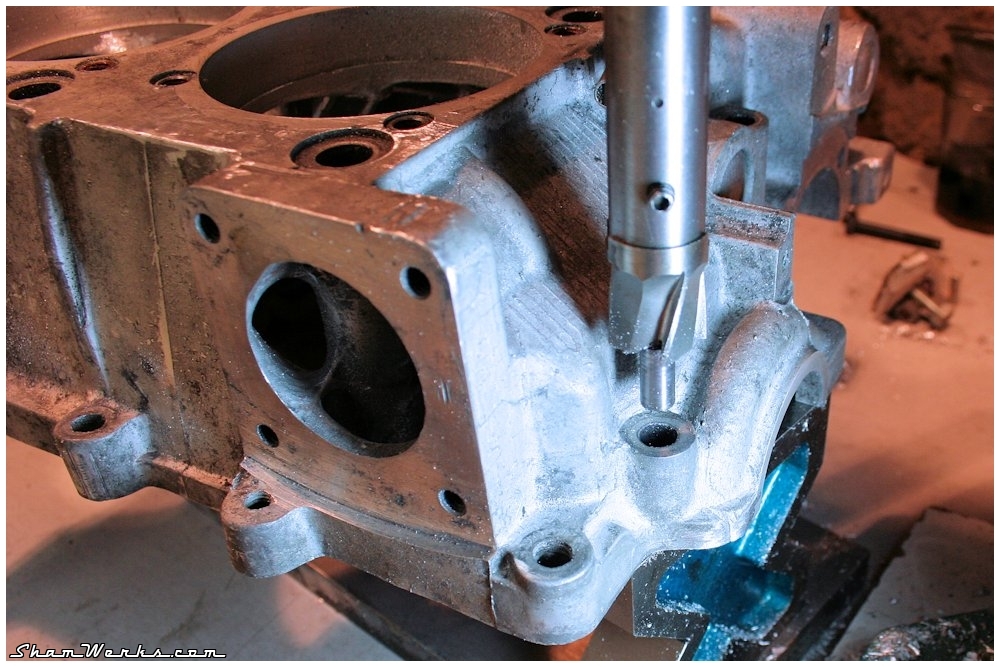
In order to do so, you would first need the right tool, a 22mm counterboring bit with a 8mm pilot tip (actually fellow enthousiast KY260, advised that Ø23mm is even better, as the washer may be a bit tight with 22mm). Not an easy to find tool, but I finally found it on eBay : a set of 23mm cutters, with two CM3 tool holders and 4 14.4mm pilot tips. At 44€, that was a steal!
As I don't have a mill, I want to use that tool with my drill press ; in order to do so, I lathed down one of the CM3 tool holders to give it a cylindrical end instead of the conical morse one. I also lathed one of the pilot tips down to 8.5mm (that hardened steel was very, very hard to lathe!).
Finally, I have the correct tooling, let's give it a shot!

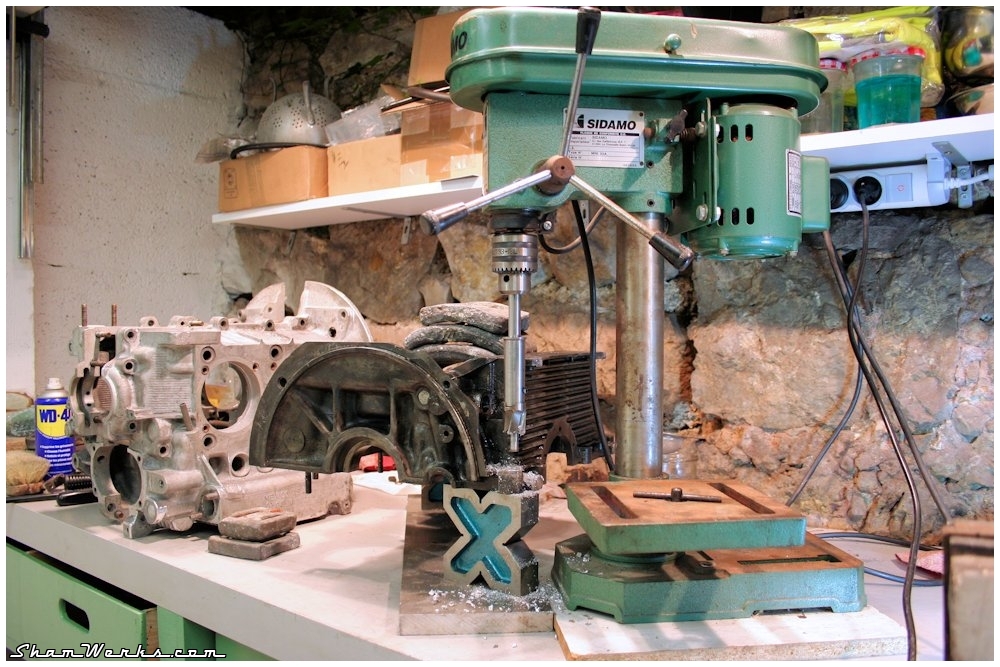

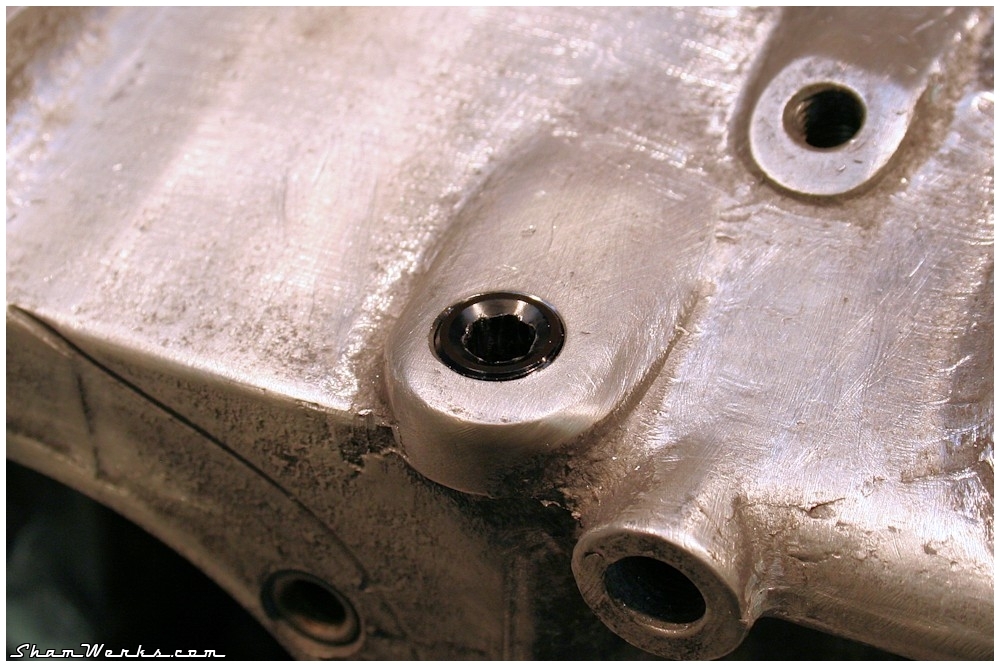
So, here we go now, same procedure on my actual case. It's actually quite a quick process, except the ones below the case ; some Dremel work was required to free the way for the cutter.

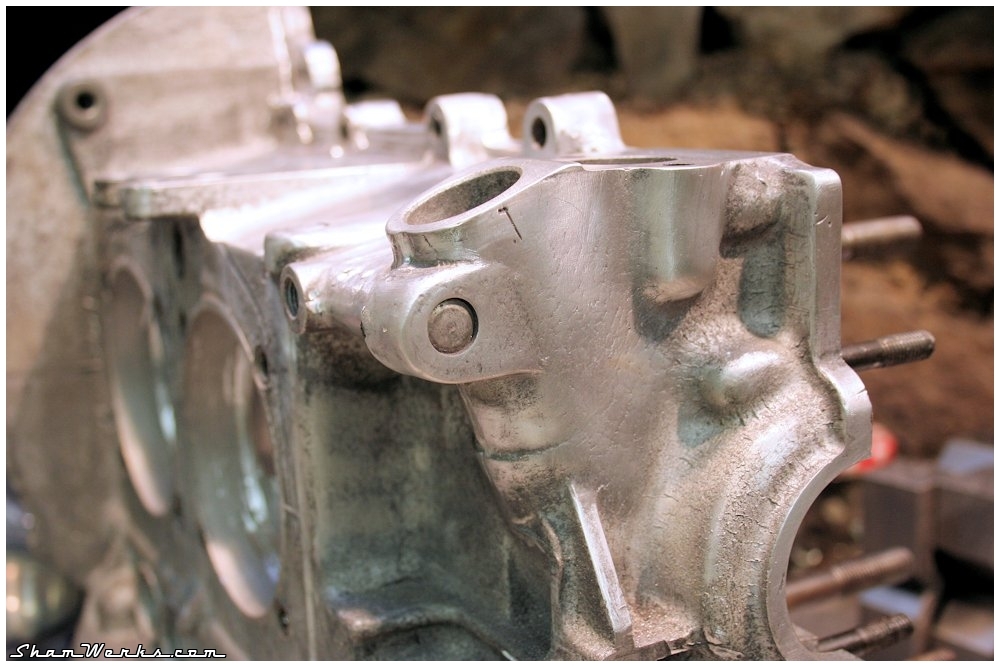
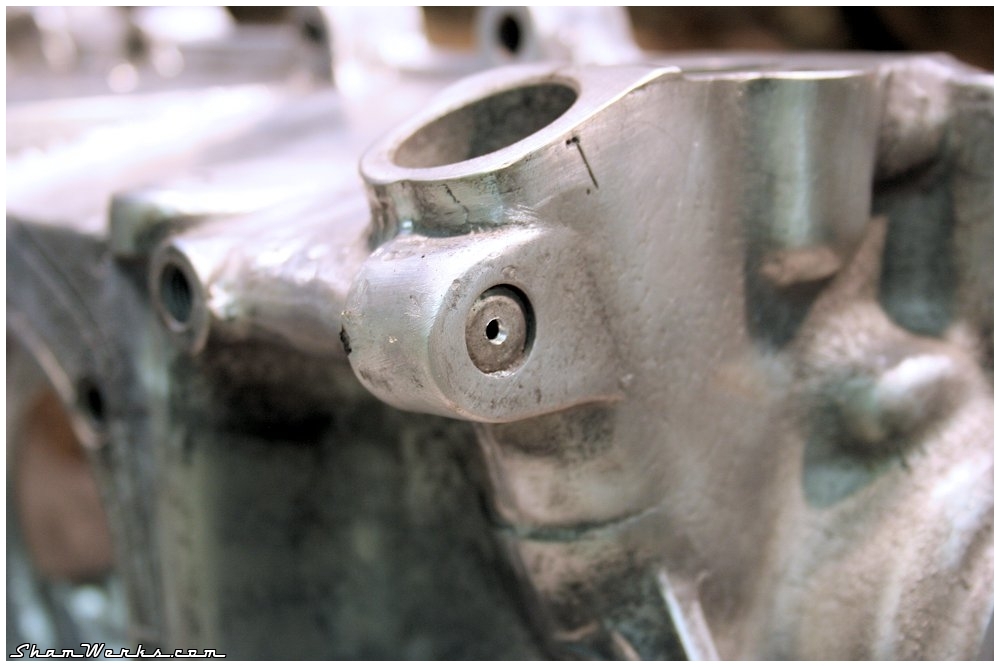
Unpluging the oil galleries
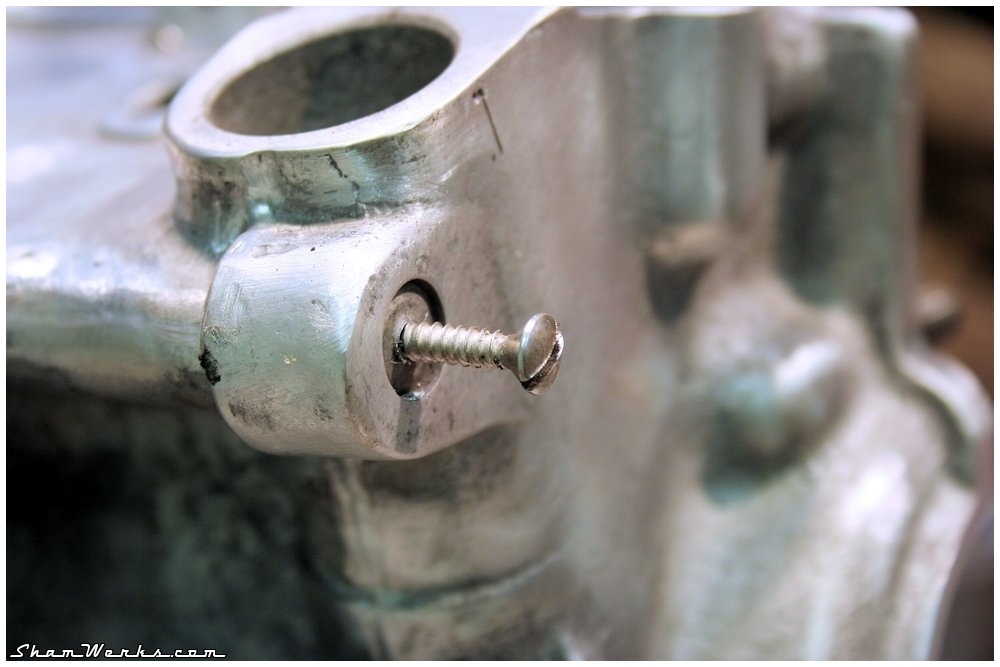
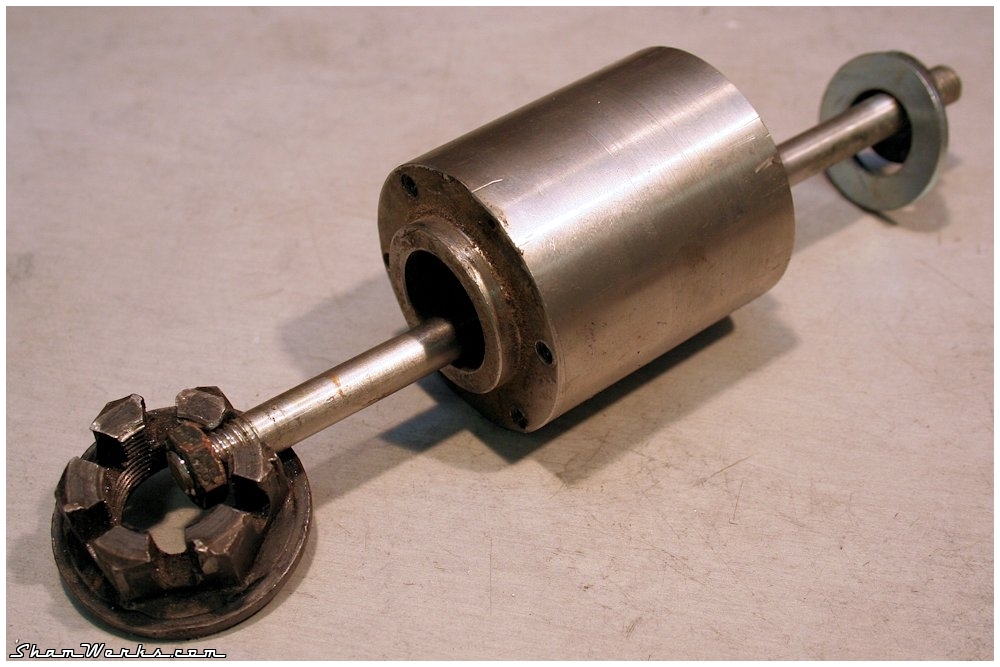
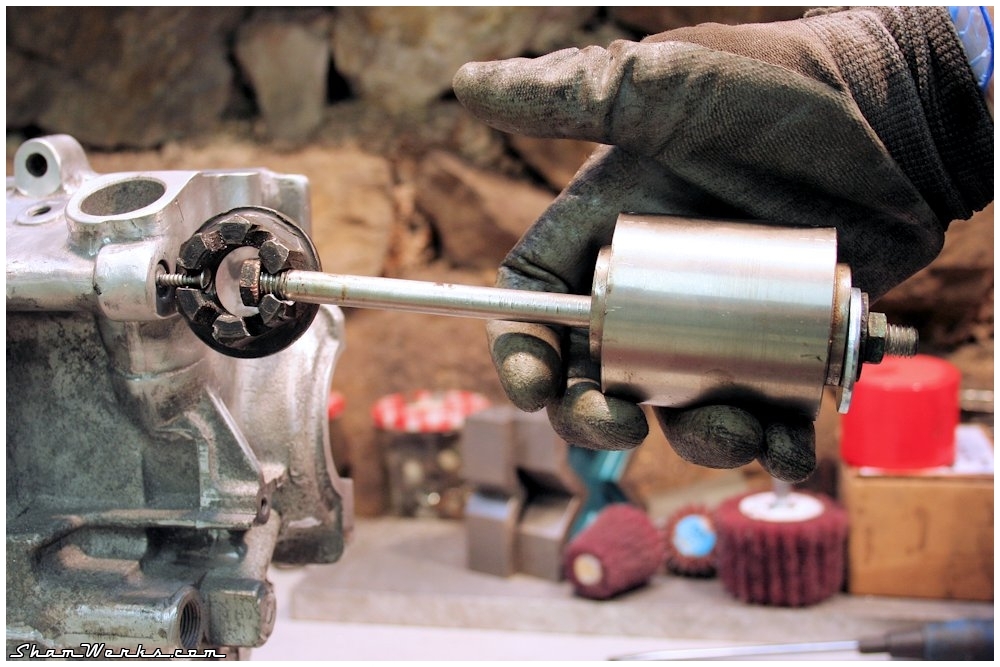
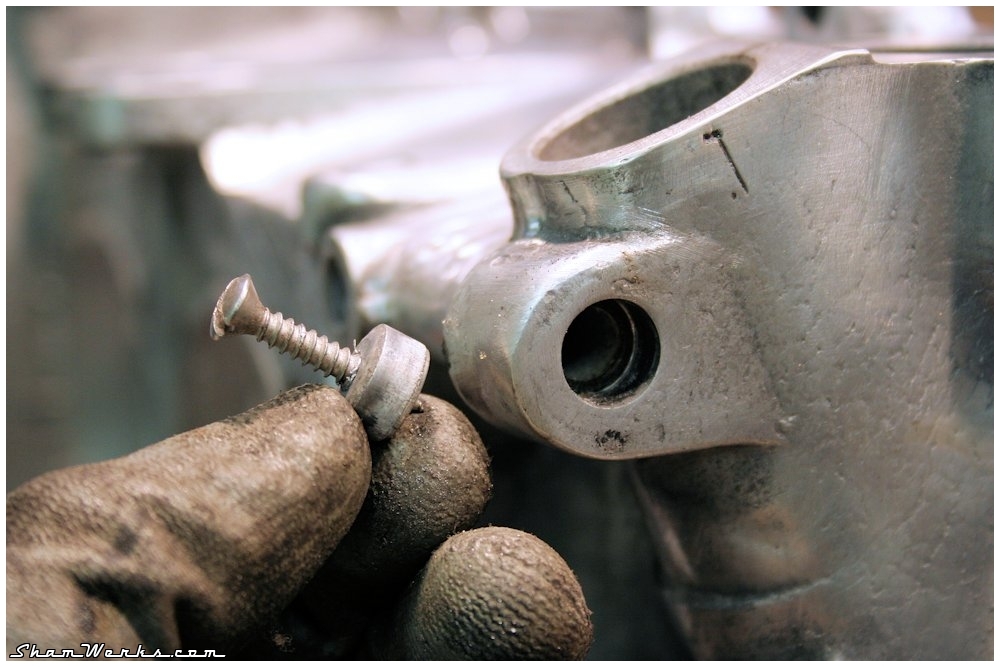
In order to thoroughly clean the oil galleries, and by doing so avoid that some gunk would screw up all the nice work do so far upon engine's first start, you must un-plug the galleries. The operation isn't that difficult if you're careful : first center-punch the plug, then drill it with a 3mm drill bit ; then force-screw a sheet metal screw in that hole, and pull on it with an inertia hammer.Since I did not have an actual inertia hammer, I thew one together with what was available around the workbench... I'm actually pretty happy of that recycling of an old rear-drum 36mm nut.

Cleaning and plugging back the galleries
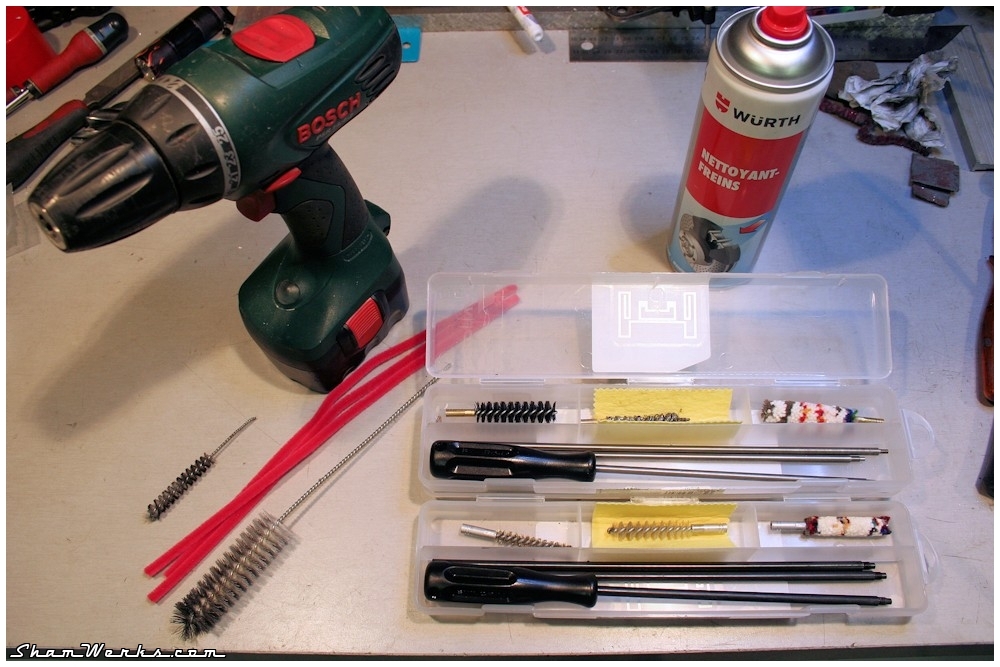
So, now that the galleries are un-plugged, it's time to clean them, and find a way to plug them back after!Here's the tools of the trade for these two steps...
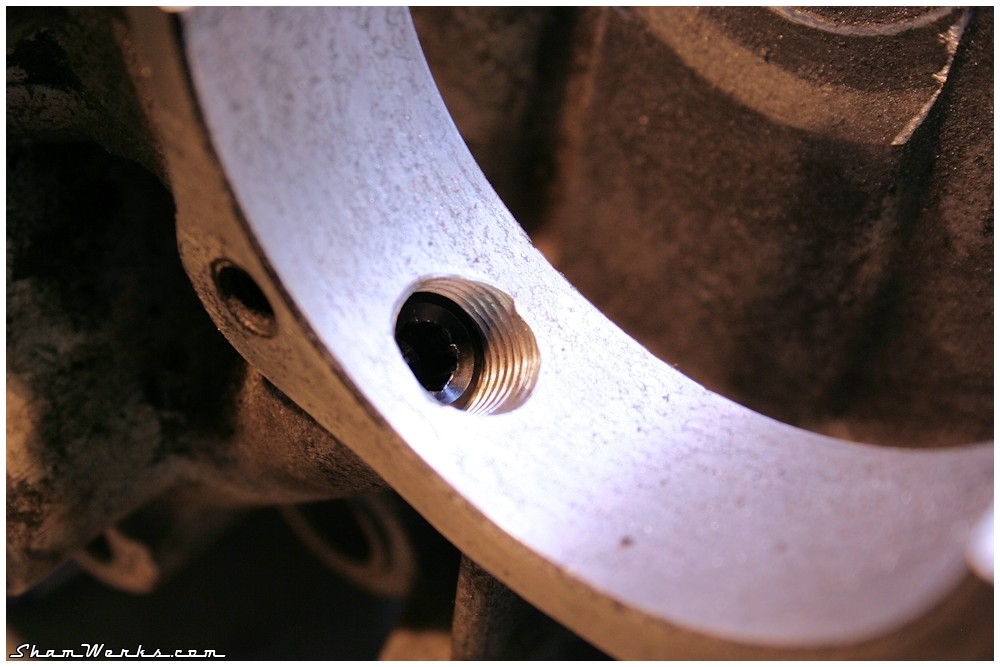
I ordered plugs from Torques.co.uk (great address I already got fuel fittings from). These are conical NPT 1/8"x27, 1/4"x18 and 3/8"x18. They are anodized aluminium, really nice products ; to be installed with Loctite 577 pipe sealant ; make sure you have the imperial size Allen wrenches to tighten them in!
As for the cleaning of the galleries, any means are good. Myself, I'm first using the compressed air to get rid of as much shavings and dust as possible ; then bottle brushes, shotgun brushes and pipe-cleaning brushes... And lots of brake cleaning fluid ; some WD40 can be used too, to help removing any hardened oil sticking in the nooks and crannies.
To make it a bit easier, I like to mount the bottle/riffle brushes on my cordless electric drill, and then go back and forth in the galleries while turning full speed ; that's the way to go, galleries end up all nice and shiny! (sorry, no picture about it, I could not manage to get a proper picture inside the oil gallery)
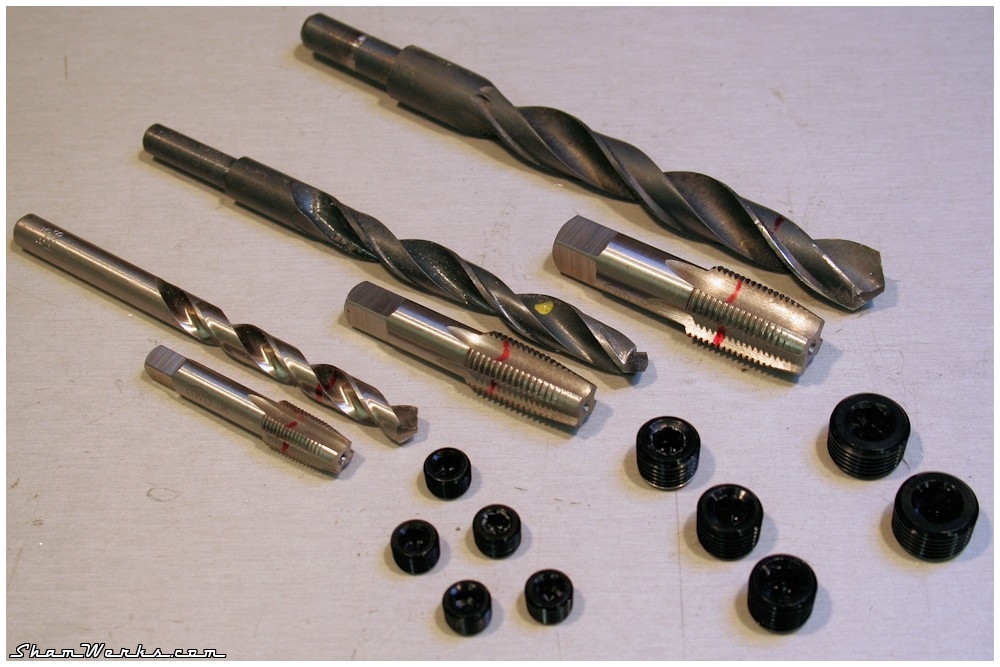
Prior to taping, you first need to drill the holes : here are the drill bits sizes you'll need for that :
- 1/8" plug : 8,5mm drill bit (11/32"), going 15 mm deep
- 1/4" plug : 11mm drill bit (7/16" ), going 26 mm deep
- 3/8" plug : 14,5mm drill bit (37/64" or 9/16"), going 25 mm deep
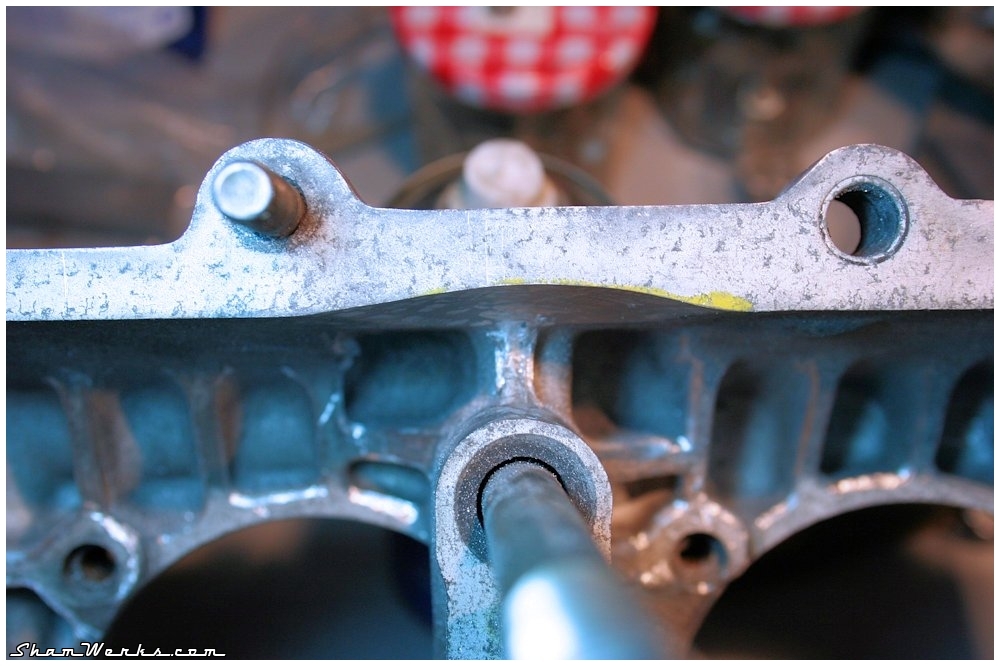
You need to be cautious while taping, as it's conical. As per the depth, you need to go little by little : tap a little, test fit the plug, tap a bit more, test fit the plug, et cætera until the plug sits flush with the case when tighten. To make it easier/faster, once the first plug of a given size is tapped, I make a mark on the tap for the next ones! (see previous picture, red marker stripe on the tap)

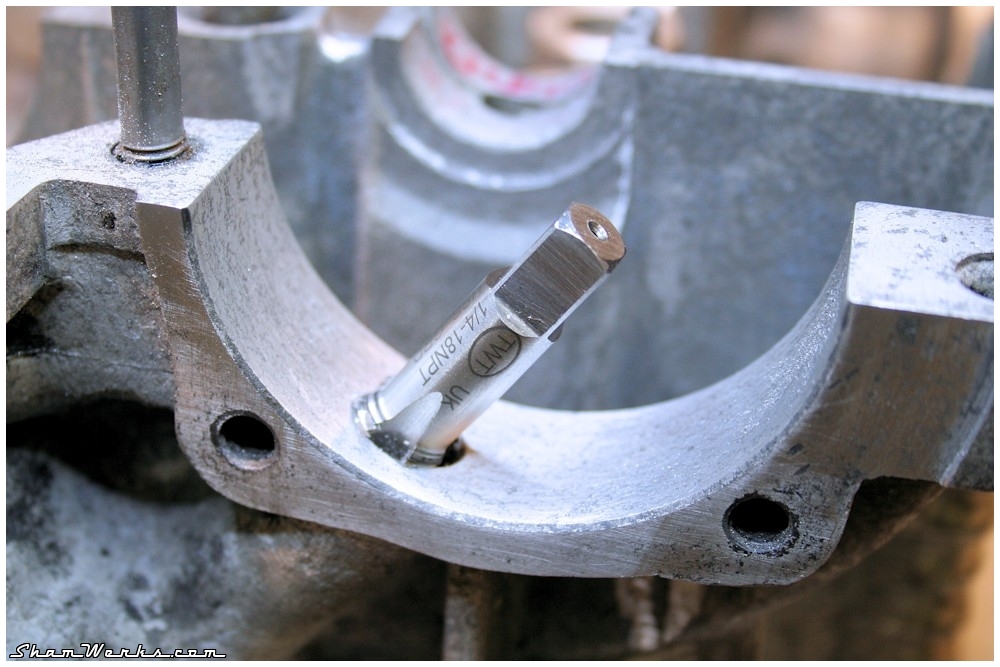
So here we go gain, NPT 1/4"x18 tap, directly in the gallery without any prior drilling (inside diameter is correct). Half a turn ahead, quarter turn back to get shavings ou, and repeat... The plug will be tightened in the gallery with its dose of Loctite 577 pipe sealant again.
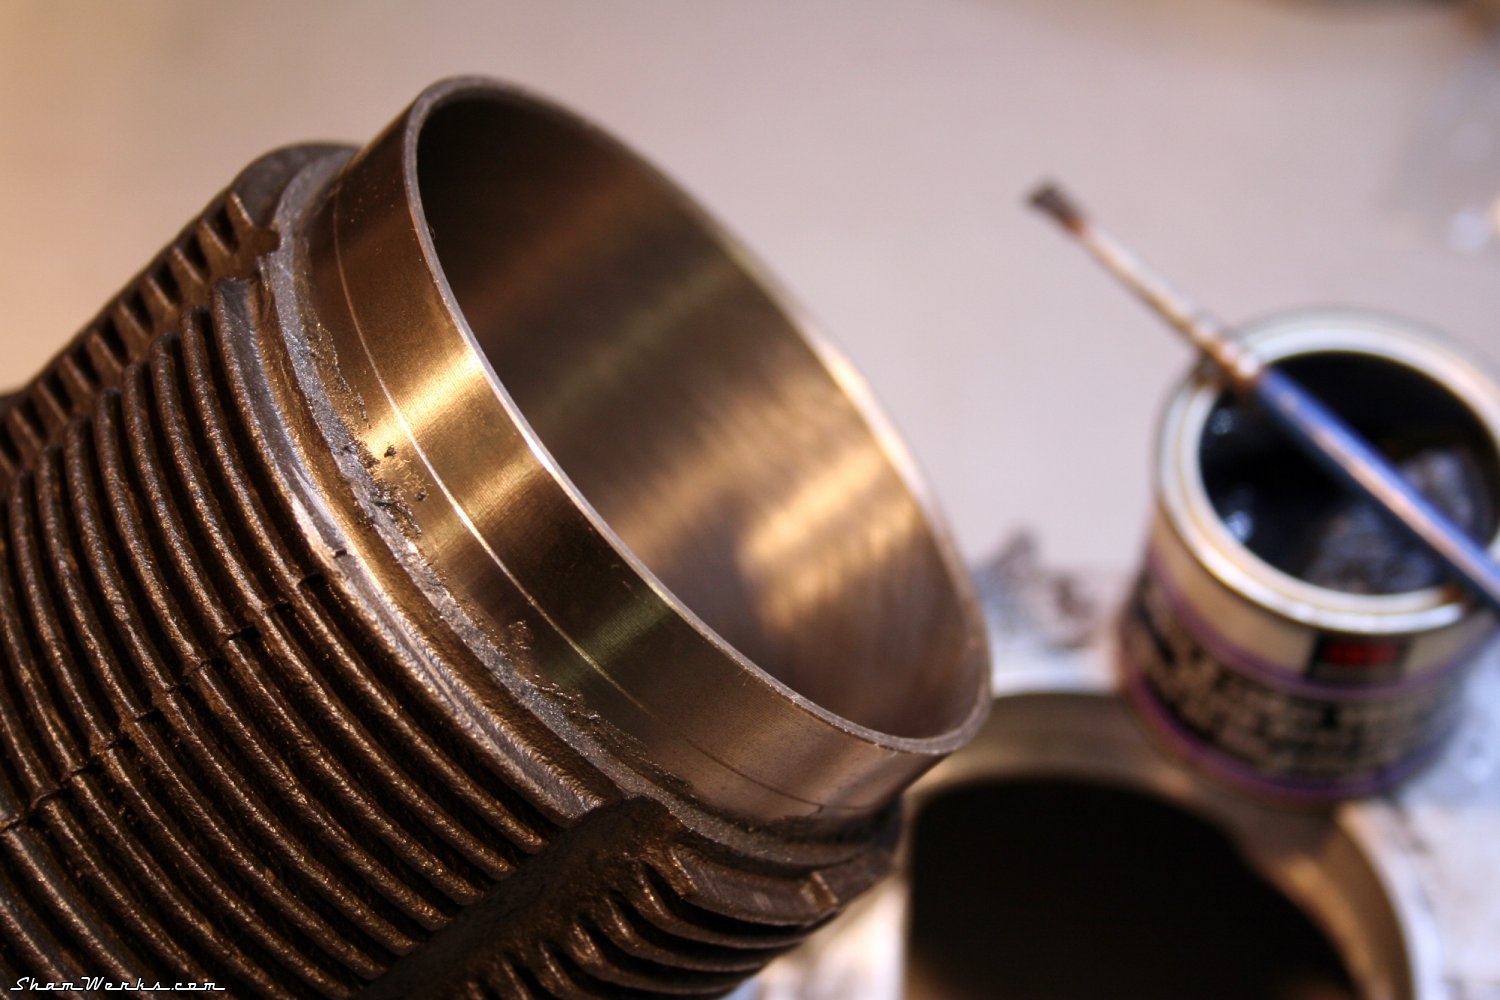
Running in the Cylinders
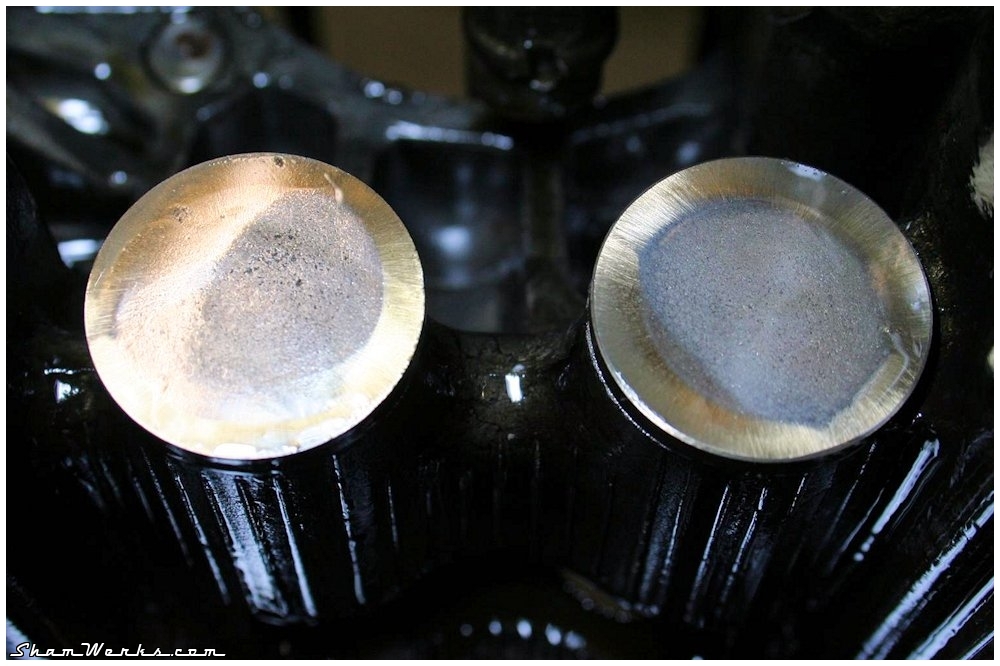
I then hone the cylinders on the crankcase, to make sure they seat correctly. Some may think it's not necessary, but as I'm trying to do things right...So here we go, honing compound applied with a small brush at the bottom of the cylinder, a fw back-and-forth movements (3cm to the left, 3cm to the right, repeat). Doesn't need much, few minutes per cylinders are enough ; you can see the matte finish on the picture below, showing propper hoining. It's also a good way to check the cylinders aren't resting on the case savers, but well onto the case itself (it not, some Dremel action would be required).
In my case everything looks fine on all 4 cylinders, perfect, validated. Next.

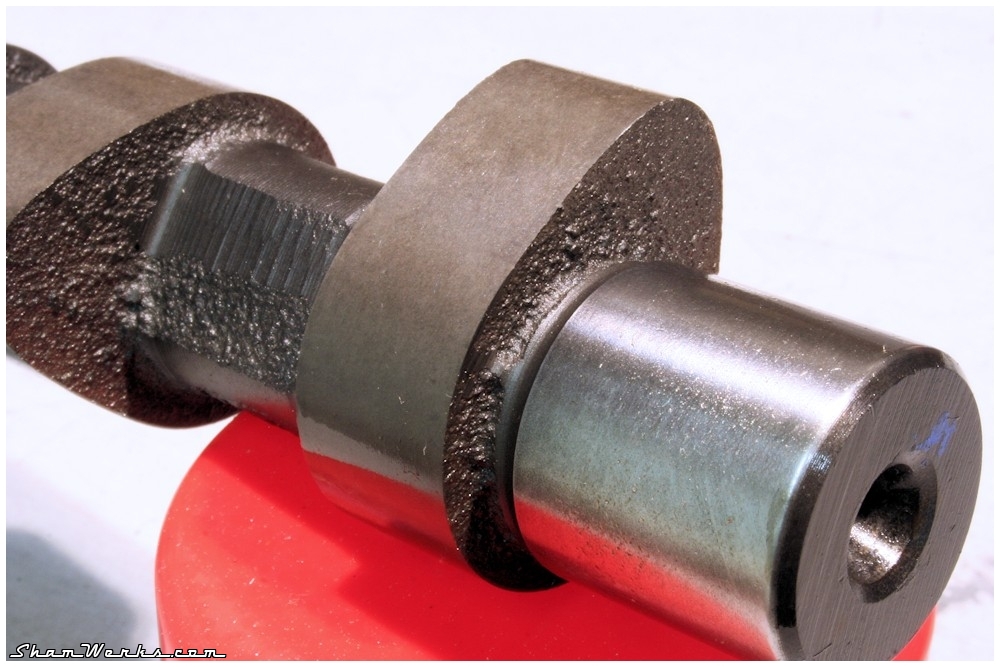
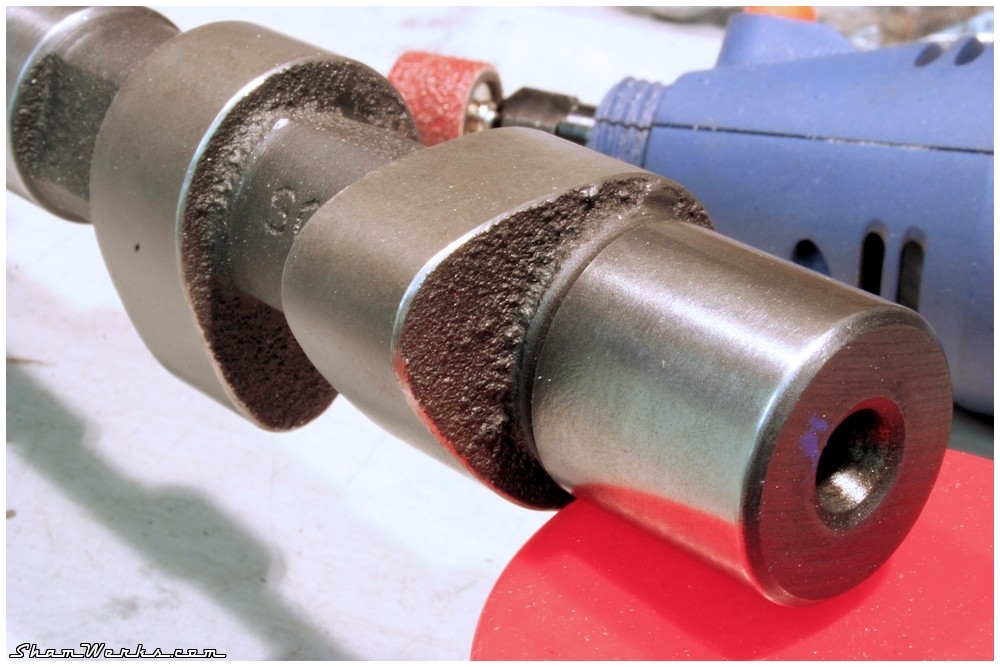
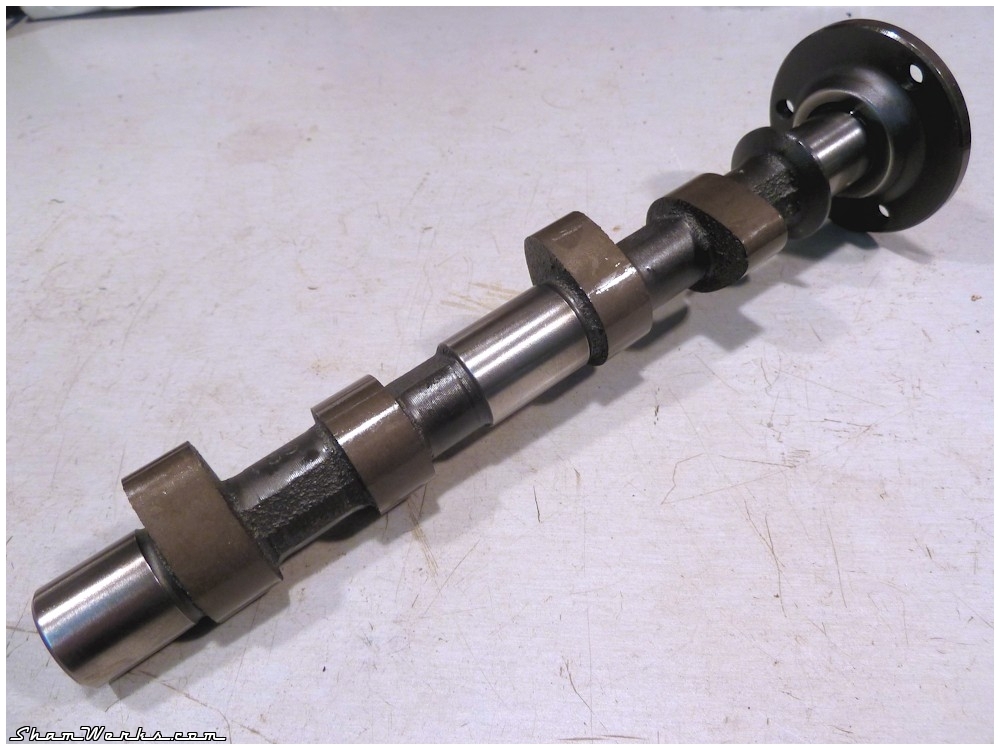
Camshaft
Out of the box, the cams edges are razor sharp, which may damage the lifters upon engine's first start. So I lightly smooth them down with my Dremel and a sanding drum. It doesn't need much, just smoothing down that angle a bit ; I finish it off with some 600 grit sandpaper with a drop of oil.The journals are polished with some 2000 grit sand paper (a worn-out ScotchBrite pad would work too), to remove any imperfection and promote the oil film. If you use sand paper though, make sure you thoroughly clean the part after, as grit particles may get embedded in the material (well, that's more true about the soft material of bearings han the hard steel of the journals!).
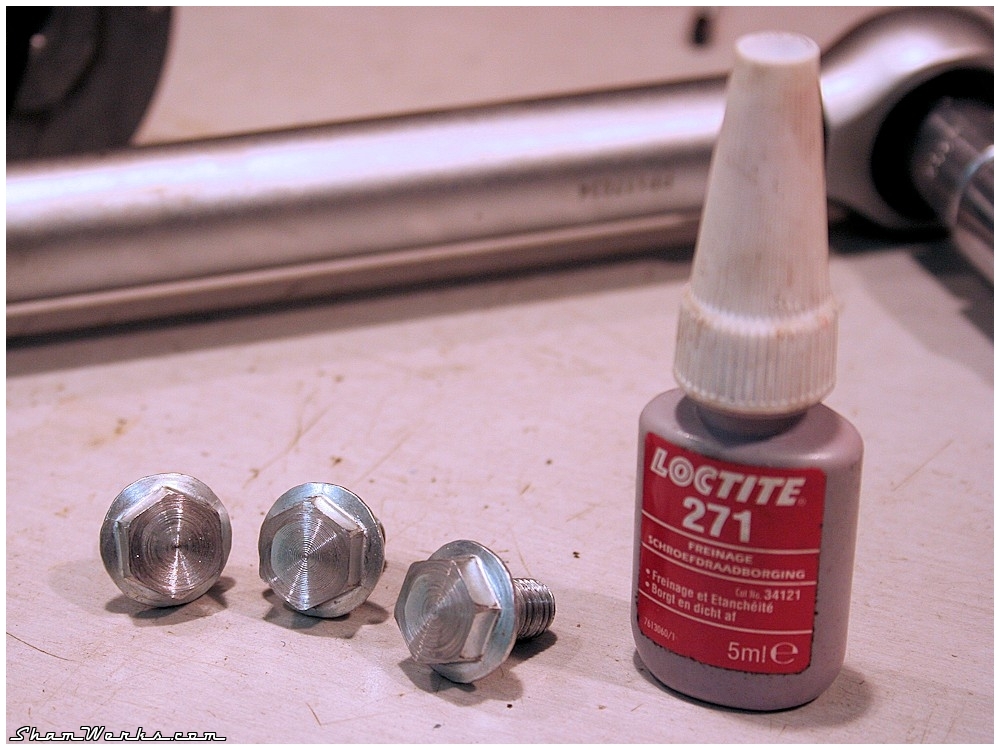
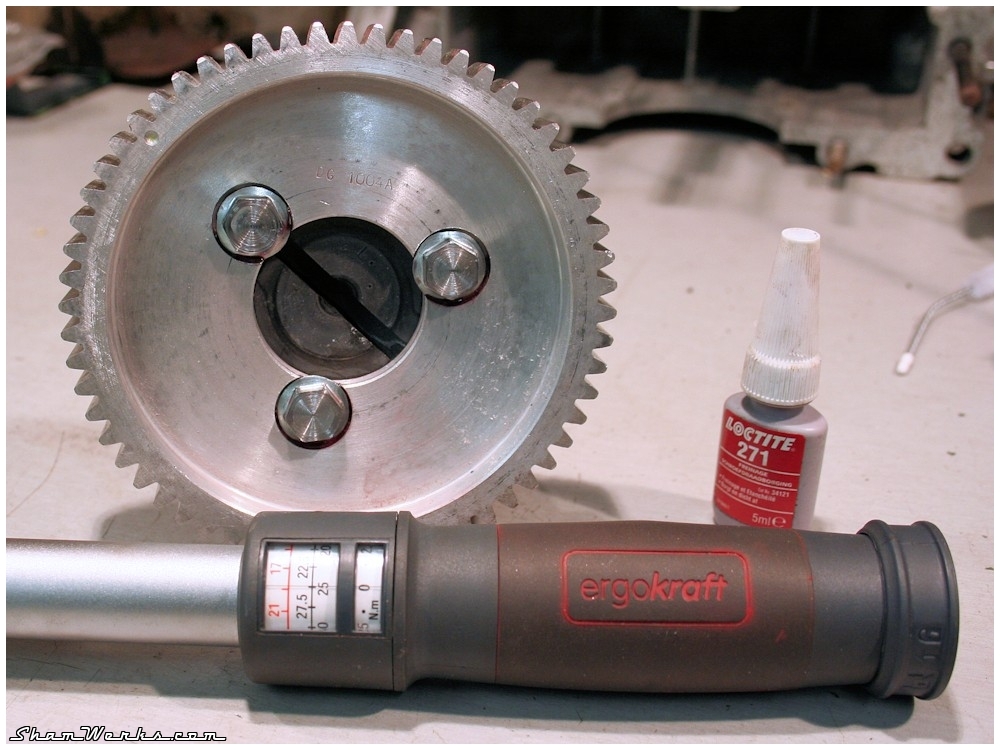
Finally, a thorough cleaning/degreasing of all the parts (brakes cleaning fluid, acetone), and assembly, torquing the screws at 25nm, with a drop of Loctite threadlock (the stronger, red one - you really don't want these to get loose!). The notch in the camshaft (that drives the oil pump) has to be aligned with the mark on the gear.
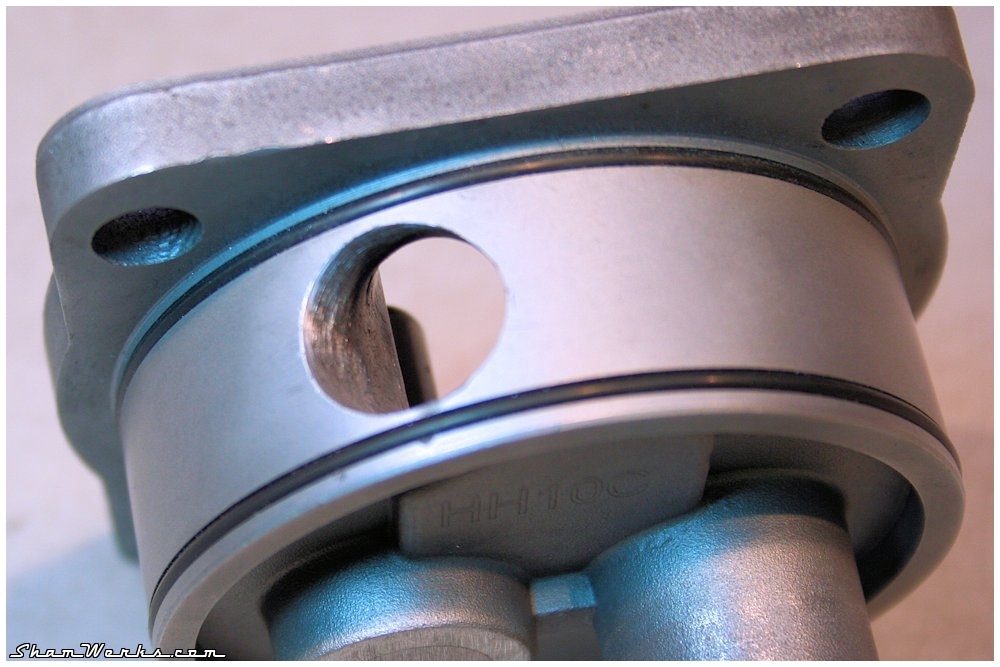
Oil pump
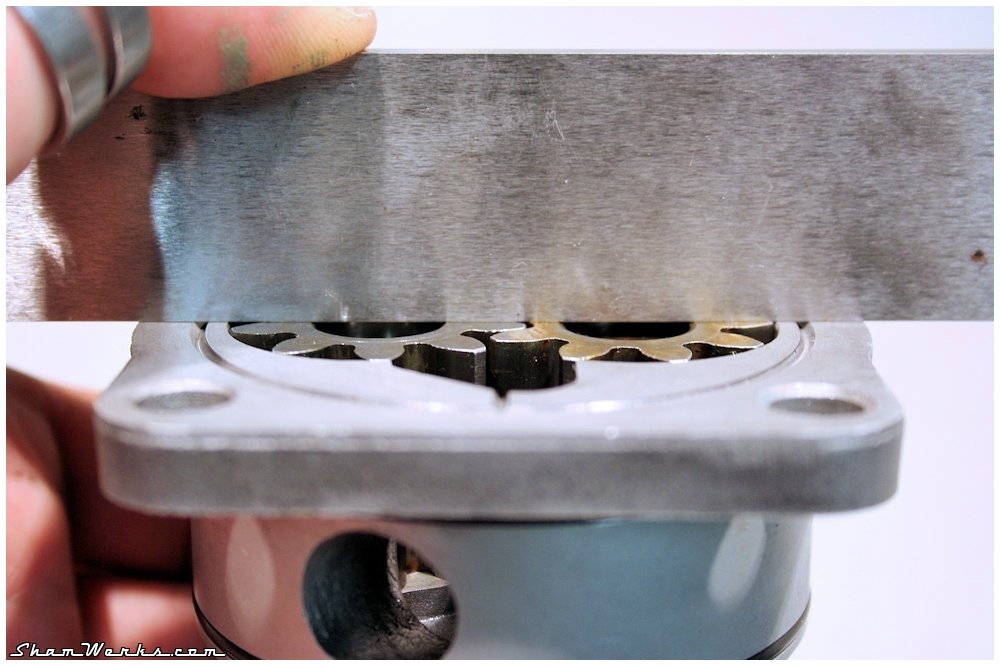
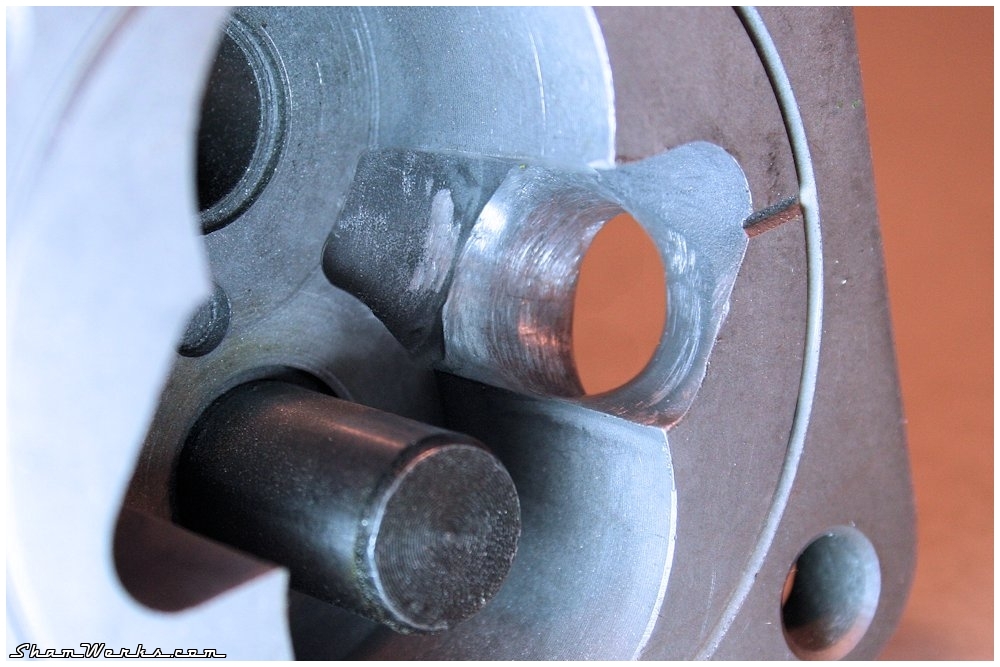
The oil pump is a modified model, prepped by Feller Service (a french perf shop) : it's a Shadek 26mm base, machined to add a couple of O-rings around it (to prevent leaks and cavitation). The pump body and gears are rectified so that the gears are perfectly flush with the body (checked with my trustful rectified ruler).The output is already plugged, with the full-flow output on the anodized black, CNC aluminium cover (tastefully engraved with the name of my fav parts dealer!
More information about this pump on Feller's blog (in french only I'm afraid) ; actually if you give it a close look, my pump cover is somewhere on the last picture, on the right hand side...
Anyway, here's a really nice, highly recommended product, and made in France for once!


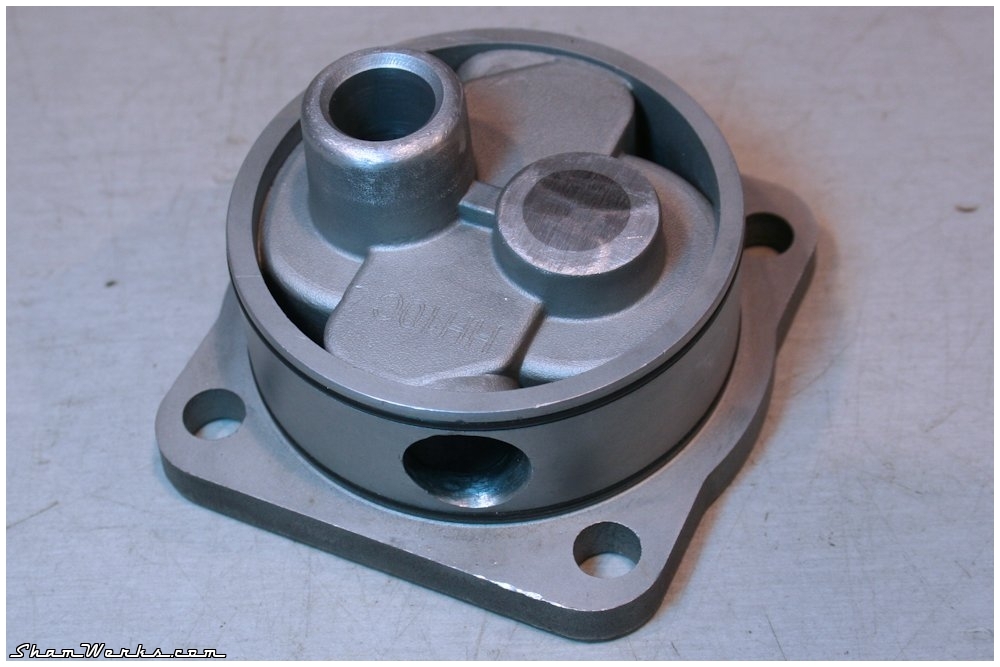
And that's it, enough for the oil pump, it's ready to install!
To be continued soon!
Posted on 30/01/2014 at 09:03
Kitty Injection : Moteur 2 : 1776!
1776 / Part. 1
Case & camshaft
- Bearing saddle 1 : 64.98 / 65.00 / 64.99 / 65.00
- Bearing saddle 2 : 64.98 / 64.99 / 64.99
- Bearing saddle 3 : 64.99 / 64.98 / 64.98
- Bearing saddle 4 : 50.01 / 50.00 / 50.00 / 49.99
While I'm at it I measure the crank that's inside this case ; out-of-round is OK with 0.01mm, but the rod and main journals have been ground to 2nd undersize. Serviceable, but well, not ideal.
So...What now?
I take a deep breath and give it a good thinking... Since I'mm rebuilding a complete engine, why remain with a stock 1600?So, after a lot of reflection about the cost / reliability / performances ratio of my future engine, I decide to go for a 1776cc : stock 69mm crank stroke, and larger 90.5mm bore pistons/cylinders.
My objective is to build an engine capable of long drives on the highway, but still playful on the little mountain roads of my area - this will remain a "week end driver", so mileage is not my priority.
I want a strong, durable, optimized engine, with a wide range of usability, while keeping the Mex injection manifold for now, but keeping an upgrade as an option for later...
So, I roll up my sleeves, and here we go!
Crankcase
I make some modifications to the engine case, inspired by the "Bob Hoover's Sermons", what he used to call the "HVX modifications" (read about it on his blog here, and there). A good reading (in french, sorry!) as well if you want to give it a shot, this post and this post by Vince/PanelVan, who demonstrates this procedure very well.The idea behind this modification, is that the right side of the case is supplied with oil only through the grooves around the central camshaft bearing (see schema below). That's far from ideal, since the lifters/rockers/valves on the right side (cylinders #1 & #2) are less lubricated/cooled than on the left hand side of the case (cylinders #3 & #4).
The solution recommended by Bob Hoover was to extend the lifters oil gallery (bottom right on the schema), and feed it through a hole drilled below the gear-side camshaft bearing.
OK, here's a schema of the modification, that'll be easier to explain!
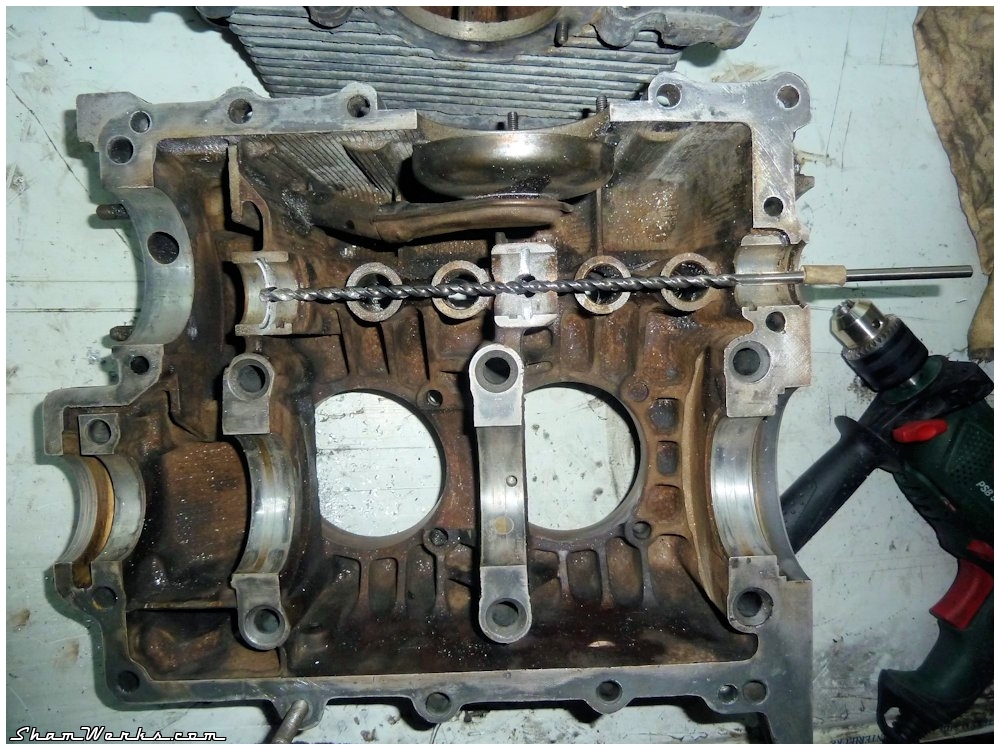
Next is the extension of the lifters oil gallery, to bring it up to 225mm long. I've used for that a foot-long, Ø6mm drill bit, and used a small hand-held electric drill. The trick is to go in slowly with relatively high RPM (to avoid breaking the bit in the case), using some lubricant to avoid vibrations (WD40 will do), and back off often to get the shavings out. A piece of tape on the drill bit helps spotting when to stop.
For the hole under the camshaft bearing, I used a Ø7mm on a press drill.
It's actually quite an easy process ; I was a bit nervous the first time, but I drilled 4 cases in a row that day, I was pretty confident in the end!
Beware : make sure there's enough material on your case before drilling anything, not all cases are identical, and on some of them your gallery extension would end up outside of the case... Which would surely end up in the trash bin for that.
Simultaneously the oil grooves on both the camshaft bearings (red arrows on the schema) are widen with a Dremel to increase the oil flow.
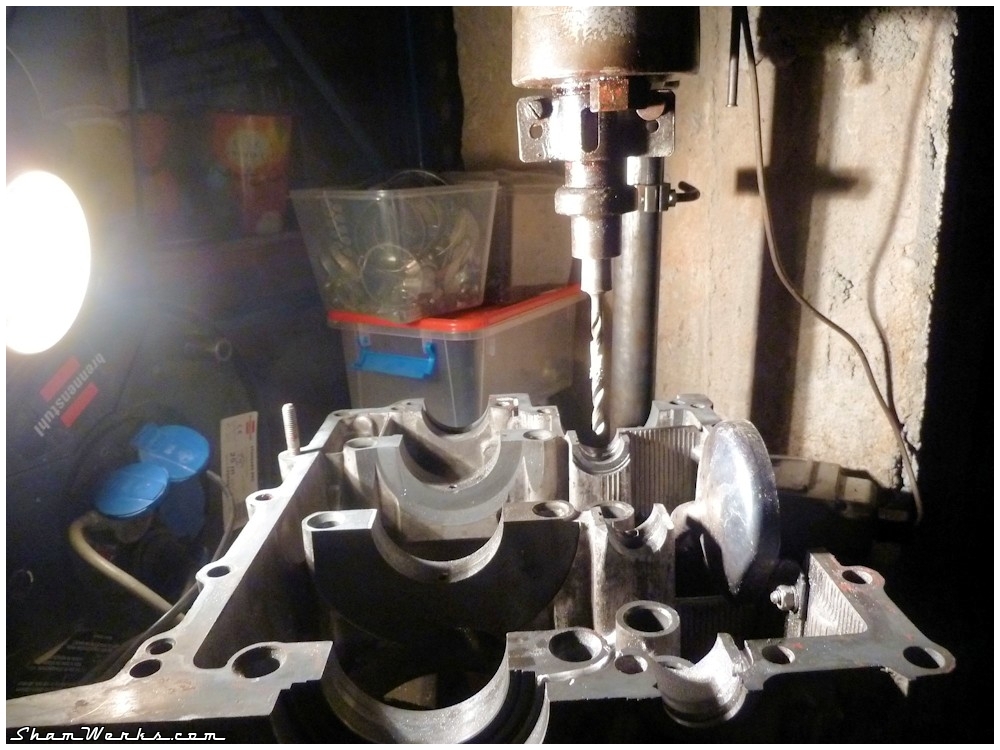
The first hole is drilled with a Ø9mm bit, and then widen it with a pneumatic die grinder and carbide bits. My brand new bits eat through magnesium like if it was butter!
Here again, I was a bit nervous at the beginning, but the handling of the die grinder comes with practice... Three cases in a row that day!


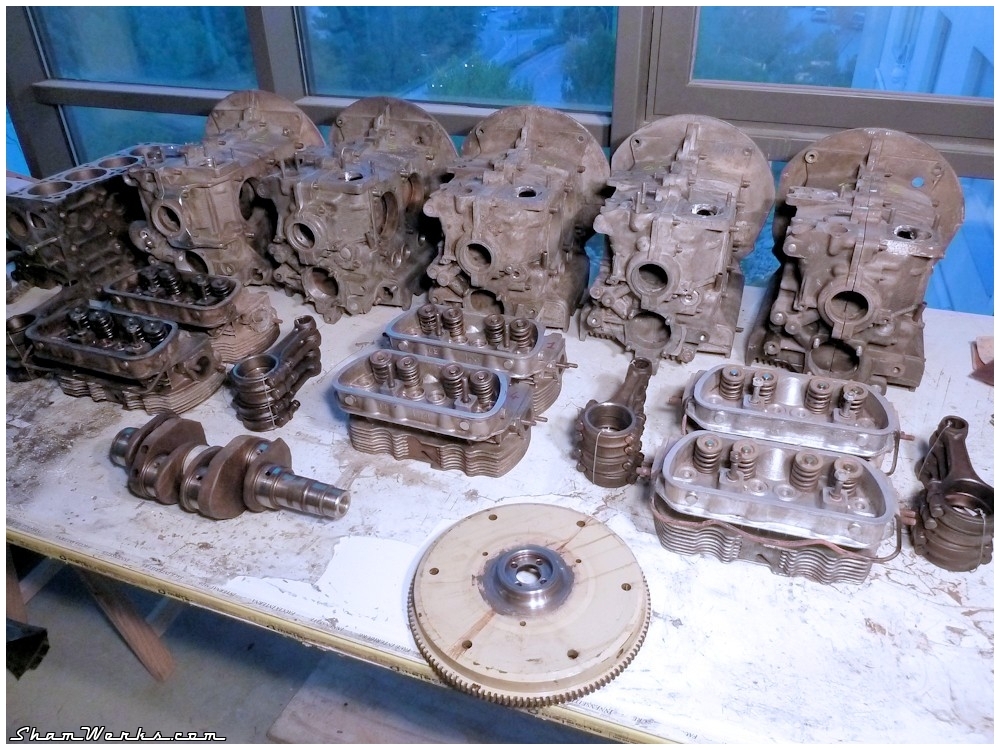
Next step, the case is shipped for some machining, but not alone : since we are a small group of friends building engines at the same time, we're pooling the shipping costs, and it's a complete pallet that leaves the workshop!
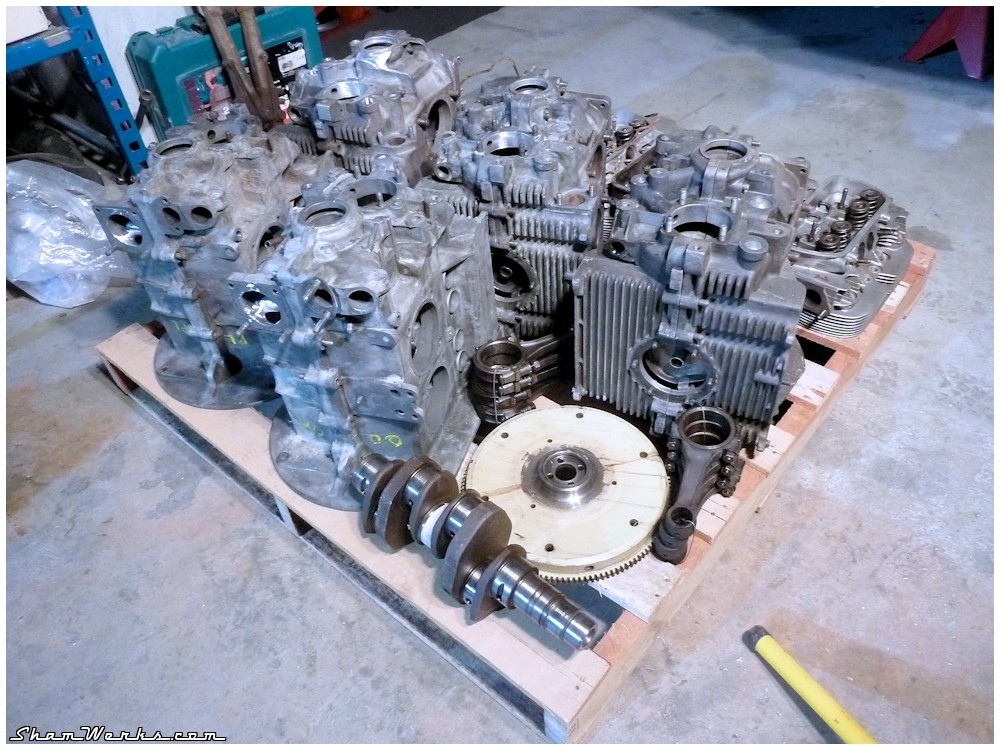
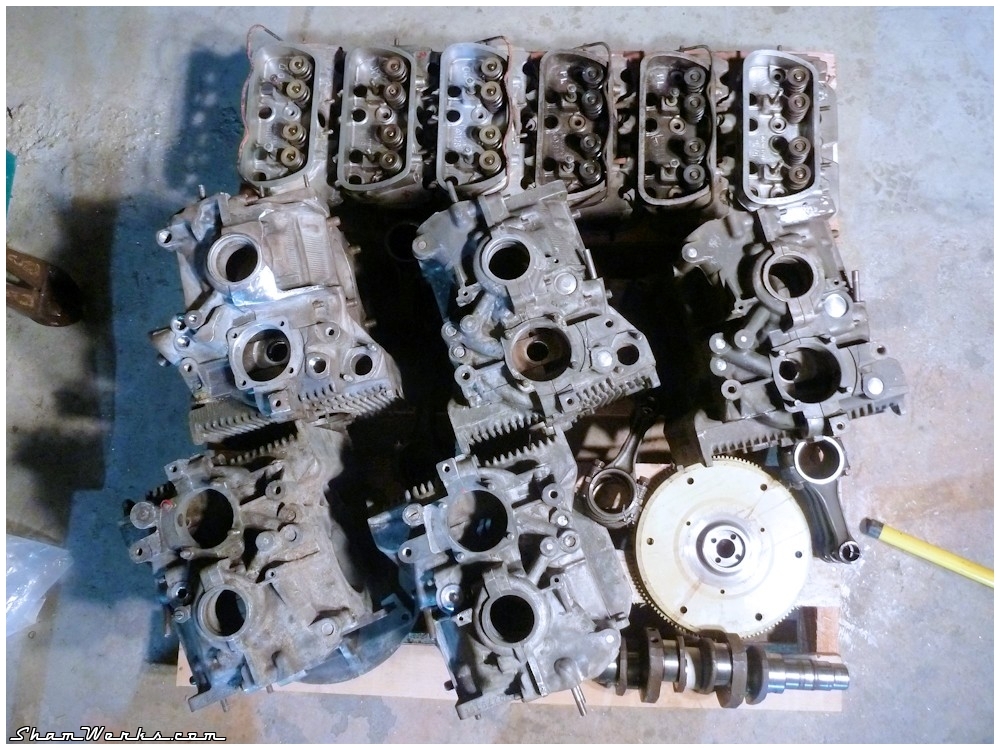
And after a couple of weeks of patience, here's the result!


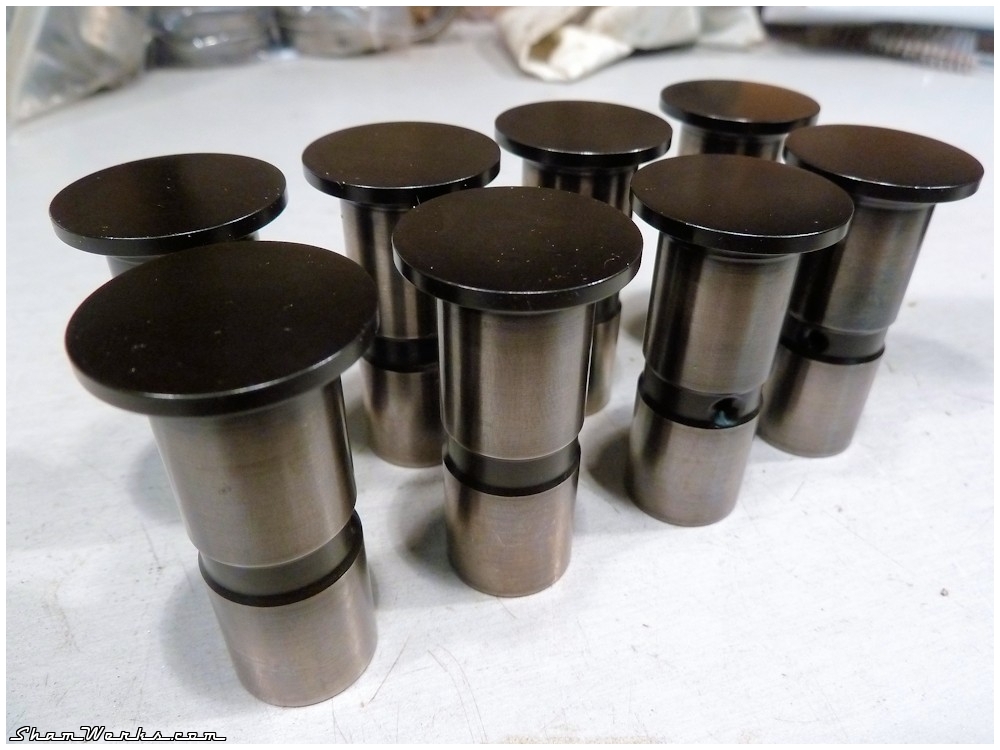
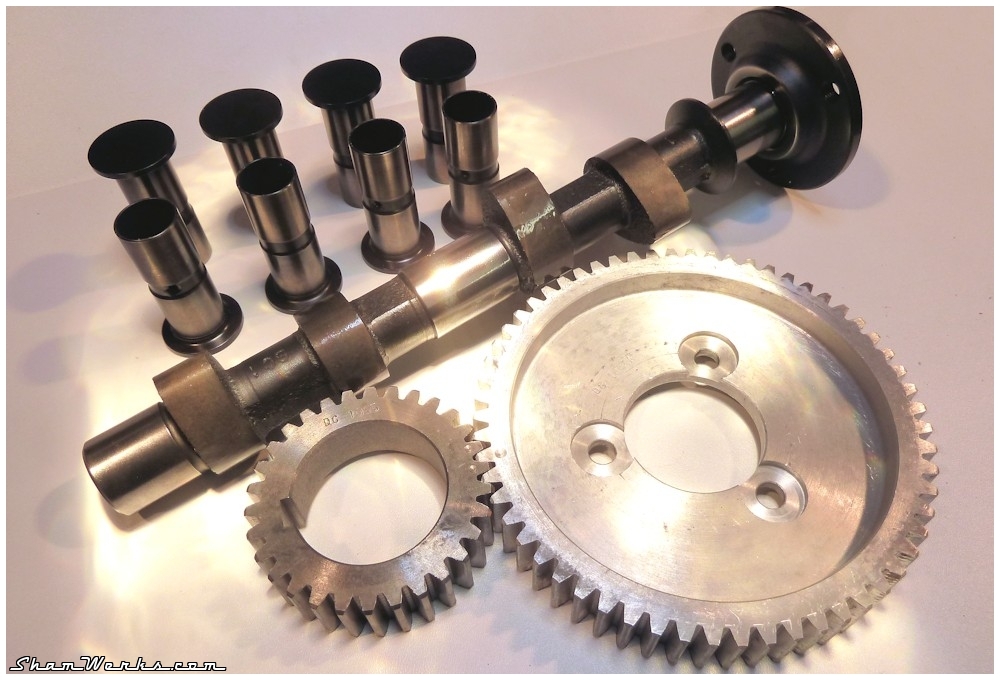
Camshaft / Lifters
The camshaft is a L&G V280 lobe 108°, to keep a street-oriented yet playful behavior to this engine... a compromise, we'll see in practice if it was the right choice!It's running thanks to a couple of straight-cut cam gears, to limit the axial efforts on the camshaft, and gather a bit of power too... The gears are steel and aluminum to limit their nose : steel on the crank, aluminum on the camshaft.
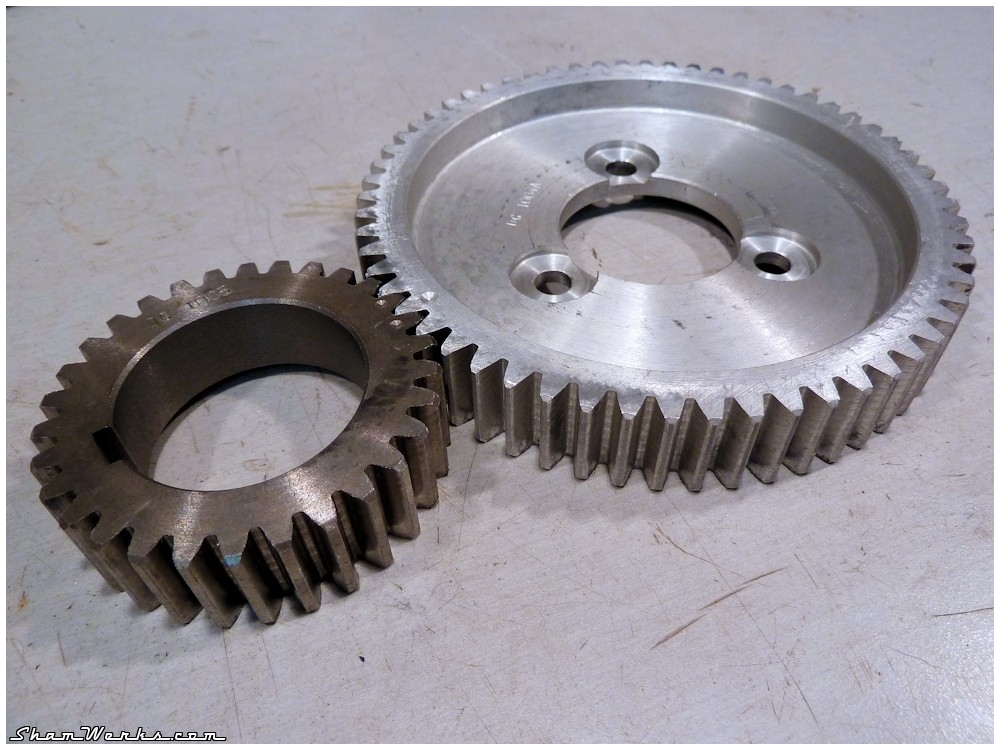

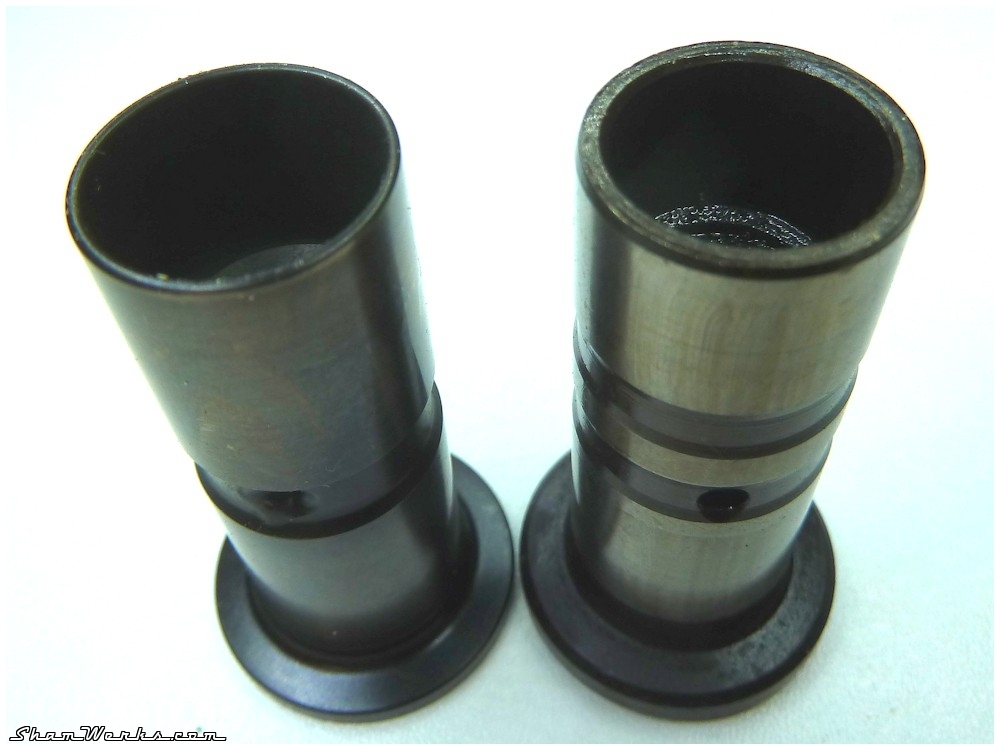
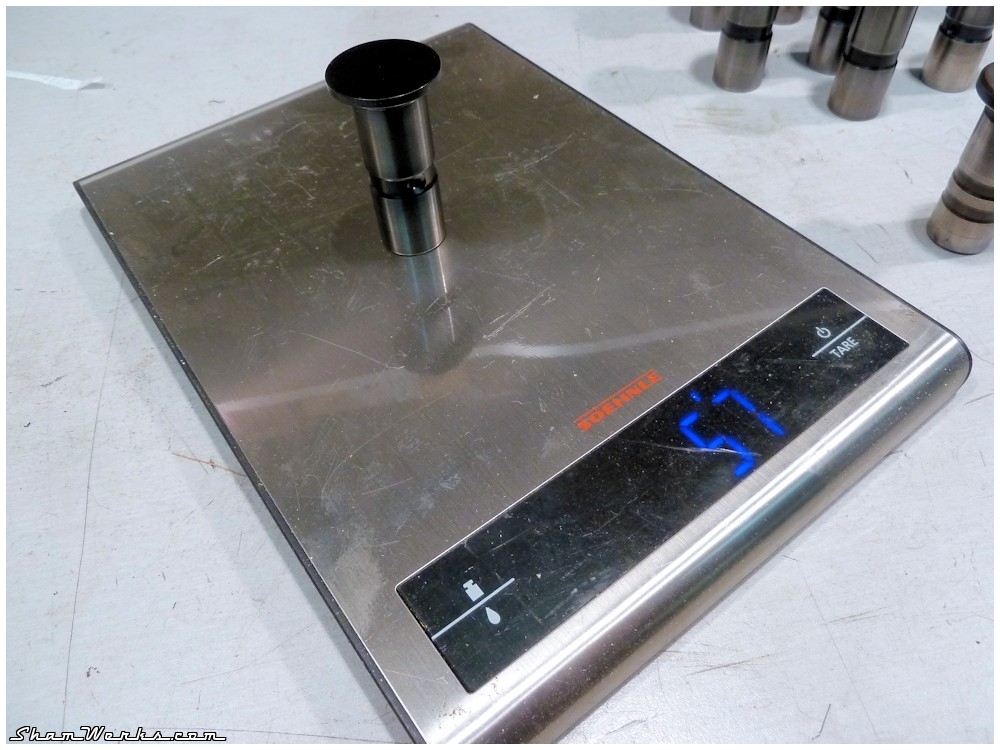
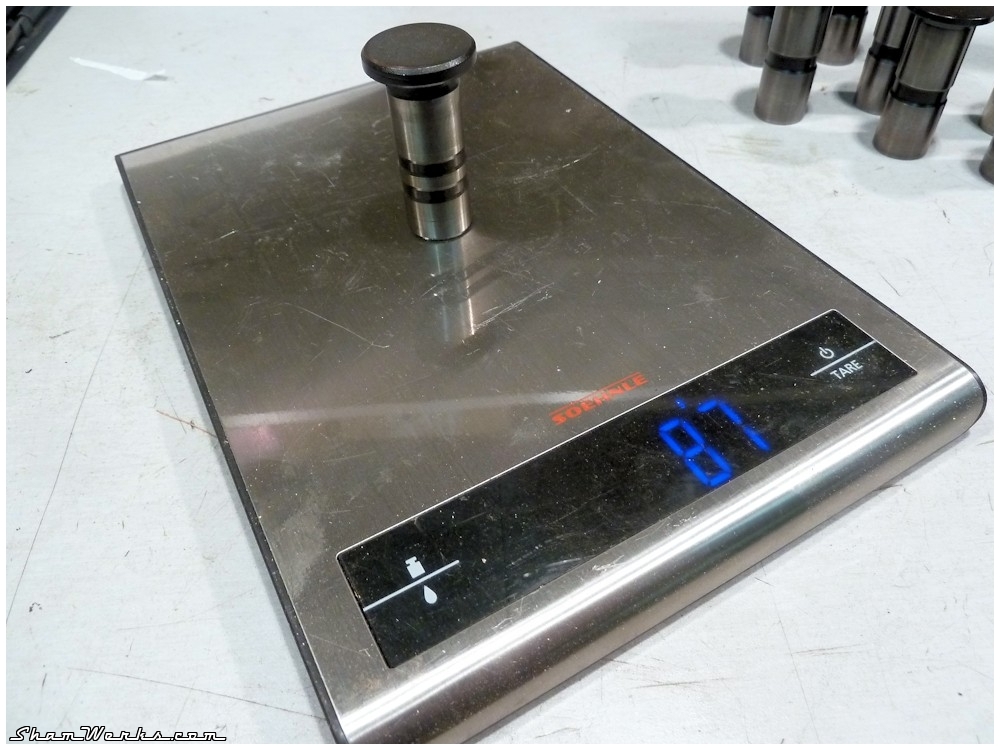

They're lighter than the stock ones : 57g each instead of 87g, nice! That's will help grabbing HPs at high revs!
At a hefty 350€ the set, these are quite expensive lifters, but at least I won't have to worry about'em.
Finally, the camshaft will run on a set of dual thrust bearing, to make sure it's axially guided on 360°...
Posted on 30/11/2013 at 15:47
Kitty Injection : Engine
INJECTION
ENGINE CHECK... & SCREW UP
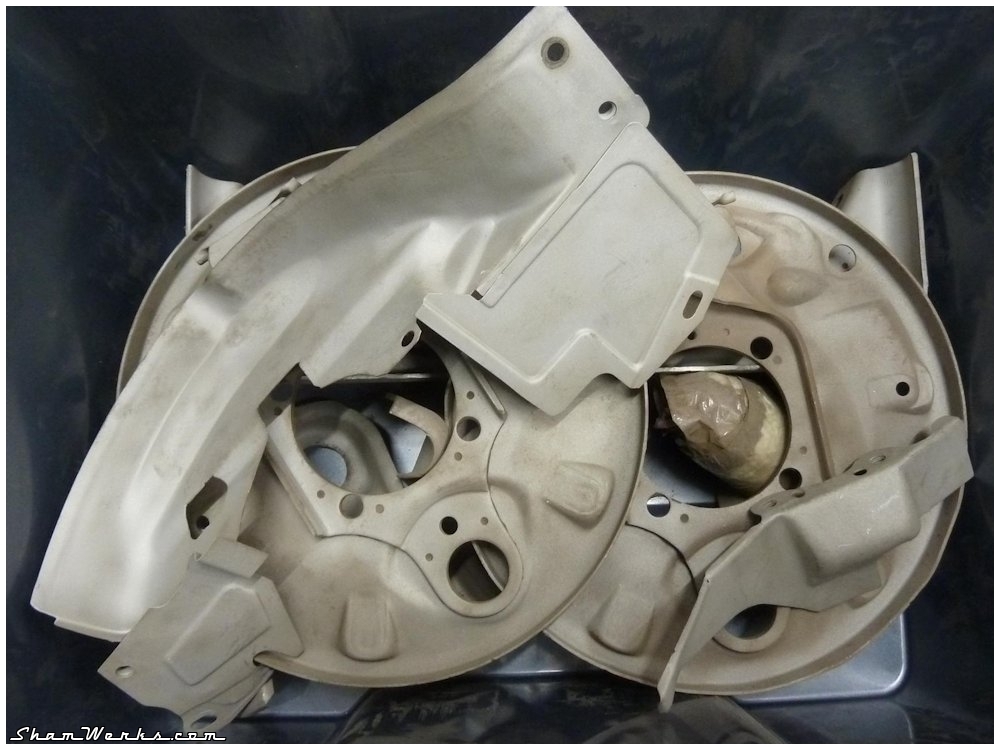
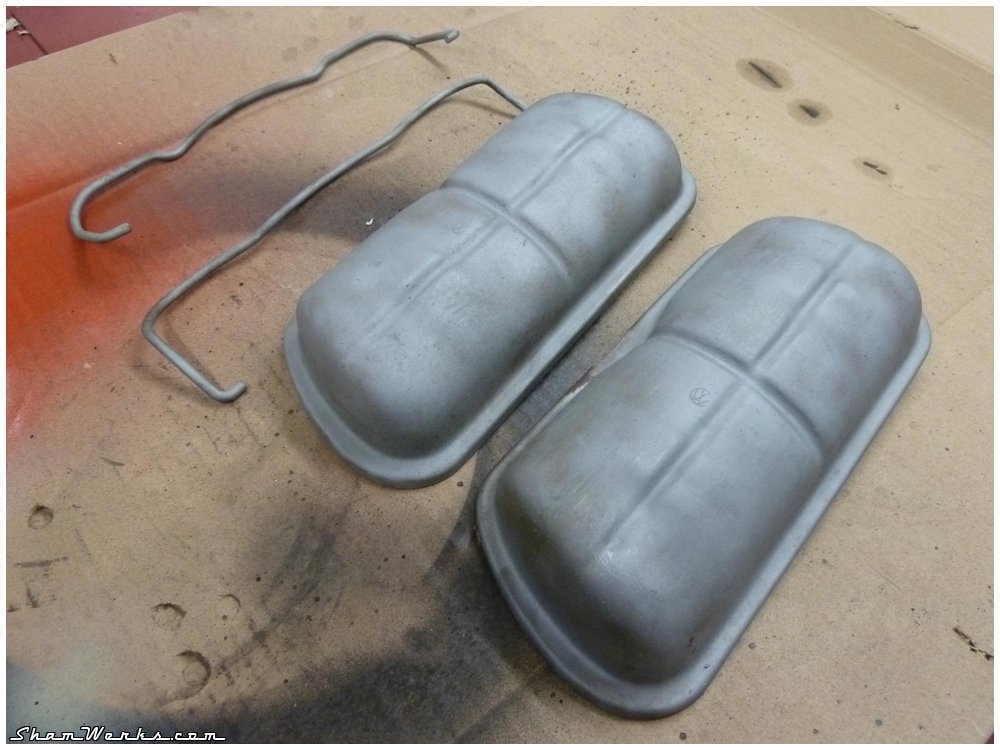
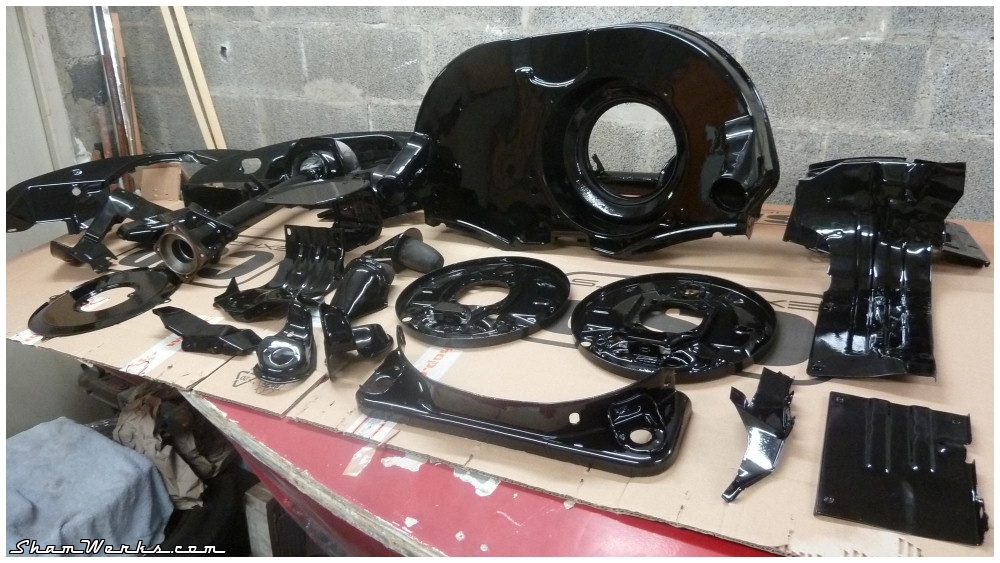
Engine tin
Since the engine is outside of the car, I decided to give it a fresh look as well.I started by sandblasting all the engine tin (why the hell did I wait so long to build myself a sandblasting cabinet?!), then brought everything to the auto body shop a for a shiny coat of black paint :

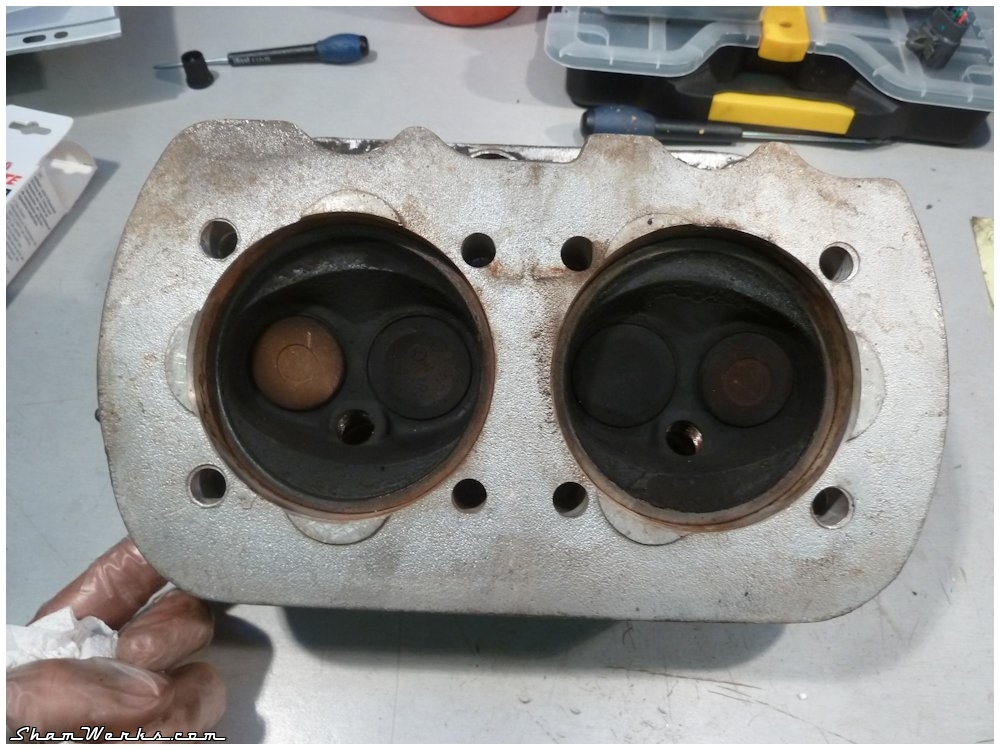
Cylinders heads
I was a bit concerned by one spark plug threads (cylinder #3), so I took off the head to have a closer look... In the end it only needed a tap to get it straight.It was the opportunity for me to take the head (35.5/32 DP) apart, to give a thorough cleaning to the channels and valves, and check everything... And I did the same with the other head as well for good measure.

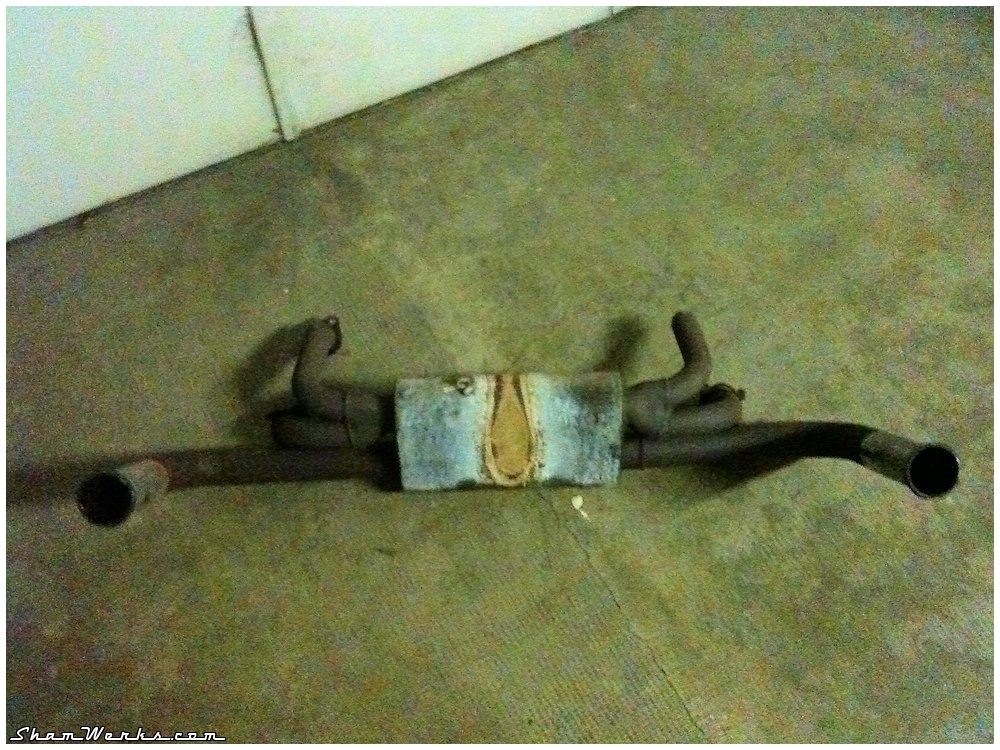
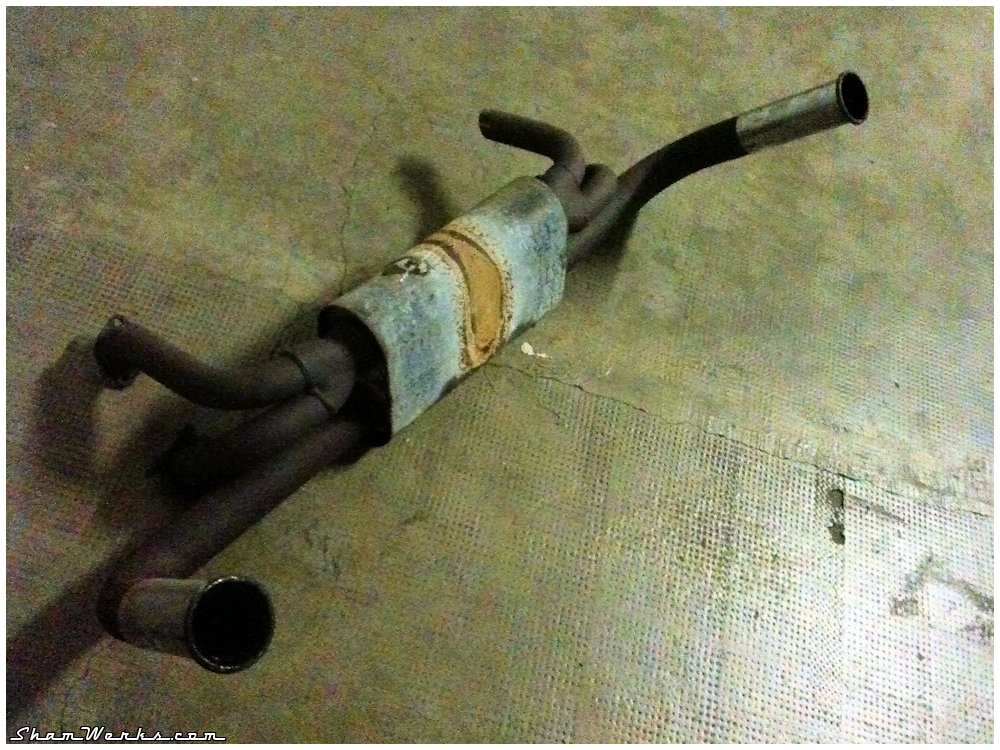
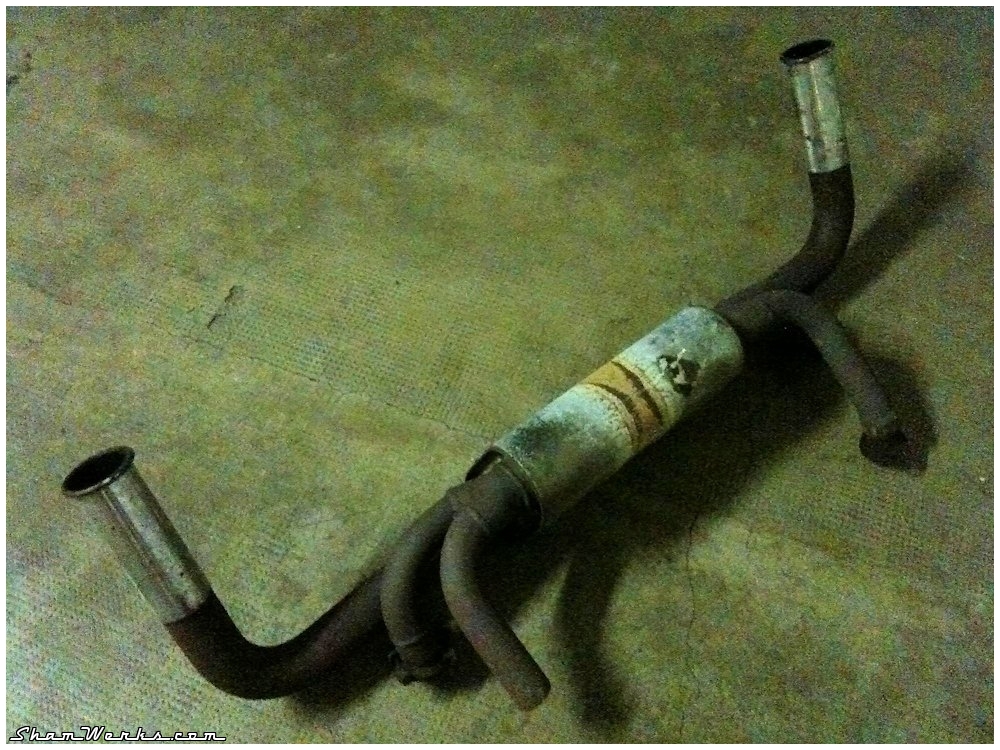
Exhaust
It was the right time as well to get rid of the hideous exhaust that was on Kitty since I bought it, and replace it with a 38mm CSP Python, along with its specific heat boxes. That's quite a pricy baby there, but a really nicely made one. And with its merged design, I should get a nice lambda reading. Well, hopefully!It's a bit overkill on my little 1600cc, but at least Ill be prepared if I ever decided to go bigger! (spoilers alert!)

That's quite a common customer experience in the US, but here in Europe it's usually not that smooth. Great job guys, some shops down here in France should learn from you!
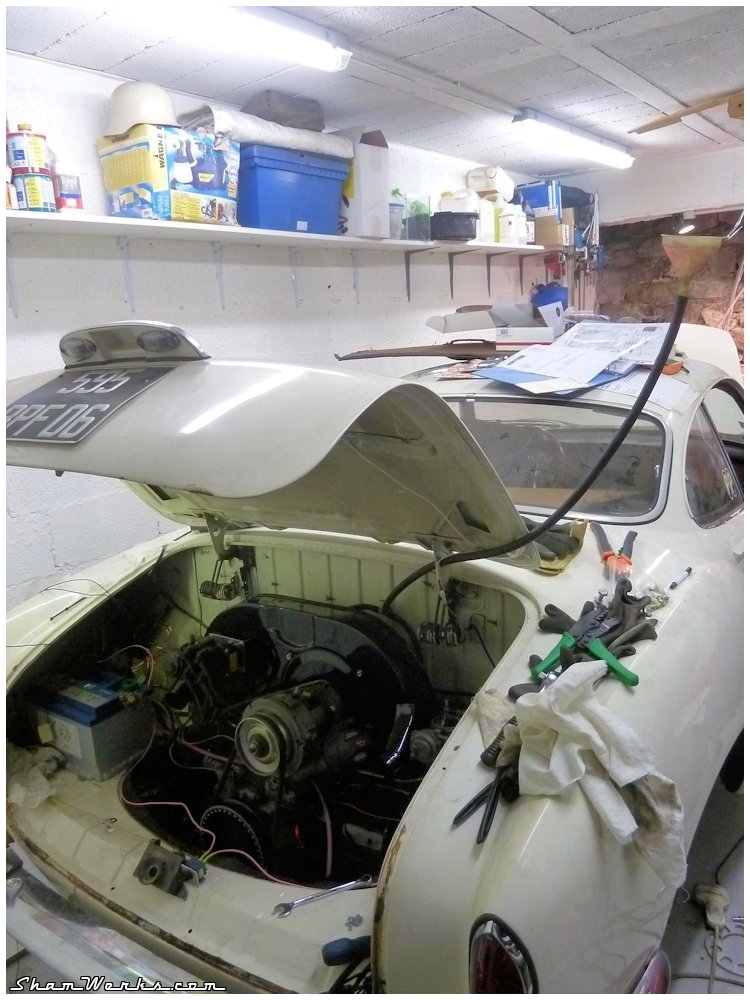
Putting it back together and... my Major Screw Up
I put back the engine in the car for a first start with the Megasquirt and its wasted spark ignition (distributorless), but without the injection, still with the carburetors, just to validate the setup.A funnel hooked to the ceiling and some rubber hose will provide the fuel to the system...
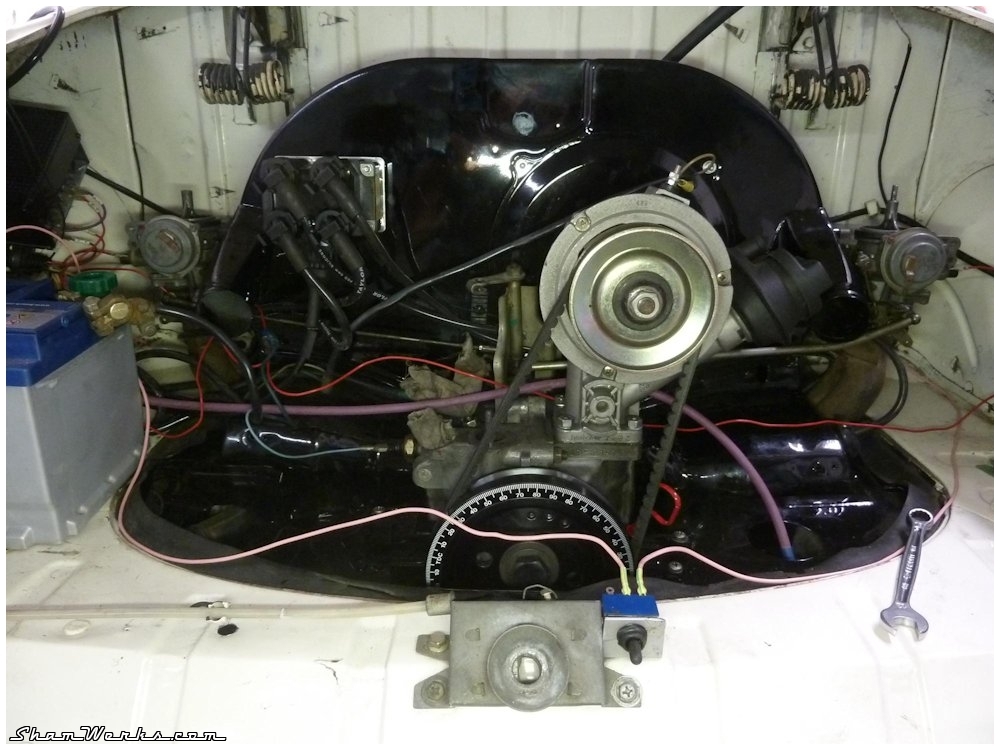
The Class 1 mistake.
Like, 8 on the Richter Scale of Blunders.
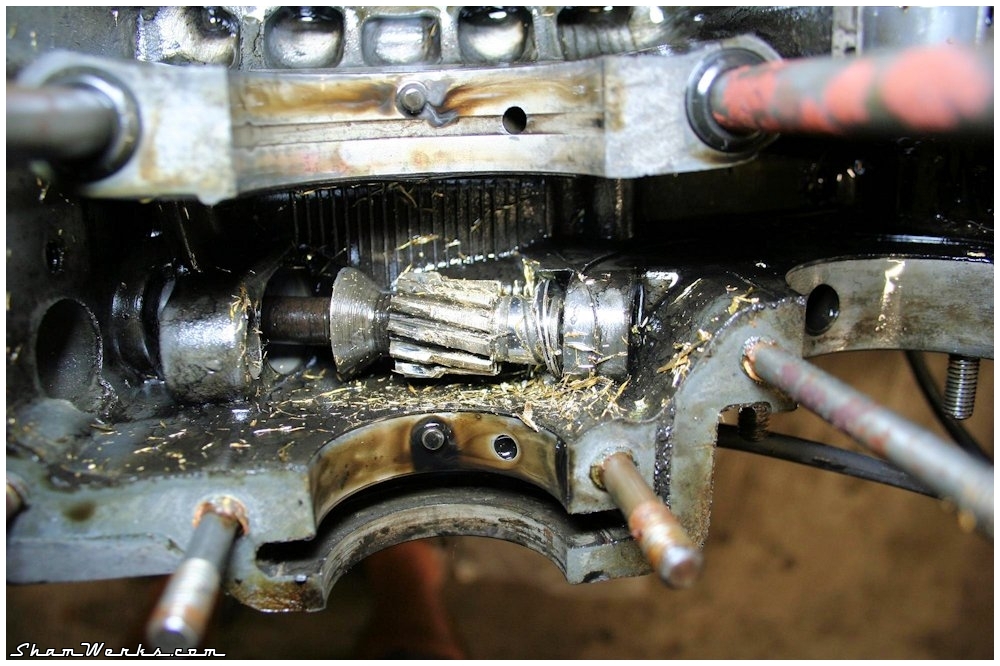
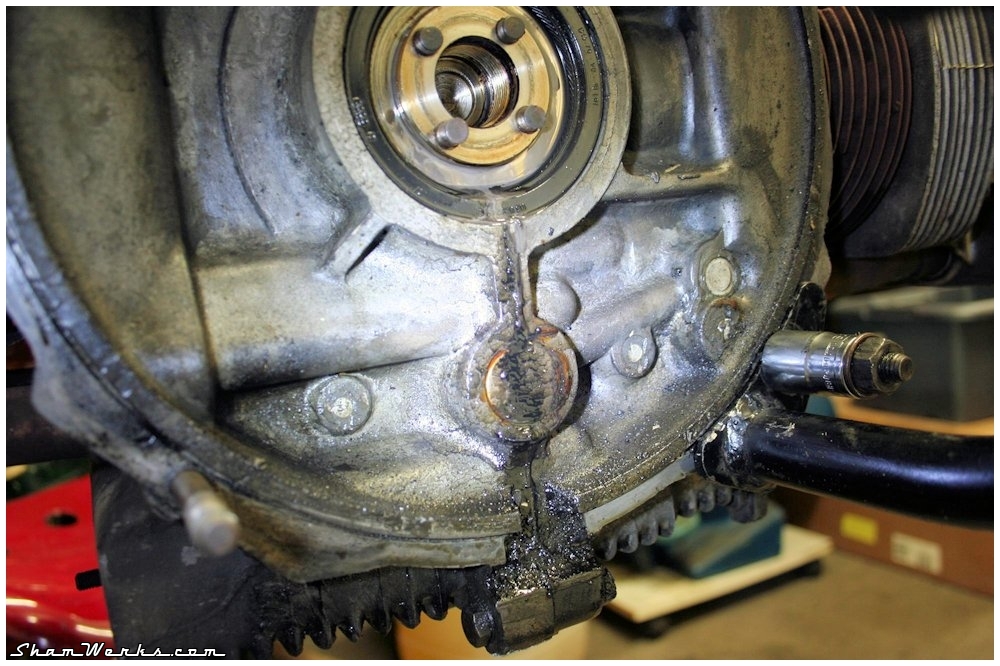
I forgot to remove the distributor drive shaft..
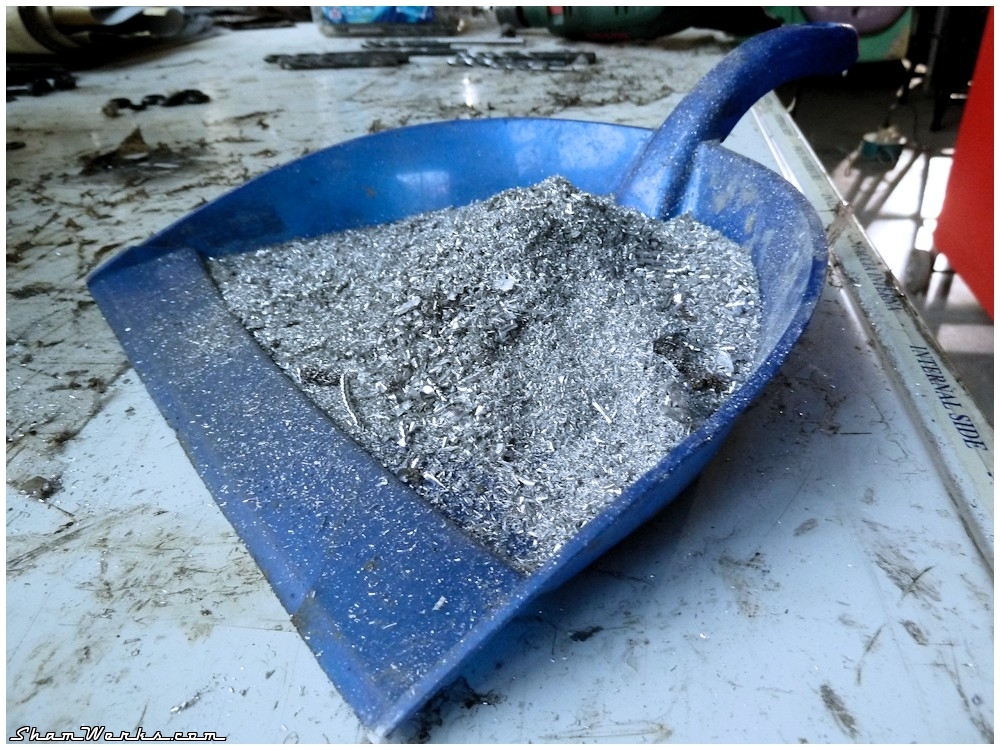
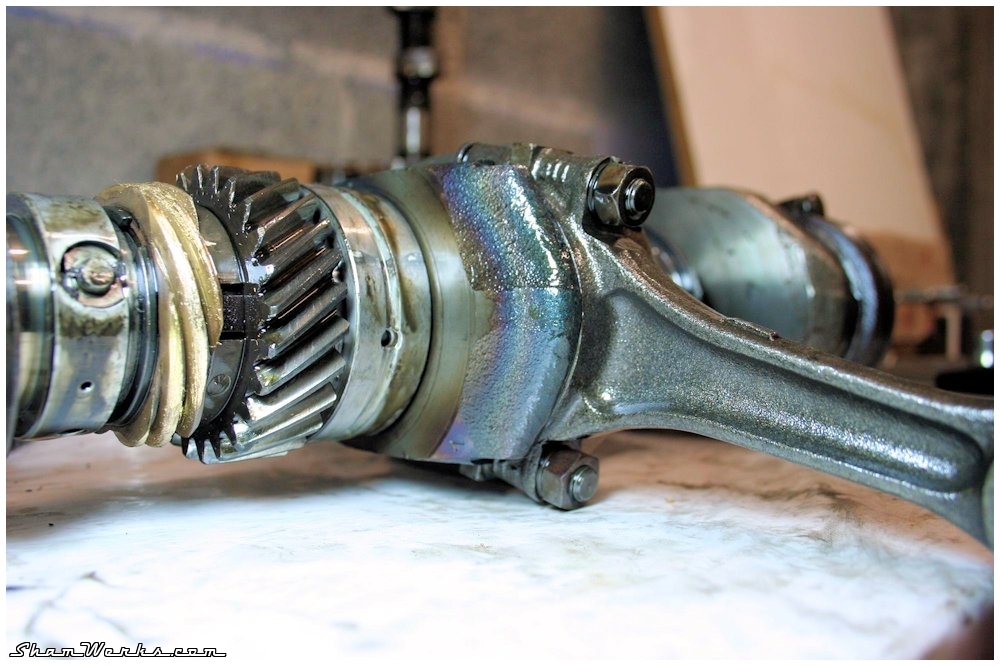
So upon start-up, it went up a little bit, till it went out of its bottom housing, so it tilted a bit, seized up into the case and machined the drive pinion on the crankshaft, sending bronze shavings all over the case...
The engine has probably not run more than 8 seconds, but it's too late, back to square one, I have to take it out again, open the carter and clean everything!
I'll remember this one for a long time... Excuse my french, but F*CK!


Argh, I can't believe I was just moment away from being able to drive it! Grrrrr!!!
Still, the good new is, it started perfectly, so at least my ignition setup is validated! (come on, let me have this good news!)
Ok, so, i just have to open it, clean everything, throw in a set of main bearings just to be sure, an close it back, right? Ts'gonna be easy, ain't it? Imma right? Uh?
But nothing's ever that simple... That would be too simple.
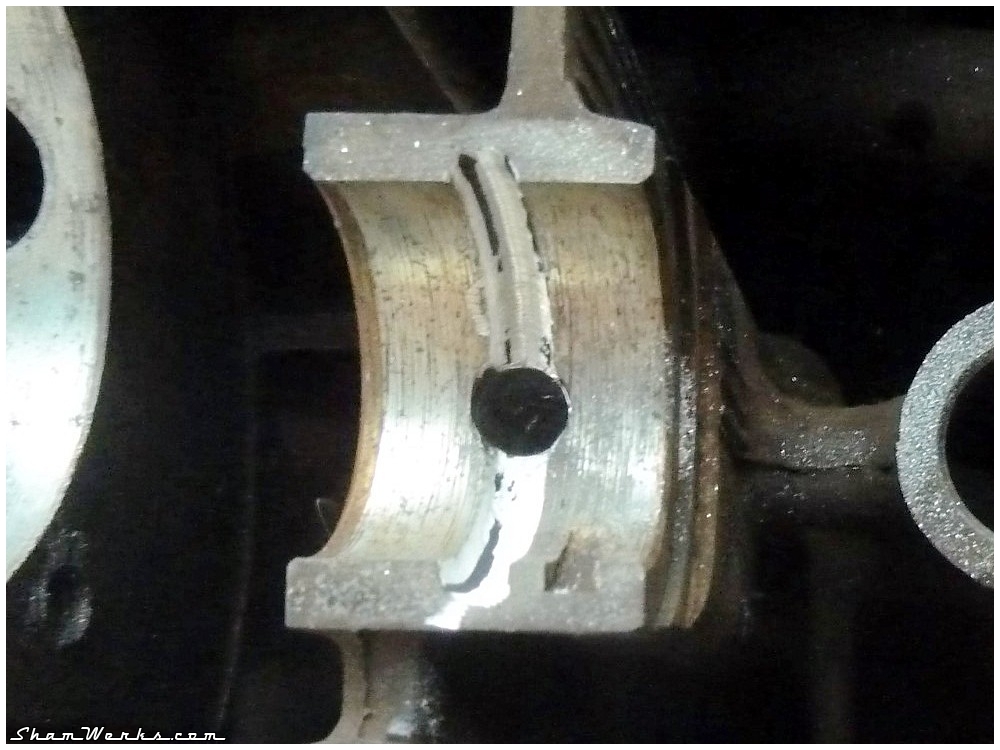
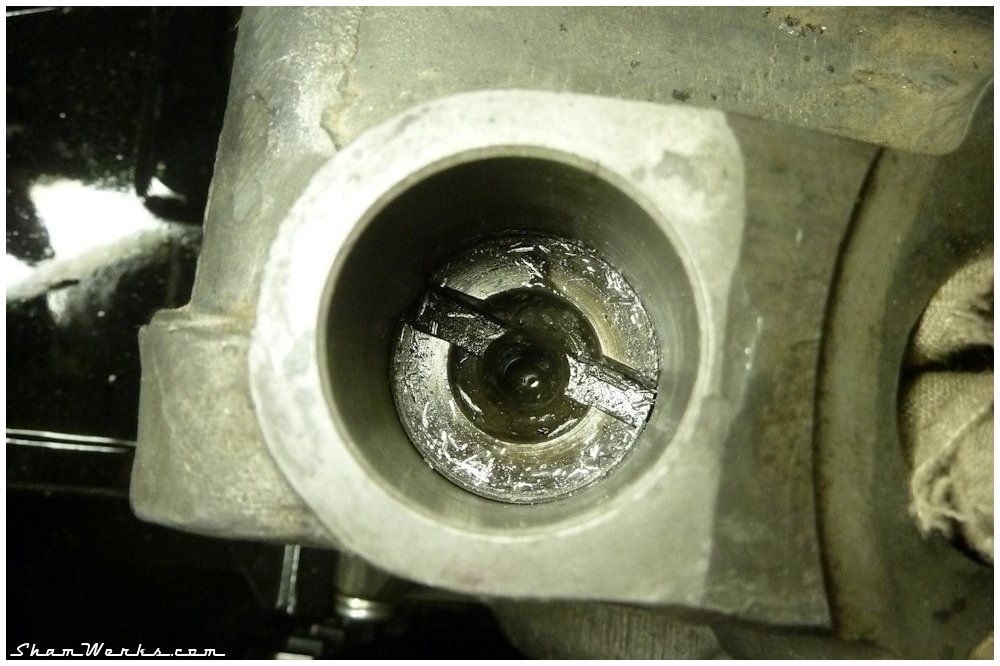
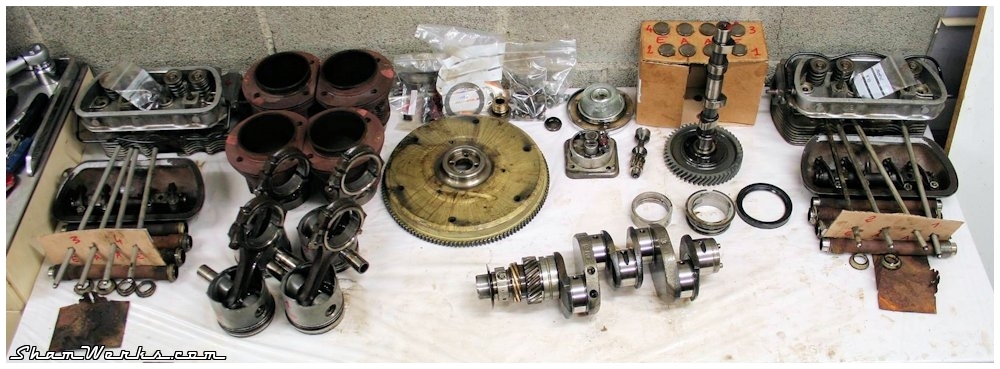
Opening the engine
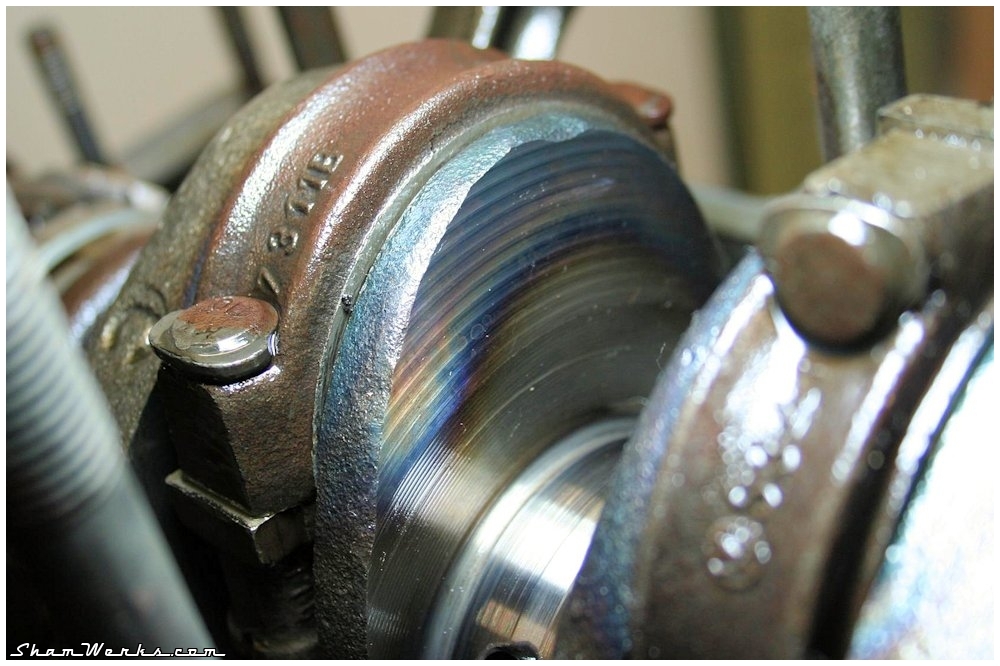
I can't avoid the usual set of nasty surprises : just by removing the flywheel I find a nice oil leak at the crank seal...Next, on the crankshaft itself I find heavy bluing marks, which I really not like. Upon inquiry, it might just be the result of the machining process of the journals, but still, I'm not too keen on putting it back like that... Anyway, moving on.
The lifters are totally worn out... Great...
Needless to say, the camshaft looks the same.
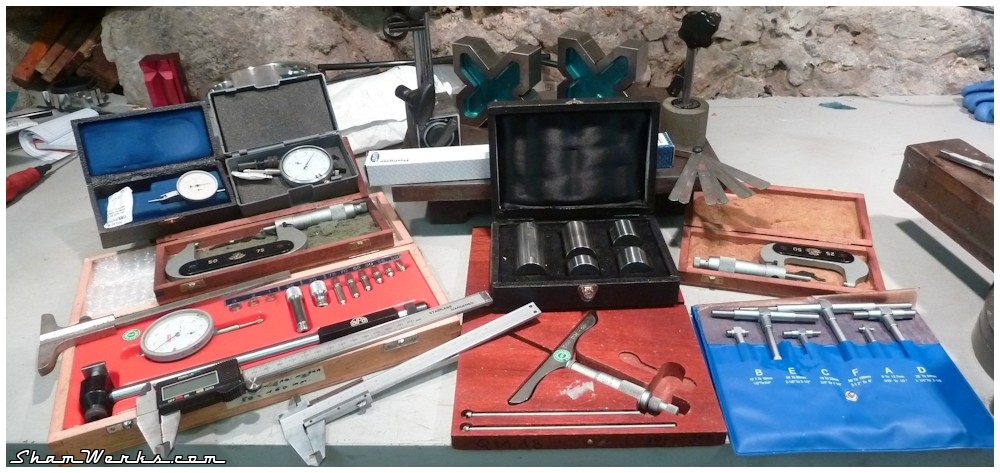
Next, I take out my metrology set to see where we're at... A couple of micrometers, a bore gauge, calipers, a small surface plate, V blocks, magnetic stands, telescopic feeler gauges, Plastigauge, depth gauge, gauge blocks set, I got myself reasonably equipped over time, which gives me some autonomy when it comes to controlling my parts.
These are quite pricey toys, but keeping an eye on eBay and the adds on specialized forums helps finding bargains!
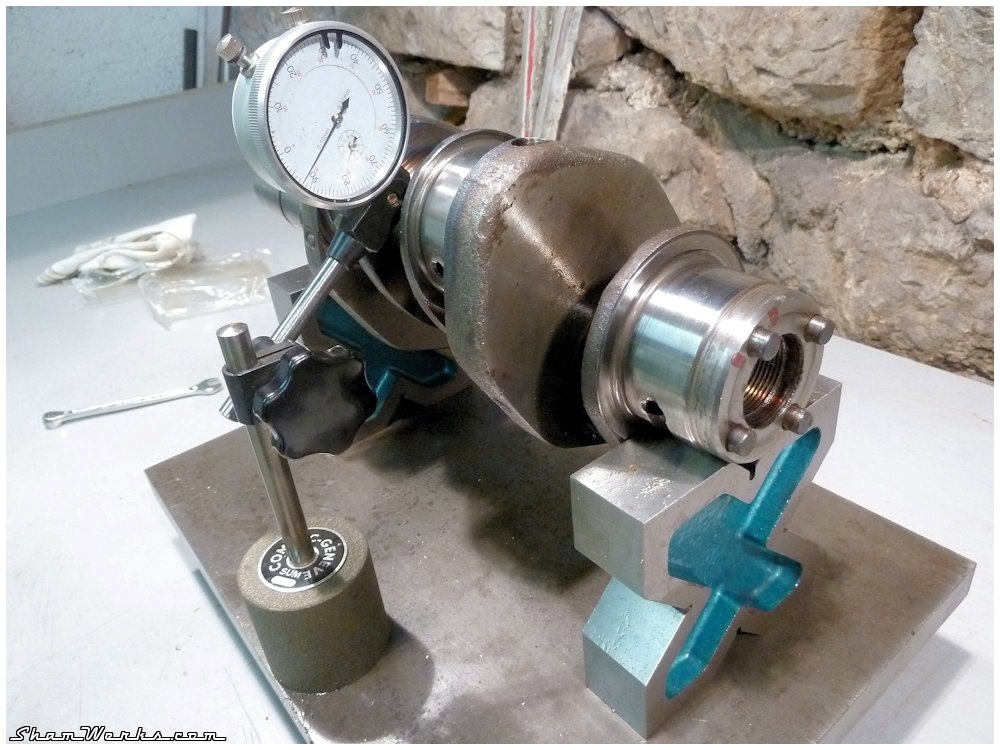
Bam, it keeps getting better : the out-of-round is 0.07mm! Volkswagen gave a factory tolerance of 0.02mm max, it's already way off!

- Main journal 1 : 54.988 / 54.985 / 54.988
- Main journal 2 : 54.980 / 54.980 / 54.980
- Main journal 3 : 54.988 / 54.985 / 54.983
- Main journal 4 : 39.994 / 39.993 / 39.993
Next comes the time to check the case... I fetch the bore gauge, and then, you get a laugh :
- Palier 1 : 66.02 / 66.03 / 66.04
- Palier 2 : 65.51 / 65.51 / 65.49
- Palier 3 : 65.49 / 65.49 / 65.50
- Palier 4 : 50.57 / 50.58 / 50.57
What the Hell?? Someone felt asleep on the mill at VW South Africa??
All things considered at this point, I reckon it's finally a good thing that I opened my engine... OK, it used to work great, but it might very well not have done so for much longer.
Years ago I bought an AS41 case/crank set from my friend Dangerous, as I had the project to build myself a bigger engine...
It might very be time to do so, don't you think?!