

Posted on 23/02/2012 at 02:40
Elvira : rebuilding the 36hp


And, finally, it's gonna progress!
Some background explanations : the original little 36hp engine of my '59 beetle "Elvira", was totally breathless, barely any compression left. So, a dozen years ago (ouch! It hurts when you start counting years!) I replace the original engine with another one I bought from someone who told me it had been "rebuilt". I obviously preciously kept the original engine on the side, and started riding this new engine, which actually worked pretty well... for a few years.
But then, it started having troubles : oil pressure dropping down, a deep, loud noise at idle revs (sounded like "klong klong"), which disappeared as soon as I touched the throttle pedal... Well, it was difficult to trust that engine any longer.
So, I've decided to rebuild it, myself this time, in order to know exactly what's going on inside.
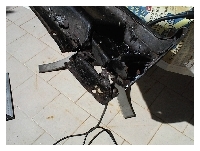
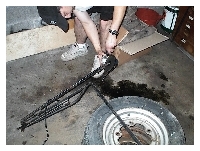
Step 1 : Opening the case.
All of this dates back to... 2008!! Four years!!It's already been four years that I opened the engine, saw the damage, four years that the engine is waiting for some TLC, and Elvira is gathering dust! In the meantime, I moved, had no workshop, troubles to find 36hp parts, etc... Everything kept me from progressing on that project. But, finally, stars aligned, and Elvira should be back on the road soon! Woohoo!
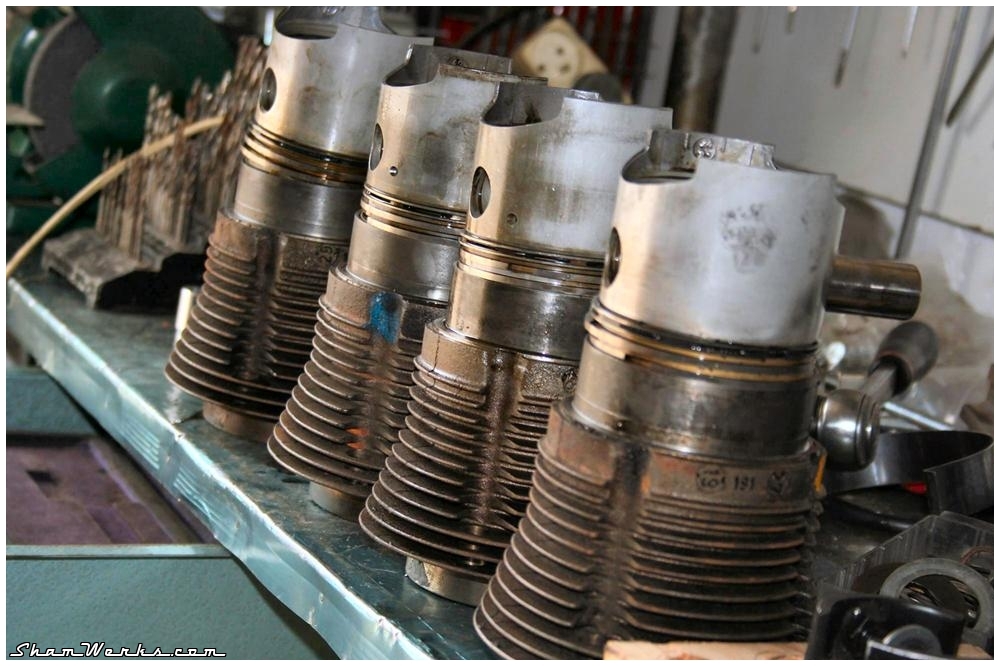
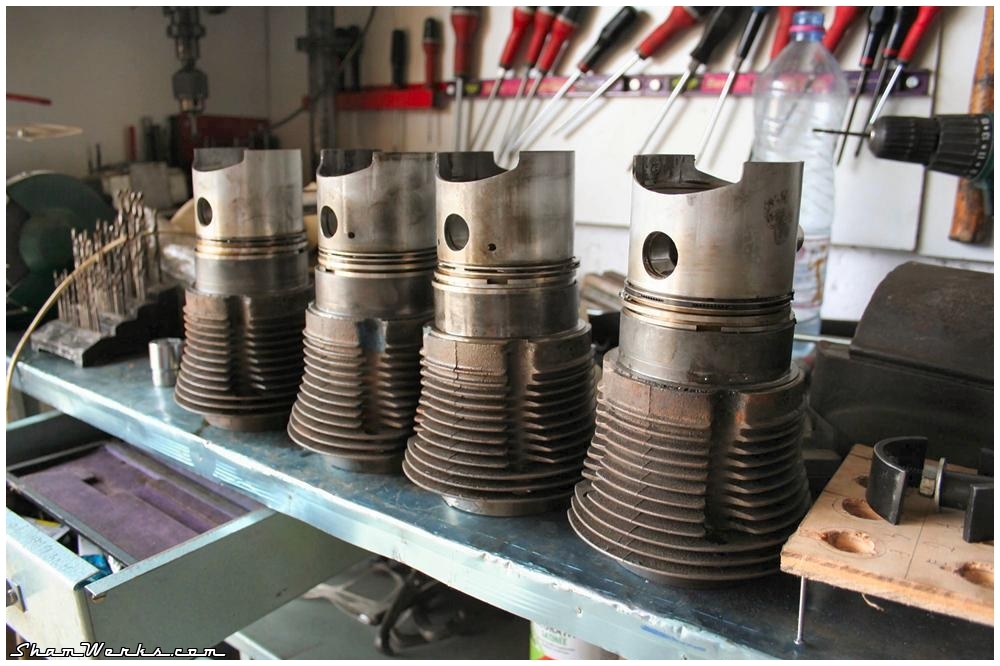
So here we go, February 2008, with the help of my friend Laurent "Dangerous" (thank you for your help and advices buddy!), I opened and checked the lil' 1192cc...

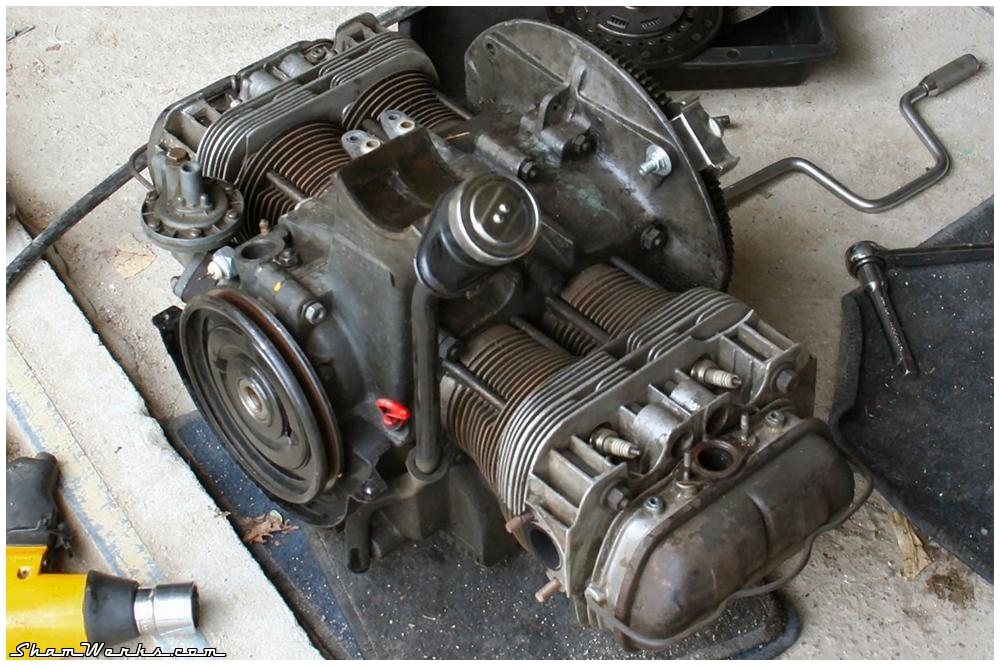


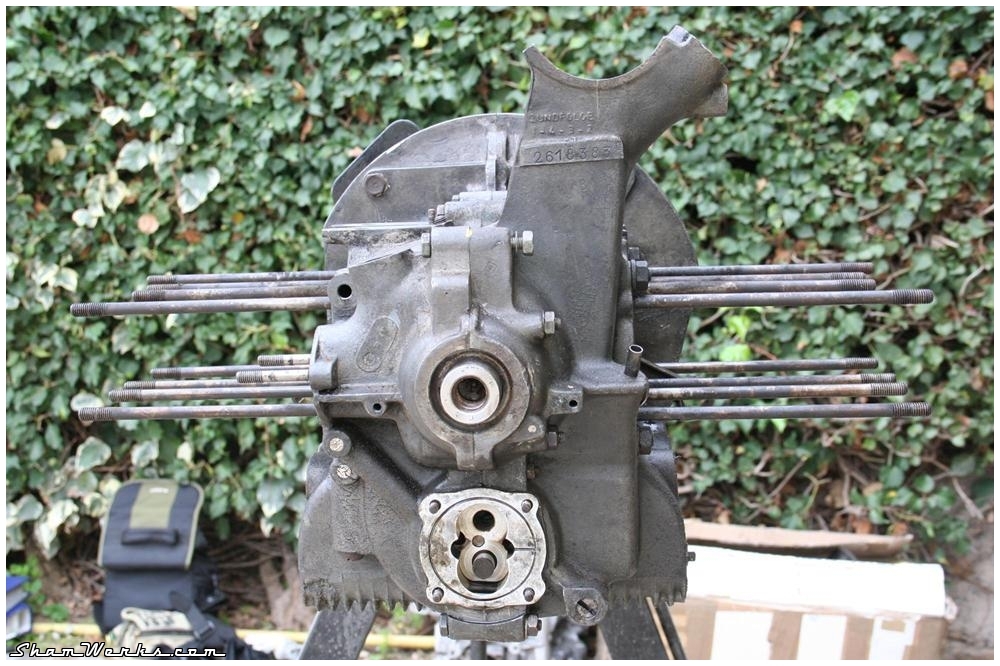
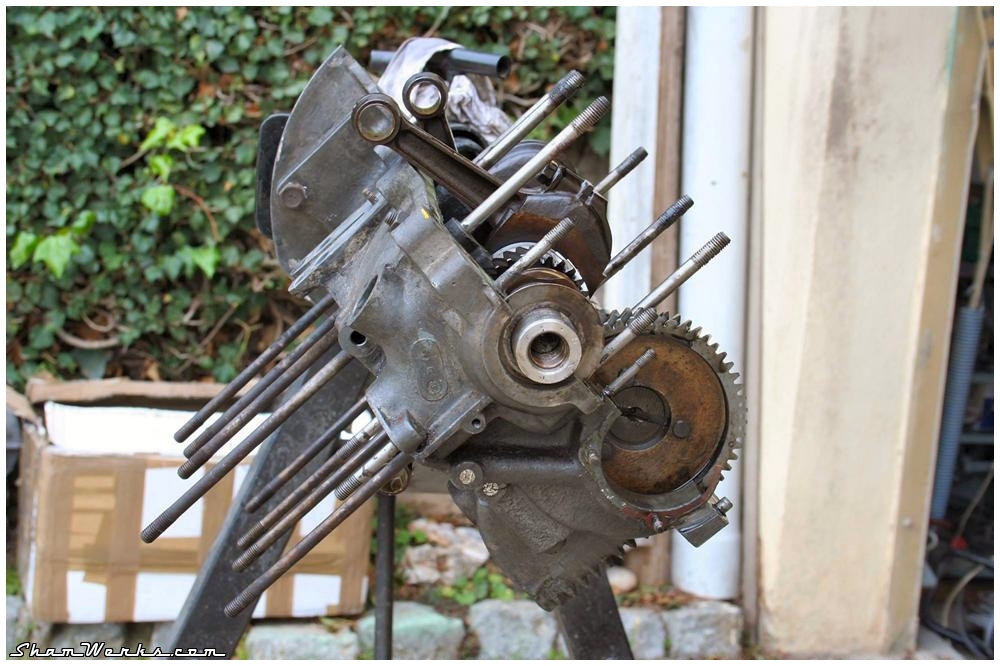
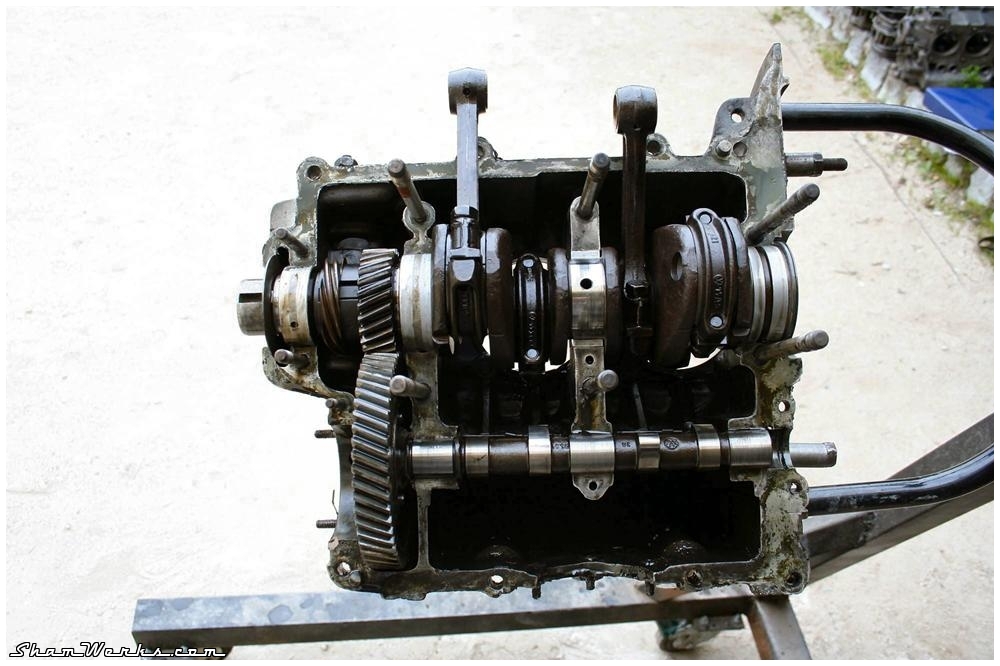
This block had been indeed "rebuilt"... But most definitely not the way it should have been :
- Regarding the noise I could hear when idling, it looks like it came from the flywheel : the dowells didn't have the correct size, and the whole thing started to move. Consequently, the bored holes in the flywheel are now slightly oval : direct to the bin!
- A quick measurement of the crankshaft runout shows it is of limits. Barely, but still : to the bin.
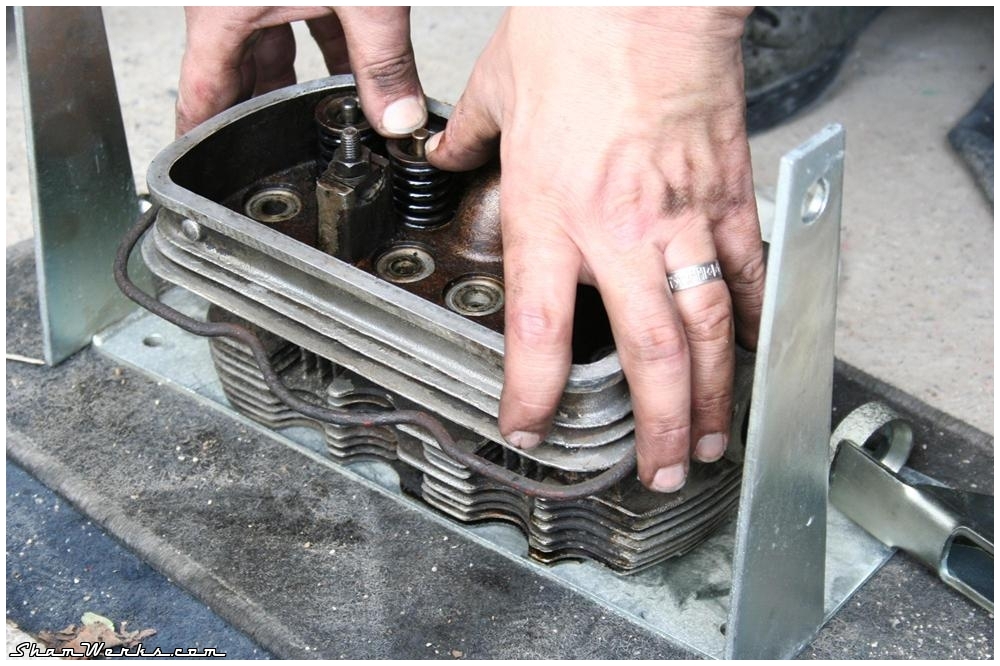
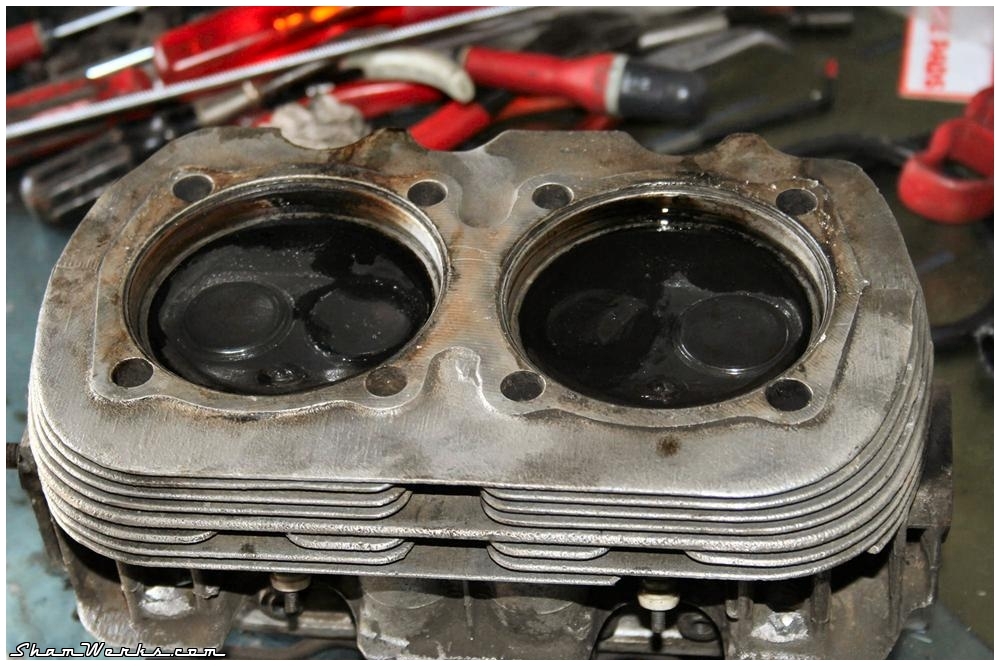
- The cylinder heads are totaled : cracks between spark plug holes and valves seats, broken fins, more helicoils than proper threads : with its buddies, to the bin.
- The oil pressure regulator piston doesn't look great, it doesn't slide smoothly in its housing, but it is probably still salvageable. Not going to the bin, but needs TLC.
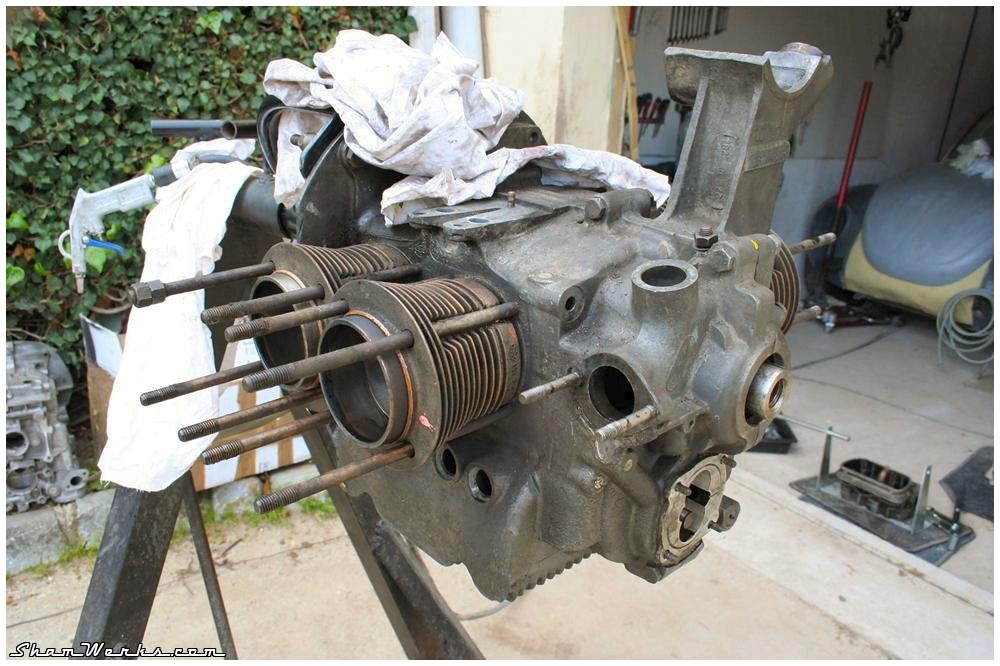
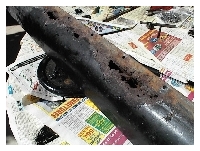
- The dowells of the cranckshaft's bearings do not have the correct size, thus allegedly allowing the bearing to move... To be honnest, they look like they were poorly handmade with a hacksaw and a file, not even properly debured...
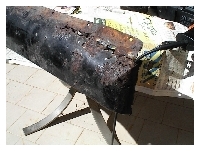
On the bright side : the engine case bearings housings roundness is OK ; a bit of corrosion underneath and around the oil sump, but nothing to be concerned about. The pistons and cylinders look like new, they definitely had been replaced - that, and the ugly fixes on the heads, is probably what the seller of this engine called "rebuilt"...
Anyway, it means I need to find a crankshaft, a flywheel, main bearings, a pair of heads... And all of the above for a 36hp, means one needs to be patient...
Posted on 08/01/2009 at 13:50
KG from above

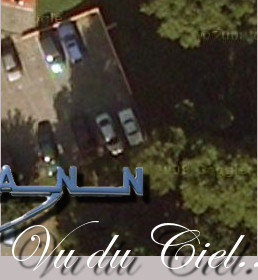


Yep, that is my KG, parked on the parking lot of my former place, spotted by the Google's satellites (middle picture) and the Microsoft's planes (left and right pictures)! Feels a bit like Yann Arthus Bertrand (Earth from Above), somehow...
Click the pictures to get to the maps...
What about you? Can you see your toys from space?
[via Google Maps and Live Maps]

Posted on 09/10/2008 at 02:35
Panam' Split


A mythical road, which, sorry to tell, personally makes me dream way more than the Route 66.
I'm talking about the Big Panamericana, from Prudhoe Bay, in Alaska, on the shores of the Arctic Ocean, (the most northern place of the American continent, accessible by car), to the famous Ushuaïa, in Tierra del Fuego, at the extreme south tip of Argentina. As the crow flies, it's around a 15.000 kilometers trip ; by car, about 25.000, and do not expect an highway all along the journey... Quite a cruising, uh?.
Anyway : two German guys took up the challenge, driving a... Split Beetle 1952.
And this, commands respect. Take your jaw back if you dropped it as I did.
Well, OK, the old Beetle doesn't have any more it original 25 HP engine... The motor unit is a much more recent 1956' one, a monster of 30HP.
Arrived in Seattle by plane, their Beetle joined them in a container. They already drove up to Prudhoe Bay (hey, that's already a 12.000 kilometers loop!), and they're now back in Fairbanks (California), after a pit stop in Seattle again, to prepare the rest of their long journey. Aiming to the South...
Their web site is available in German only for now, but even if you're not familiar with Goethe's language, go check the pictures there... : http://www.panamericana-im-alten-vw.de
Dirk , Torsten, I have a lot of respect for such an adventure, be sure I'll follow each of your steps closely...

Posted on 09/10/2008 at 02:33
Lego Beetle
 They did it!
The most famous construction game company produces a kit to build a Beetle!
Knowing that I, as a kid, grew up seating in the middle of a bunch of those plastic bricks, I'm about to go for this one!
Doors, hoods, glove box are functional, the seats can be folded... That's quite a nice baby, with its 41cm long! There's only the front hood that I don't like that much, well, actually, reproducing the round shape of the original one with cubic bricks was hell of a challenge...
Click on the picture to go to the online LEGO® store!
A 149 euros toy, still and all...

Posted on 20/03/2008 at 18:26
Intermeccanica Kübel replica
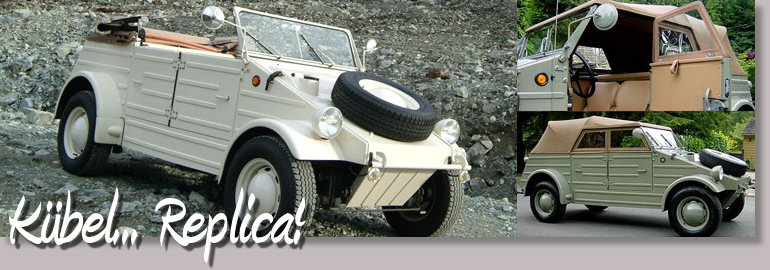
I believe everything's in the title!
Intermeccanica, a Canadian company which already produce Porsche 356 reproductions, now proposes poly Kübelwagens.
Polyester shell and tubular chassis, but genuine VW engine, at least... But with air conditioning!
If you ever dreamed a dropped Kübel on a set of chrome plated Fuchs rims... It'll cost you at least $16.450 for the base kit...
[via RetroThing]

Posted on 29/09/2007 at 18:30
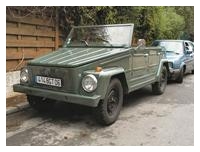
Bye bye Küby...
 Here we are, finally... Küby is sold! I'll miss my toy...
Lack of time, of space, new projects, need to do some clean out around me... Well, actually, it's a friend of mine who bought Küby, therefore I know it's not too far, I'll see it again... Take great care of it aSa!
But here is the last image I'll keep from Küby : a few words, written in the dust of my windshield, by a lovely English girl, on a
Bye bye Küby...

Posted on 07/08/2007 at 18:00
For Sale!
Sorry! This article has not yet been translated in english! Please come back later!


C'est à regrets, mais je n'ai pas le temps, ni la place de le garder, je préfère me recentrer sur le Karmann... Et puis pour des raisons plus personelles, je dois faire du ménage autour de moi.
Travaux effectués :
- Les 4 cylindres recepteurs de freins, le maitre cylindre, les flexibles de frein sont neufs.
- Allumeur 009, régulateur de dynamo neuf, lentilles feux AR neuves...
- Les 4 pneus Colway CTrax MT ont moins de 1000 kilomètres au compteur.
- le rail avant de l'armature de capote est neuf (remplacé par un NOS) : cette pièce est généralement pourrie sur les 181...
- la capote est neuve (import US).
- Peinture complète (hors compartiment moteur) faite en Mai 2005.
- Plancher peint en noir (Hammerite 2 couches).
- Sellerie kaki refaite à partir de 3 intérieurs d'origine, en ne gardant que les meilleurs morceaux.
Travaux à prévoir :
- Corrosion : passage de roue AVD : trou de la taille d'une pièce de 2 euros. Un peu de corrosion perforante le long du plancher... L'ancien propriétaire ayant copieusement "mastiqué" tout ça...
- Petit choc sur aile ARG (ma faute, mal serré la roue... Grrrr!)
- Charge : de temps en temps, le témoin de charge clignote un peu... Je pense que les charbons ont fait leur temps.
- Amortisseurs : un peu fatigués si l'on attaque un virage un peu vite... Mais c'est pas vraiment le but de cet engin à la base.
- Petite fuite au niveau du réducteur droit.
- Tambours de freins un peu ovalisés, le freinage manque de progressivité... Mais ça freine.
- Il lui manque les 2 pare-soleil
Je le vends avec de nombreuses pièces :
- 8 vitres (à refaire, je fournis le plexi pour ça),
- un capot AV, un capot AR, 4 portes,
- allumeur d'origine blindé,
- 2 litres de la peinture utilisée pour le peindre, pour d'éventuelles retouches ultérieures,
- chauffage Eberspacher d'origine dépose mais complet dans un carton (hormis son échappement, bouffé par la rouille).
- système (de fabrication perso) pour avoir un double couchage dans le 181 : super pratique en meeting!
Attention, ce n'est pas un show car! Il est propre, c'est une super machine à balades, mais pas un Top 20!
Tout les photos sont dispo sur la page de Küby...
J'en veux 3800 euros... N'hésitez pas à me contacter pour plus d'informations.
Bye bye, Küby...
Edit 2007/08/08 16:30:
J'ai eu plusieurs appels concernant le 181, et on m'a fait remarquer que je ne parlais pas de la mécanique du monstre : il s'agit du 1500H simple admission d'origine, un moteur pas très puissant (44cv), mais coupleux et fiable. Il n'a pas été trafiqué, je me suis contenté de retirer son allumage militaire (blindé) d'origine pour le remplacer par un 009+Bobine bleue+faisceau neufs.
Bref, pas un foudre de guerre, mais un couple de camion (surtout avec les réducteurs!) et des reprises surprenantes en 3ème dans les embouteillages...
Edit 2007/09/29 18:30:
Here it is, Küby is finally sold : Bye Bye Küby...

Posted on 22/07/2007 at 19:28
Ice and Fire...
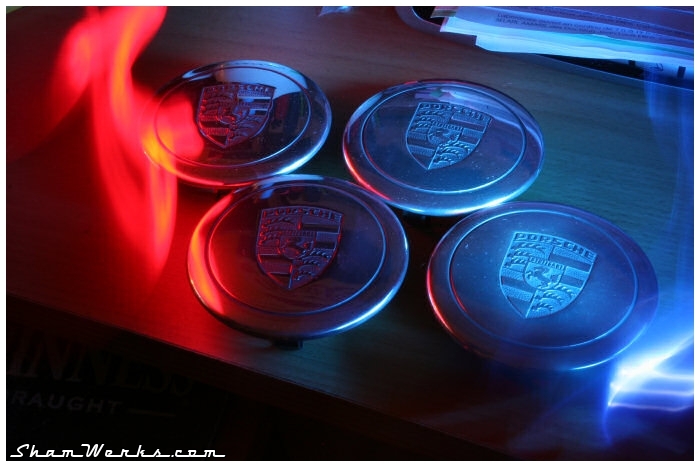 Just a picture, made without any Photoshop editing, only using a long exposure (20 seconds) and light methods from LostAmerica.com... Not too bad, uh? (Click the picture to see it fullsize)
Only few updates those days, many other things to think of, way more important than all this stuff...
Posted on 14/07/2007 at 15:56
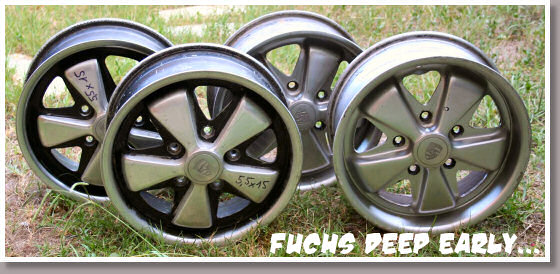
More polishing tests...
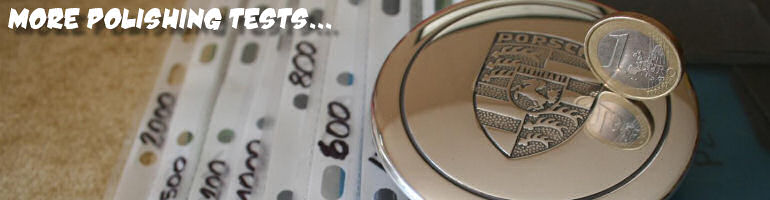
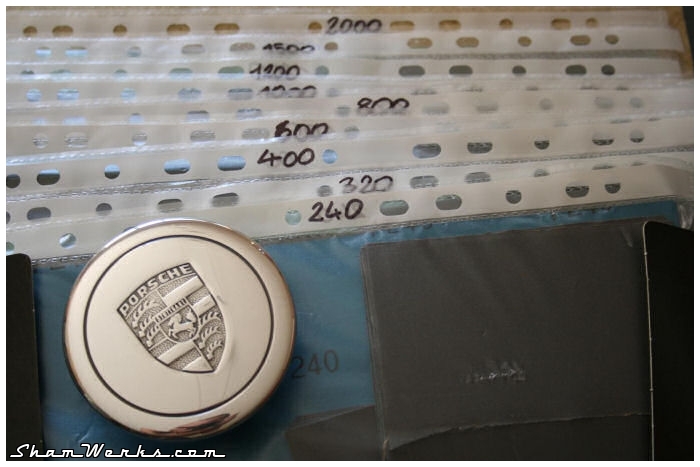
This time I believe I've validated my polishing process... First sanding with 240 grit paper just to get rid of the anodization, then 320, 400, 600, 800, 1000, 1200, 1500, and finally 2000 (all of those wet, obviously).
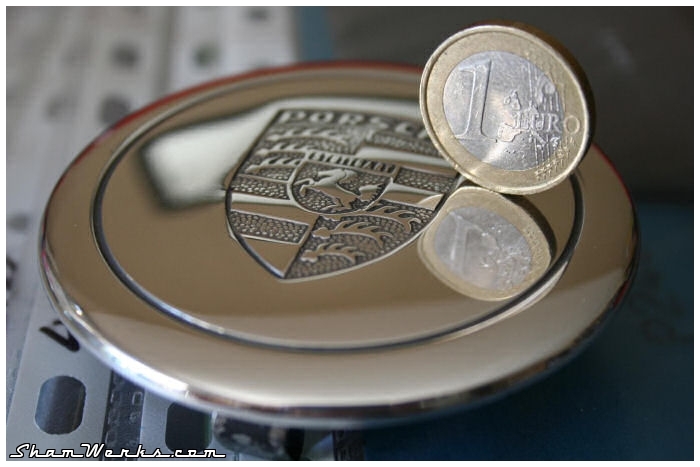
Then, final refinish in two steps, sewn cotton first, non-sewn then, with two different polishing pastes. The result looks pretty nice to me (see left picture)...
The main point is to follow closely the order of the papers grit : so I kind of organized this stuff in a folder, with the sandpaper already cut ; the actual work will be much easier (see right picture).
Here we go, I'm going back to my wheels...
Posted on 11/07/2007 at 16:02
Polishing Tests...
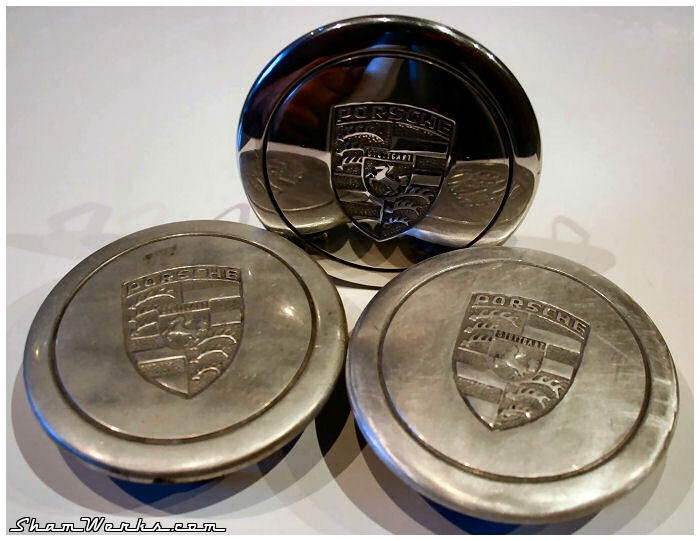
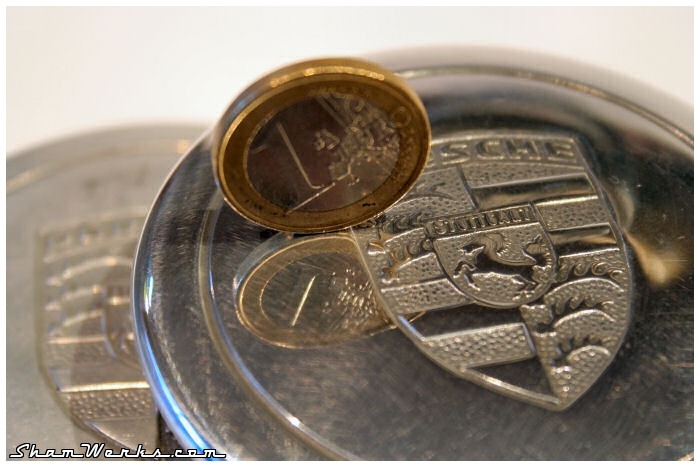
I'm trying to validate my polishing method before I actually do it on my rims... So I'm doing some tests on the wheel-center caps...
The result is not that bad, but not as mirror-like as I want it to be : too many micro-scratches, only visibles under raking light. Probably cause I sanded up to paper 1000 grit only...
Next test will occur with paper 1200, 1500 then 2000 grit with oil, as soon as I receive my abrasives order...
I promise, I'll make you a nice tutorial...
Posted on 11/07/2007 at 01:37
Kübel on Modern Mechanix
Last April, I already told you about the excellent blog Modern Mechanix.
I'm coming back to it today, as a rare document has been added to it, especially interesting to us, old VWs lovers... A scanned article from the May 1945 issue of Popular Science : the US people was discovering the KübelWagen!
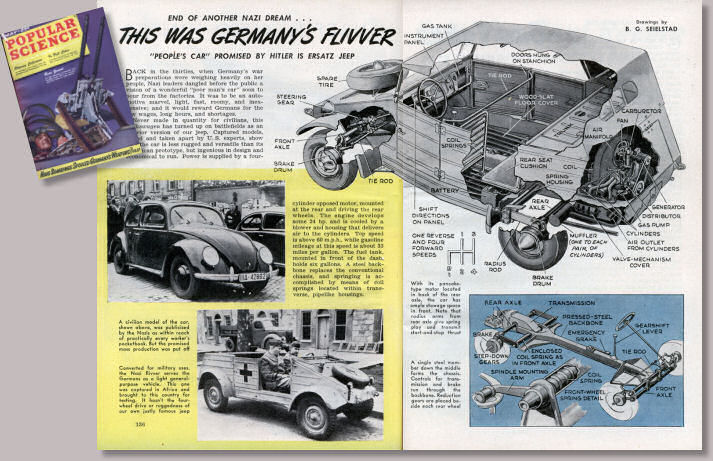 This article mentions a document from the US Army, comparing the features of the Kübel to its american equivalent, the Jeep. Here, it's said that part from its "ingenious in design" and the fact that it's "economical to run", the VW Type 82 is way inferior to the Jeep. But we are in May 45, the war is barely over in Europe, and will totally be finished only 4 month later : propaganda...
We'll learn much later that this comparison done by US experts was not that bad, they actually praised its design and abilities...
I'm coming back to it today, as a rare document has been added to it, especially interesting to us, old VWs lovers... A scanned article from the May 1945 issue of Popular Science : the US people was discovering the KübelWagen!
We'll learn much later that this comparison done by US experts was not that bad, they actually praised its design and abilities...

Posted on 03/07/2007 at 01:17
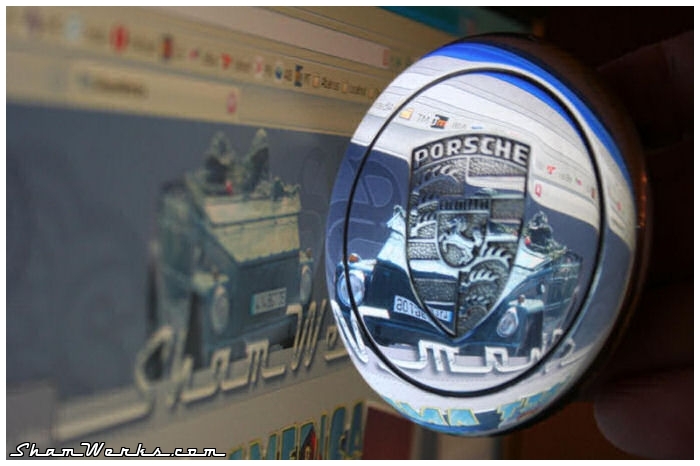
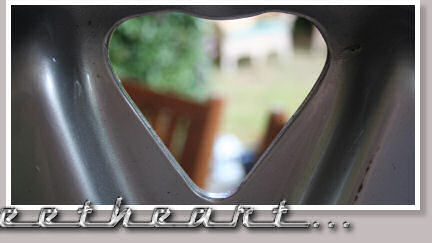
Quizz
|
And here we go, for a little quizz... You'll have to be quick on this one, I'm pretty sure this will be easy for the VW experts...
The lovely heart on the right is a detailed picture of a part that will soon be installed on the Karmann... Well, after some "refurbishment"... So, what part is this? Ready, set? Answer! (beware, only an accurate answer will be accepted... This shouldn't be too easy...) |
 |
 |
>> Edit 2007-07-05 : Nico has found the answer... Click to see the answer in picture!

Posted on 21/06/2007 at 13:17
Menton 1995


Starting from the statement that "Self-derision is always a good thing", here is a TV coverage, broadcasted on August 1995 on the french channel FR3, from the Annual VW Meeting of Menton...
OK, now, the fun part of this video : your faithful webmaster, me myself & I, by then aged 20, at 01:05! I'm already 32 today... But when I see the weird face I had, I feel like getting older can be a benefit!
Come on, laugh at me - I do so myself!
For those of you who know him, you can even see Marco at 00:12... Hello buddy!
Anyway, I'm feeling older with that...
[Link to the video on YouTube]

Posted on 04/06/2007 at 18:10
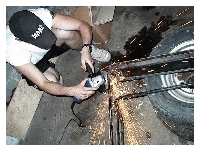
Men at work...
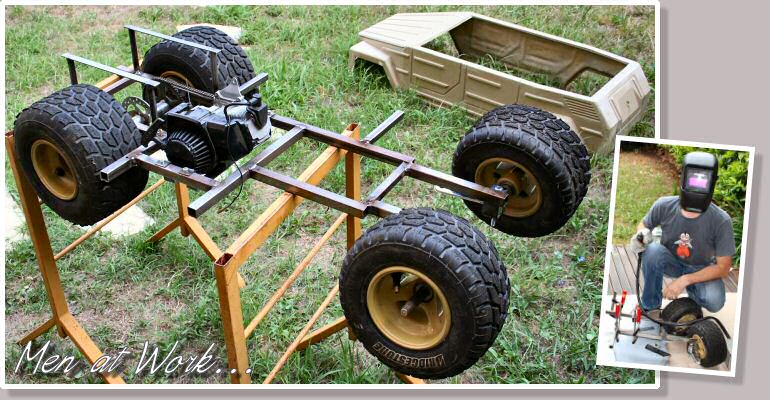
For those who think I'm twiddling my thumbs... More to come real soon!
Stay tuned...

Posted on 23/04/2007 at 17:54
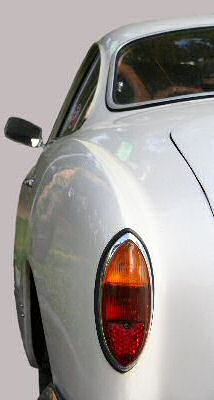
Period accessory...
|
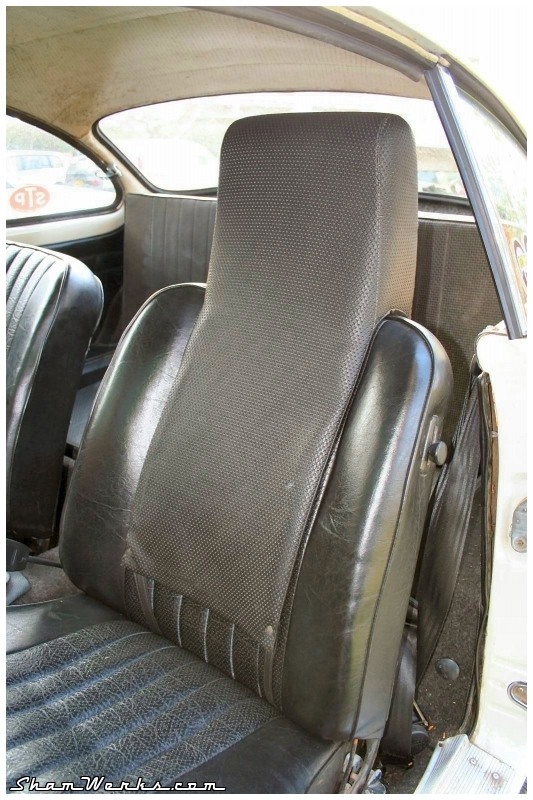
Till the day I'll be able to ask La Guèpe (the wasp) to make me dream bomber seats (see Soldeli's under restoration KG), the Karmann has just received a pair of head rests... Those are period accessories, that crimp around the backrests of the seats. First, it reassures me, as I always think about the whiplash injury riding the KG (but not in the '59 nor the Thing, God knows why?)... Plus, it gives the seats a little 911-ish look, uh?
|
 |

Posted on 26/02/2007 at 12:22
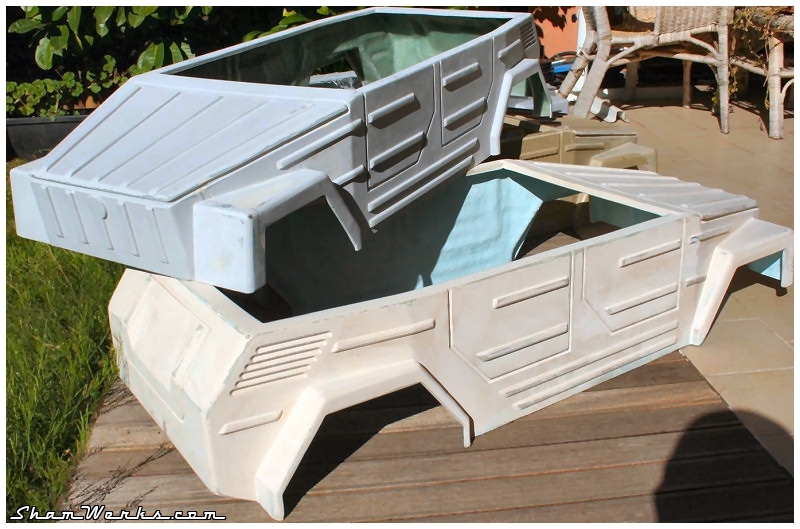
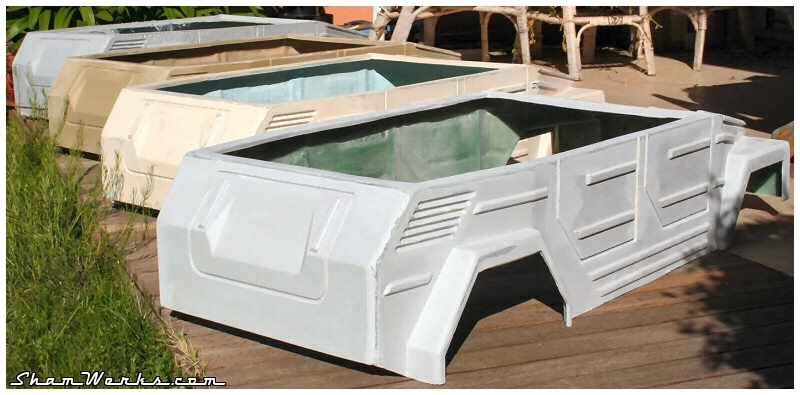
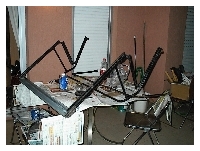
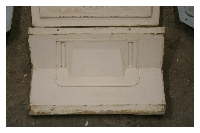
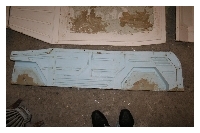
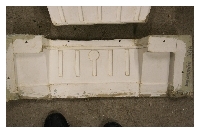
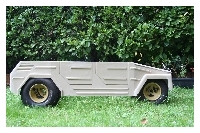
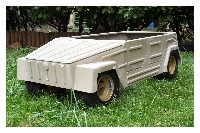
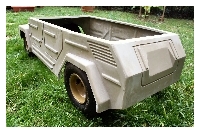
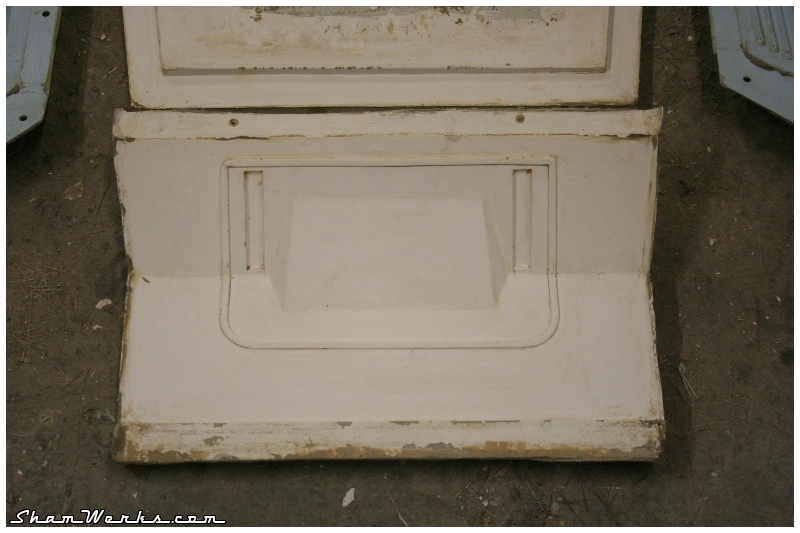
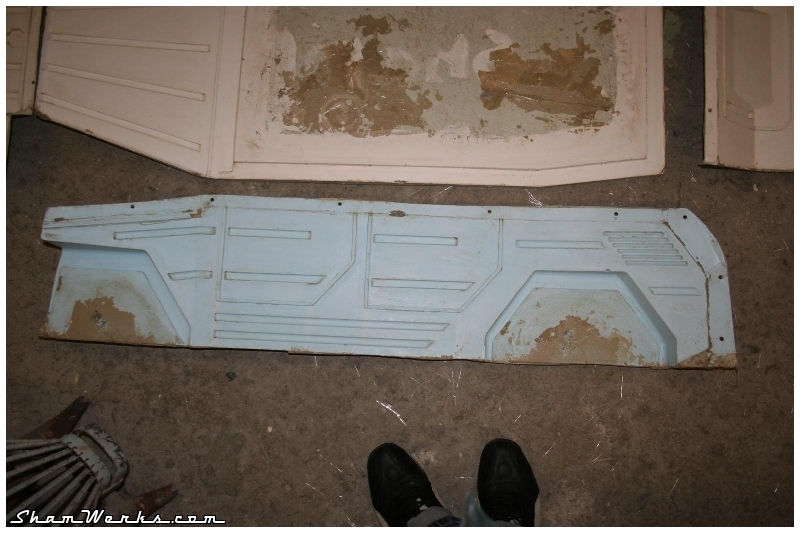
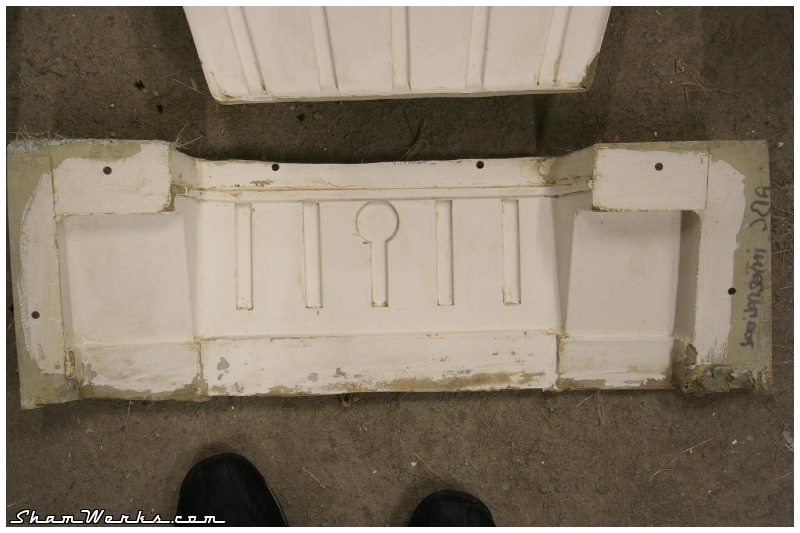
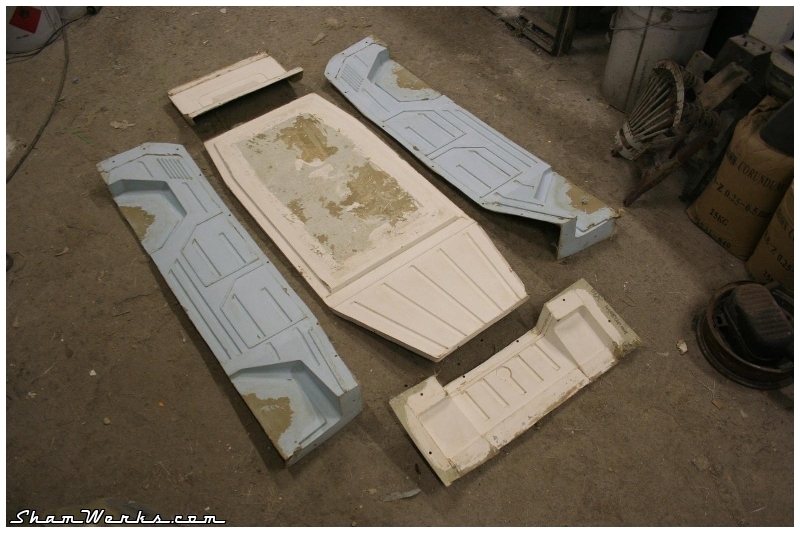
XXS Thing shells for sale!
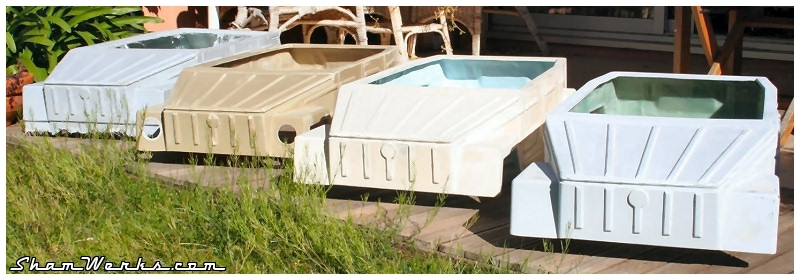 For those of ou who follow the project, I've got two XXS Thing shells for sale... 181 euros each, shipping charges to be defined.
Hurry up guys, there won't be enough for everyone : the current mold is broken, no new shells expected before long... If any...
The shells I sell are the two rightmost ones on the above picture (detailed in the two below pictures)... Want more information? contact-me... Later will be too late!
EDIT 03/14/2007 : One of the shells for sale is already sold... If you want the very last one, hurry up!
EDIT 13/04/2007 : The second shell, reserved for a while, has been shipped this morning...
Posted on 22/12/2006 at 00:31
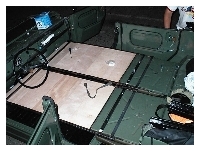
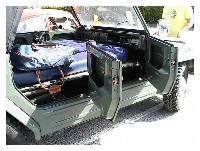
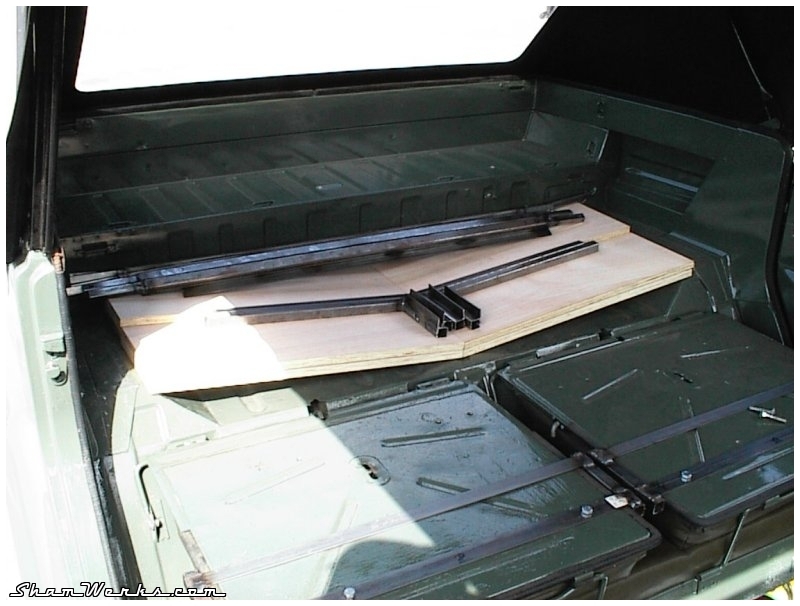
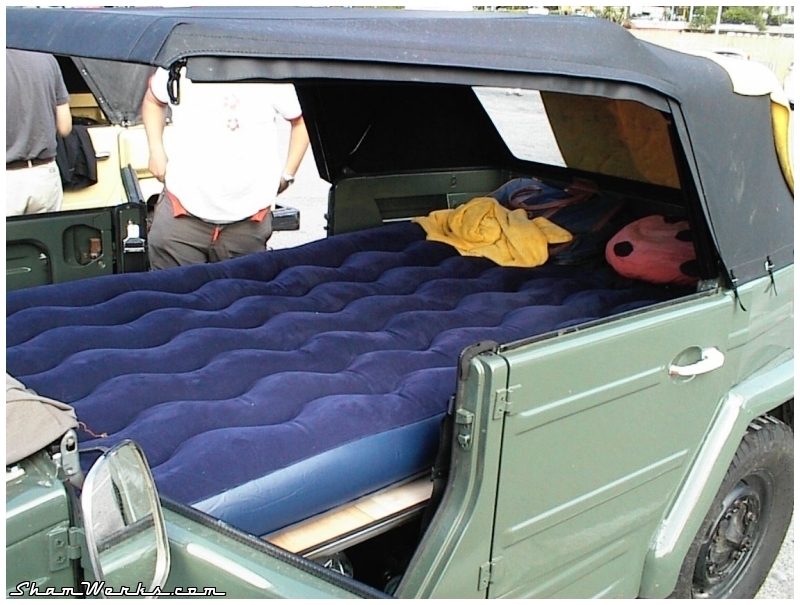
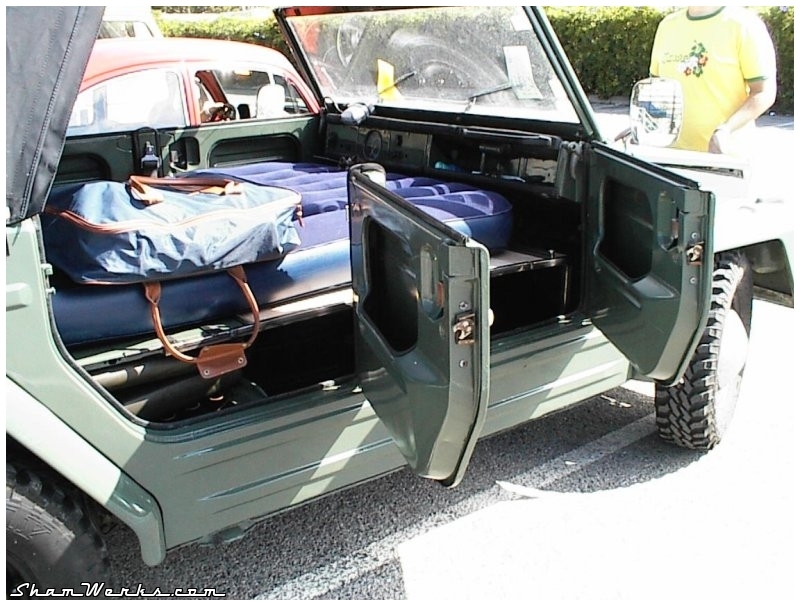
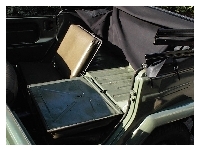
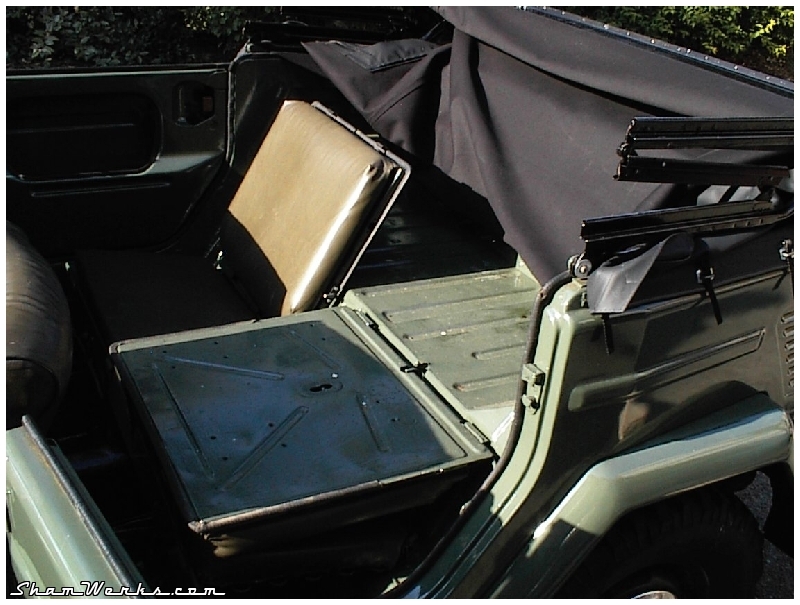
Küby Westy : the Westfalia Thing!
I had this idea while reading the "dormir dans son 181" (how to sleep in your thing) article (you need to register to read the article) written by PJ, the webmaster of 181Spirit.com... Excellent idea, I must say!
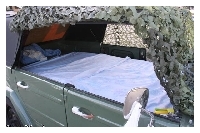
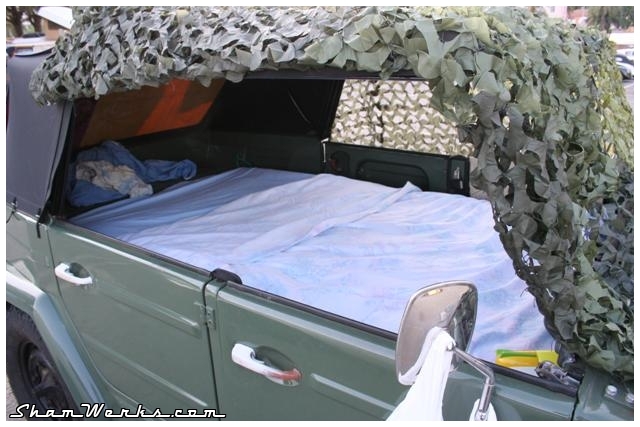
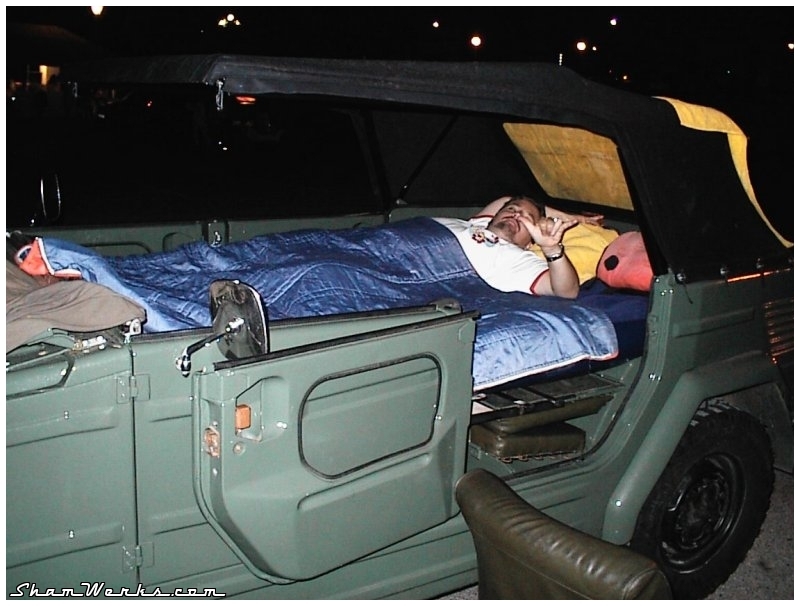
I only doubled the system to get a fully "Westaliazed" Thing, perfect to sleep at the Menton annual meeting!

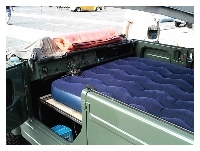
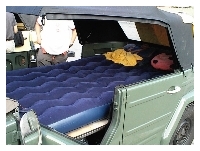
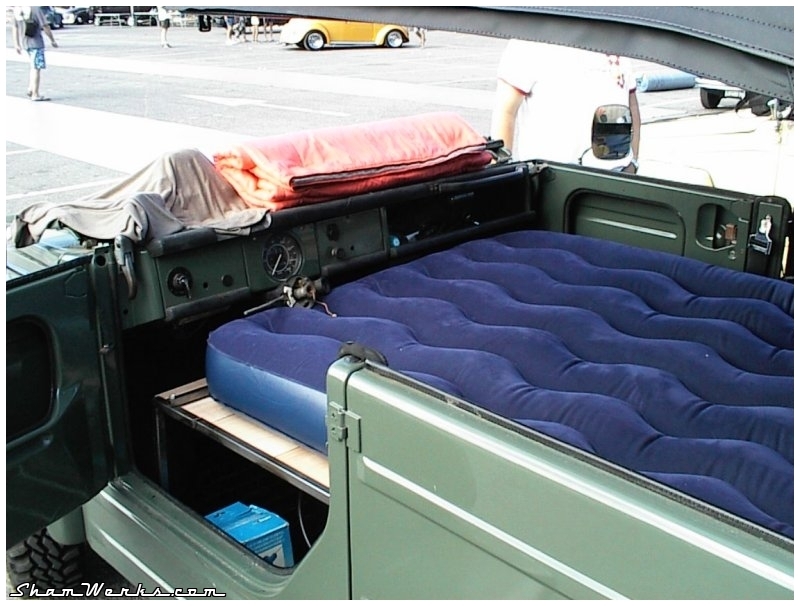
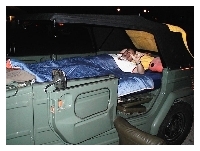 Here it is!
Hey, time is passing by, I'm getting too old to sleep directly on the floor!
I only doubled the system to get a fully "Westaliazed" Thing, perfect to sleep at the Menton annual meeting!
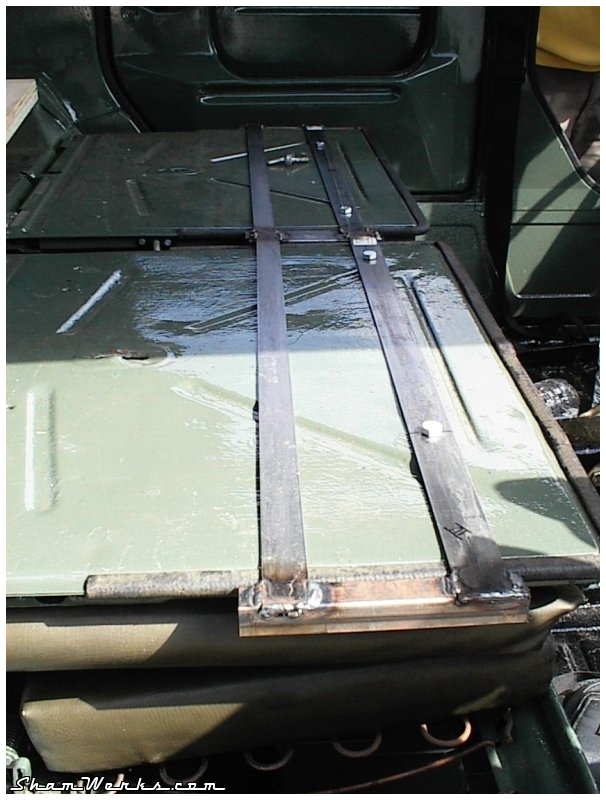
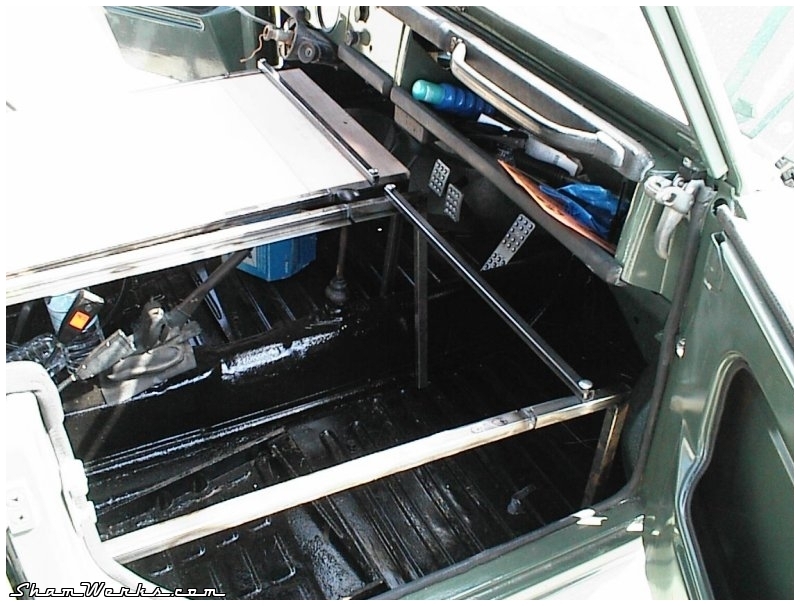

Hey, time is passing by, I'm getting too old to sleep directly on the floor!
Posted on 21/12/2006 at 00:31
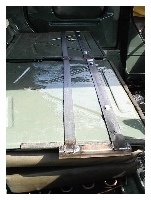
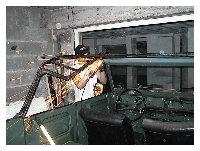
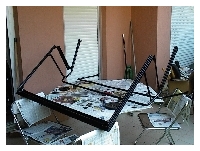
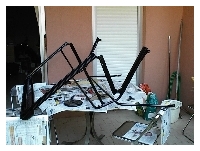
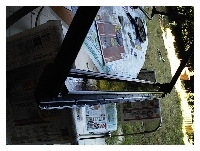
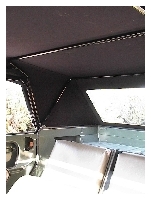
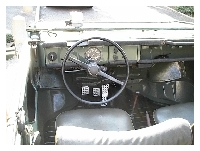
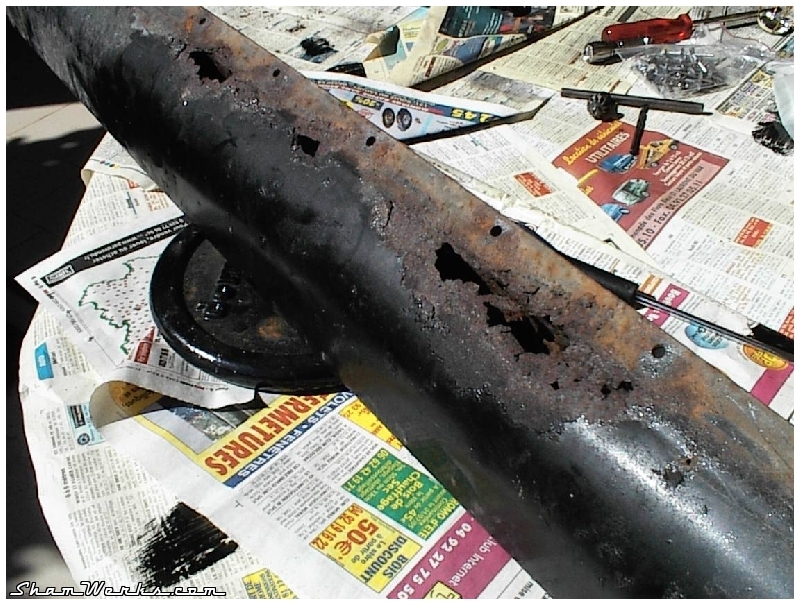
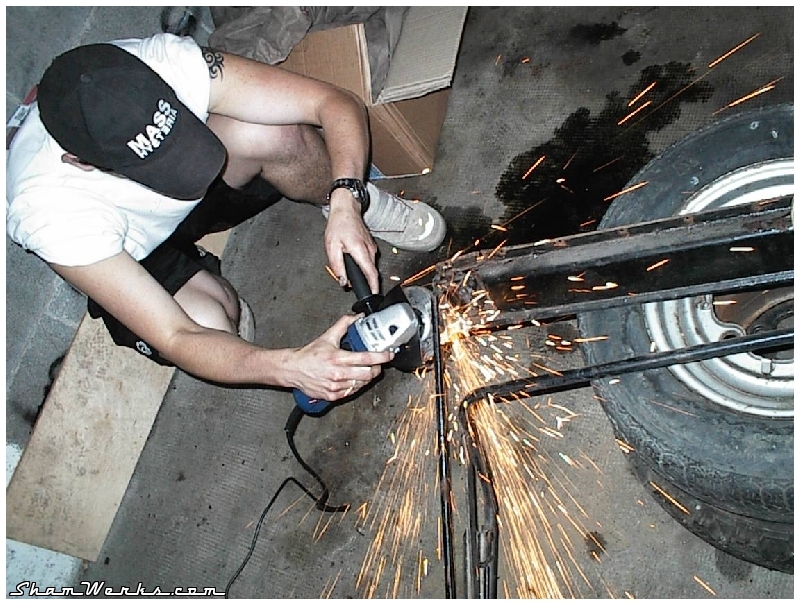
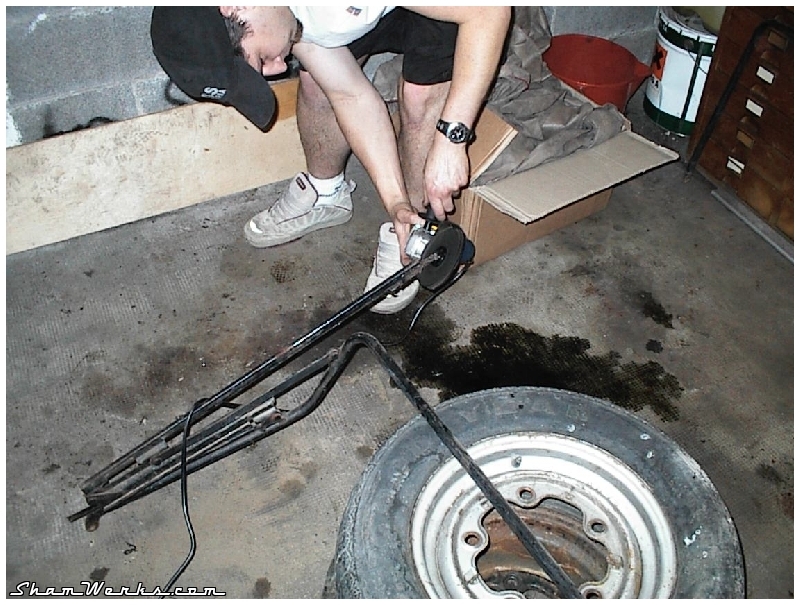
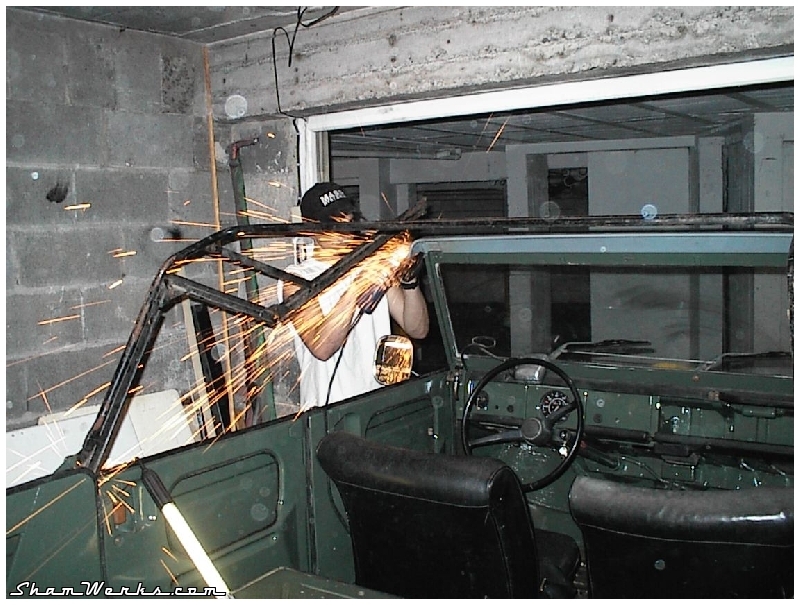
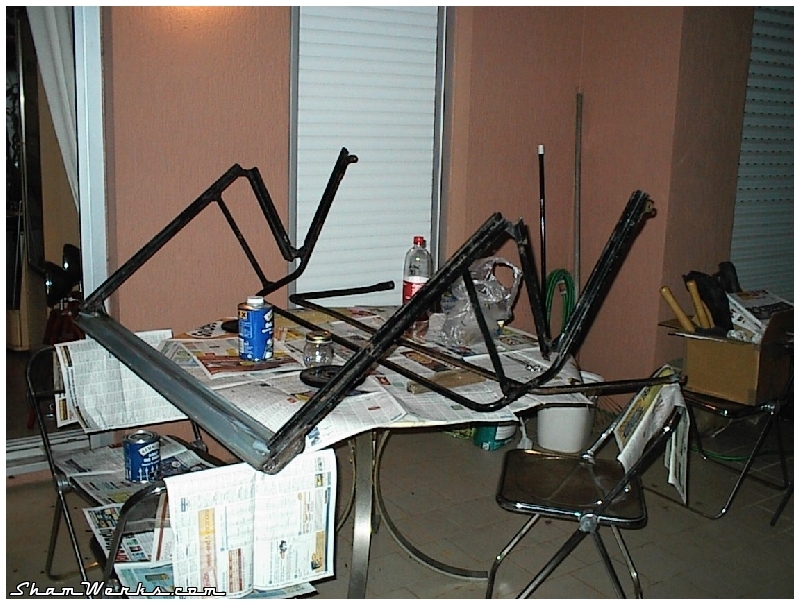
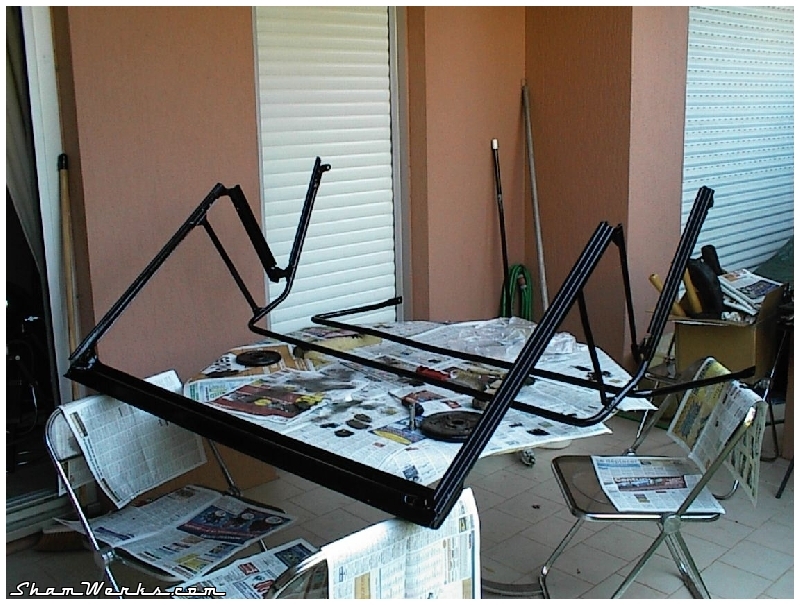
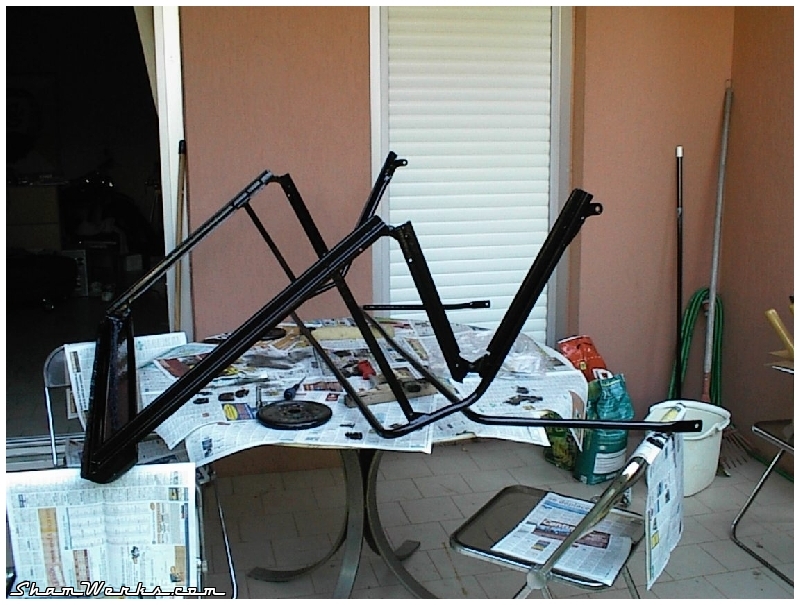
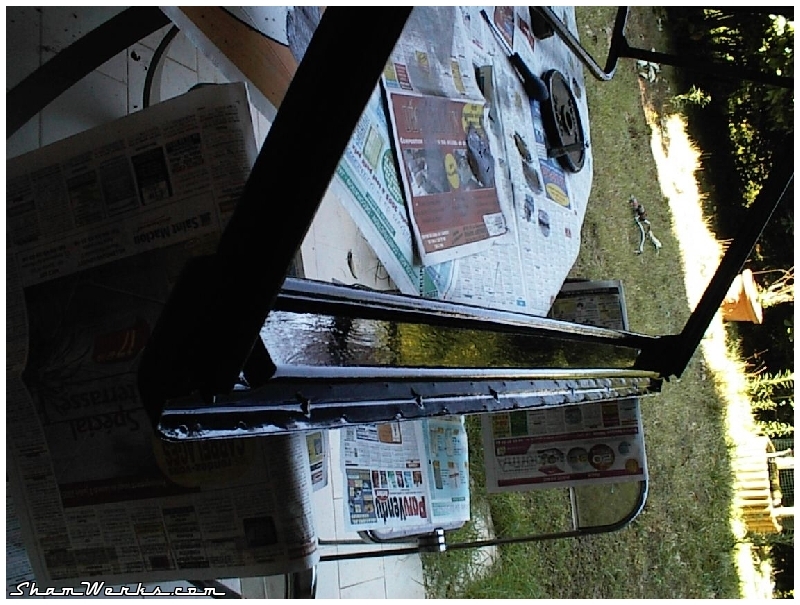
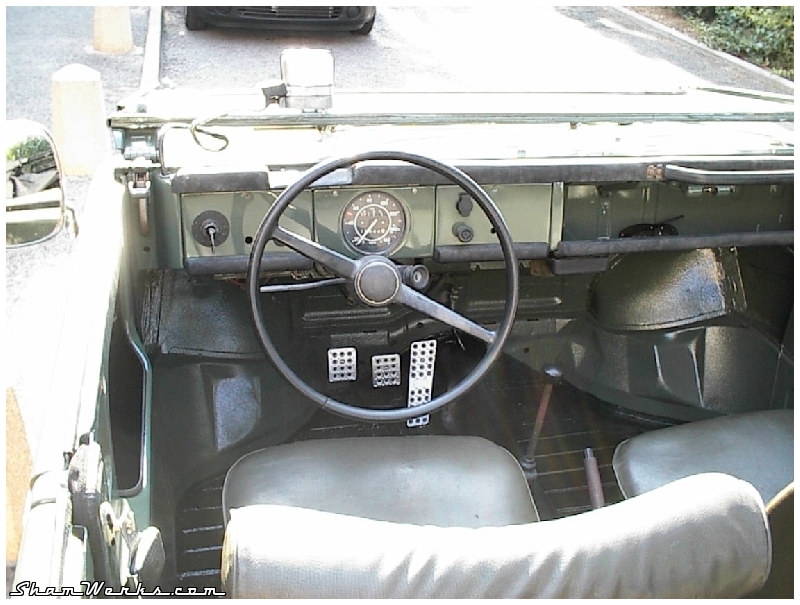
A top for Küby...
July 2005, Küby is pretty clean, but it still has no top to protect our heads from the rainy days... So I have to take care of its convertible top, and its top chassis as a starter - which is in a rather bad shape...
I nought the top on eBay US. A brand new high quality top, for a little bit more than 260 euros, it's merely impossible to find in old Europe...
The front rail, rusted to the bones, is replaced by a NOS one, brand new in its VW package, found for 150 euros on eBay Germany. You can always find the parts you need... It's just a matter of patience!

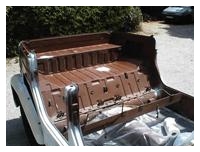
 Now that I'm protected from rain, I still need a clean interior to match... Between Doumé (thanks dude!) who gave me an almost complete interior, and seat covers found on eBay Germany (encore), I finally manage to replace the old, crappy, black interior with a Khaki Green version in pretty good shape...
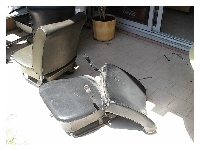
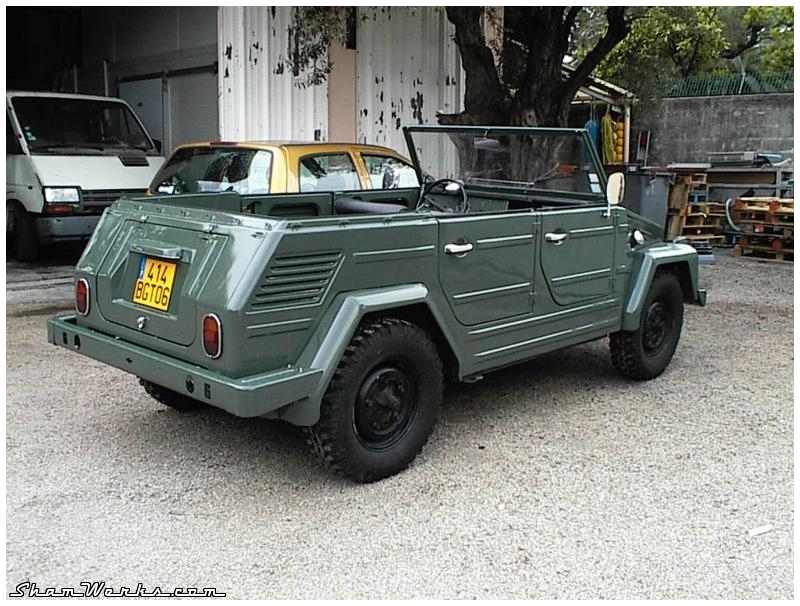
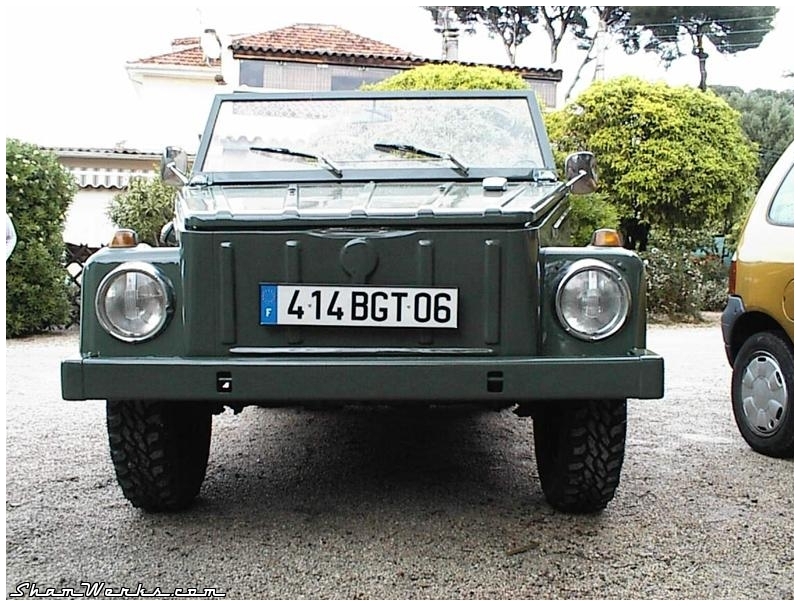
 Here we are!
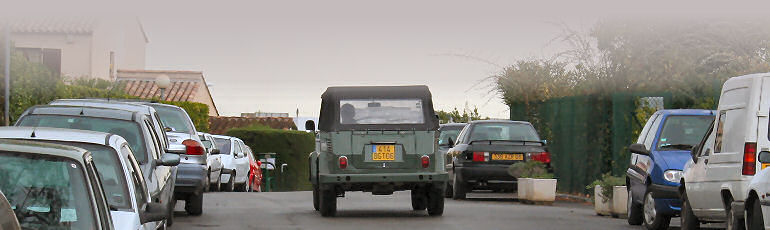
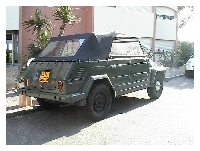
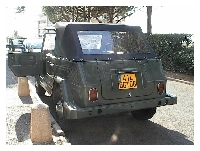
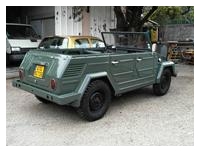
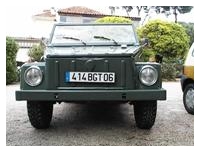
Küby is, at least, ready for looooooooong cruisings... Below is a picture taken at Menton's annual meeting in August 2005. It's been a long way since the first visit to Küby...
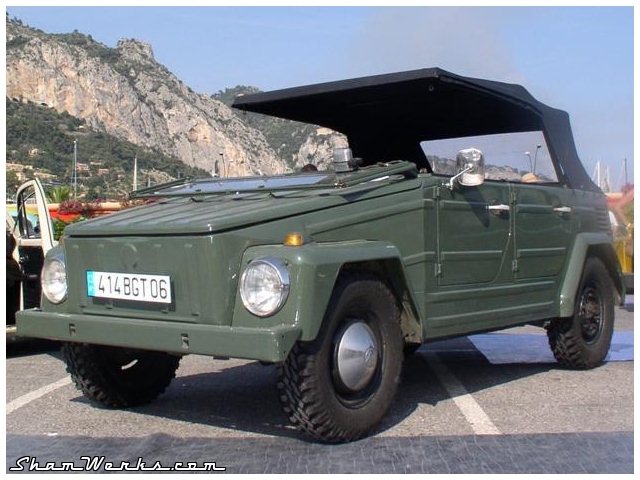
As planned, this is not a show car... But this is the ultimate cruising machine when you live on the French Riviera like I do!
I originally planned to keep it 1 or 2 seasons... But finally, I got attached to it, it's so funny to use... Nobody would touch it, you can park it anywhere, drive it with the windshield down... I even use it to carry large object, as the two rear backrests fold down providing a large platform... So useful to me!
You guessed it folks... It would be pretty difficult for me to sell my Küby!
I nought the top on eBay US. A brand new high quality top, for a little bit more than 260 euros, it's merely impossible to find in old Europe...
The front rail, rusted to the bones, is replaced by a NOS one, brand new in its VW package, found for 150 euros on eBay Germany. You can always find the parts you need... It's just a matter of patience!


Küby is, at least, ready for looooooooong cruisings... Below is a picture taken at Menton's annual meeting in August 2005. It's been a long way since the first visit to Küby...
As planned, this is not a show car... But this is the ultimate cruising machine when you live on the French Riviera like I do!
I originally planned to keep it 1 or 2 seasons... But finally, I got attached to it, it's so funny to use... Nobody would touch it, you can park it anywhere, drive it with the windshield down... I even use it to carry large object, as the two rear backrests fold down providing a large platform... So useful to me!
You guessed it folks... It would be pretty difficult for me to sell my Küby!
Posted on 19/12/2006 at 18:59
356 Production line...
There's pictures we'd like to see more often... The Porsche production line, during the 356 era.
Wet sanding of the bodywork, all done y hand... Aaahh, t'was the good ol' time!
You probably noticed, the 3 men trick to fit in the gearbox... Looks like they know their stuff, uh?
Definitely, there's some gems on YouTube...
Wet sanding of the bodywork, all done y hand... Aaahh, t'was the good ol' time!
Definitely, there's some gems on YouTube...

Posted on 14/12/2006 at 22:48
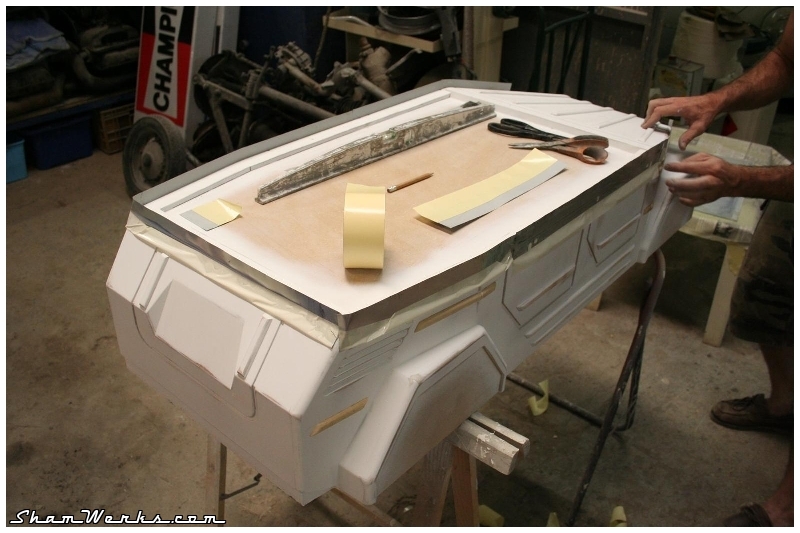
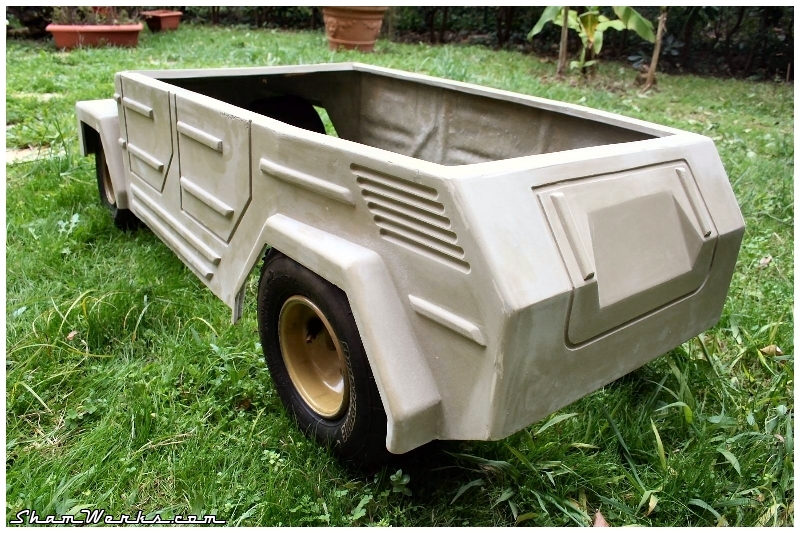
The mold / The shell
As I don't have the required skills to create the mould (and I was rather scared of screwin'up my master!), I call for help my friend Seb, of DinkyGarage, who's job is fiberglass stuff...
So, this is a 5 pieces mold that Seb built out of my master (which won't survive the operation : R.I.P!).
The numerous grooves (doors, hoods...) obliged us to multiply the number of mold parts... Unless the removal from the mould would have been impossible...
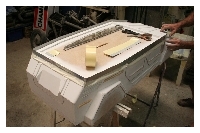

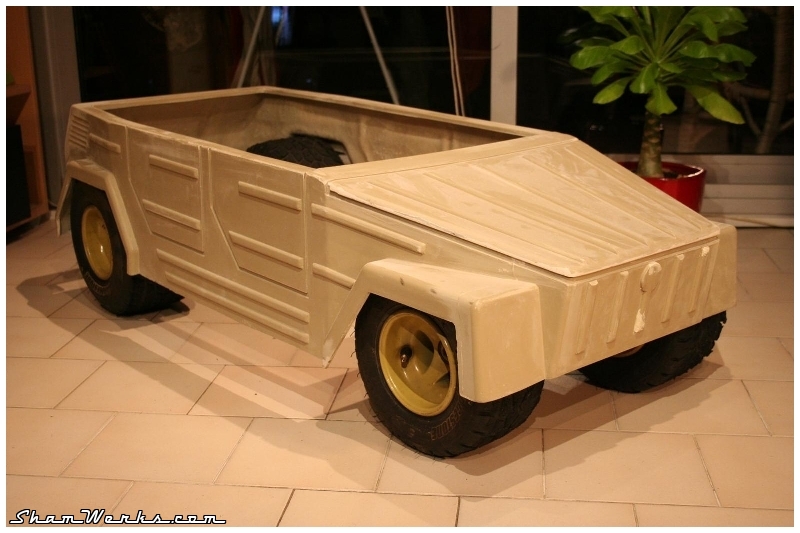
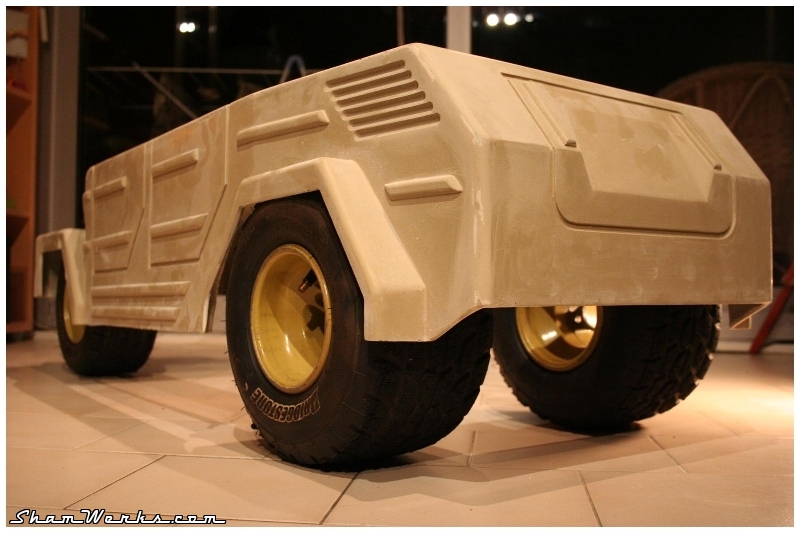
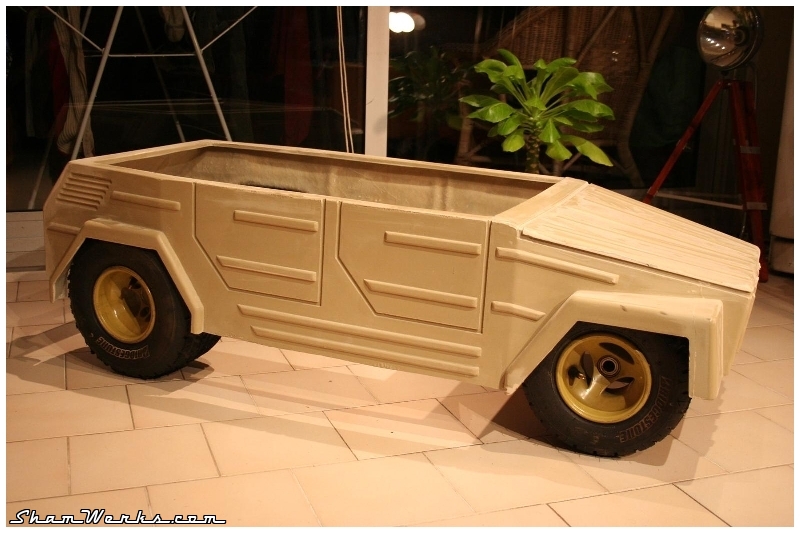
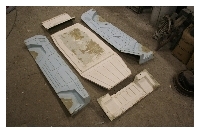 Once the mold created, we still have to take a first shell out of it... December 2006, the very first shell comes out of the mold!
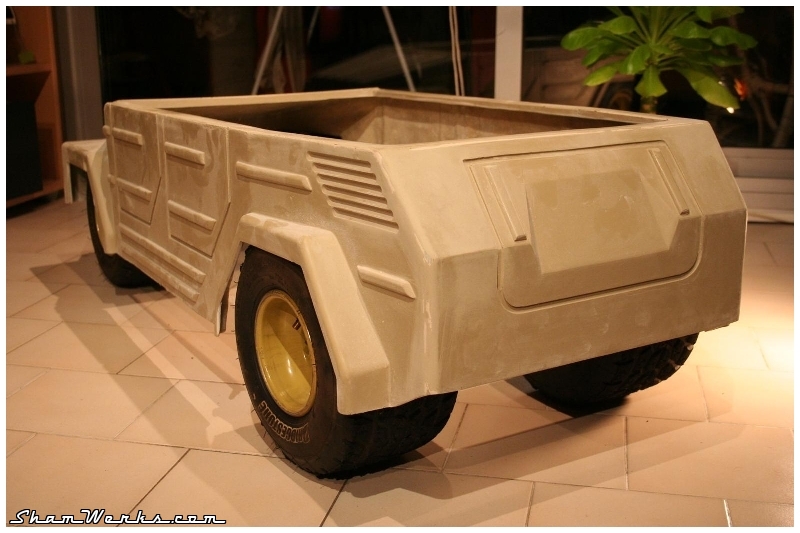
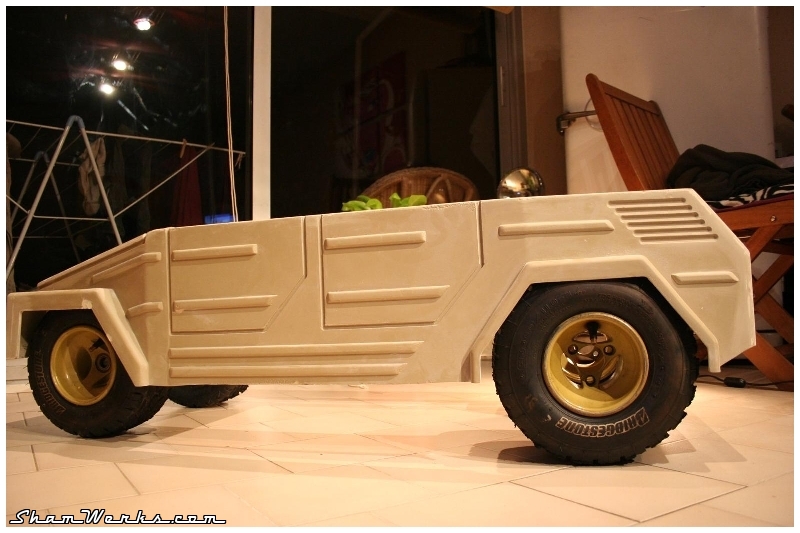
Here are some teaser pictures of the thing, the bare shell just put down on 4 karting rain-tires equipped wheels, which I will use to motorize it :
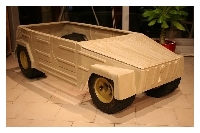
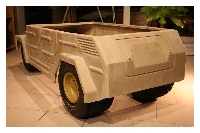
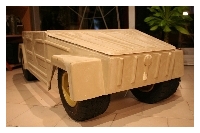

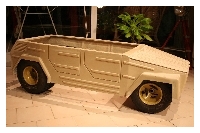
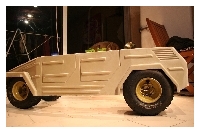
 Highly cool, isn't it?
I'm more than happy of the result... There's still a lot of work to come, but Seb obviously made a great job... Many thanks dude!
OK, the shell is out, let's make a chassis to put under it!
So, this is a 5 pieces mold that Seb built out of my master (which won't survive the operation : R.I.P!).
The numerous grooves (doors, hoods...) obliged us to multiply the number of mold parts... Unless the removal from the mould would have been impossible...
Here are some teaser pictures of the thing, the bare shell just put down on 4 karting rain-tires equipped wheels, which I will use to motorize it :
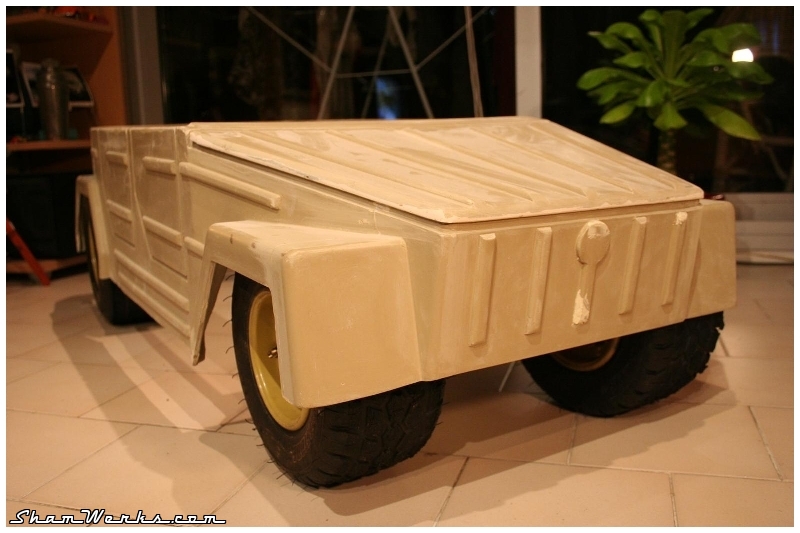
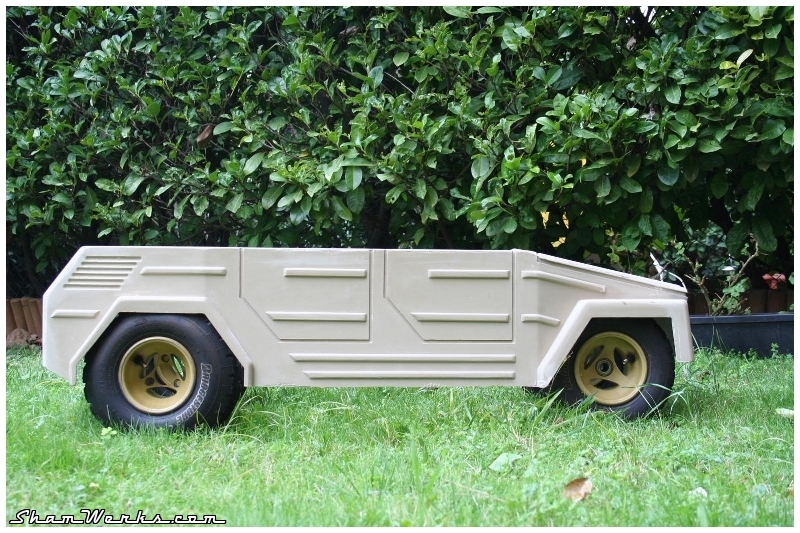

I'm more than happy of the result... There's still a lot of work to come, but Seb obviously made a great job... Many thanks dude!
OK, the shell is out, let's make a chassis to put under it!
Posted on 14/12/2006 at 22:40
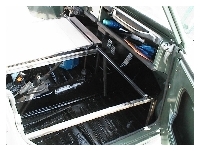
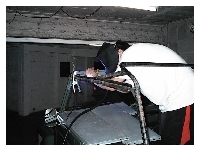
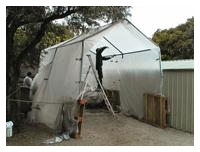
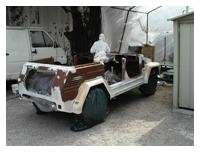
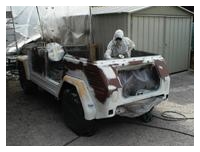
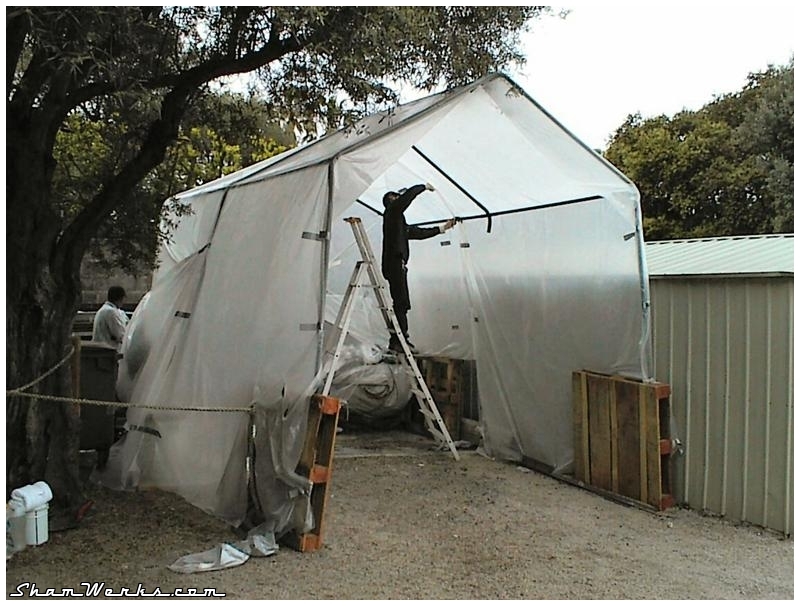
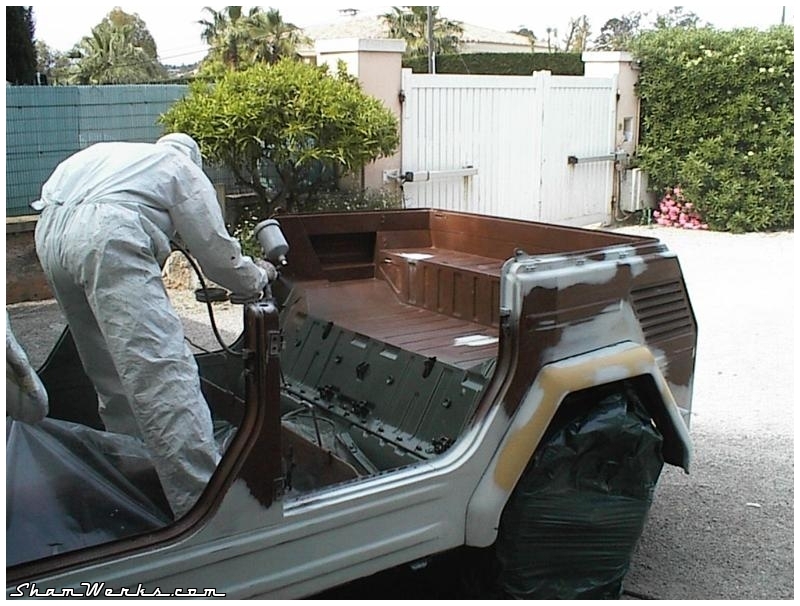
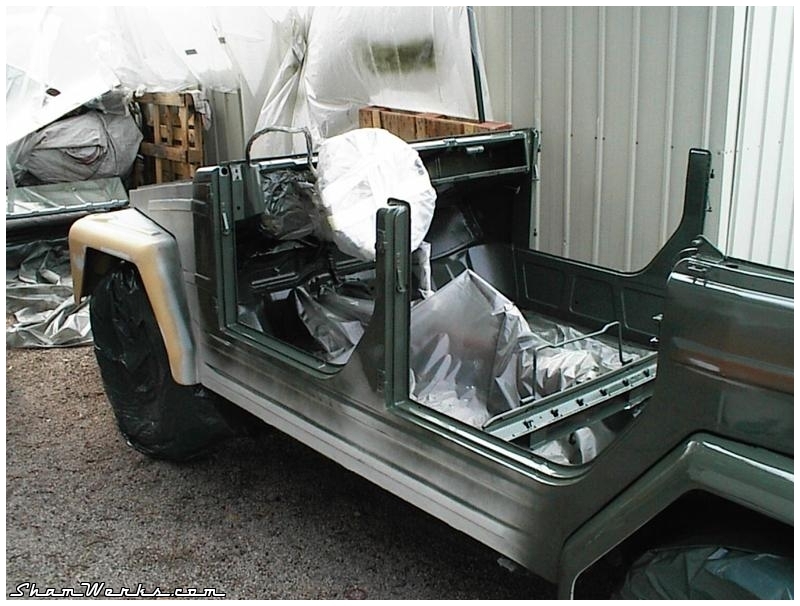
DIY paint job
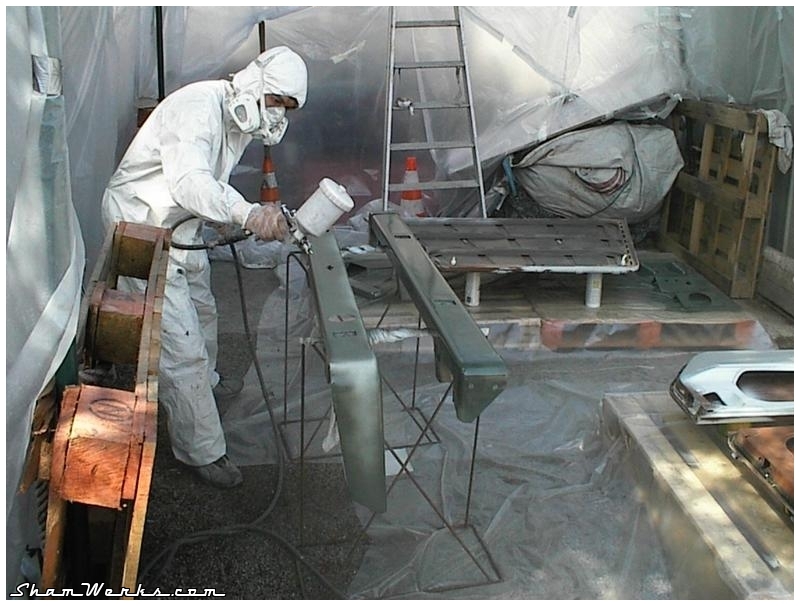
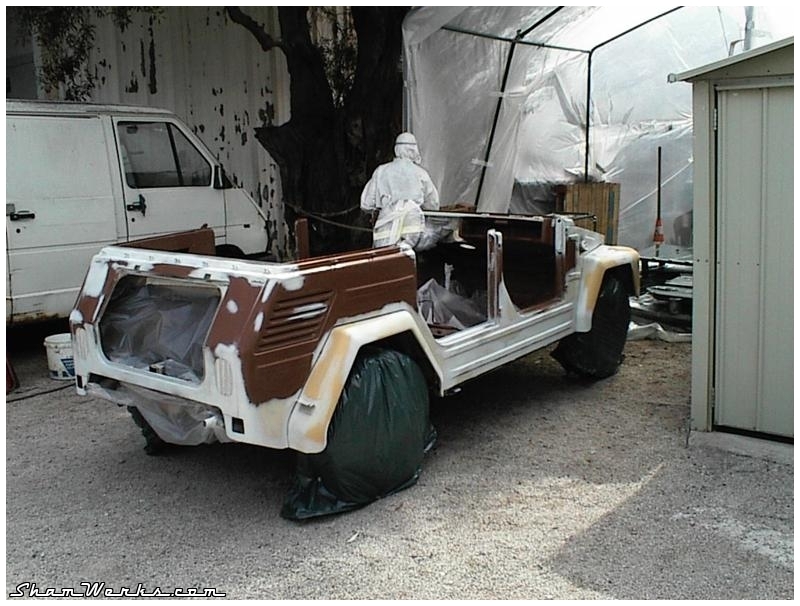
Still trying to get a new toy for a reasonable price, it was out of the question to ask a professional body shop for Küby's paint job. So it's only homemade stuff, full D.I.Y., thanks to a few friends help...
However, I had a time dead-line : everything had to be done within a weekend, not to disturb the activities of my friend who let me do it at his work place... So, everything will be done on 15 and 16th may 2005!
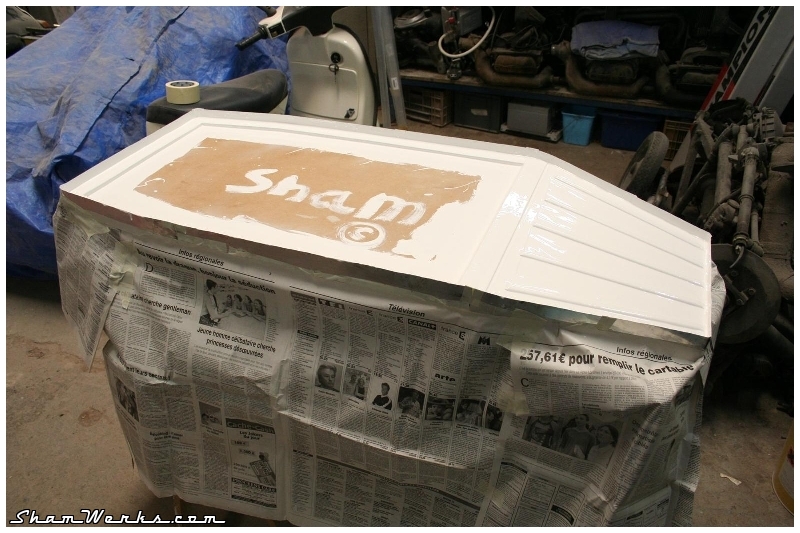
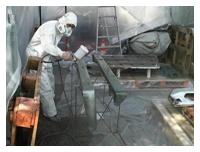
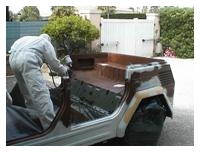
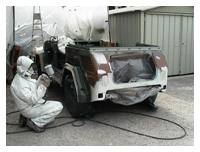
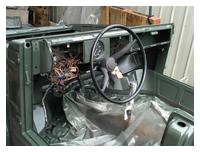
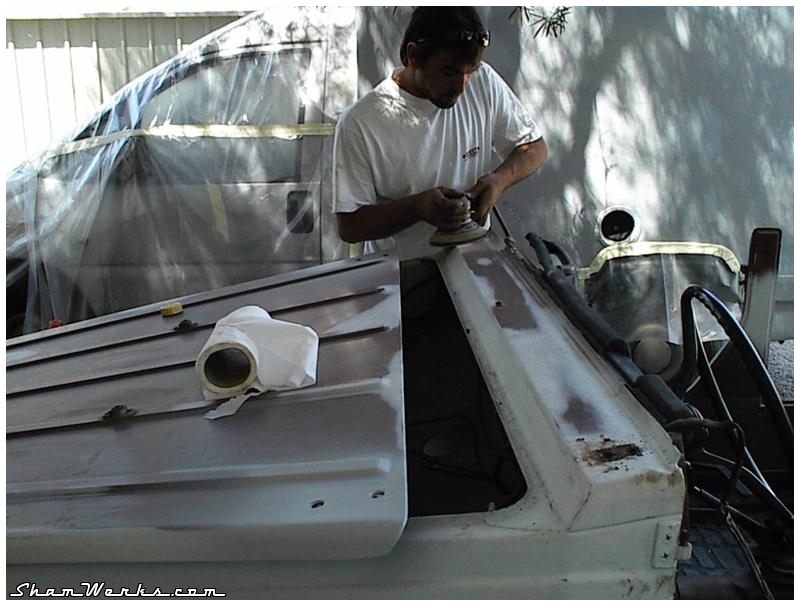
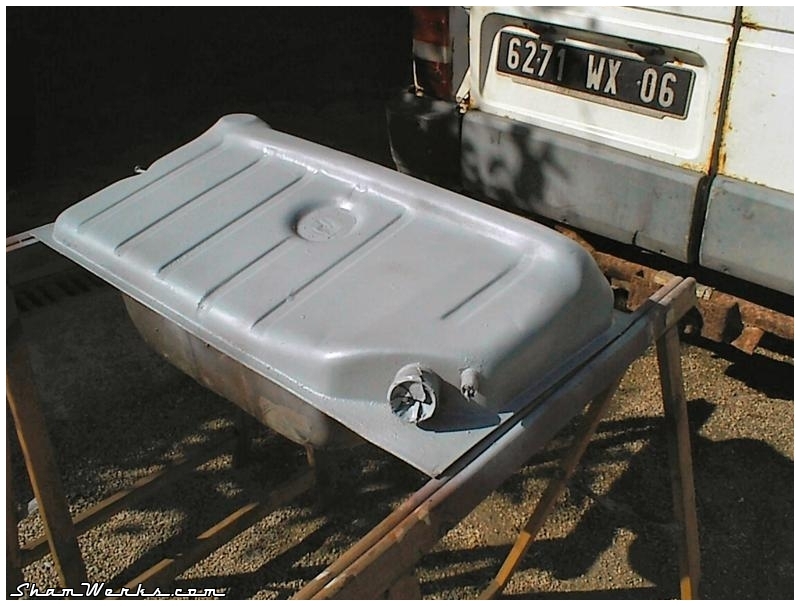
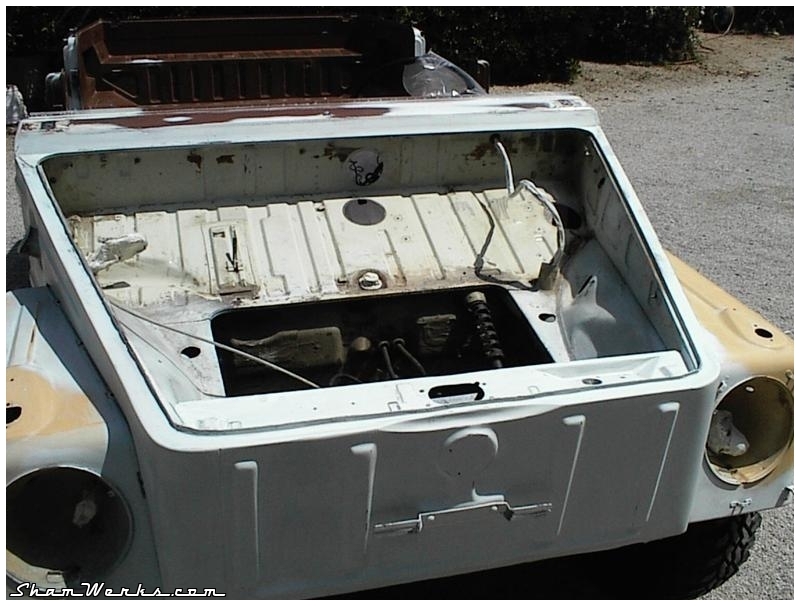
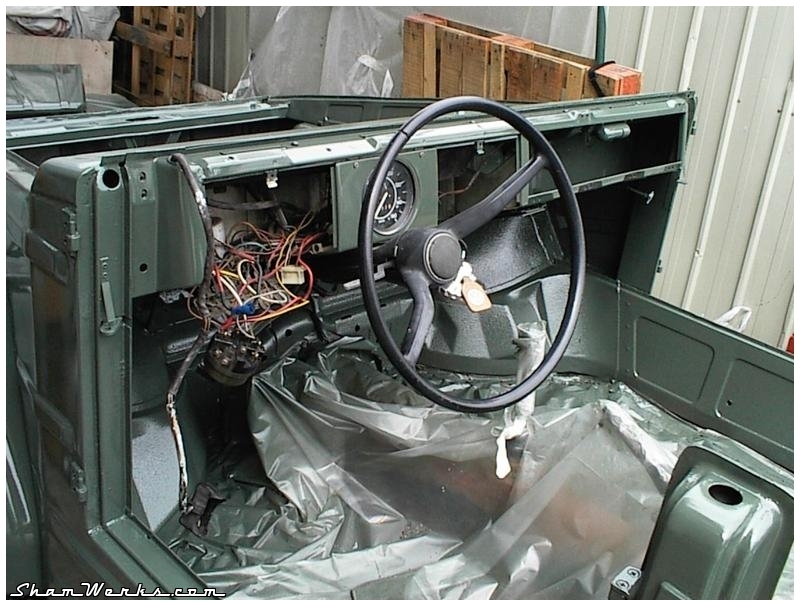
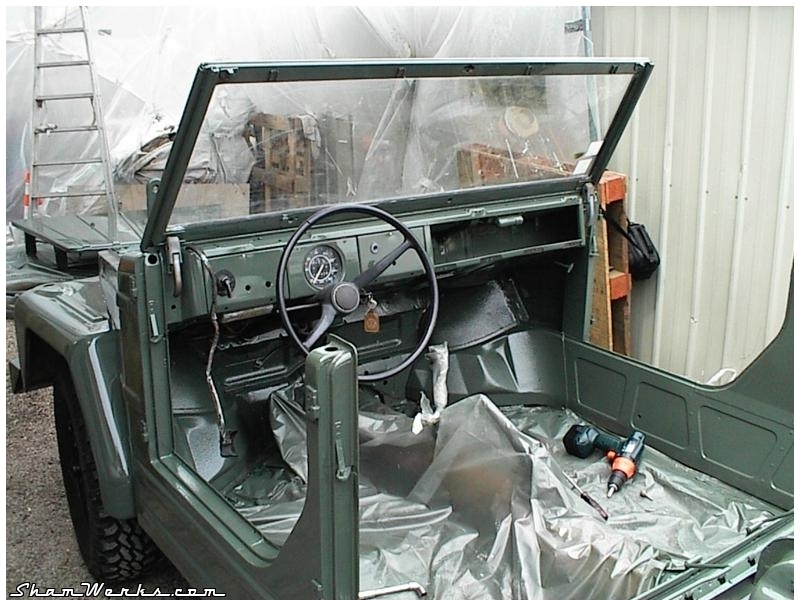
We built kind of a paint cabinet, just to get rid of dust... Well, this is the easy par, let's first prepare the body!
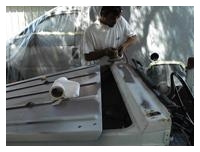
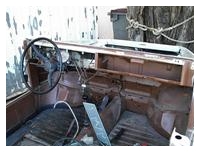
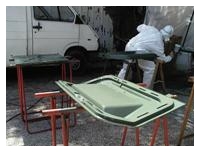
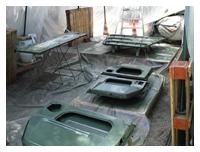


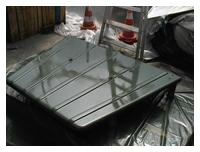
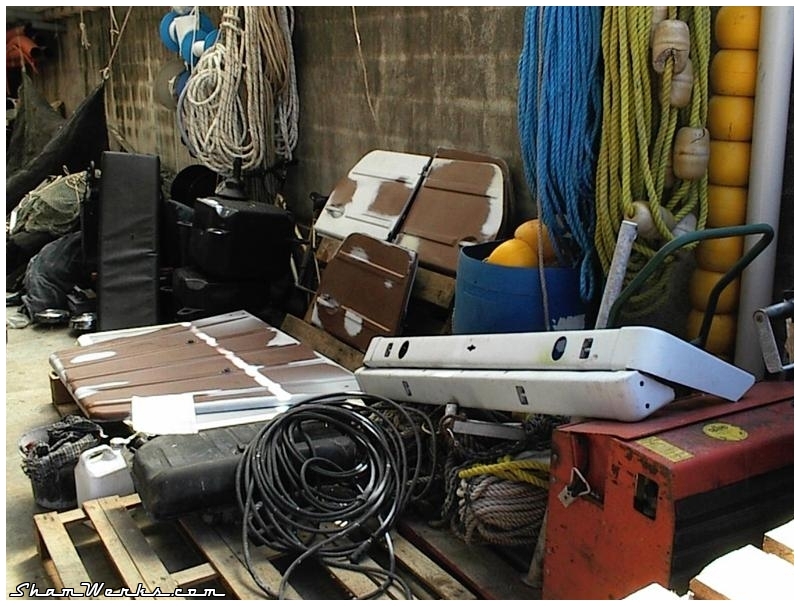
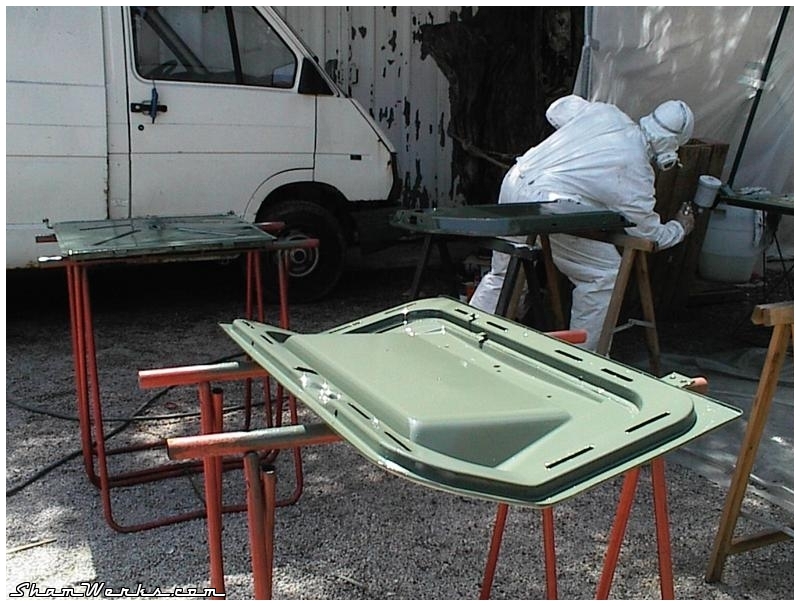
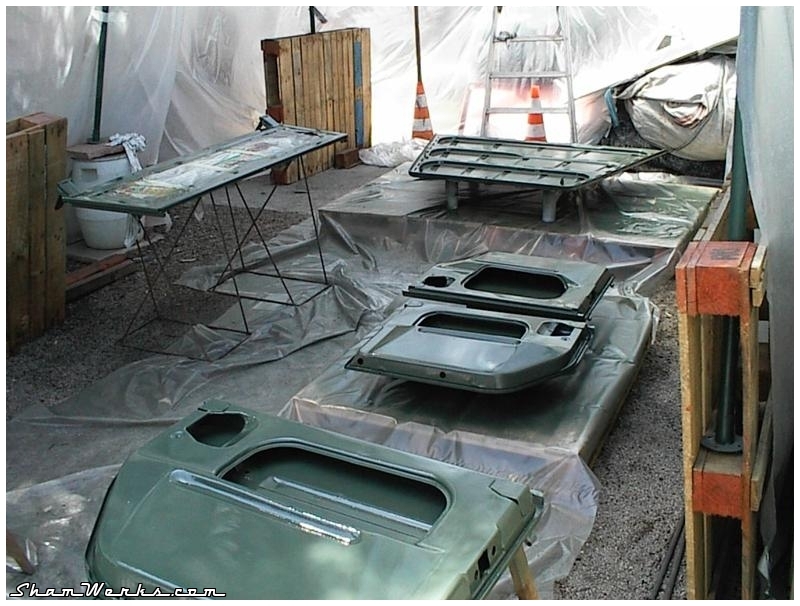
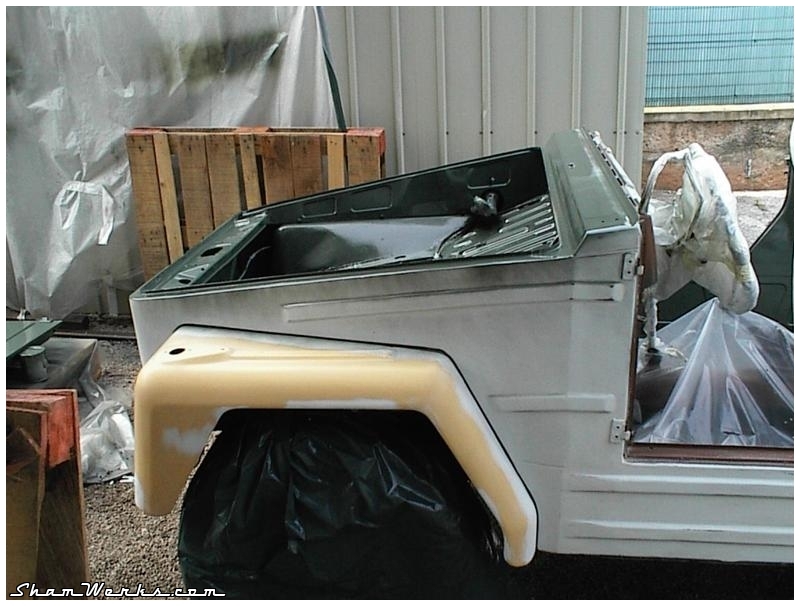
 Here we are, the openings have been painted... The "only" thing left is the body to get its coats of green sauce!
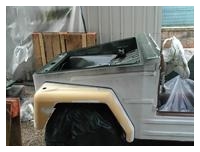
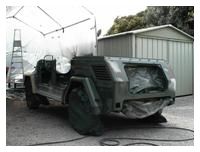
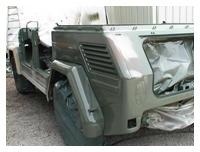
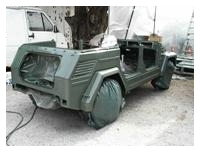
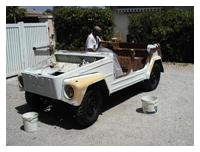
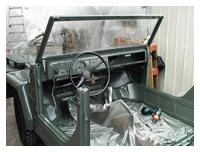
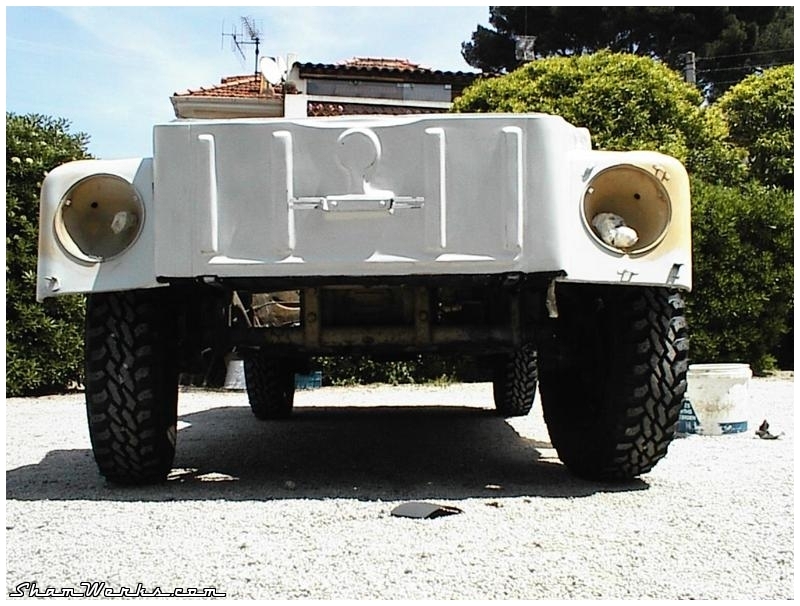
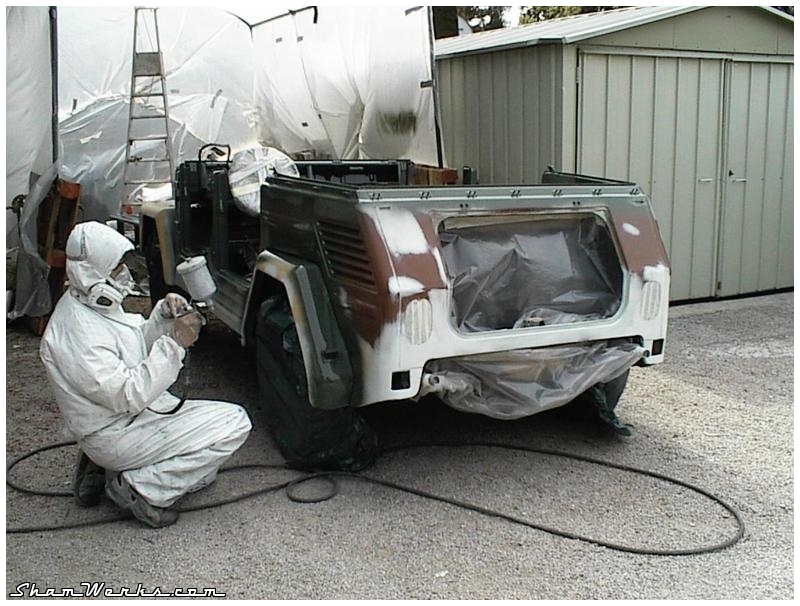
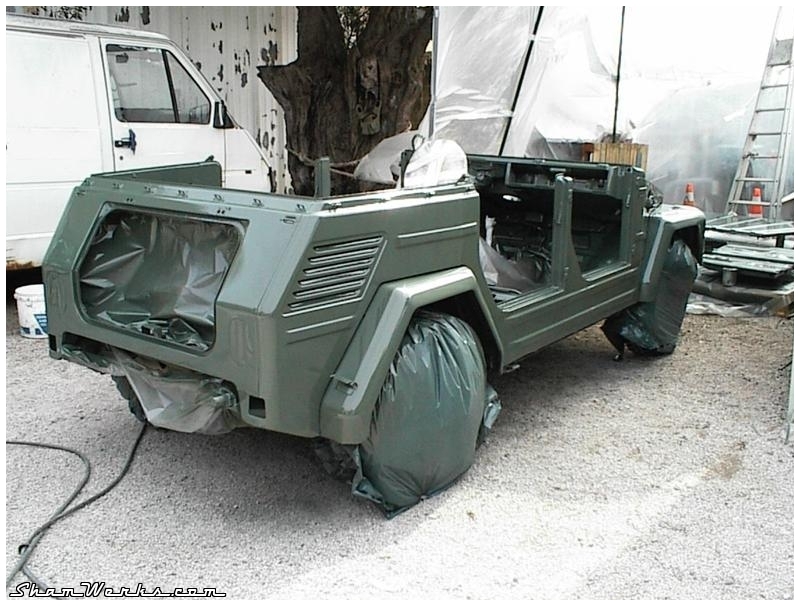
 OK, its finally painted! Last, but not least, we still have to put back everything together! And let's do it as fastly as possible, looks like a storm is coming...
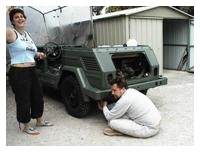
 I'd like to give a gigantic "thanks" to Fred, Aurel', Xav'Yeah and Alex for the great help!
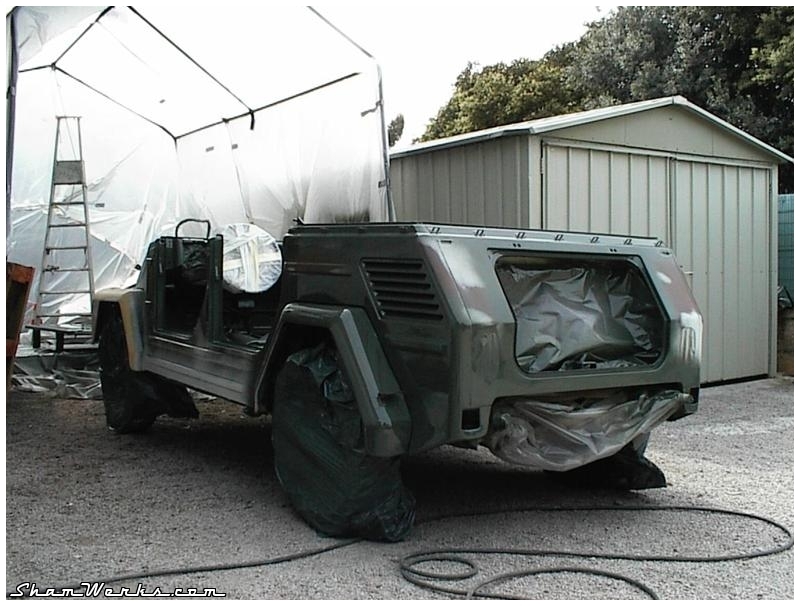
Obviously, in such conditions, the paint doesn't look like a show car one... Far from that. But trust me, it's not too bad either! And within a 600 euros budget, it was difficult to do much better... Even though, thinking about it...
I used industrial type paint (usually used for trucks). It's a little bit less shiny as normal car paint, and there's way less colors available. Actually, I must admit the final color of Küby is pretty far from what I originally expected... But I like it anyway.
However, this industrial paint is much cheaper, and way more resistant than normal car paint. And as I still want to keep this toy low budget... That's perfect to me!
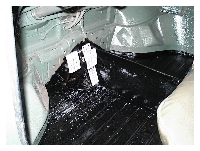
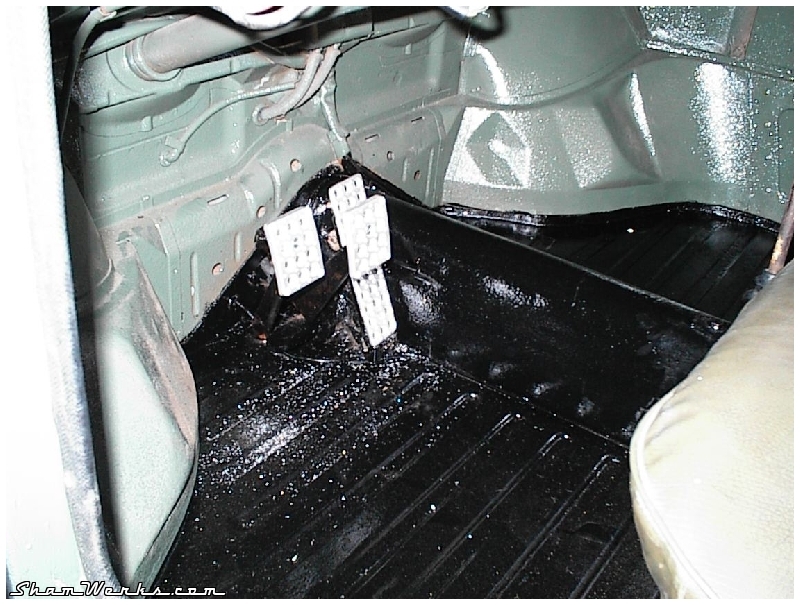
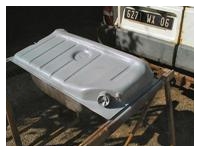
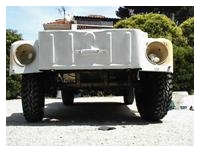
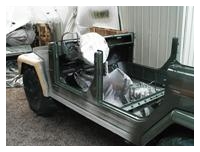
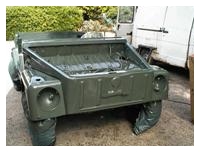
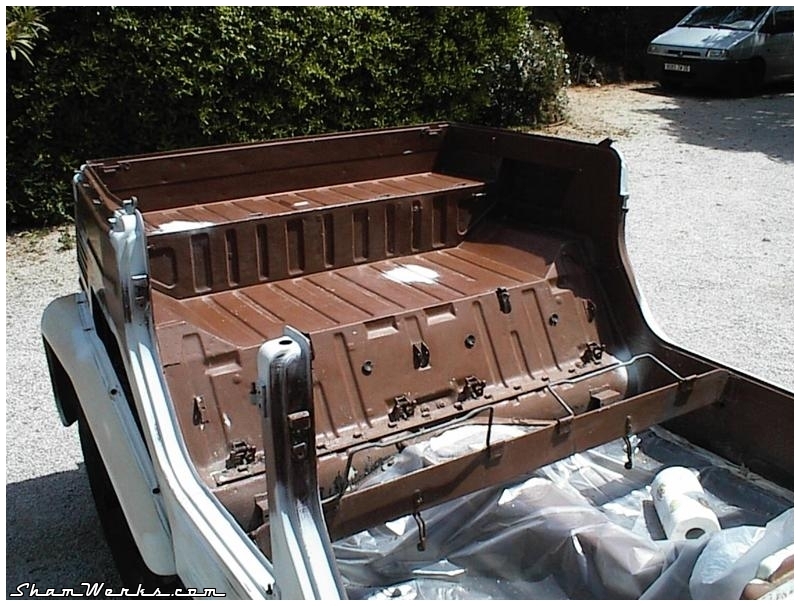
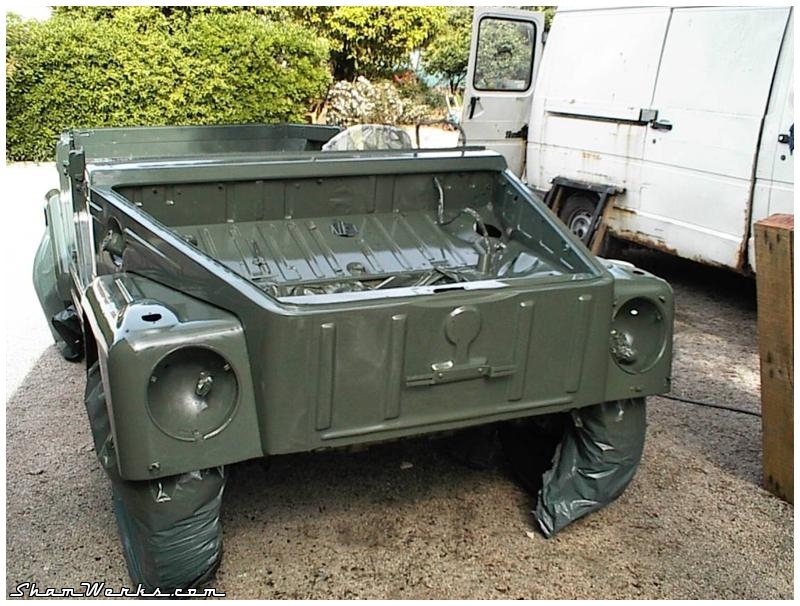
Floor pans, after an vigorous cleaning with metallic brushes, is brushed with two coats of black Hammerite (Hammerite is an anti-rust paint, containing glass micro-spheres, and looks like a gel : it isolates the metal from the air's oxygen, therefore preventing rust...)... The result is even better than I expected!
OK, finally Küby looks presentable... It still needs a top, clean seats, and let's go cruisin'!
However, I had a time dead-line : everything had to be done within a weekend, not to disturb the activities of my friend who let me do it at his work place... So, everything will be done on 15 and 16th may 2005!
We built kind of a paint cabinet, just to get rid of dust... Well, this is the easy par, let's first prepare the body!


Obviously, in such conditions, the paint doesn't look like a show car one... Far from that. But trust me, it's not too bad either! And within a 600 euros budget, it was difficult to do much better... Even though, thinking about it...
I used industrial type paint (usually used for trucks). It's a little bit less shiny as normal car paint, and there's way less colors available. Actually, I must admit the final color of Küby is pretty far from what I originally expected... But I like it anyway.
However, this industrial paint is much cheaper, and way more resistant than normal car paint. And as I still want to keep this toy low budget... That's perfect to me!
Floor pans, after an vigorous cleaning with metallic brushes, is brushed with two coats of black Hammerite (Hammerite is an anti-rust paint, containing glass micro-spheres, and looks like a gel : it isolates the metal from the air's oxygen, therefore preventing rust...)... The result is even better than I expected!
OK, finally Küby looks presentable... It still needs a top, clean seats, and let's go cruisin'!