Posted on 29/11/2011 at 00:56
Workshop : DIY Sandblasting cabinet
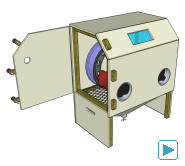
 A sandblasting cabinet... Now that's a tool I've been looking for for quite a long time!
 One can find different models for sale, but I find them pretty expensive, plus they never have the right dimensions (too large or too small)... So I decided to build my own, with ideal dimensions.
Plans
As usual, I started by drawing accurate plans with SketchUp (if you're a frequent visitor on ShamWerks, this shouldn't be a surprise!)...
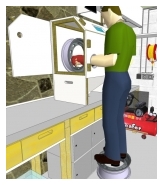
For the cabinet to work properly, the bottom funnel-shaped sand recycling tank needs to have enough angle for the media to slide down to the bottom. That made my design way taller, and since the cabinet is supposed to stand on my workbench (quite high itself at 95cm from the floor), it's too high for me to use it comfortably. Therefore, I want the funnel to work properly and the cabinet on my workbench, I'll need myself to stand on some sort of support (a rim for example) in order to have a correct working position.
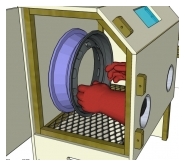
In terms of size, I've adapted the dimensions of my cabinet so that a 15" rim can fit in it. I have an idea for a flexible extension if I need to blast bigger parts, but it'll have to wait..
My SketchUp plan is available for download here.
Building
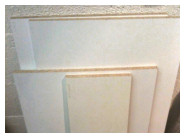
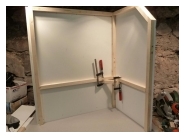
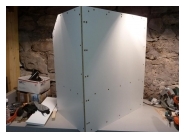
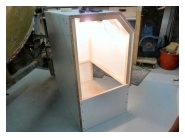
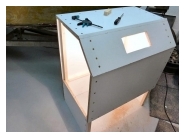
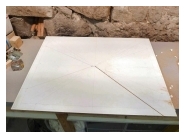
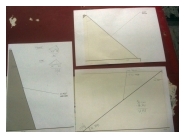
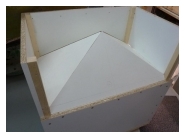
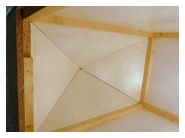
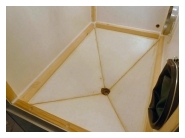
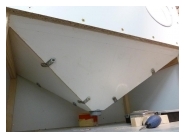
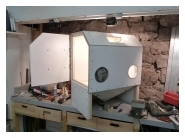
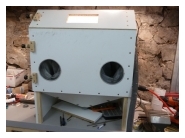
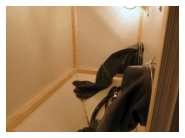
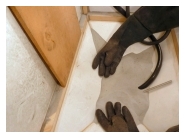
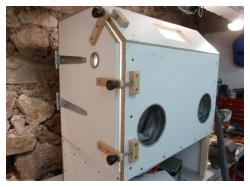
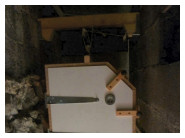
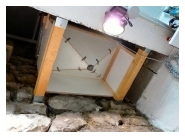
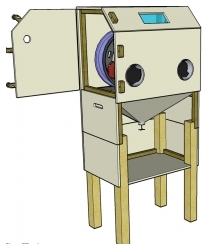
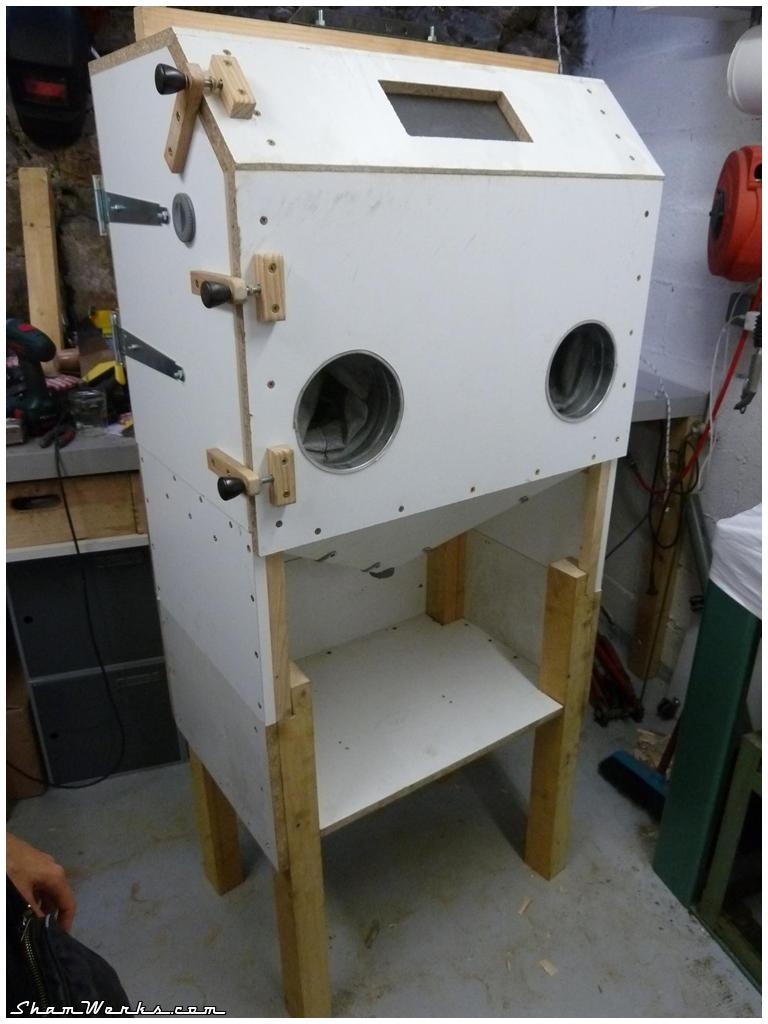
The cabinet is built out of white melamine 15mm thick chipboard. That's purely an economic choice, as I hate working with this material : but al the boards for €37, that's a bargain... Additionally, the white surface will add a welcomed brightness inside. All boards are glued and screwed on a 27x27mm pine wood frame.The only difficulty in this process is th bottom funnel shaped part, in which the media is recycled : in order for the assembly to be accurate, I need to make very precise angle cuts with my circular saw... In order to make it easier, I've printed the angle directly from Sketchup (removing the perspective effect to have a parallel projection) on A4 paper (see picture) : then I could directly put my circular saw on the paper and finely adjust the angle by visually aligning the blade with the print. I've honestly been impressed by the accuracy of the method, as my assembly wasn't totally perfect but very close to! My saw can cut up to a 45° angle ; unfortunately it wasn't enough for one of the angles, so I temporarily glued a strip of wood below the saw's base to reach the 55.7°. The method isn't really secure but it worked like a charm.
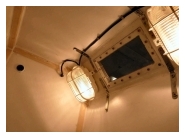
As for the lights, 2 spotlights (first price models; €4.95 here) with 60W bulbs.
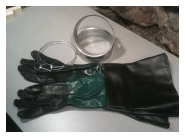
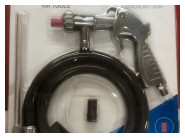
The blasting gun comes from eBay, a €18.90 model using standard ceramic nozzles. Gloves as well come from eBay ; I could have build'em from scratch using an air chamber and glued rubber gloves, but it was cheap enough to avoid this additional hassle (€19.95).
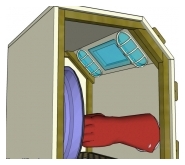
The acrylic glass piece is cut from a reclaimed piece I had in the garage ; it is mandatory to stick a sacrificial transparent protective sheet in the inside, unless it turns opaque pretty quickly due to the blasting media sanding the glass.
At the end of the funnel is a screw-in PVC plug, epoxy glued. It allows me to drain the media and change it.
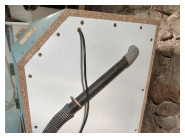
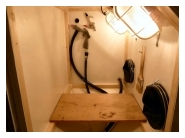
On the right side of the cabinet, a PVC 32mm bend allows the connection to the vacuum. A couple of hooks and a rubber band help securing the vacuum hose in place ; an additional rubber band is wrapped around the extremity of the hose, acting as a gasket to make it air tight. On the opposite (left) side of the cabinet, another screw-in plug acts as air intake. It creates a diagonal, bottom-up air flow keeping the airborne particles level low during operation.
Air tightness
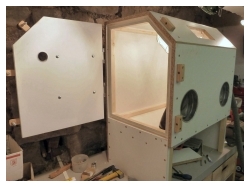
Ok, that's a nice box, but it needs to be perfectly air tight as well to work properly. for that matter, all assemblies/joints have been caulked (silicon caulk for bathrooms). Using a metal saw blade tip is perfect to smooth out the caulk with a nice round finish.The door articulates on 2 shutter hinges (€1.95 each). Airtightness is ensured by a double rubber foam gasket glued around the frame. Hinges are placed taking into account that additional gasket thickness.
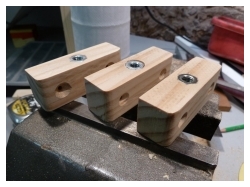
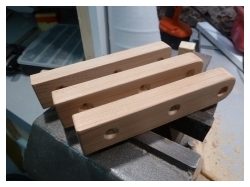
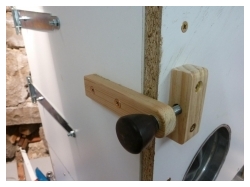
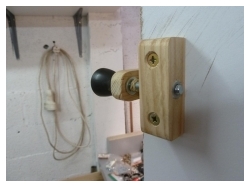
Door is closed using 3 screws (with Bakelite knobs I "reclaimed" 20 years ago from the windows of my high-school. I knew that would come up handy someday). It's probably overkill though, 2 could have been enough. Screwing snug tight compresses the rubber foam gasket, that's perfect. I originally wanted to put lever-type metal thingies, but they were too fragile, and do not offer any adjustment levels, so I decided to make my own system...
Storing
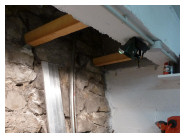
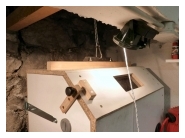
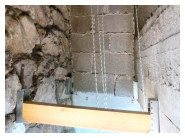
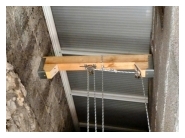
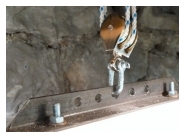
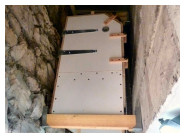
So, now I have a nice cabinet but it's quite bulky and my garage is small...Fortunately, I had planned that from the beginning, and reckoned the dimensions of the cabinet accordingly : it's made to fit right above my workbench! With the help of a couple of pulleys, as the beast weighs a good 20kg.
First tests
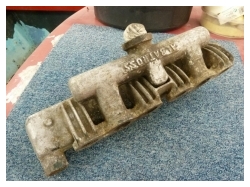
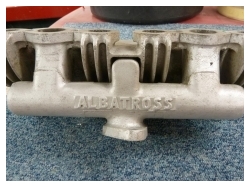
Since I could get my hand on any reclaimed metallic grill inside the cabinet, I just used a piece of plywood instead. Works fine too!I've ddone my first tests using glass beads (200-300 microns, bought online on Matthys) at 4.5 bars (65 psi), on an aluminium part (the Albatross' intake/exhaust manifold). It was just a 10 mn quick test, without degreasing the part first, which was a mistake since a rubbery/greasy compound on the part prevented me from getting a perfect result. But for a first test, I'm delighted with the result, the aluminium ends up with a smooth satin mat finish, looks just as new!
Conclusions
The cabinet is perfectly airtight, only a few glass beads manage to make it into the glove (as I had to "fold" a part of them to adjust them on the metal rings holding them). Good news! I just need to remember blowing/brushing away the grit at the bottom of the door before opening it after a blasting session, since it accumulates there ; I'll try adding an inclined/angled piece of wood to fix this later.Actually, it's almost too airtight : the depression created by the vacuum cleaner make the gloves inflate inside the cabinet, even with the air intake on the door opened. If I close it, the glove become totally inflated and rigid! I'll probably have to add another air intake to limit that effect.
However, just as expected, my 3HP/100L compressor turns out to be a bit small for blasting : it runs a lot, I'll need to take pauses to let it breathe... Or find a bigger one.
The air blow gun inside the cabinet : bad idea, the quick coupler gets jammed with the grit. So either I install a 3 way coupler to have the blow gun permanently fixed to its own hose, or I just pull the hose of the blast gun out of the grit to use it just as an air blower. Well, I'll go with that easier solution!
Here are a few links that inspired me while building my cabinet, for your consideration if you want to do so :
- Ma500.fr (et and his first, smaller version) (in French)
- Restauration Anciennes (in French)
- The Simca 1100 forum (in French)
- Ford Trucks
- Custom Fighters
Coming next
As next I'll try getting heavy rust off of metallic parts using aluminium oxyde grit instead of glass beads. I'll post the results here in that very same article. I consider as well building a cyclone dust separator (like in the "Dyson" vacuums cleaners) just like this one (in French), this one, or that one here.To be continued...
Edit 30-08-2012 : a stand for the cabinet :
In addition, I will keep the cabinet away from the lathe, which wouldn't have liked the abrasive dust that always hangs around the cabinet... 
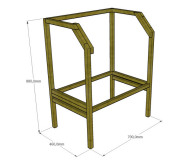
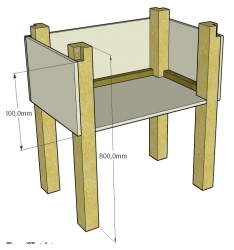
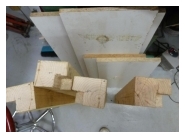
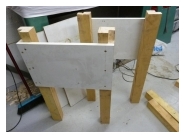
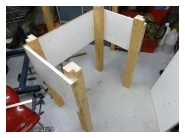
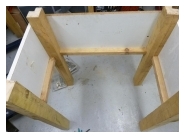
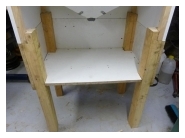
So after some reflexion, and some more Sketchup, I decided to build a stand for the cabinet. Only out of scrap wood that I have laying around the garage. It'll have to be heavy duty since the cabinet is pretty heavy.
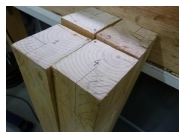
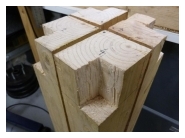
The legs will be made out of 62x75mm lumber (the left overs of the workbench project), the rest will the out of 19mm thick melamine chipboard (some od shelves I scrapped). The legs will be chiseled out at the top for the cabinet to slide into them. (check the plan).
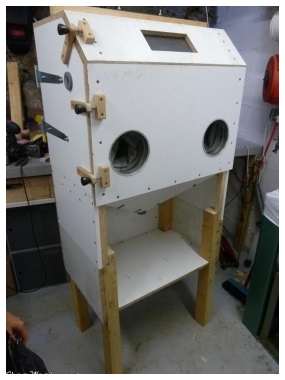
And... Tadaaaaaaa!
I got it right first time... Pretty proud of meself gotta admit.
So now, the cabinet is at the perfect height, no need to stand precariously on something!
The shelf right below allows me to put a bucket to pour the sand/beads into.
Next step, a cyclonic dust separator??
Edit 10-09-2012 : Corundum blasting test :
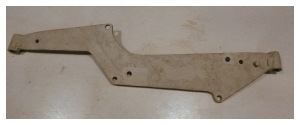
The complete process took me around 10 minutes (at 5 bars of pressure), I you can see the result by yourself, it works perfectly! I'made a short video for you to see how fast it goes.
The only drawback is my compressor : 100L/3HP is a bit low (I knew that before hand), so it tends to run non-stop, with a risk of over-heating. If I ever have to do long blasting sessions, I'll have to make regular pauses for it to cool down a bit.
I also discovered that the corundum media slides way less easily than the beads towardss the bottom of the cabinet ; on the video, you can see I have to push back the sand to the bottom from it to be catched by the intake tube. Well, it's not actually too much of a hassle, and it give a few seconds off to my compressor .
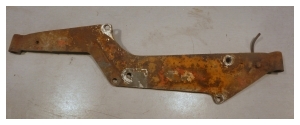
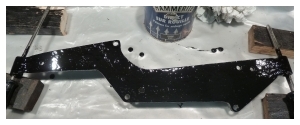
After sandblasting, the metal must be protected asap, unless rust will settle back in a matter of days (even hours depending on the conditions). Here, I use a couple of thick layers of black Hammerite (well, mostly because that's the only thing I had at the garage at that time!).
I'll still have to install a cyclonic separator on the exhaust, and a form of siphon on the intake (as some dust manages to get out that way), and it will be perfect!
Posted on 18/10/2011 at 14:13
Workshop : Workbench

Last major step in the process of renovating my garage : create a proper workbench.
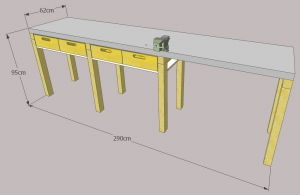
The specifications were simple : sturdy enough so I can hammer on it, or put a couple of complete engines on it; higher than standard benches since I'm tall and the usual benches just kill my back; precisely adjusted to the space available in the garage (I ain't got much space, so I can't afford to lose any); and obviously... As cheap as possible.
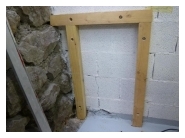
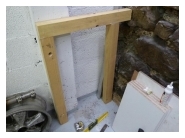
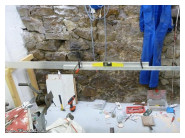
So, this has to be DIY, tailor-made... Moreover, the floor isn't perfectly flat, so every single foot rest of my workbench has a different length... I've started with the two left and right end stands (made of of 62x75mm lumber), in order to have a proper level reference ; both are carefully aligned using this tool (basically a long piece of plastic tubing), works perfectly, and very accurate even with the long distance
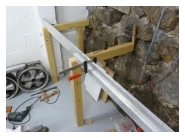
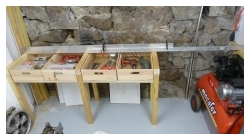
Once both of these stands are fixed into the walls, I could, using a long aluminium rule (actually, it was two 2 meter rules clamped together) in order to measure the exact length of each stand. Well, have a look at the pictures, you'll understand what I mean.
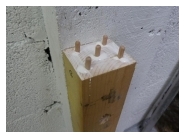
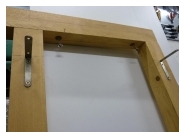
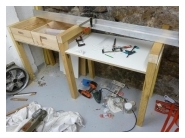
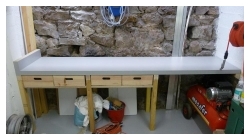
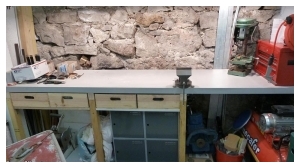
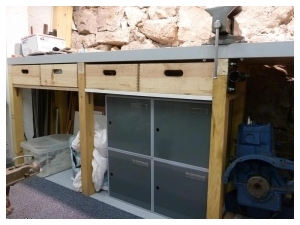
Stands are assembled using dowels and wood glue. I glue everything up clamping the whole assembly against a spare chipboard : pressing the assembly is done using a ratchet strap, while clamps make sure everything remains square and in the same plan. The drawers are just wood boxes I found at Castorama (our french version of Home Depot, see these boxes here). Once you've removed the small wooden strip on their bottom (used to line'em up when you stack'em up), they slide perfectly on the bottom board (melamine chipboard 19mm).
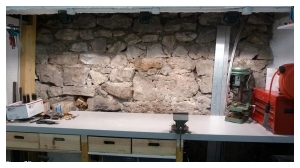
On top of it all, a 58mm thick (maximum I could find) melamine chipboard kitchen countertop, and here you go!
I'd prefer a proper counter top made of an assembly of lerge lumber pieces, planed all together... But I don't have the room, nor the time, to go into such a project. That'll wait till I have a real workshop!
The 4 bottom metal cases I found in the trash bin (seriously, there were 50 of them, brand new!), and luckily they just fit below the drawers. Below the vice, you can see the VW engine support, fixed on the side of the wooden stand. Phew, good thing it's done, I started to have enough with that renovation!
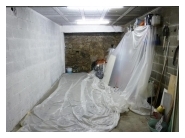
I know, my garage looks more like a lab now, it's quite far from what it looked like in the beginning (Click here the "workbench" before :
 ), but I like to work in a clean, well ordered environment. Yeah, probably some OCD as well, hmm.
 And now finally I'll be able to work on some real projects...
Posted on 26/07/2011 at 00:05
Workshop : Garage project, the renovation

Act 1 : walls...
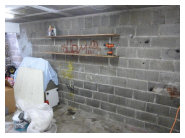
OK, first thing, if you've never tried before, painting concrete blocks is Hell on Earth. Specially after 50 years of dust encrusted in...I've painted the walls using a paint which actually is a primer... But it's way white enough for a garage. Plus, it was on a special offer.
So, white acrylic paint Jullien "Multifond 2" it will be. I sprayed the first coat using an HVLP gun, diluting by 50% (that's border-line for the cohesion of the paint, be it works). The spray-gun is quite handy for the first coat, it gets the paint in every hole/asperity of the blocks, it blows away the dust (still remains lots of it even I thoroughly brushed the wall before - wear a dust mask!) and removes the small loose grit from the surface (these gravels would f*ck up your paint roller in 2 sec. if your try it directly...).
The second coat is applied with a paint roller end blocks the concrete from sucking in more paint. Finally, a third coat to make it shiny white, with the roller loaded to the max with paint (almost like a plaster coating!).
Eventually, 2 and a half 10L paint container will be necessary to cover the surface of 45m² (484 sq ft : walls + ceiling), while each paint pot was supposed to cover 96m² (1033 sq ft)! Didn't I tell you concrete blocks suck paint? (...and suck at painting!)
It's long, very long to paint that bloody thing if you want a bright, pristine white result...
Act 2 : floor...
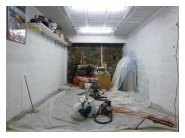
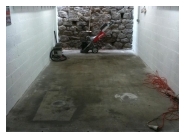
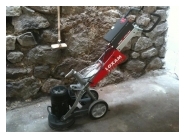
My floor was covered with greasy/oily dirt (see previous article), and I decided to clean it using a concrete grinder. The idea behind this is to remove the top 1mm from the concrete surface to get rid of any oil stuck in... I've rented the machine at "Loxam" (picture below).To be perfectly honest, it was probably not the best solution. You can not imagine the amount of dust that beast will generate : after less than a minute of use, I couldn't see past my elbows! I couldn't even see my hands! Plus, that very fine dust goes everywhere, including the whole building basement and my neighbours garages... Hence heavy complains from them, it was Armageddon!
And, I discovered that the floor of my garage wasn't perfectly flat, and the grinder can not get into these shallow areas... At the end of the day, I managed to clean 90% of the whole surface. Fair enough, but I'm still unsure it was worth the hassle.
After that, treatment was :
- Acid cleaning ("Shampooing sol ciment/béton V33"), using a floor-cloth.
- Rinsing with floor-cloth too (twice).
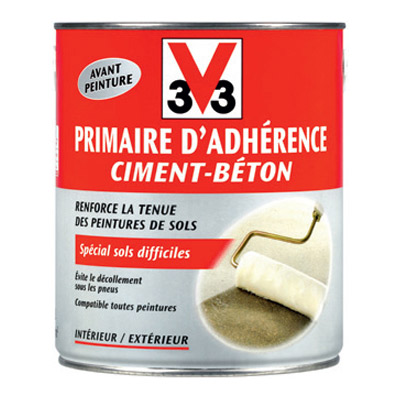
- One coat of special primer : "primaire d'adhérence spécial ciment/béton V33".
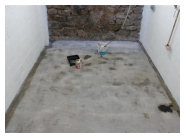
- Finally, two coats of V33 floor paint : "peinture sol V33 trafic extrême gris clair U133/A".
Act 3 : electricity...
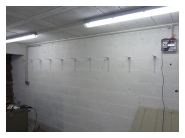
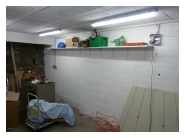
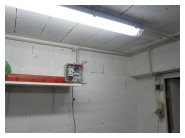
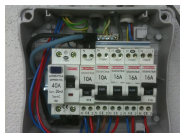
I am not an electrician, but I believe I managed not too bad...4 fluorescent lights on the ceiling, 3 halogens above the workbench, the whole circuit wired with rigid 2.5mm² wire in PVC conduits (with helluvalotta bends and "T"'s!), 3 outlets, 2 switches, and a real electric cabinet with circuit breakers to make it safe.
Phew!
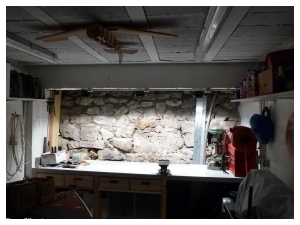
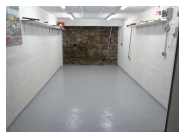
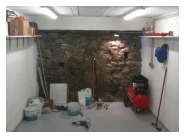
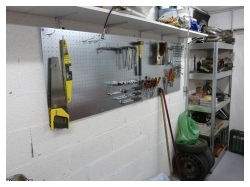
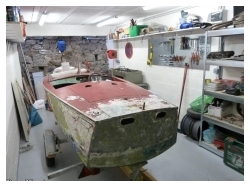
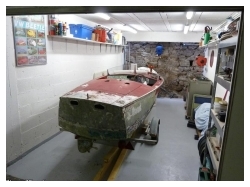
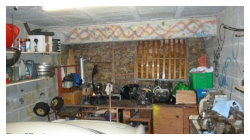
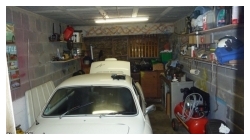
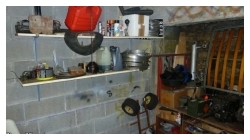
Voilà the current status : that's day and night compared to what it was before! Bright, clean, with plenty of storage space. Still looks a bit messy on the pictures, I didn't have the opportunity to organize everything!
Compared to the original Sketchup plan (see previous article), I've moved the tools panel to the side wall : it's more practical, access is easier this way than if it was above the workbench as originally planned. Speaking of which, next step : the workbench!
Posted on 14/07/2011 at 01:08
Workshop : Garage Project
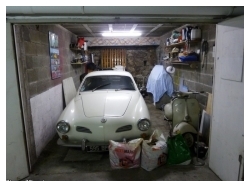
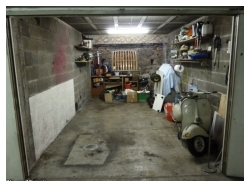
 I'm tinkering around this garage for more than 15 years now...
The bare concrete floor is greasy due to the oil and braking fluid spilled all those years ; since the concrete absorbs the fluids, it un-cleanable. The floor and block walls produce fine dust, the shelves on the walls are about to collapse, lighting is way insufficient, electrical installation is disaster waiting to happen...
Anyway, if I want to be able to work here in good conditions, it's high time I give it a complete overhaul.
As would Murtaugh say in Lethal weapon : "I'm too old for this shit".
Pros :
- Surface of the garage is a bit above average : 17m2 (183 sq. ft.)
- Same level as the street, no ramp : good thing for the dropped KG and the Albatross' trailer.
- Natural light source at the back of the garage : as the garage is located right below the parking, large windows at the back bring some sunlight down there, as well as some additional room to store stuff.
- Electricity is available.
- 5 minutes walking from my place.
- Basement level (underground), below a residential building : that's a limitation for noise, and spray paint/kärcher use are just a no-no ...
- The bitumen of the building's parking is right above my garage's roof : in mid-summer, it turns into a natural oven!
- Neighbors : a bunch of old people live in this building, and have organised a sort of militia in the basement, taking turns... As soon as I make some noise or dust, they're on my back. I hope someday I'll have a place without any neighbors...

- No water inlet/outlet.
- Walls made of 5cm (2 inches) blocks ; it's difficult to fix anything really sturdy (I'm thinking shelves).
OK, that's far from the perfect place, but hey... It's not like I have the choice.
The project : Solutions / optimisation of room :
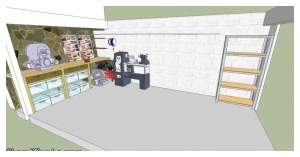
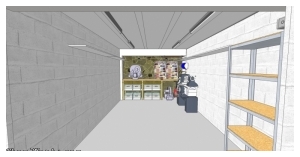
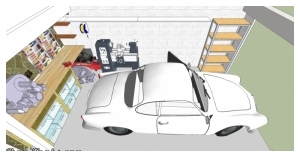
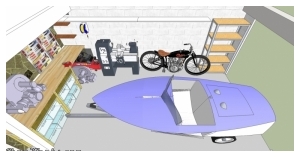
As usual, Sketchup is my best friend here to organize/layout everything.- White paint on walls and roof : more light and less dust.
- Lightgray paint on the floor : easy to clean, no more concrete dust. But painting on that oily surface will be tough...
- One long shelf on each side, almost as long as the garage itself, with many angle brackets. The shelves being more than 185cm high, I can easily walk below.
- A 5 shelves rack near the entrance. I'll buy it from Castorama (your "Home Depot") : see here. 90x40cm, height 180cm, heavy duty (supposed to handle 80kg per shelf - I doubt it though).
- Home made workbench, wooden structure. Since the floor is far from being flat, I'll handle the variations. Four drawers below the countertop (actually, wooden crates 40x60x15cm from Castorama as well see here).
- The air compressor will be hidden below the workbench. Not an ideal situation for tis ventilation, but I'll be able to take it out if it has to run permanently. Winding drum for the compressed air hose right above the compressor.
- Brand new electric circuit matching safety standards, with proper circuits breakers, 2 electric outlets near the workbench, another one close to the door.
- Four 1.20m fluorescent lights on the roof, plus three 150w halogen lights above the workbench.
That's it, that's the project right now... Gotta get my hands dirty now!
Posted on 30/03/2011 at 13:28
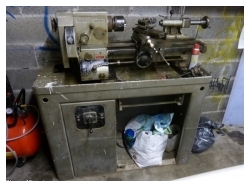
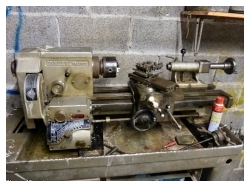
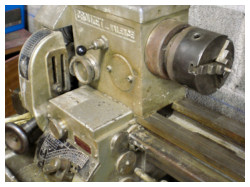
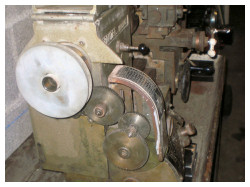
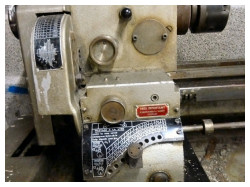
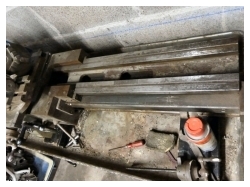
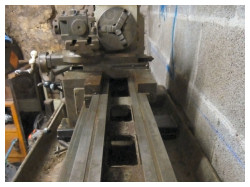
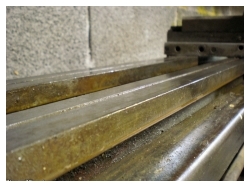
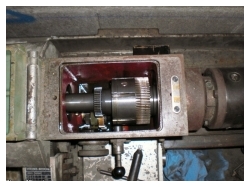
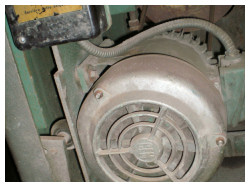
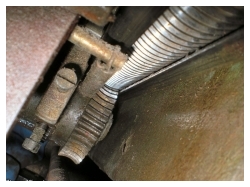
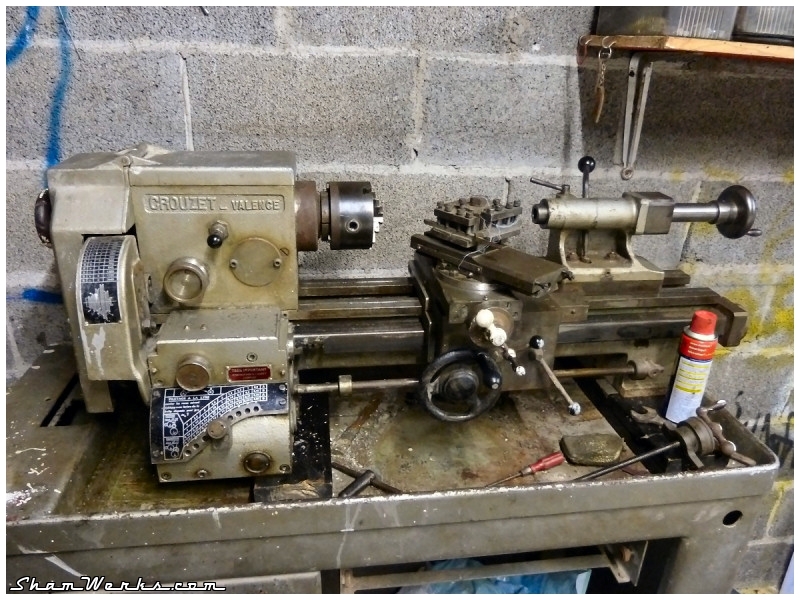
Crouzet-Valence VM125 metal lathe
Sorry! This article has not yet been translated in english! Please come back later!
 Pour démarrer le dossier "atelier", voila quelques photos du petit dernier...
 Je cherchais depuis longtemps un tour à métaux, mais d'une part ce sont des machines très recherchées (les prix s'envolent), et d'autre part si l'offre est généreuse dans le nord du pays (passé industriel oblige), c'est loin d'être le cas ici, dans le Sud-Est. Et comme on parle de machines qui pèsent lourd, la distance est un paramètre important.
Après des mois de surveillance des petites annonces, je finis par trouver mon bonheur sur eBay : un tour Crouzet-Valence VM125, du milieu des années 50!
Et vous voulez savoir le meilleur? Le vendeur se trouvait à 10 minutes de chez moi, et il me l'a gentiment livré (merci encore Fabien) avec sa remorque tractée par sa Jeep 1944 (!)... Le tout pour 200€!
Un beau bébé qui approche quand même les 400kg sur la balance (merci les potes pour décharger), mais avec un encombrement limité à 120x50cm au sol : le petit tour dont je rêvais depuis des années!
Aaaaaaaaah, si je l'avais eu pour fabriquer mon sous marin...
Je n'ai pas encore tenté de le faire tourner, il me faut un variateur 380V pour ça... A suivre bientôt!
Posted on 26/03/2011 at 02:05
Workshop : Welcome to the Garage!
 Not so long ago, I sent an SOS, looking for a garage/workshop where I could finally work on my vehicles...
I got a handful of answers back (many thanks to all of you, you know who you are!), but nothing really matched : either small and expensive, or way too far from my place...
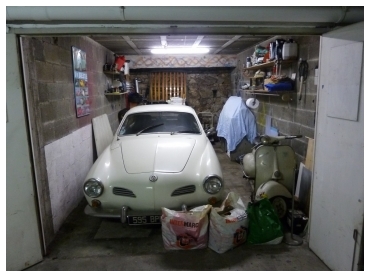
Additionally, I must say that watching Fabbe restoring his Oval-window in a shoe-box sized garage (full respect, Boss!), helped my putting things in perspective...
In conclusion, I've decided to renovate my current garage, in which I've been working for 15 years now... New paint, optimisation, cleaning, selling/giving/throwing away uneeded stuff, new tools, invasion of a part of my father's garage to store parts... I'll show you as well what I came up with last winter, to work at home comfy.
Anyway, the situation is far from ideal, but it gives me back some motivation, I really couldn't keep going that way.
So, here you are : a brand new section "workshop" begins on ShamWerks : Welcome to the Garage!
Posted on 07/11/2010 at 14:17
Terrace Project : Final Result and Conclusions
Sorry! This article has not yet been translated in english! Please come back later!

Final Result and Conclusions
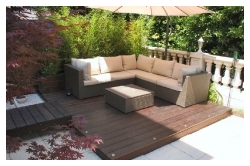
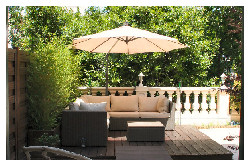
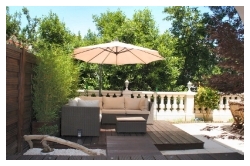
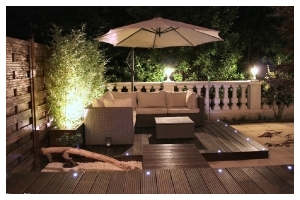
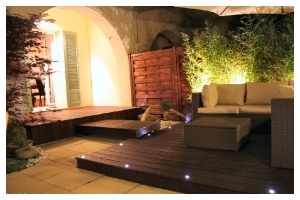
Voila, donc, en photos, le résultat final! (cliquez ici pour voir l'état "avant"). Cela fait maintenant plusieurs mois que la terrasse est terminée, les decks ont déjà passé un hiver et un été complets... J'ai donc un peu de recul sur les choix que j'ai pu faire.
Construction
Ca aura été plus de boulot que ce que j'avais initialement imaginé!Si vous vous attaquez à un projet de ce type, et que vous êtes un peu pointilleux comme moi, ne vous attendez pas un un "weekend project".
Rien que pour ce qui est du vissage : au total, près de 1000 vis y sont passées! Dont la grande majorité nécessitait un trou fraisé auparavant, ajusté au millimètre pour que le rendu soit nickel... Tout ça ne demande pas d'énormes compétences, et est à la portée de tout bricoleur un peu outillé ; par contre, cela prend du temps, beaucoup de temps, pour que tout s'aligne correctement.
Du choix lames avec rainures vers le haut
Les lames de terrasse en bois exotique comportent, généralement, deux faces. L'une est soit lisse, soit légèrement structurée pour la rendre antidérapante. L'autre face présente de profondes rainures dans le sens de la longueur, dont le but premier est à ma connaissance de faciliter le séchage du bois à cœur (et ainsi réduire le "time to market", le délai entre le moment où l'arbre est abattu et la commercialisation du produit fini) et d'éviter que la lame ne se fende.Bien que cela ne soit pas prévu ainsi, j'ai choisi de poser mes lames avec cette face "verso" vers le haut. Un choix purement esthétique, les rainures profondes ayant un aspect plus graphique (...) à mes yeux.
Je craignais deux choses : d'une part, le risque d'échardes, à cause de l'angle droit au bord des rainures... Mais après un an exposé aux intempéries, tout va bien, pas d'écharde en vue, ouf!
Je pensais aussi que les rainures risquaient d'être difficiles à nettoyer (genre aiguilles de pin, etc). Il n'en est rien, ça se nettoie très bien au jet d'eau, du moment que les rainures sont bien alignées d'une lame à l'autre.
Par contre, ce que je n'avais pas vu venir, c'est la difficulté d'application des produits de protection (huile ou saturateur). Pour un rendu impeccable avec ces produits, il faut en essuyer l'excédent avec des chiffons après une courte période d'imprégnation... Et essuyer au fond des rainures, c'est pas une partie de plaisir!
Je ne regrette pas mon choix pour autant, ce type de traitement ne se faisant qu'une à deux fois par an...
Traitement
J'ai fait le premier traitement à l'huile Starwax : j'étais satisfait du résultat, aspect mat/huilé et bonne résistance à la pluie qui perle à la surface du bois.Mais un spécialiste m'a dit que pour les terrasses (surfaces horizontales), il valait mieux utiliser un saturateur, et réserver l'huile au mobilier bois... Dont acte, printemps 2010, j'ai tout traité au Saturateur terrasses V33.
Le résultat est bien moins chaleureux qu'à l'huile, aspect brillant, "plastifié". La protection est impeccable, c'est vrai, mais je pense que je reviendrai à l'huile l'année prochaine...
De l'utilisation du bois exotique
C'est un choix que j'ai fait, dont je comprends qu'il est écologiquement discutable ; la mode occidentale pour les bois exotiques accentue les ravages de la déforestation des forets primaires...Renseignements pris auprès du vendeur, ce bois serait issu de forêts gérées pour une exploitation durable (label FSC, soutenu notamment par Greenpeace et WWF), tous les arbres abattus étant replantés - la GSB où je me suis fourni prêtant une attention particulière à l'origine de ces produits.
J'ai donc tenté de prendre des précautions... Mais je ne suis pas dupe non plus, je sais combien la corruption dans ces pays émergents (BRIC) permet d'obtenir les papiers officiels pour l'exportation de ces essences.
Reste de toutes façons la problématique d'utiliser des produits venant de l'autre bout du monde, dont le transport a une empreinte carbone non négligeable ; mais je ne voyais pas vraiment d'alternative...
J'aurais pu utiliser du "bois composite", mais je doute que sa production se fasse en Europe ; sans parler de l'immonde toucher "plastique" de ces produits.
Sinon, il existe bien des essences de bois européennes, imputrescibles elles aussi ; malheureusement, elles ne sont pas distribuées au grand public, il est très difficile de mettre la main dessus...
Bref, j'ai fait pour le mieux, en essayant de limiter la casse, mais j'ai bien conscience que ma solution n'est pas parfaite.
Coût
Je n'ai pas gardé toutes les factures (j'aurais dû!), mais j'estime le coût du projet complet aux alentours de 2300€, en matériaux seulement (hors outillage). Le poste le plus important est bien sûr le bois : à 17€ la lame d'almendrillo, ça va vite...Voici en gros, "à la louche", les postes de dépense les plus importants :
- 960€ : Lames d'almendrillo
- 200€ : Lambourdes
- 150€ : Quincaillerie
- 240€ : Bacs bambous
- 230€ : 6 plants de bambous
- 180€ : 3 panneaux bois pour la séparation pare-vue
- 240€ : 2 érables
- 120€ : Matériel jardin japonais
Si vous attaquez ce genre de projet, budgétez "large", on oublie toujours des éléments, et cela peut chiffrer vite (ex: la quincaillerie, géotextile, produits de traitement, etc.)...
De la sécurité sur ce type de chantier
Un mot sur la sécurité : l'emploi de lunettes de sécurité et de gants va sans dire, évidemment. Mais ce genre de chantier où l'on utilise beaucoup la scie circulaire (dans un bois dur de surcroît), produit de grosses quantités de poussière de bois très fine. Poussière que vous n'avez pas du tout envie de respirer!Pour ma part, j'utilise un masque à cartouches 3M , qui est agréable à porter (pas trop lourd, on fini par l'oublier) et dont la jupe caoutchouc reste bien étanche sur le visage. Oubliez tout de suite les petits masques papier avec 2 élastiques, qui ne protègent de rien du tout... Le plus difficile, finalement, est de trouver une paire de lunettes de sécurité qui soit portable en même temps que le masque!
Pour ceux d'entre-vous qui parlent anglais, il y a une excellente vidéo sur le sujet sur TheWoodWhisperer.com.
Dernier détail : j'utilise des bouchons mousse (jetables) pour protéger mes tympans. Le confort de travail est incomparable : le bruit de la circulaire ne vous pourrissant plus les oreilles, vous pouvez travailler à l'aise, en prenant votre temps. Et vous évitez du même coup le sifflement aigu dans vos oreilles en fin de journée!
Je sais, je suis très "sécurité sécurité", mais gardez à l'esprit que circulaire et défonceuse font partie de cette famille d'outils qui vous allégeront d'un doigt ou deux en moins de deux secondes et sans arrière pensée ; ces machines n'ont pas de cerveau, utilisez le votre. Votre meilleur allié, c'est votre bon sens: ne faites pas n'importe quoi avec ces jouets là, respirez un grand coup avant de mettre une circulaire en route (et ne le faîtes pas si vous êtes fatigué, c'est là que les accidents arrivent), vérifiez où son fil passe, où sont vos doigts, si la pièce à couper est stable et le restera en fin de coupe, etc... On n'a que 10 doigts, 2 yeux, et autant de tympans, hum?
En savoir plus
Quelques liens à étudier avant de se lancer :- Autoconstruction.info : ce site propose au téléchargement (payant) différents dossiers. J'ai investi 24€ pour avoir celui traitant des terrasses bois. Très bien documenté, beaucoup d'informations, une vraie mine de renseignements, je n'ai pas regretté mon achat (pub gratuite!
 )
) - TheWoodWhisperer.com : (en anglais) site généraliste sur la menuiserie/ébénisterie. Beaucoup de vidéos, très bien faites, sur la construction de meubles, l'outillage, la sécurité... Plein de tours de mains à apprendre. Incontournable.
- WoodGears.com : (en anglais) autre site généraliste sur la menuiserie, beaucoup de vidéos. Tours de main, machines et mécanismes en bois, nouvel article chaque lundi.
Et beaucoup d'autres, bien sûr. Google est votre ami.
Je vous laisse, j'ai un canapé qui m'attend dehors.
Posted on 04/11/2010 at 16:18
Terrace Project : Japanese Garden Tsuboniwa Karesensui

Tsuboniwa Karesensui
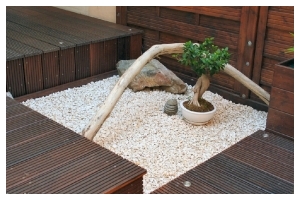
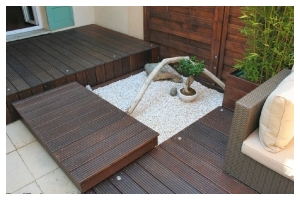
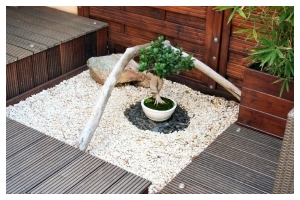
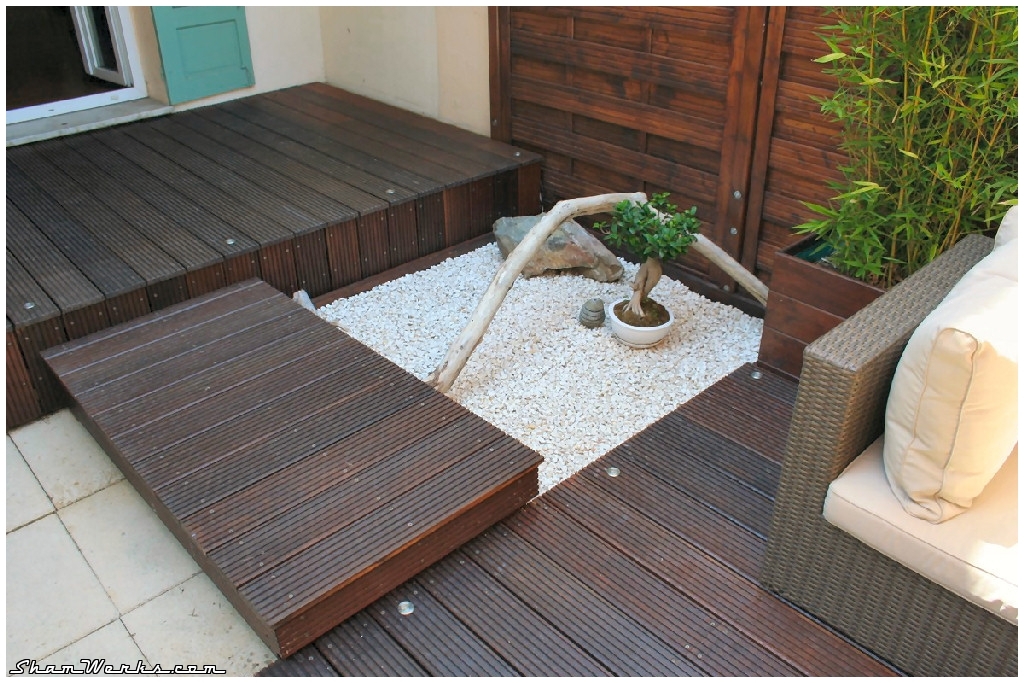
Nothing very fancy about the construction. Just some 3x2" wood pieces spared from the building of the two decks (loggia and lounge), cut to the right dimensions and screwed together... Just a small detail I hadn't planned, a small notch was necessary for the frame to fit perfectly against the fence. Nothing a jigsaw and a chisel can't fix in a matter of minutes though... The frame is covered with two layers of wood surface coating. The goal is not only to protect the wood, but as well giving it a color as close as possible to the two decks and the boardwalk surrounding it.
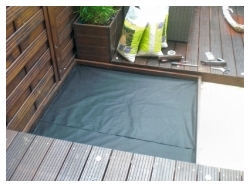
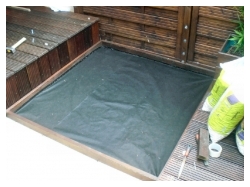
Once the frame was in place, I stapled on it a geotextile fabric to cover the bottom part. The objective is that the weight of the gravels that will come over it will help flattening it to the ground. Without it, since the tiles of my terrace aren't perfectly flat, I would have had gravels sneaking between the tiles/ground and the frame...
About the gravels, it's very important to rince them with lots and lots of water before you put them in place, since in their container bags they produce huge amounts of fine stone dust by rubbing against each other. And that dust would then dirty the rest of the terrace at the first rain... So, here it is, the non-final result.
The above pictures should be seen as "work in progress", the overall setup being just a first test.
Later on, there should be a granit stones Buddhist triad, a river made of black slate flakes, and perhaps a "turtle island" covered with moss... The piece of drift wood on the pictures above was reclaimed on a beach near my place the day after a big storm. I know it has nothing to do with Japanese traditions, but I like it anyway.
To be continued, evolution will come next spring!


