Lounge Deck
I'm really struggling with this post...
I had all the photos of this part of the project on a laptop, whose hard drive decided to give up the ghost, without warning.
Having been tricked before, I make regular backups... But I had just transferred these photos from my camera, so no backup yet! 😔
So, I can only offer you a 3D representation of the technique used, and photos of the final result... Who knows, maybe I'll end up paying for the (very expensive) services of a data recovery company, and I'll finally be able to show you real photos... Calling all ShamWerks readers: if you have any good tips, I'm all ears! 😉
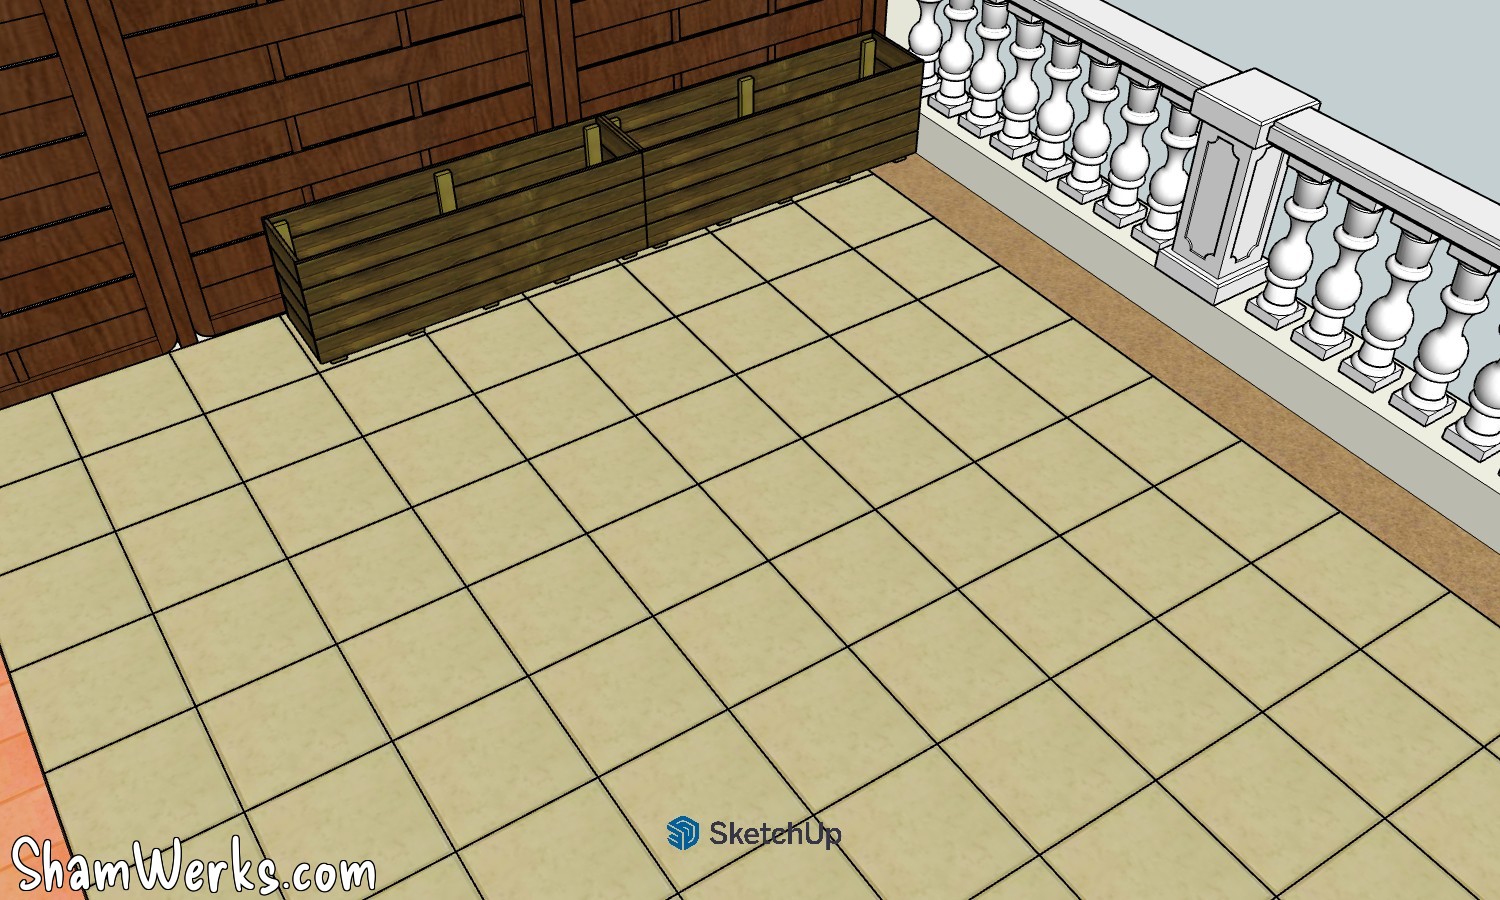
Let's go... Here's the situation at this point in the work. The containers for my bamboos are at the back, just in front of the wooden partition (see previous articles: [Wooden screen/partition] and [Bamboo containers]).
The slabs are laid on a bed of sand: I started by removing them from a 3 x 3 meter square. As they are 50x50cm (and 4cm thick), that makes 36 slabs to set aside.
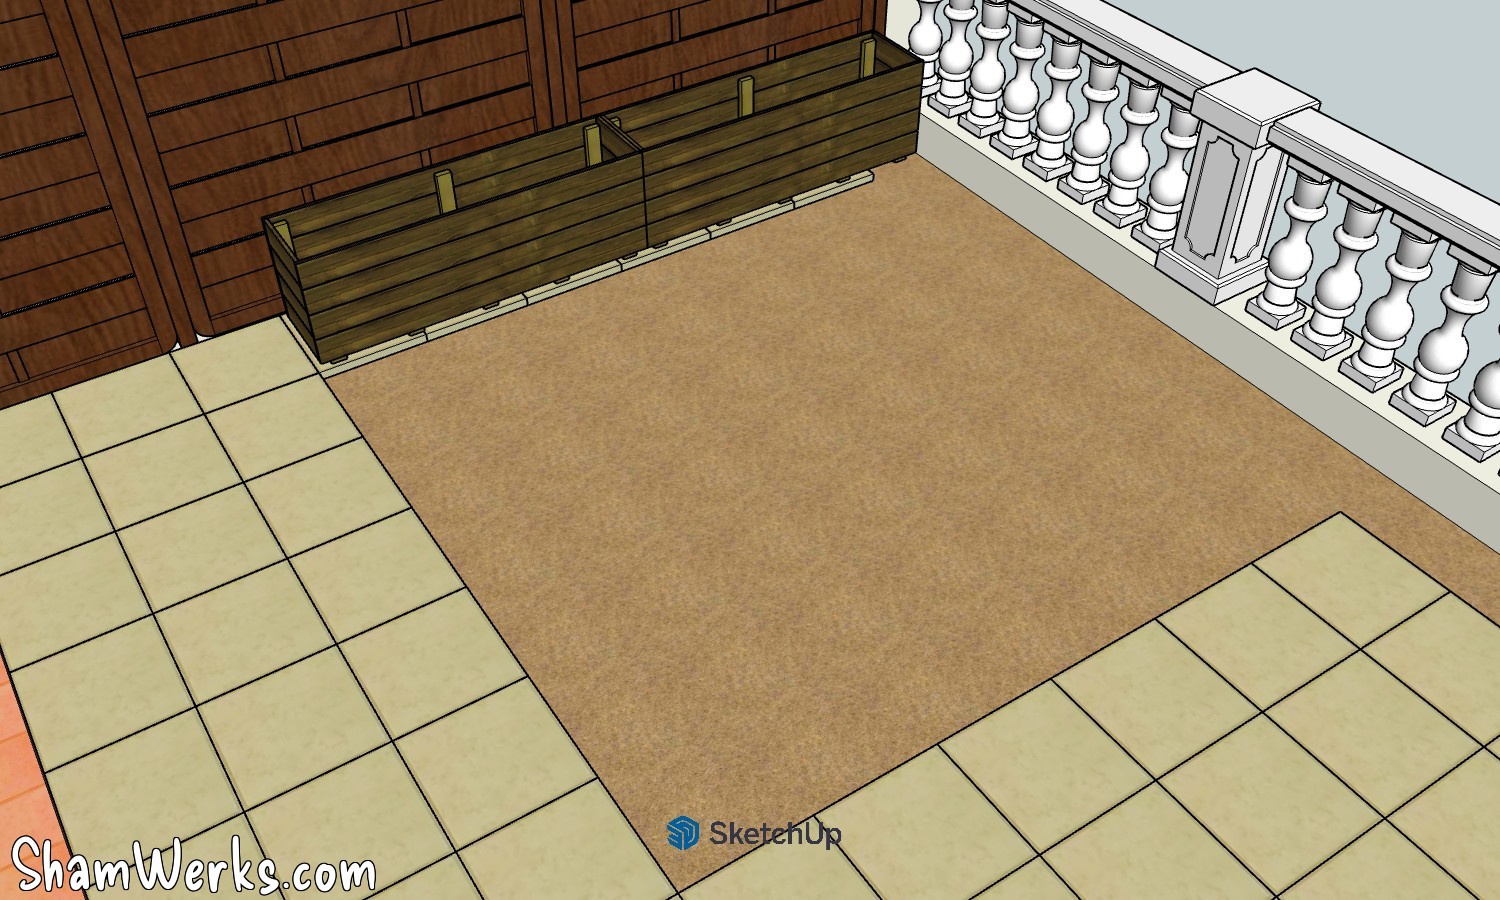
The exposed sand is then dug over, incorporating a little cement: this will stabilize it, preventing rain from causing it to shift later. No water is added at this stage: the soil moisture, over the following weeks, will be sufficient to set the cement.
The whole area was finally leveled and compacted. To level the entire surface, I drove three joists, spaced one meter apart, into the sand (which was perfectly level, minus one centimeter per meter of slope for rainwater drainage). Then, by pulling a mason's straightedge perpendicularly across them, everything was leveled simply and quickly.
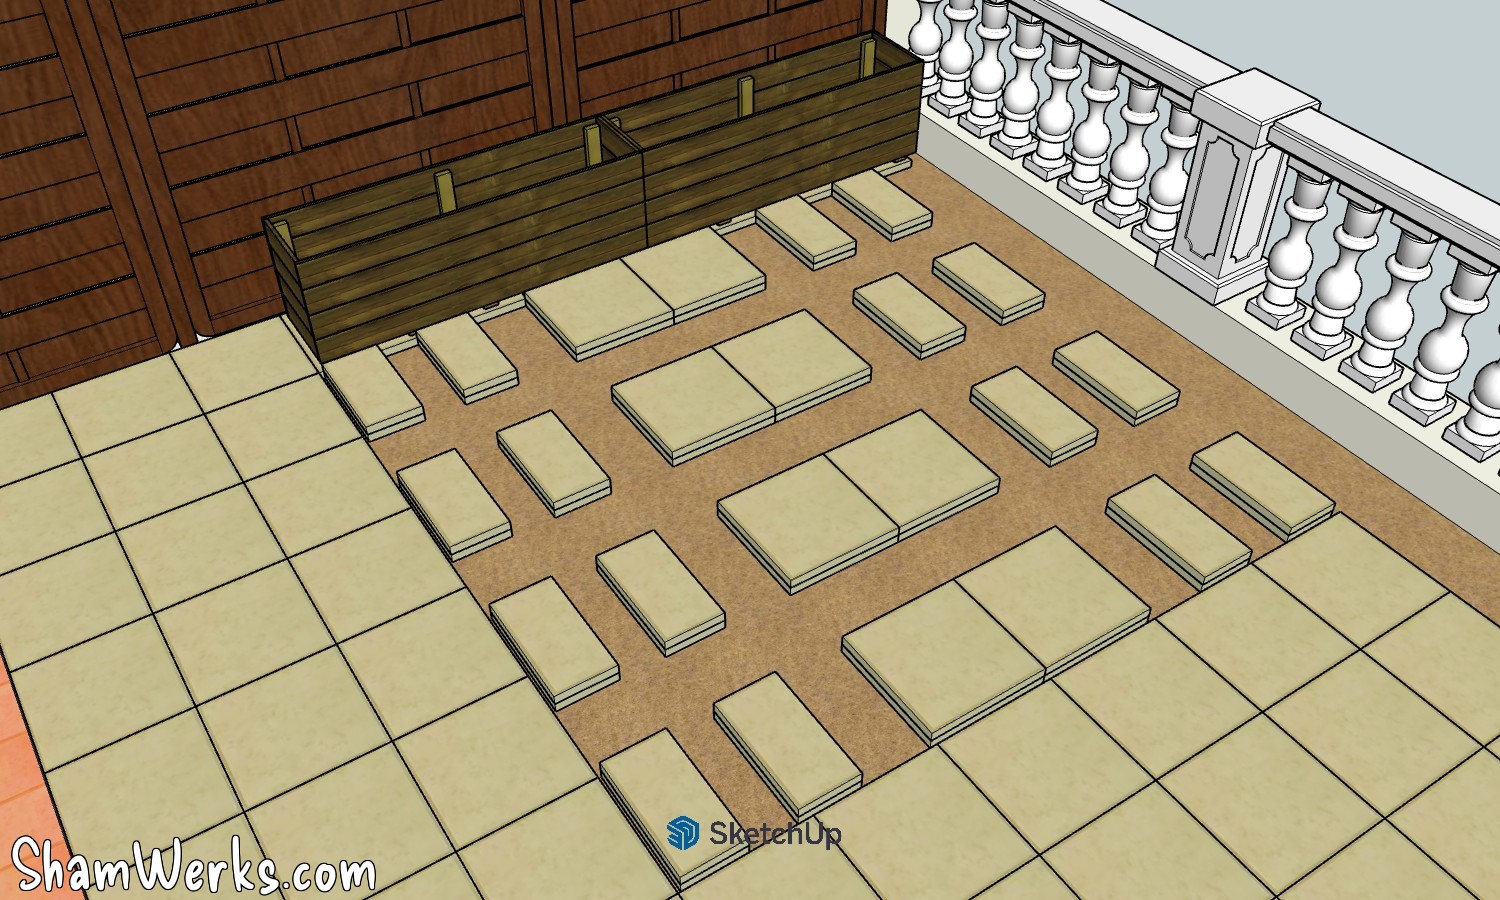
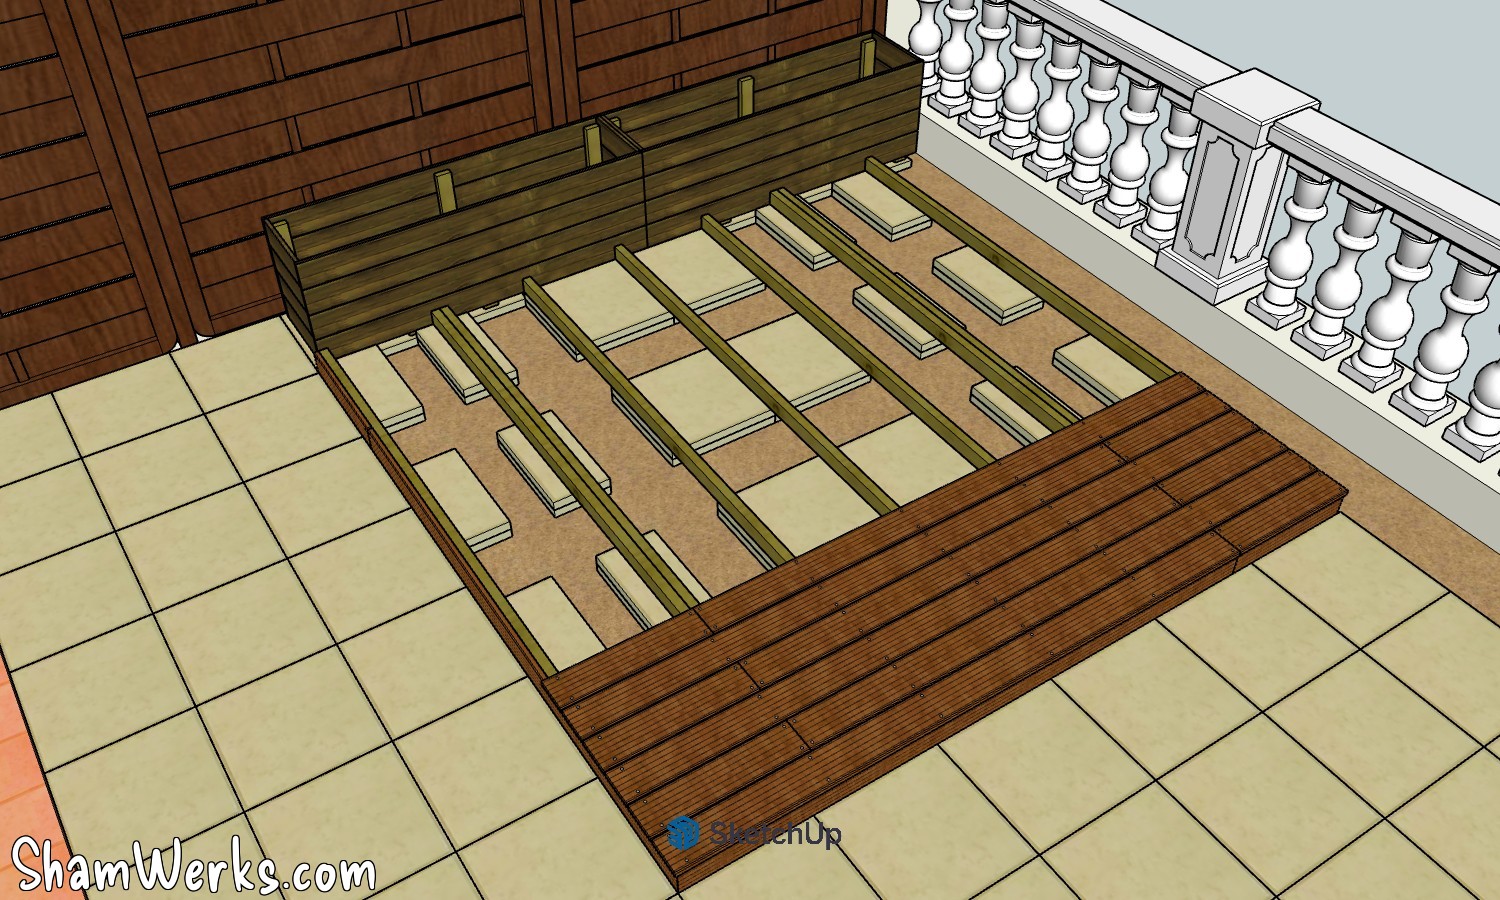
To raise such a deck, concrete blocks are generally used. To recycle materials on site, I reused 32 of the 36 slabs previously removed. Sixteen slabs were cut in half (using an angle grinder and a segmented diamond blade), while the other 16 were left intact. By stacking the slabs, I obtained an 8 cm rise, to which I added the height of the joists: more than enough to allow the wood to breathe, and just enough to allow me to finish the deck edges with a proper-sized board.
The joists are laid between each other and the slabs, and a geotextile membrane is installed to prevent weeds from growing up. The spacing is calculated to allow a maximum span of 50cm between two joists.
Although not strictly necessary, I chose to stain my joists before installing them, just to be safe. I don't entirely trust the pressure treatment of these cheap pine pieces... Note that the joists aren't fixed to the slabs; they're simply placed on top. This allows the entire structure to move with temperature and humidity variations without shifting.
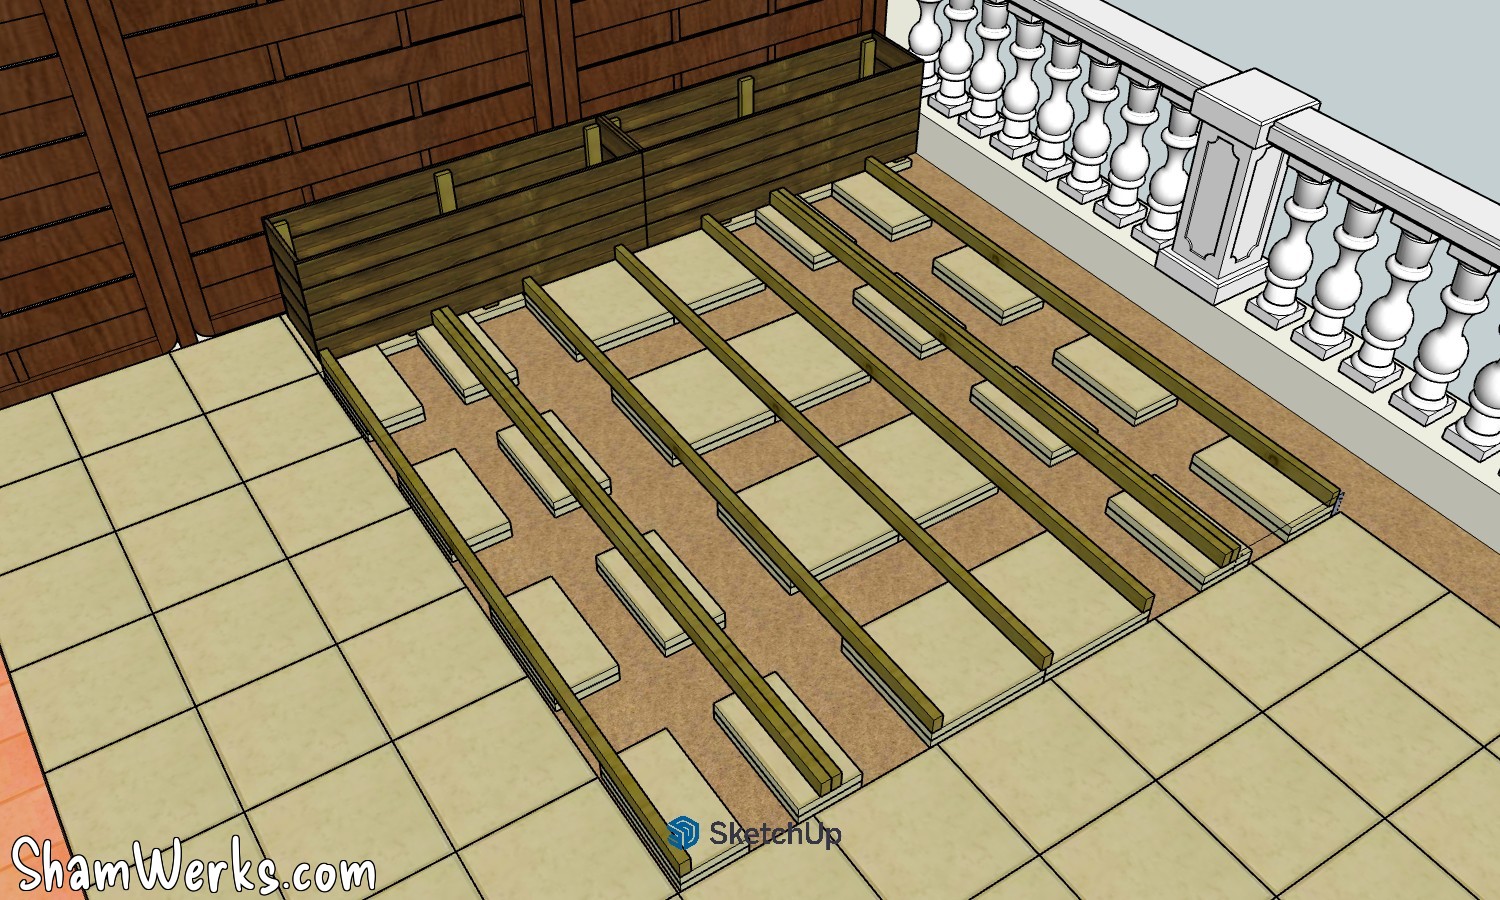
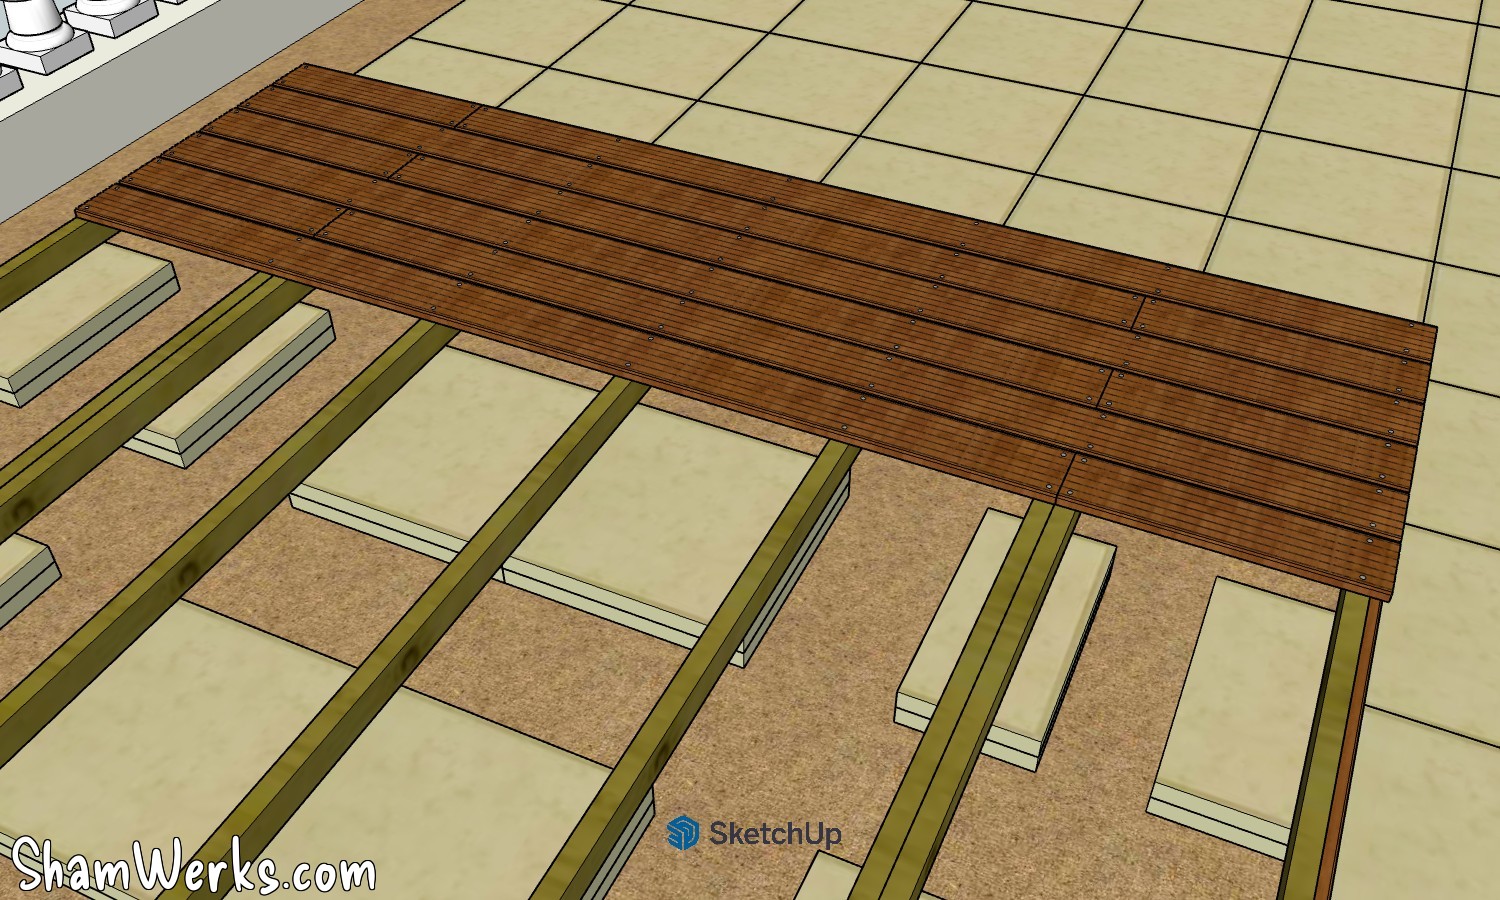
The two double joists are there to allow for the joining at the ends of the boards: they are only 240cm long, so it was necessary to be able to add a 60cm piece...
Not quite, actually: I'd planned ahead when buying the boards to optimize their use, because at €17 each, you avoid waste! So, I cut four 59cm pieces from a 240cm blade, to account for the width of the circular saw blade... The final offcut is less than 2cm wide. 😉
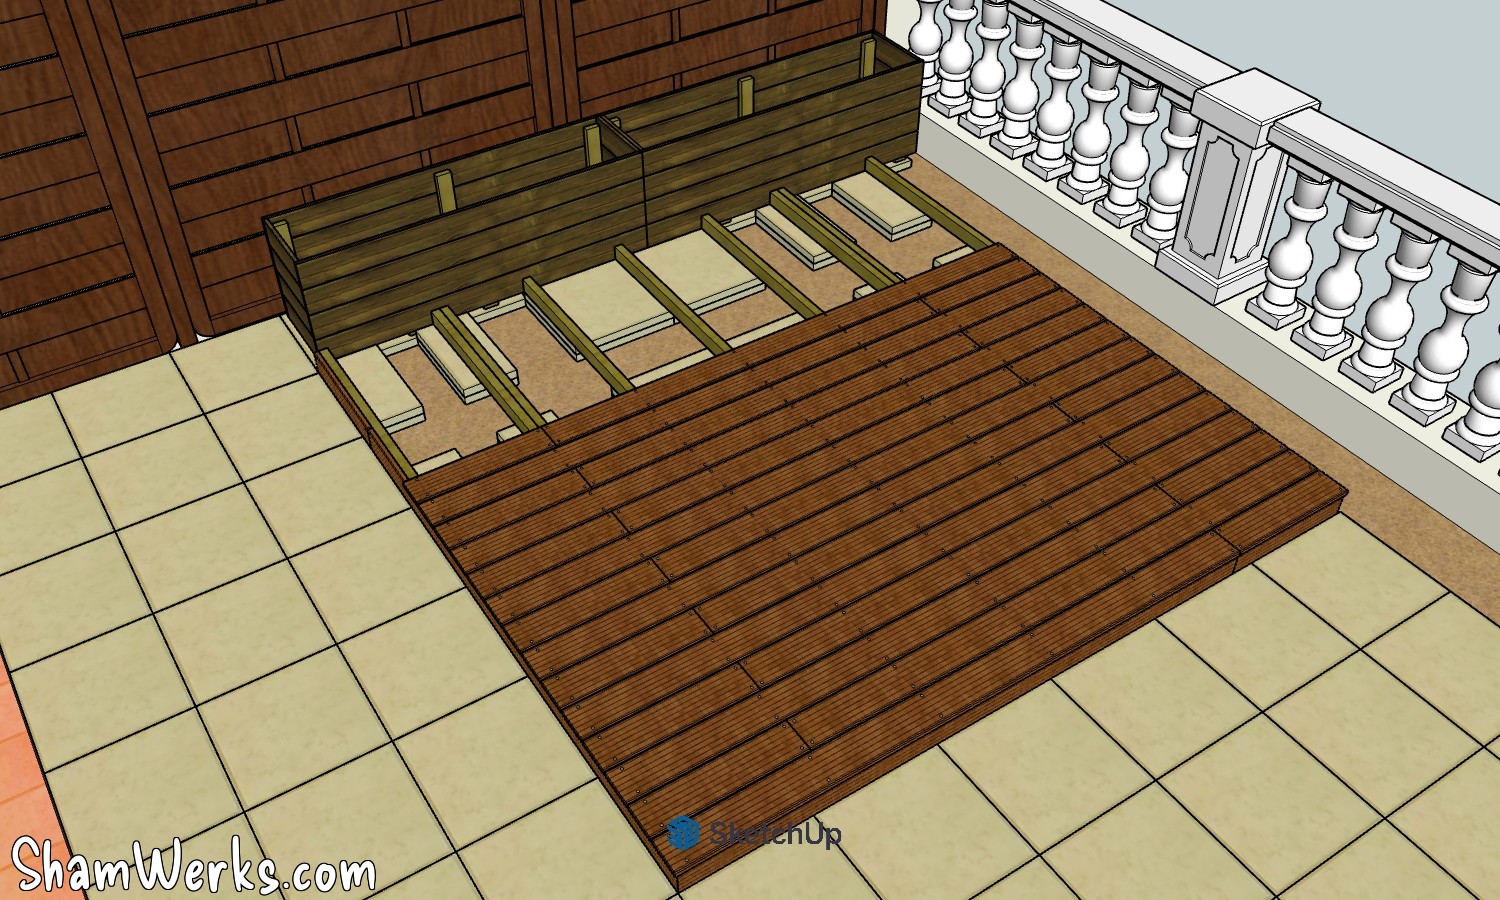
I start laying the boards from the "free" side of the deck, so that I can cut the last board to length and adjust it as best as possible against the bamboo planters...
The 5mm spacing between the planks is maintained constant by using small plastic spacers commonly used for tile installation. Any warped planks are straightened with a ratchet strap during installation.
336 screws later, the 42 top board are finally in place... All that remains is to install some LED spotlights and apply two coats of saturator to everything!
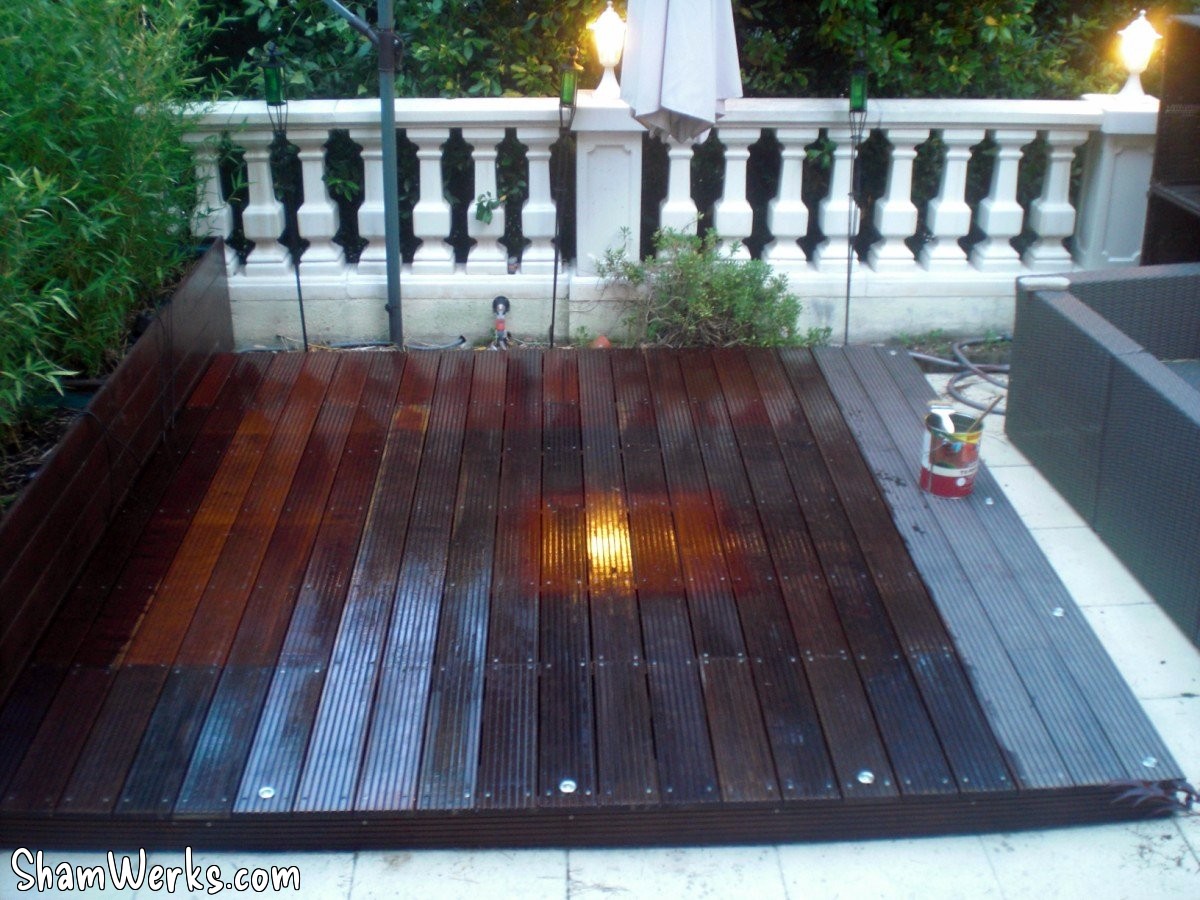
And so, here is the result of this deck - below are the few real photos I was able to save!
The photo on the left, of poor quality, was taken with my phone at night, just after I finished the installation...
The missing board on the left is the access hatch to the waterproof 12V toroidal transformer underneath. The remaining stock of wood for building the pontoon is still visible in the upper right...
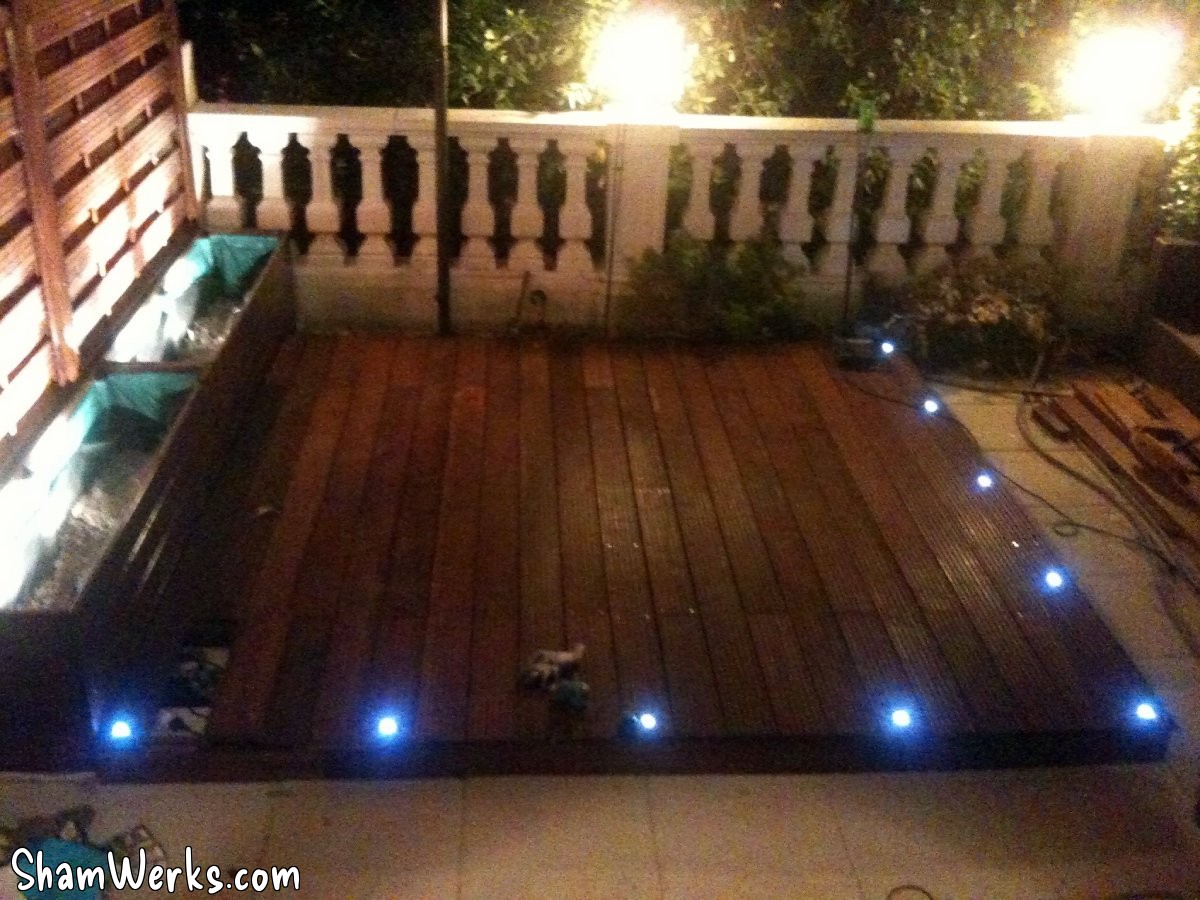

Phew... Deck lounge: Check! 😉
Published on 24/06/2010 / 1 commentaires