Kitty Injection : Engine : check & screw up
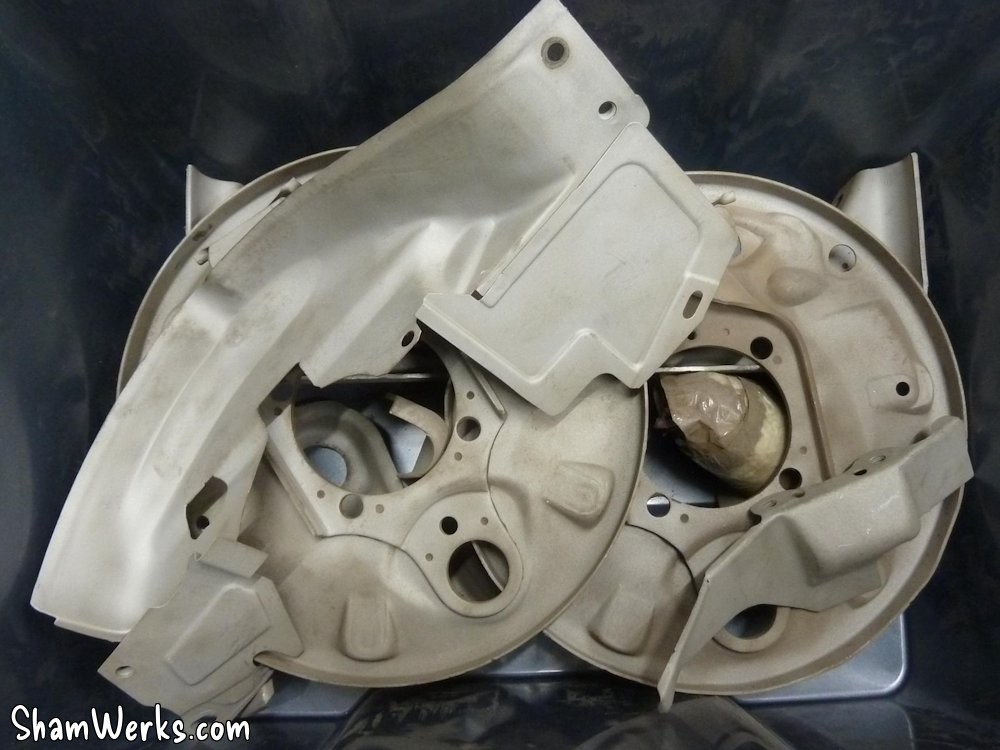
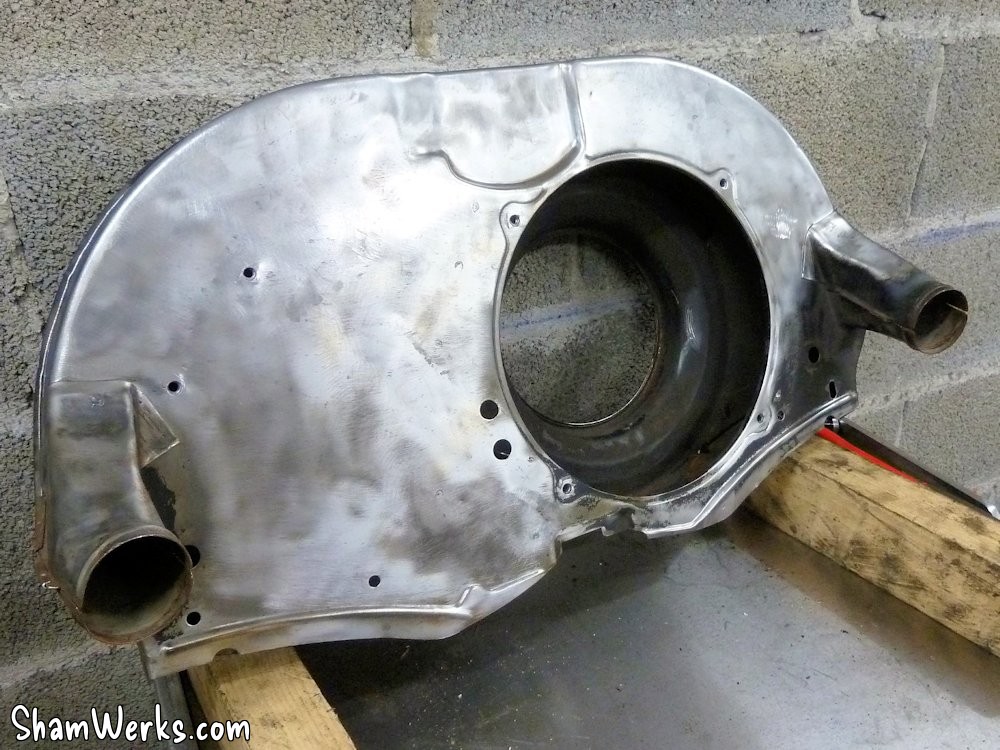
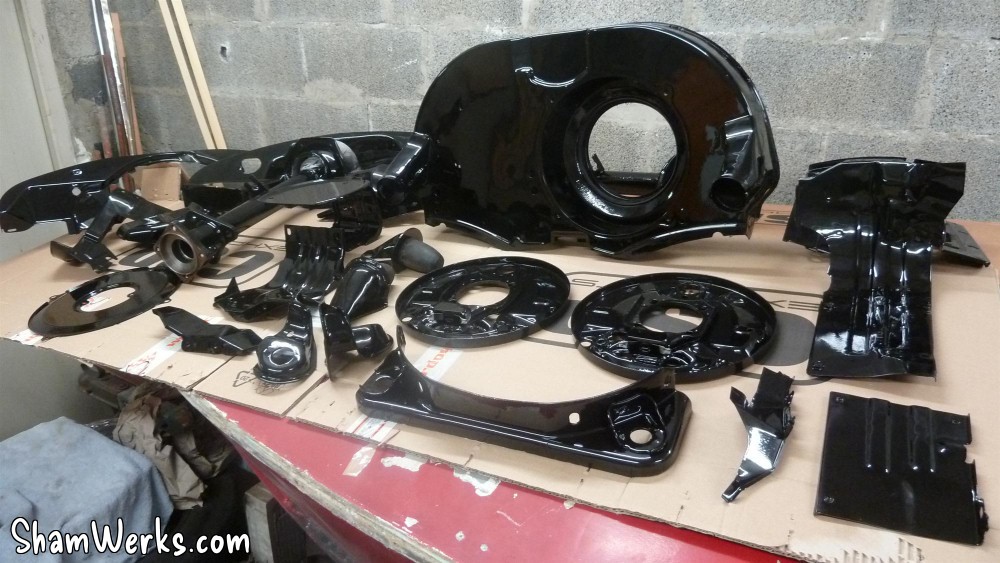
Engine tin
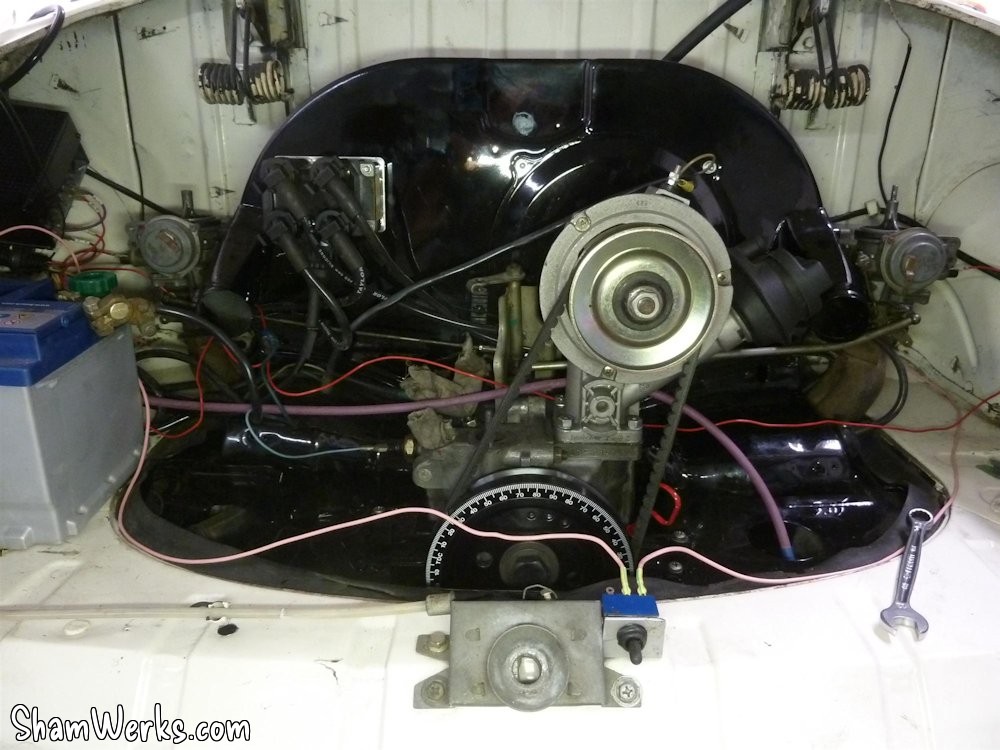
Since the engine is outside of the car, I decided to give it a fresh look as well.I started by sandblasting all the engine tin (why the hell did I wait so long to build myself a sandblasting cabinet?!), then brought everything to the auto body shop a for a shiny coat of black paint :

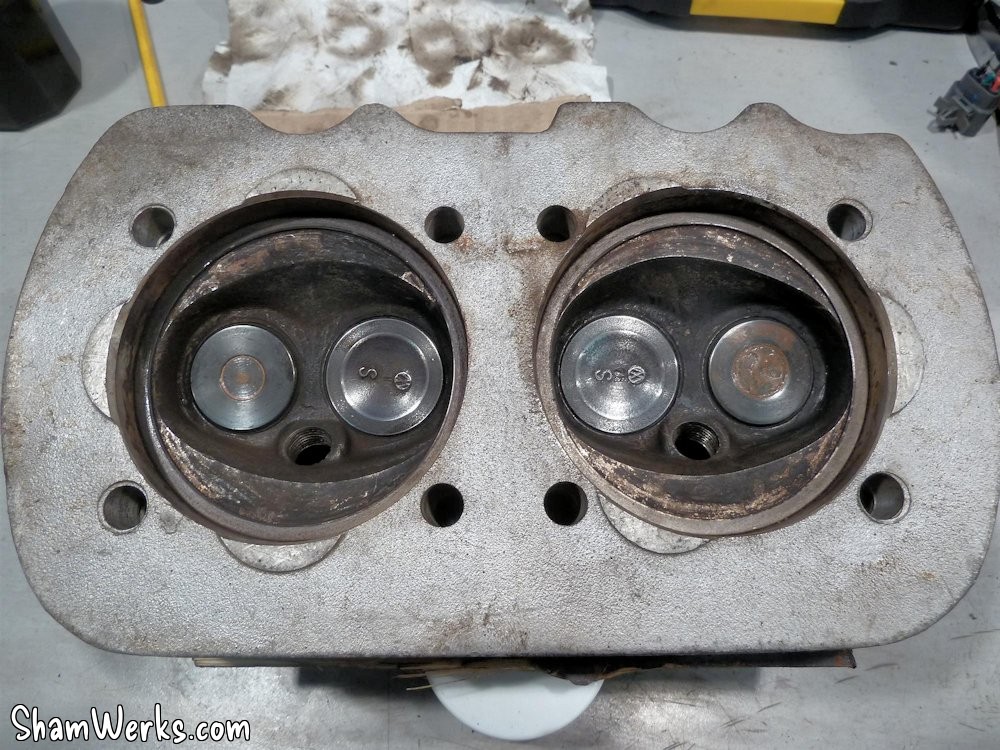
Cylinders heads
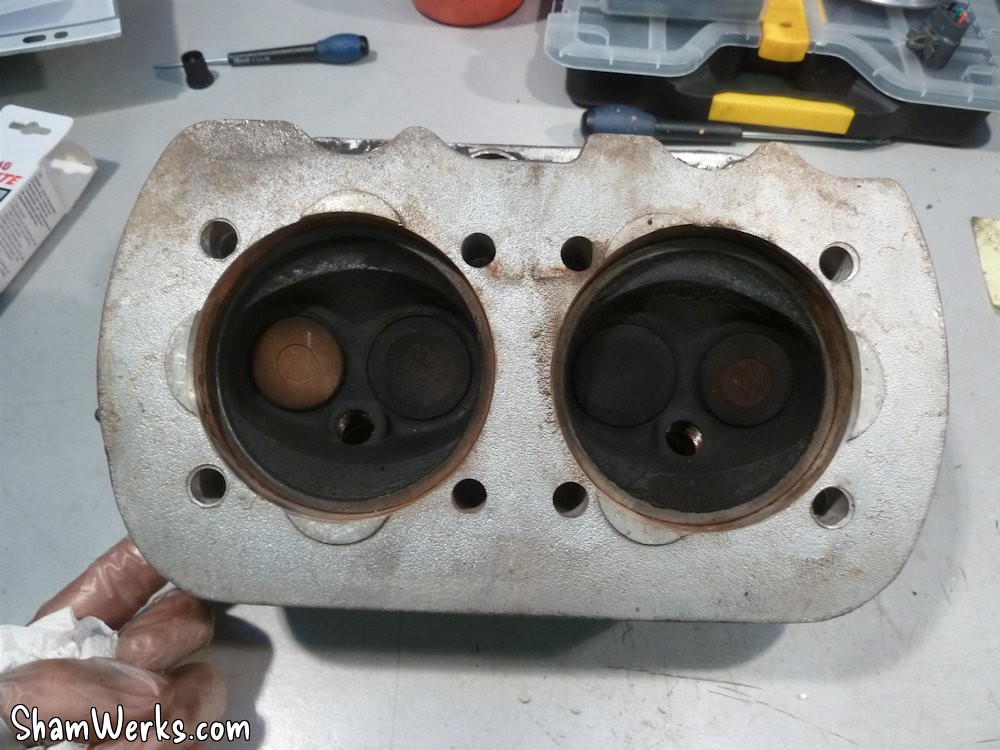
I was a bit concerned by one spark plug threads (cylinder #3), so I took off the head to have a closer look... In the end it only needed a tap to get it straight.It was the opportunity for me to take the head (35.5/32 DP) apart, to give a thorough cleaning to the channels and valves, and check everything... And I did the same with the other head as well for good measure.
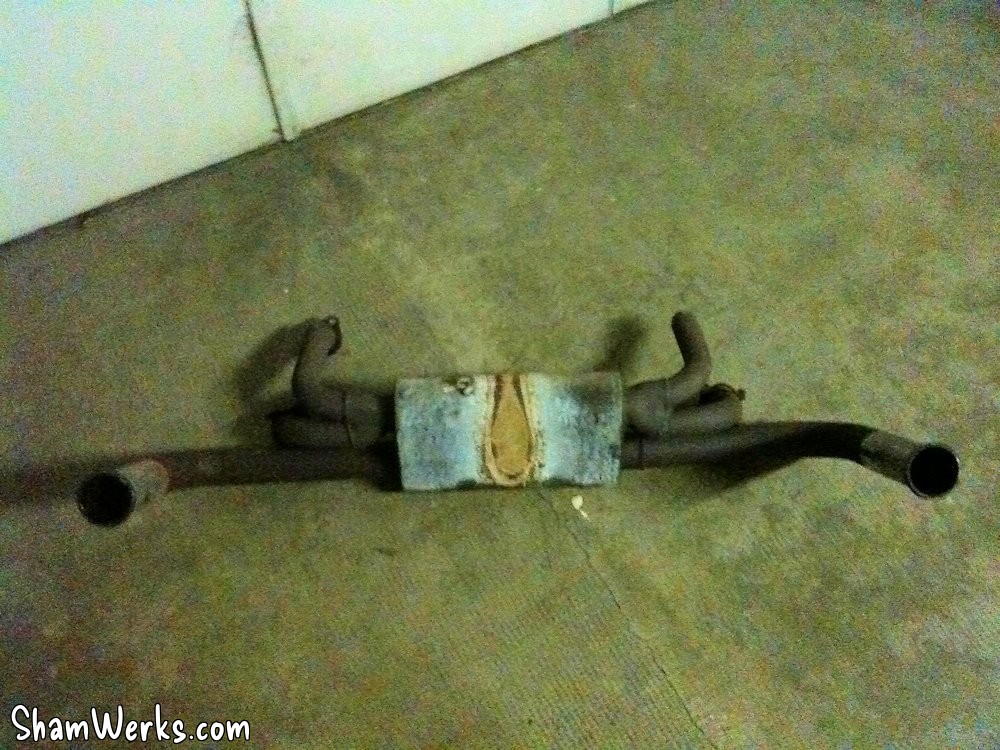
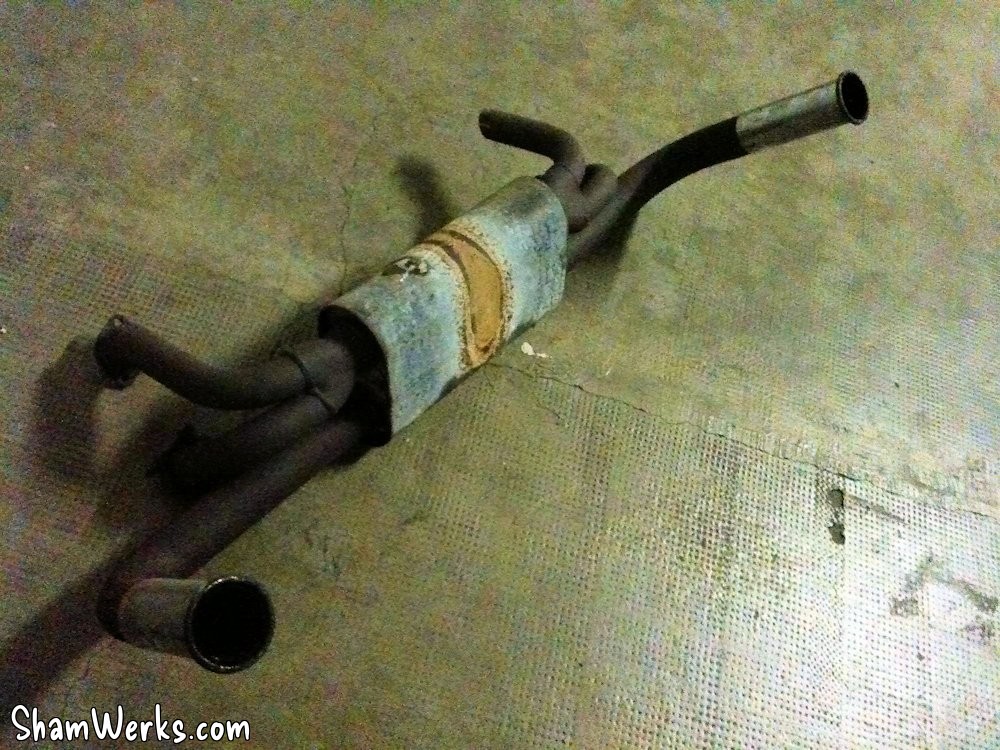
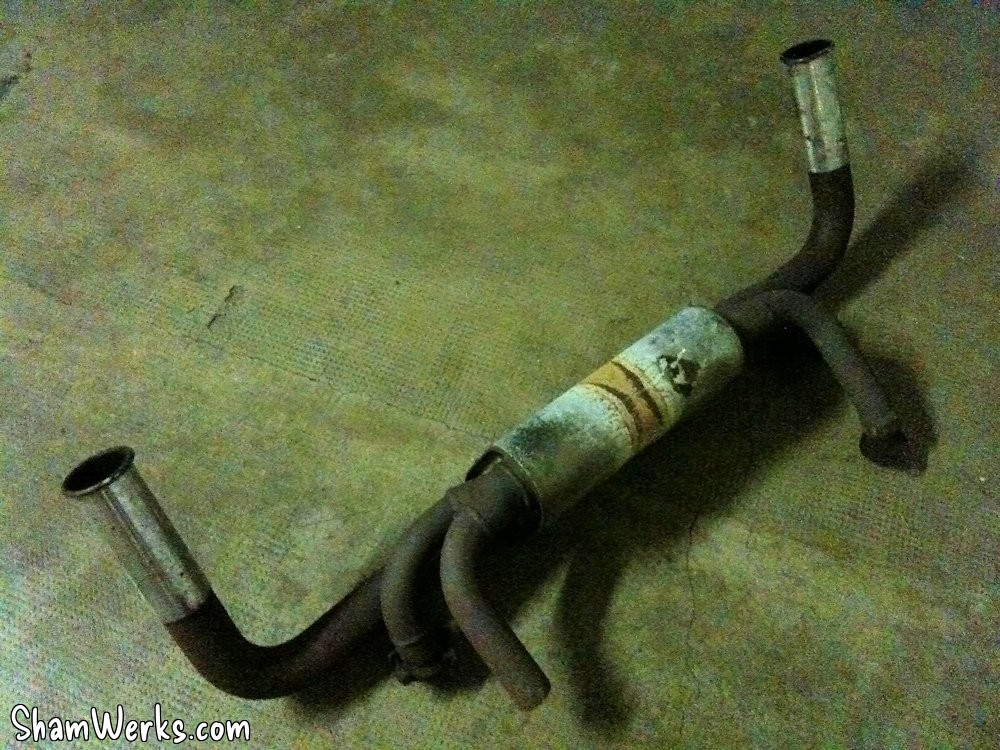
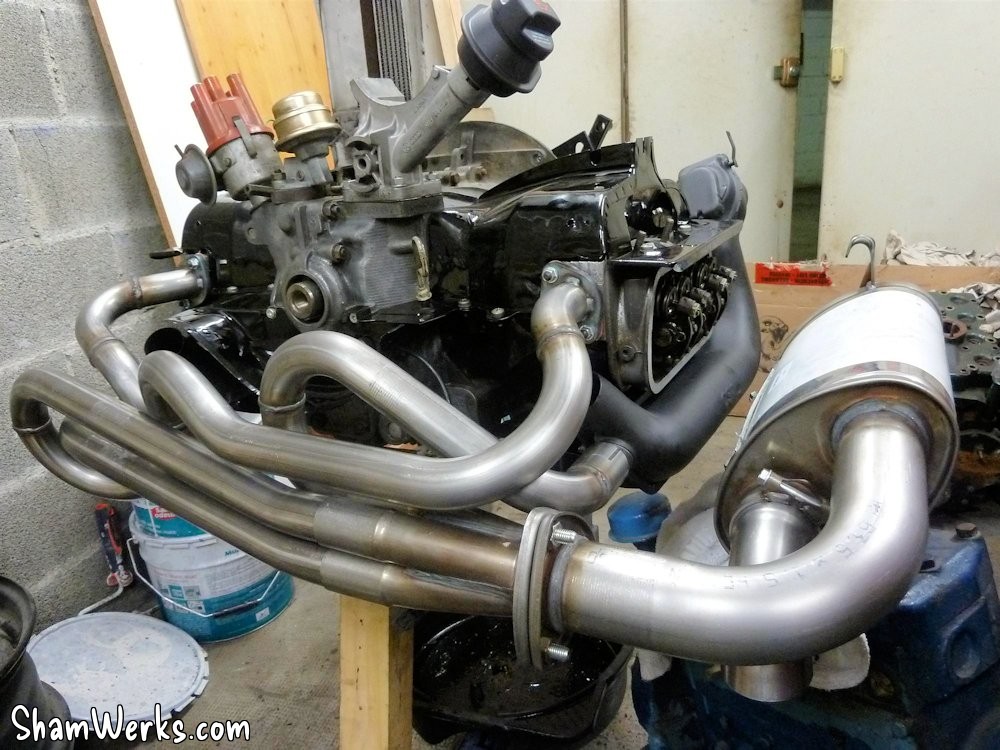
Exhaust
It was the right time as well to get rid of the hideous exhaust that was on Kitty since I bought it, and replace it with a 38mm CSP Python, along with its specific heat boxes. That's quite a pricy baby there, but a really nicely made one. And with its merged design, I should get a nice lambda reading. Well, hopefully!It's a bit overkill on my little 1600cc, but at least Ill be prepared if I ever decided to go bigger! (spoilers alert!)
That's quite a common customer experience in the US, but here in Europe it's usually not that smooth. Great job guys, some shops down here in France should learn from you! 😁
Putting it back together and... my Major Screw Up
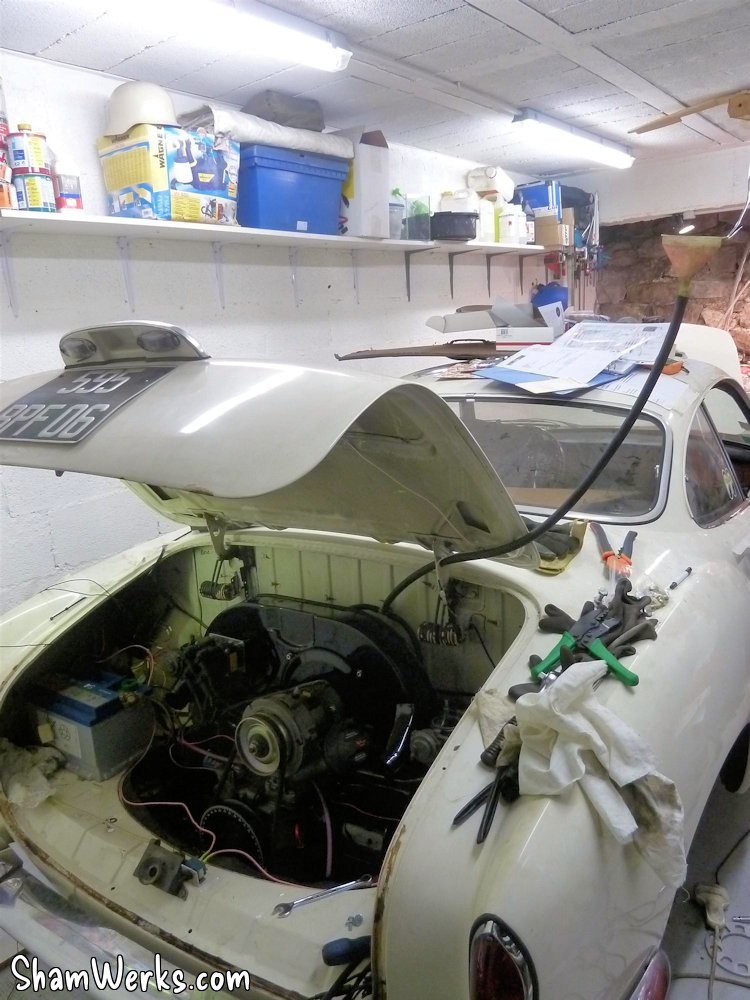
I put back the engine in the car for a first start with the Megasquirt and its wasted spark ignition (distributorless), but without the injection, still with the carburetors, just to validate the setup.A funnel hooked to the ceiling and some rubber hose will provide the fuel to the system...
The Class 1 mistake.
Like, 8 on the Richter Scale of Blunders.
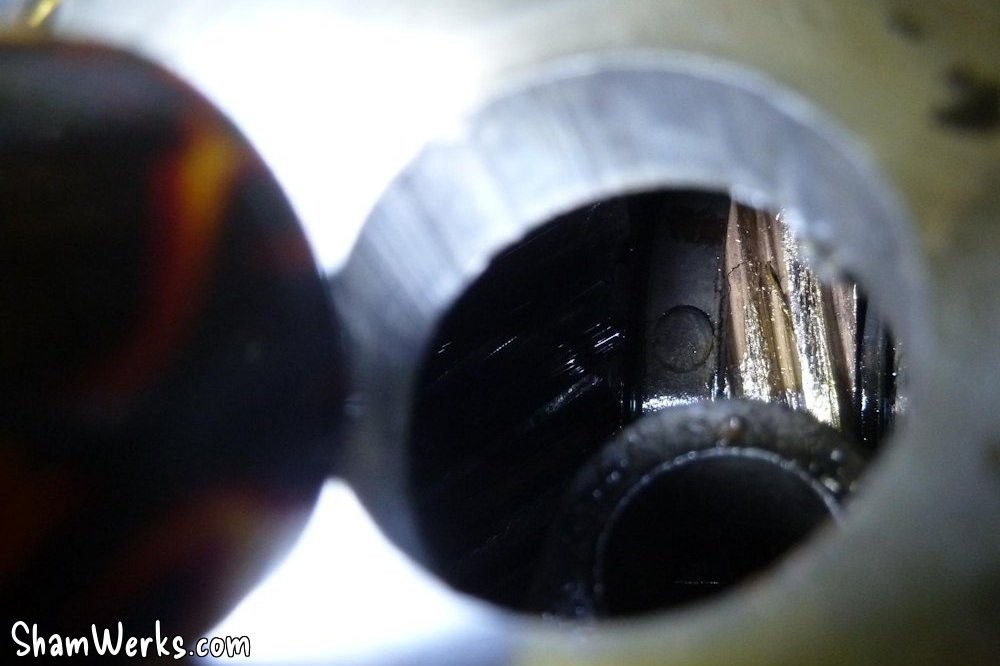
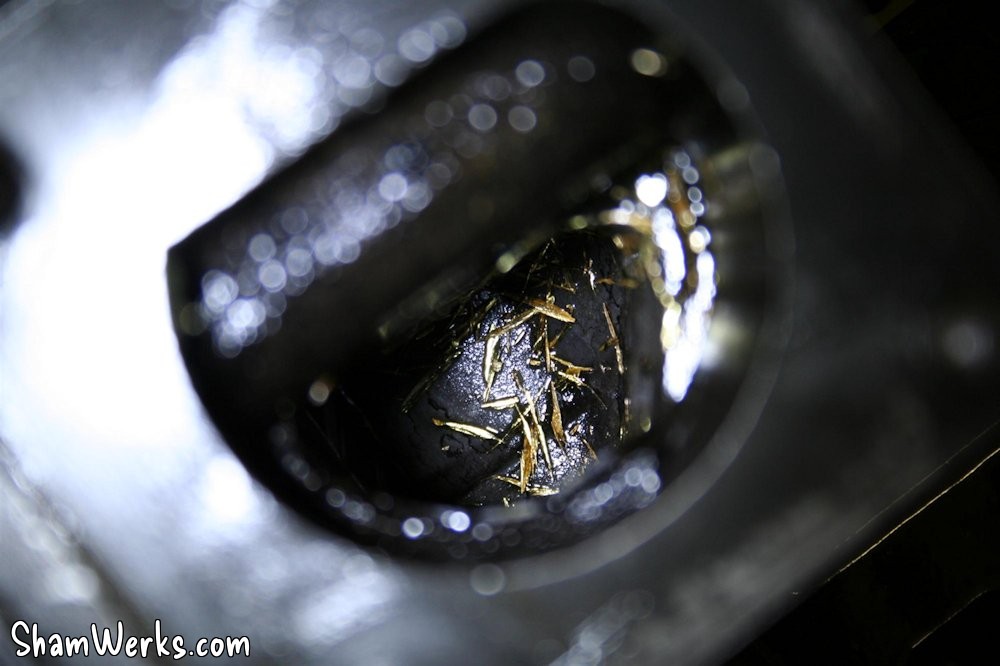
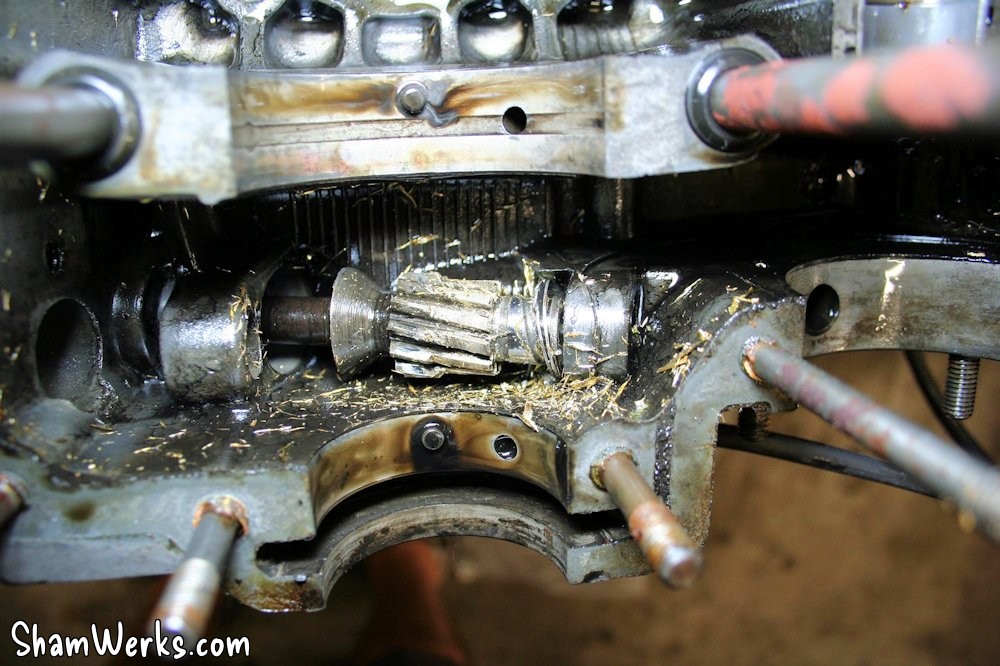
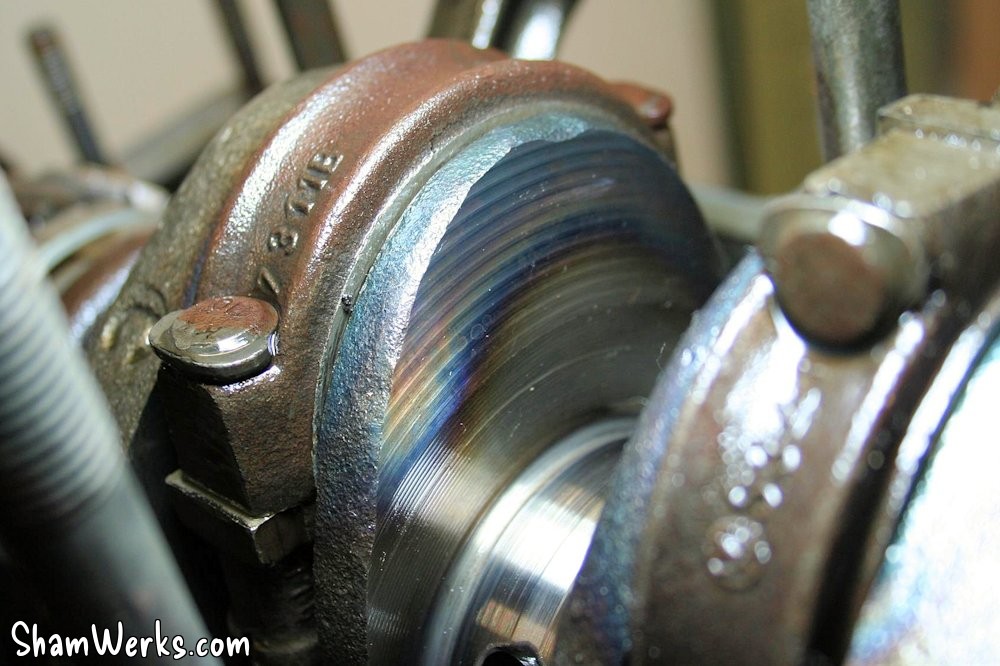
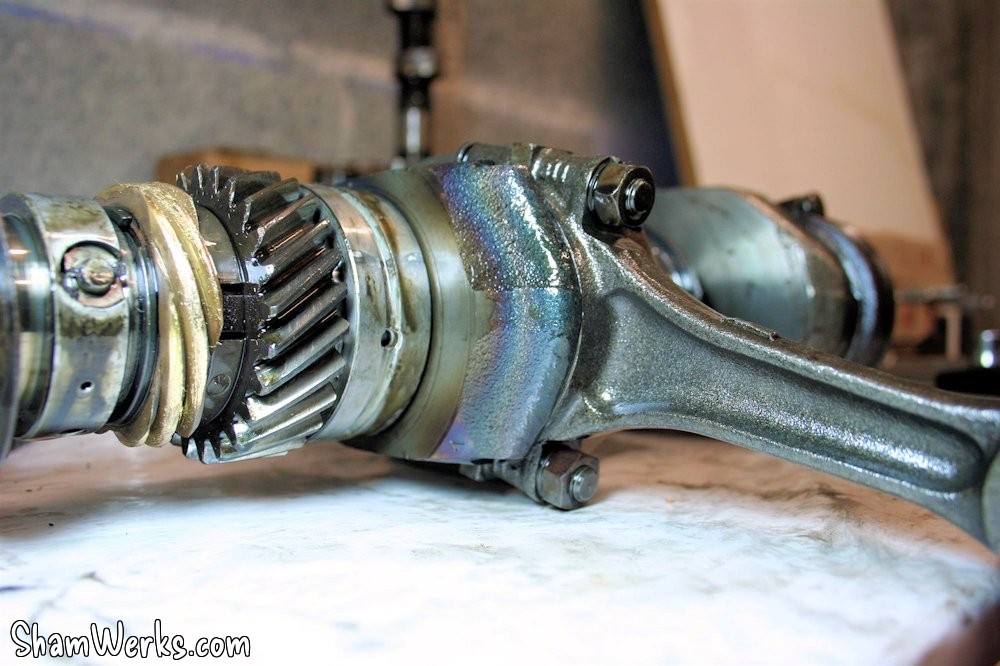
I forgot to remove the distributor drive shaft..
So upon start-up, it went up a little bit, till it went out of its bottom housing, so it tilted a bit, seized up into the case and machined the drive pinion on the crankshaft, sending bronze shavings all over the case...
The engine has probably not run more than 8 seconds, but it's too late, back to square one, I have to take it out again, open the carter and clean everything! 😔
I'll remember this one for a long time... Excuse my french, but F*CK!


Argh, I can't believe I was just moment away from being able to drive it! Grrrrr!!!
Still, the good new is, it started perfectly, so at least my ignition setup is validated! (come on, let me have this good news!)😁
Ok, so, i just have to open it, clean everything, throw in a set of main bearings just to be sure, an close it back, right? Ts'gonna be easy, ain't it? Imma right? Uh?
But nothing's ever that simple... That would be too simple. 😁
Opening the engine
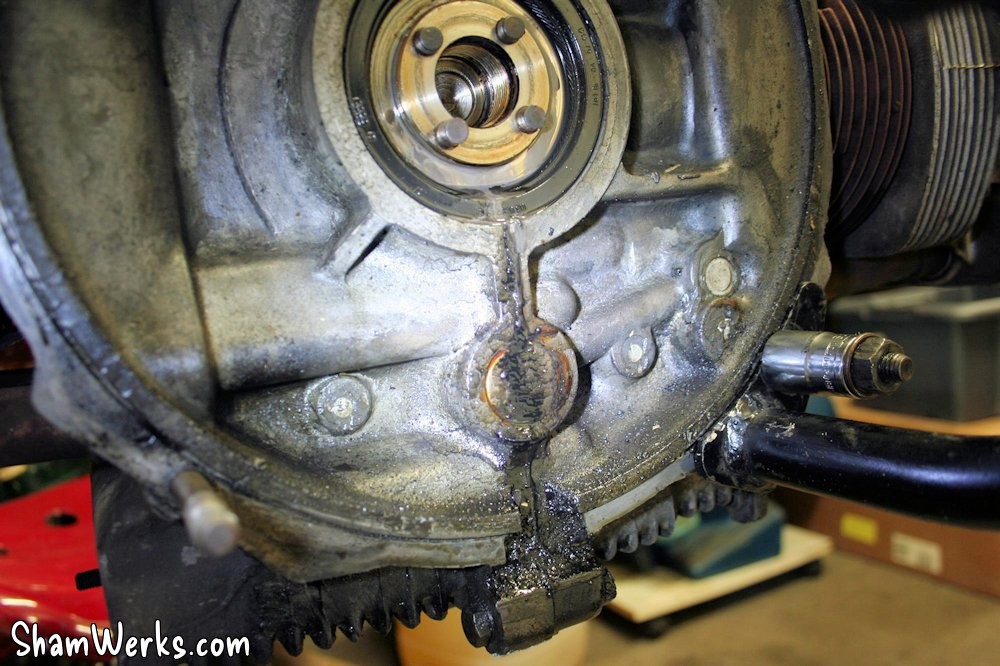
I can't avoid the usual set of nasty surprises : just by removing the flywheel I find a nice oil leak at the crank seal...Next, on the crankshaft itself I find heavy bluing marks, which I really not like. Upon inquiry, it might just be the result of the machining process of the journals, but still, I'm not too keen on putting it back like that... Anyway, moving on.
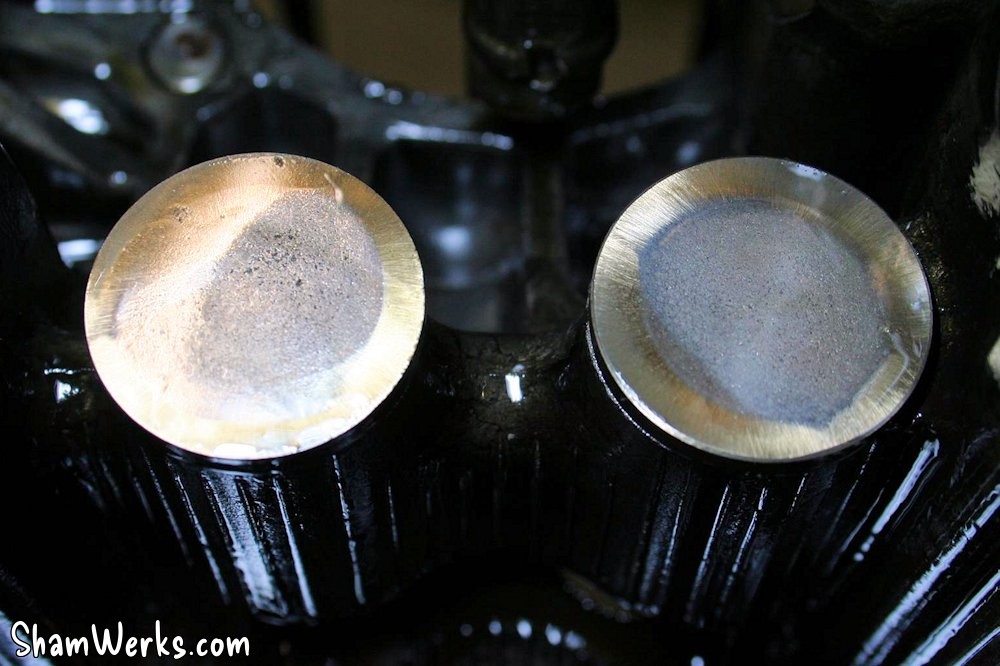
The lifters are totally worn out... Great... 😔
Needless to say, the camshaft looks the same.
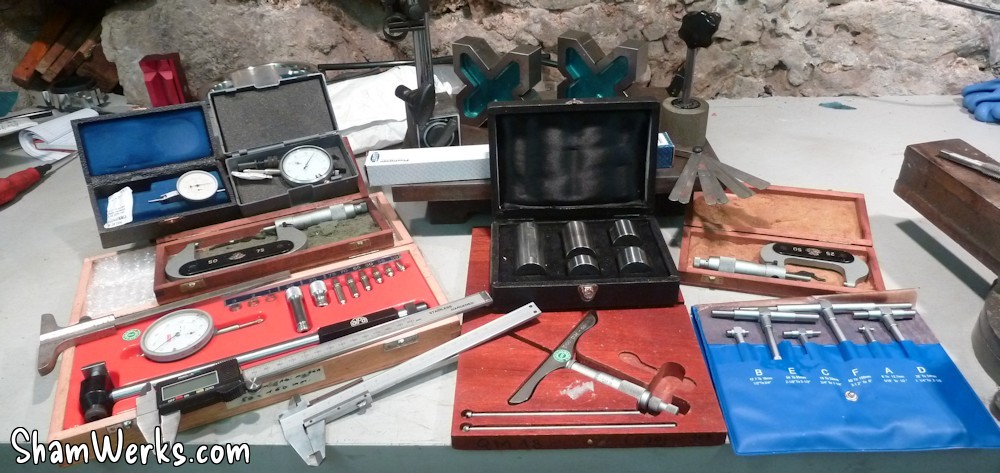
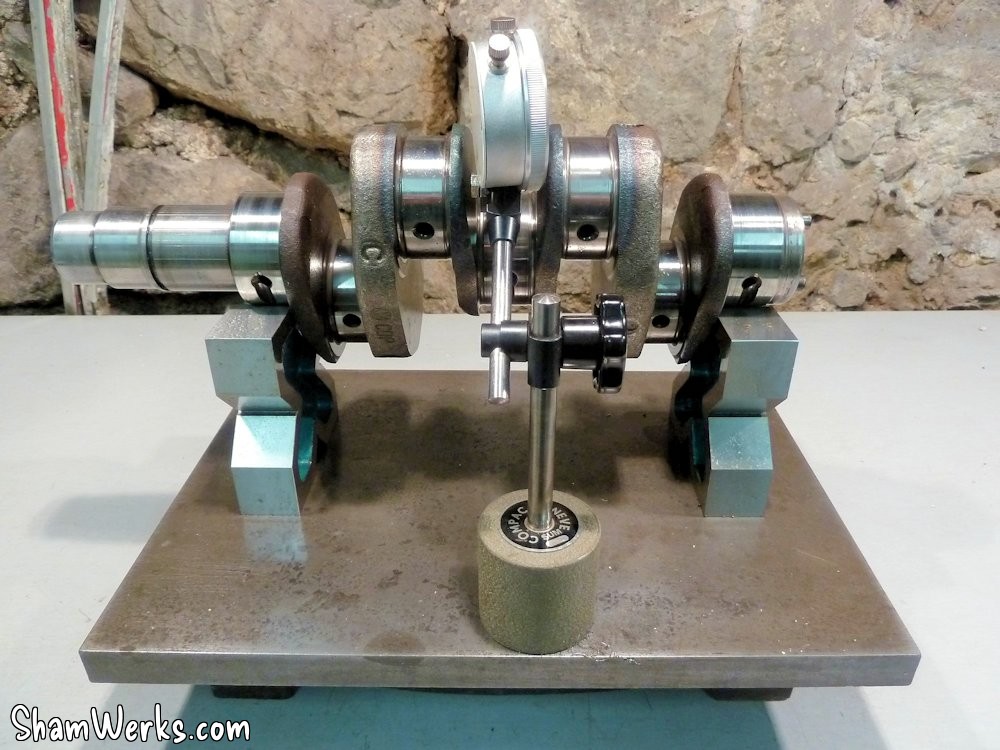
Next, I take out my metrology set to see where we're at... A couple of micrometers, a bore gauge, calipers, a small surface plate, V blocks, magnetic stands, telescopic feeler gauges, Plastigauge, depth gauge, gauge blocks set, I got myself reasonably equipped over time, which gives me some autonomy when it comes to controlling my parts.
These are quite pricey toys, but keeping an eye on eBay and the adds on specialized forums helps finding bargains!
Bam, it keeps getting better : the out-of-round is 0.07mm! Volkswagen gave a factory tolerance of 0.02mm max, it's already way off! 😔
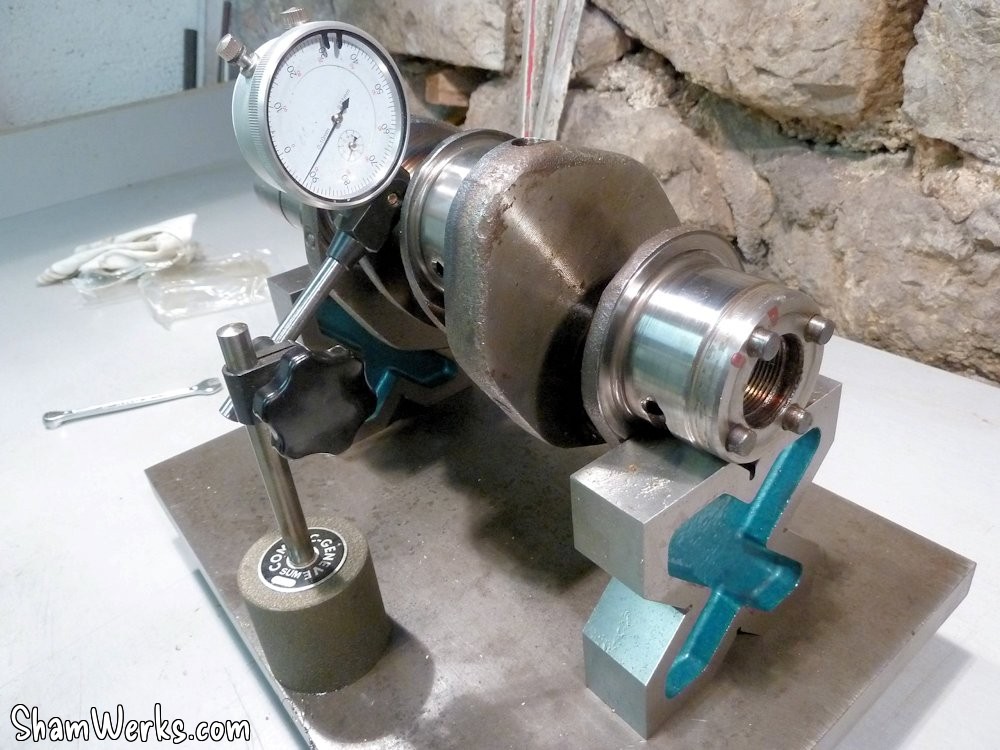
- Main journal 1 : 54.988 / 54.985 / 54.988
- Main journal 2 : 54.980 / 54.980 / 54.980
- Main journal 3 : 54.988 / 54.985 / 54.983
- Main journal 4 : 39.994 / 39.993 / 39.993
Next comes the time to check the case... I fetch the bore gauge, and then, you get a laugh :
- Palier 1 : 66.02 / 66.03 / 66.04
- Palier 2 : 65.51 / 65.51 / 65.49
- Palier 3 : 65.49 / 65.49 / 65.50
- Palier 4 : 50.57 / 50.58 / 50.57
What the Hell?? Someone felt asleep on the mill at VW South Africa??
All things considered at this point, I reckon it's finally a good thing that I opened my engine... OK, it used to work great, but it might very well not have done so for much longer. 😔
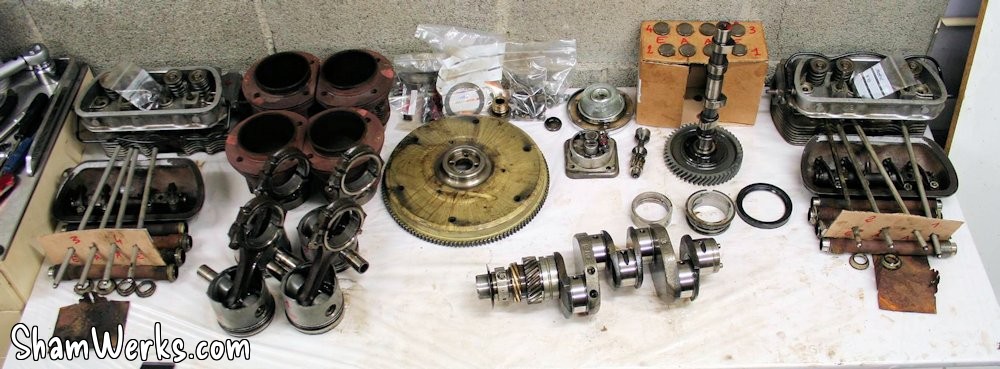
Years ago I bought an AS41 case/crank set from my friend Dangerous, as I had the project to build myself a bigger engine...
It might very be time to do so, don't you think?! 😁 Published on 30/11/2013 / 2 commentaires