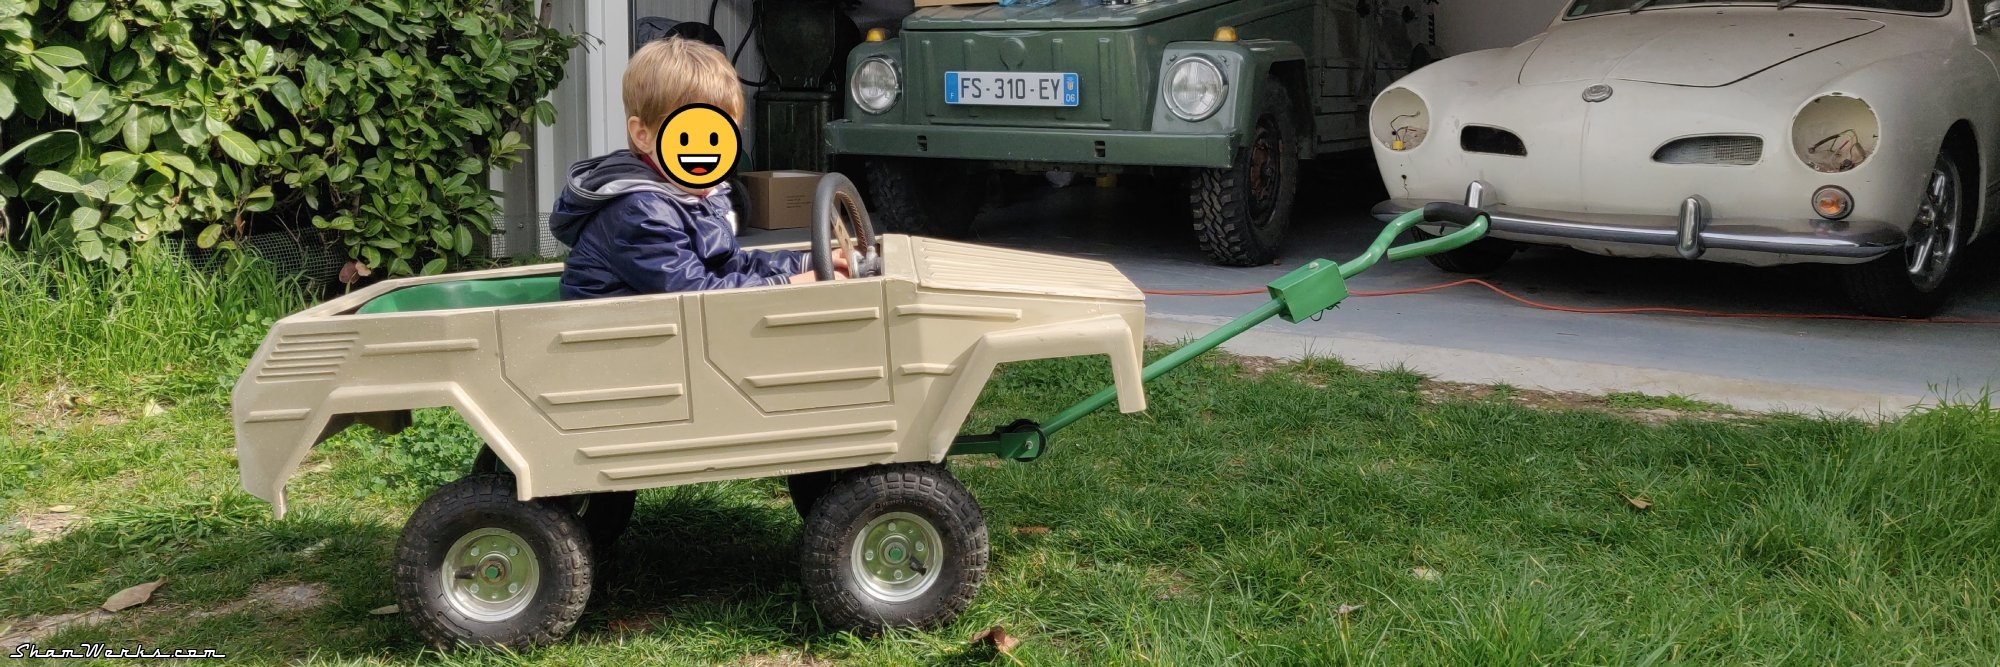
Chassis, Motor, Electricity, and first ride!
Here's a project that sat in the attic for 16 years!
The project was on hold since I had sold my VW Thing, I had then lost the motivation to make a scale version of it... But I managed to buy back my Thing in September 2020, 13 years after selling it!
But more important, in the meanwhile my son was born (2017), and when the little one saw, two years ago, the body/shell of the Mini Thing collecting dust in the workshop, he started a constant and intensive lobbying to get the project re-prioritized. 😁
Chassis
Back in 2007 I had started a chassis from square steel tubes, but it was not looking good from the beginning. I had built it in a hurry, as I had convinced myself I could get it to drive within 48 hours for an upcoming meeting. Unsurprisingly, it did not work out. To give you a glimpse of the "quality", as I did not own a lathe back then, I chose to directly spot weld the brake disc and transmission sprocket on the axle! 🫤Add on top of that the long welding session in an underground parking box, until 2AM, wearing a tank top, resulting in an unforgettably glowing sunburn... Talk about a disaster. 😁😁
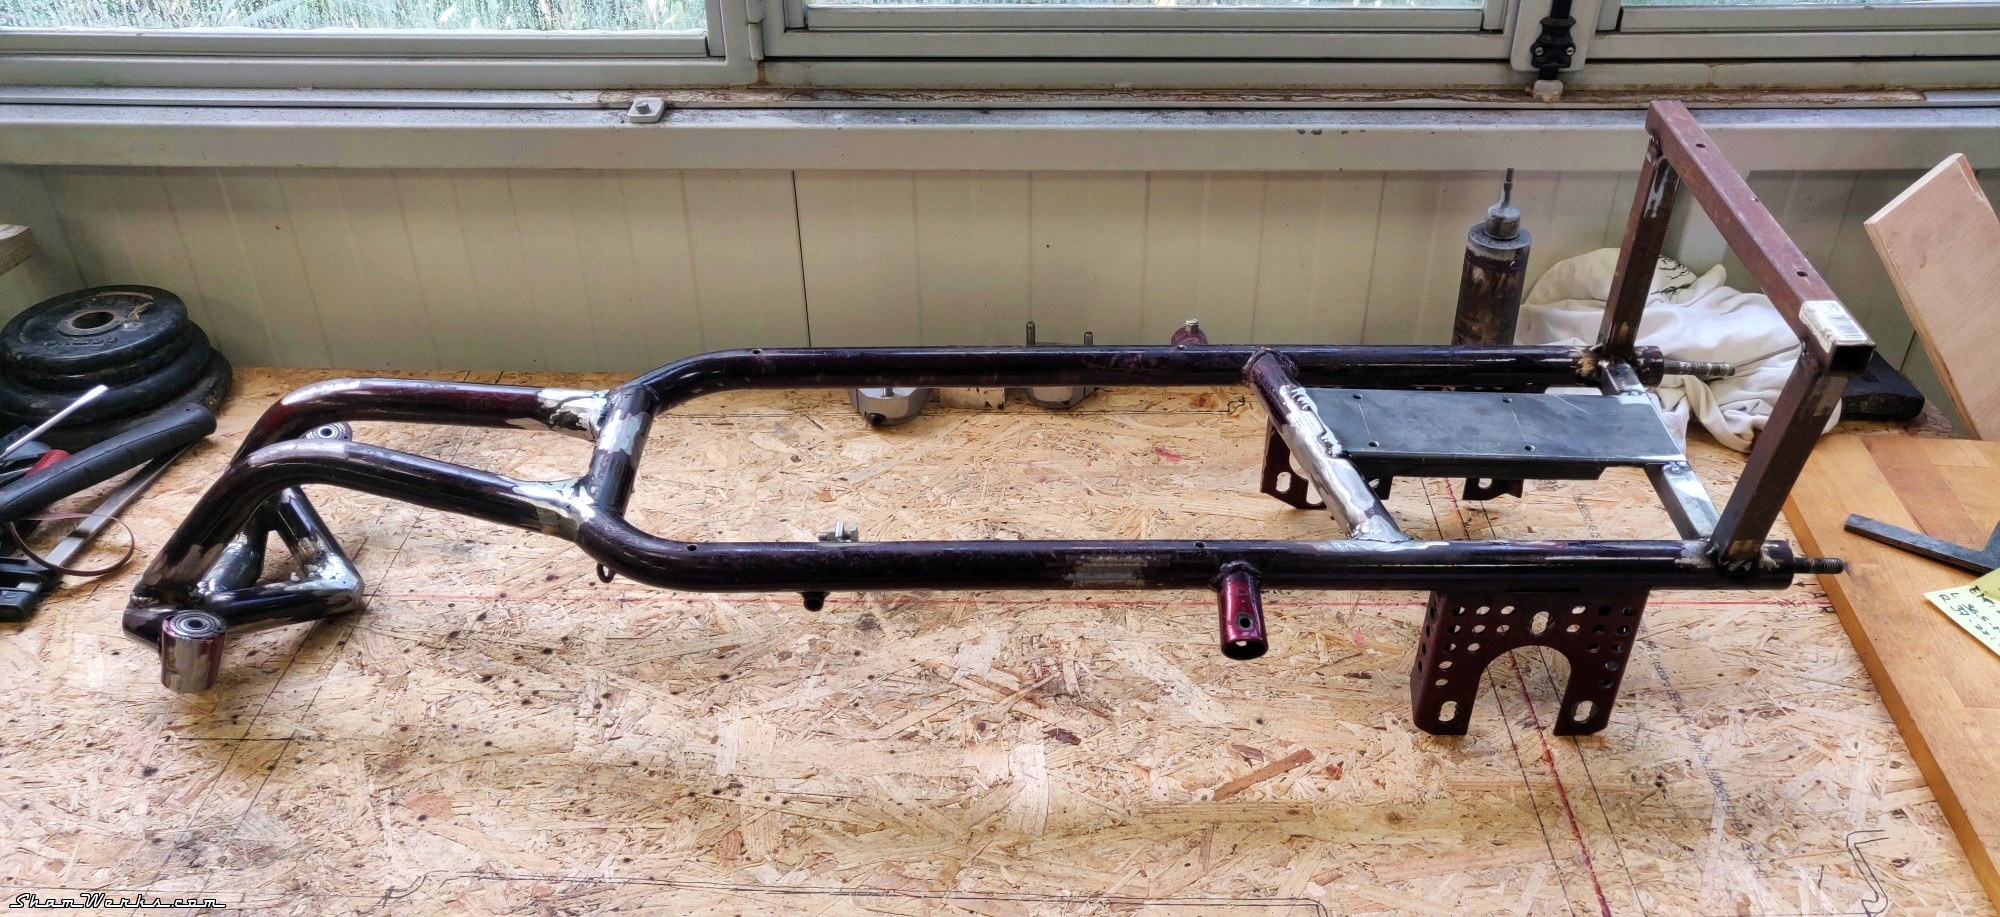
So, long story short, I started again from scratch, by sourcing two go kart chassis as base. One I bought for cheap (50€, thanks Gus!), and the other one discarded on the pavement just 100 meters from my place - fate! But you should have seen the face of the 2 cops that crossed my path, while I was dressed in a shirt and tie (I was heading to work), at 5:30AM, holding a wrecked go kart on my shoulder... Fun times. 😁😁😁😁
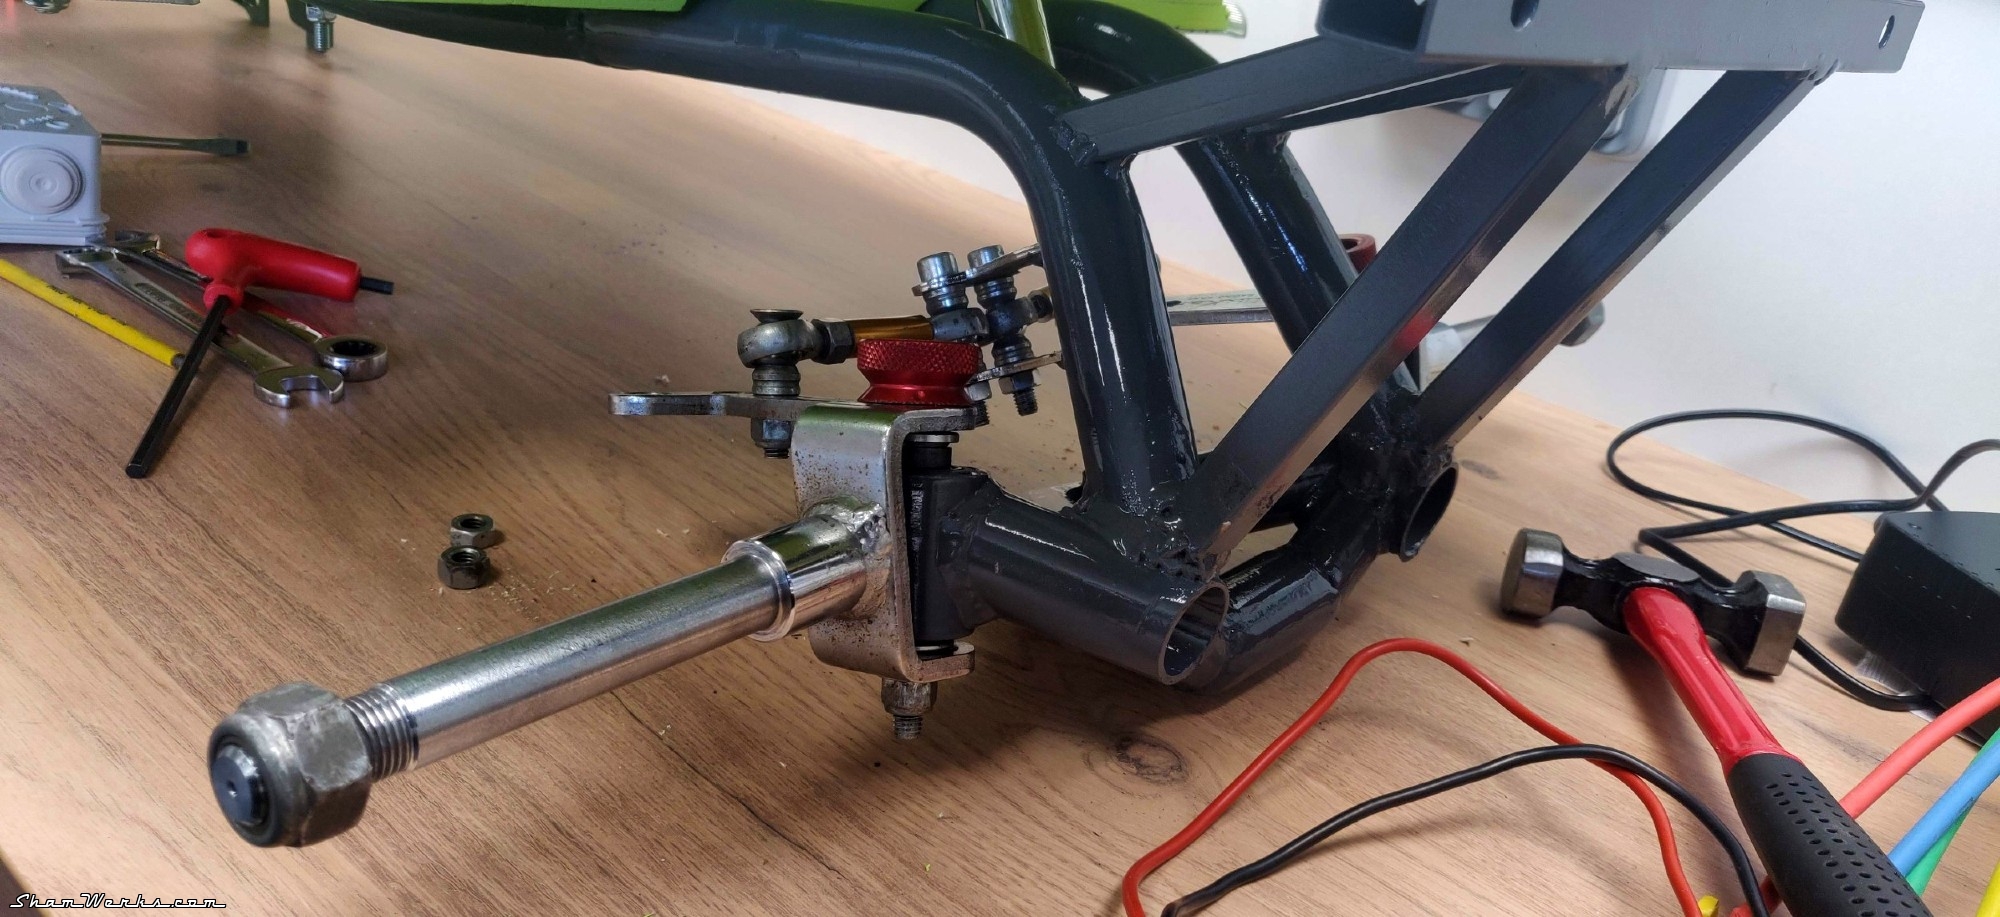
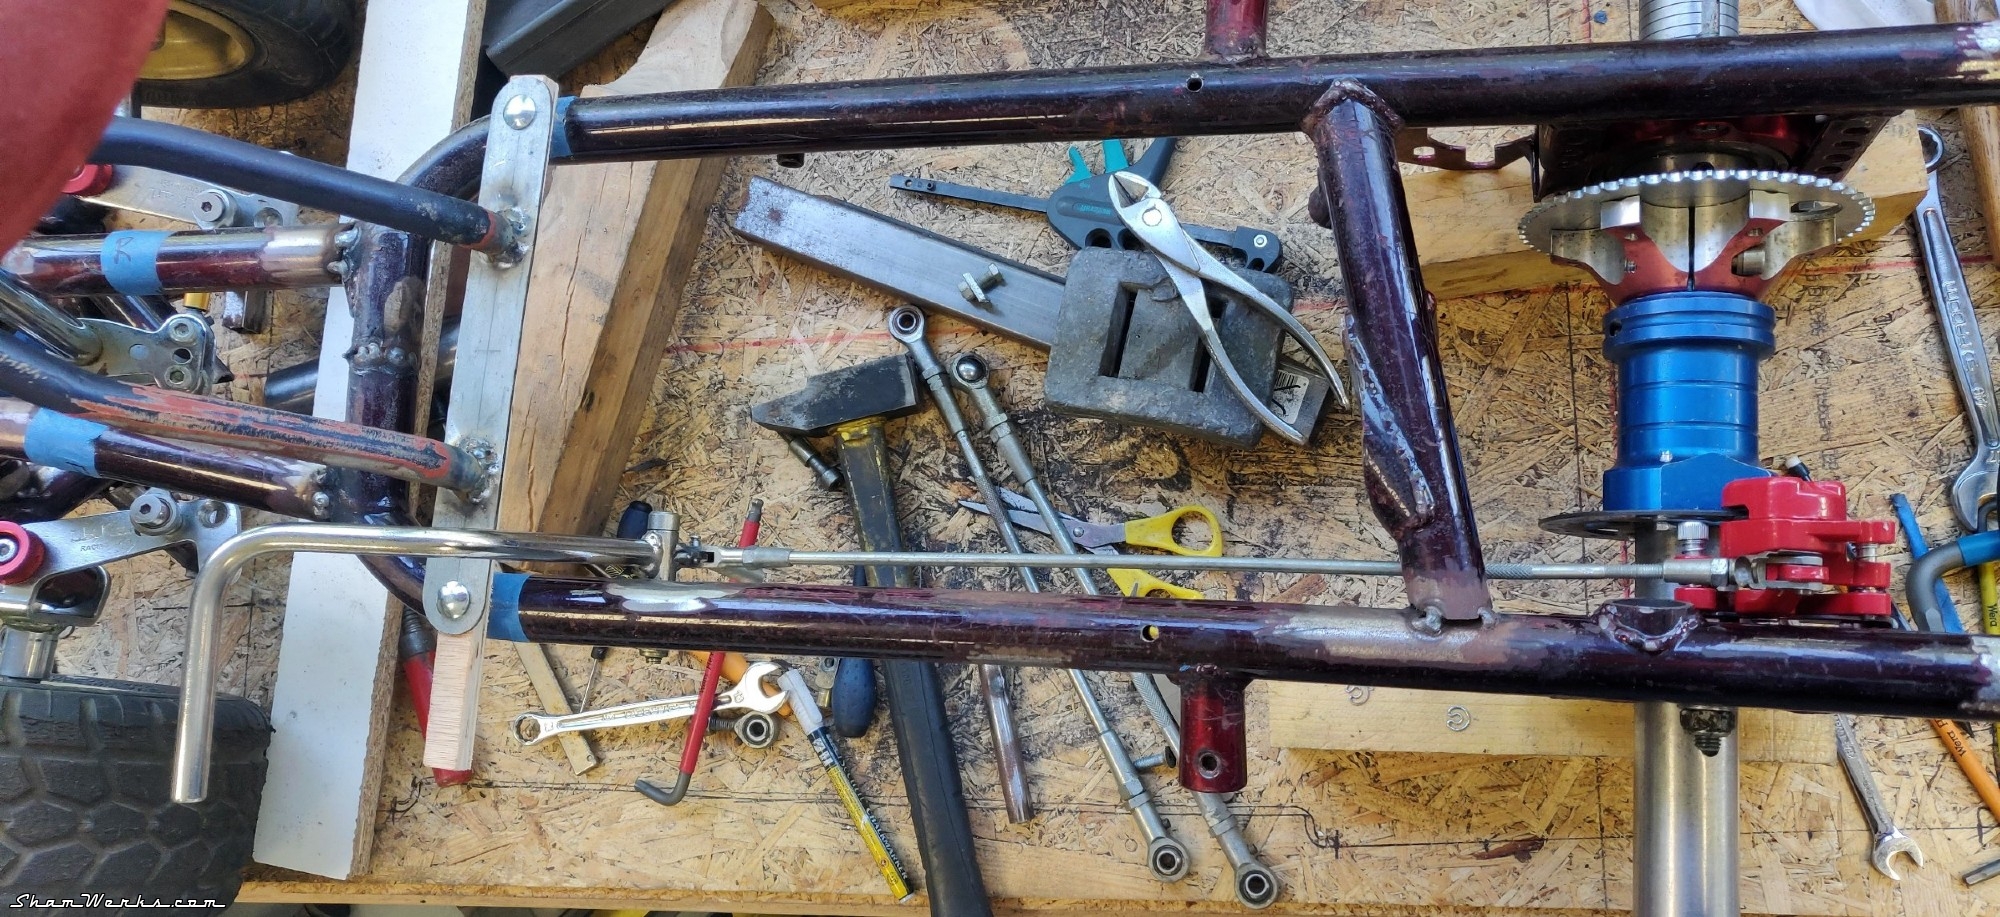
After some Sketchup design to figure out the best way to optimize my cuts, I begin with the rear end of the chassis. I cut away a section of the go kart chassis, and weld it back together, while putting it upside down to gain some much needed ground clearance. A go kart usually sits like an inch from the ground, and that's not the stance I'm going for here. 😉
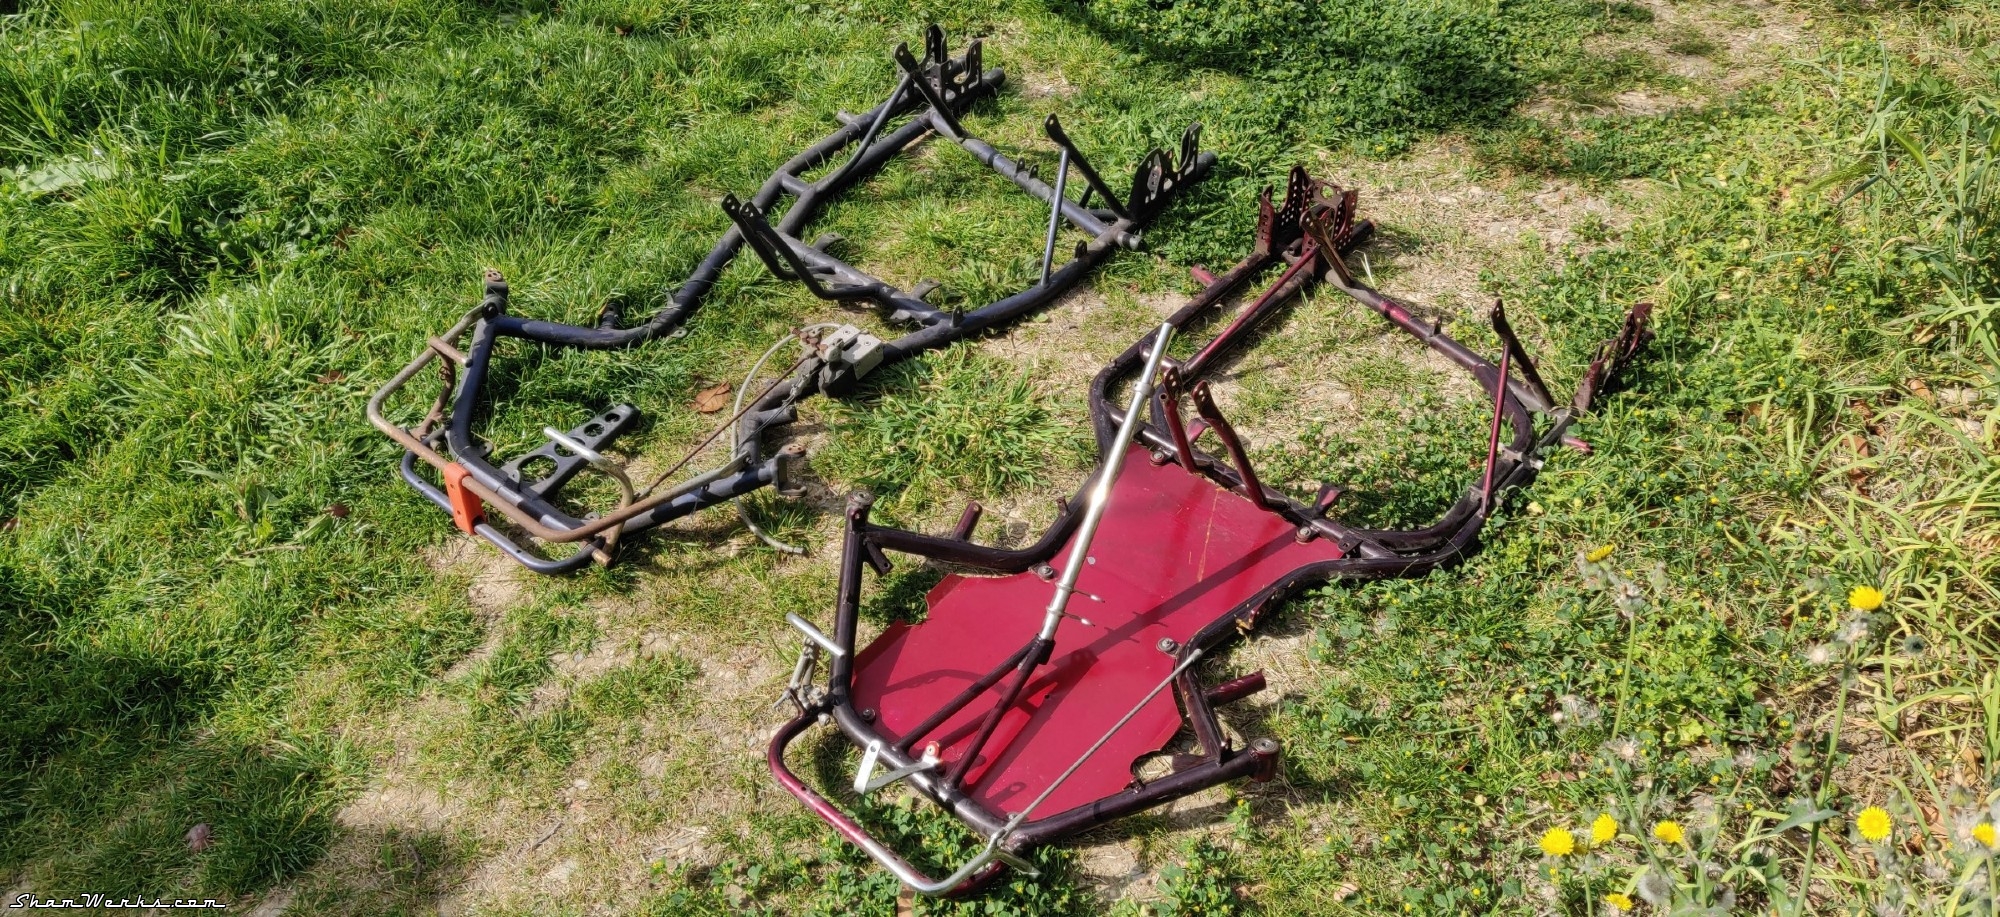
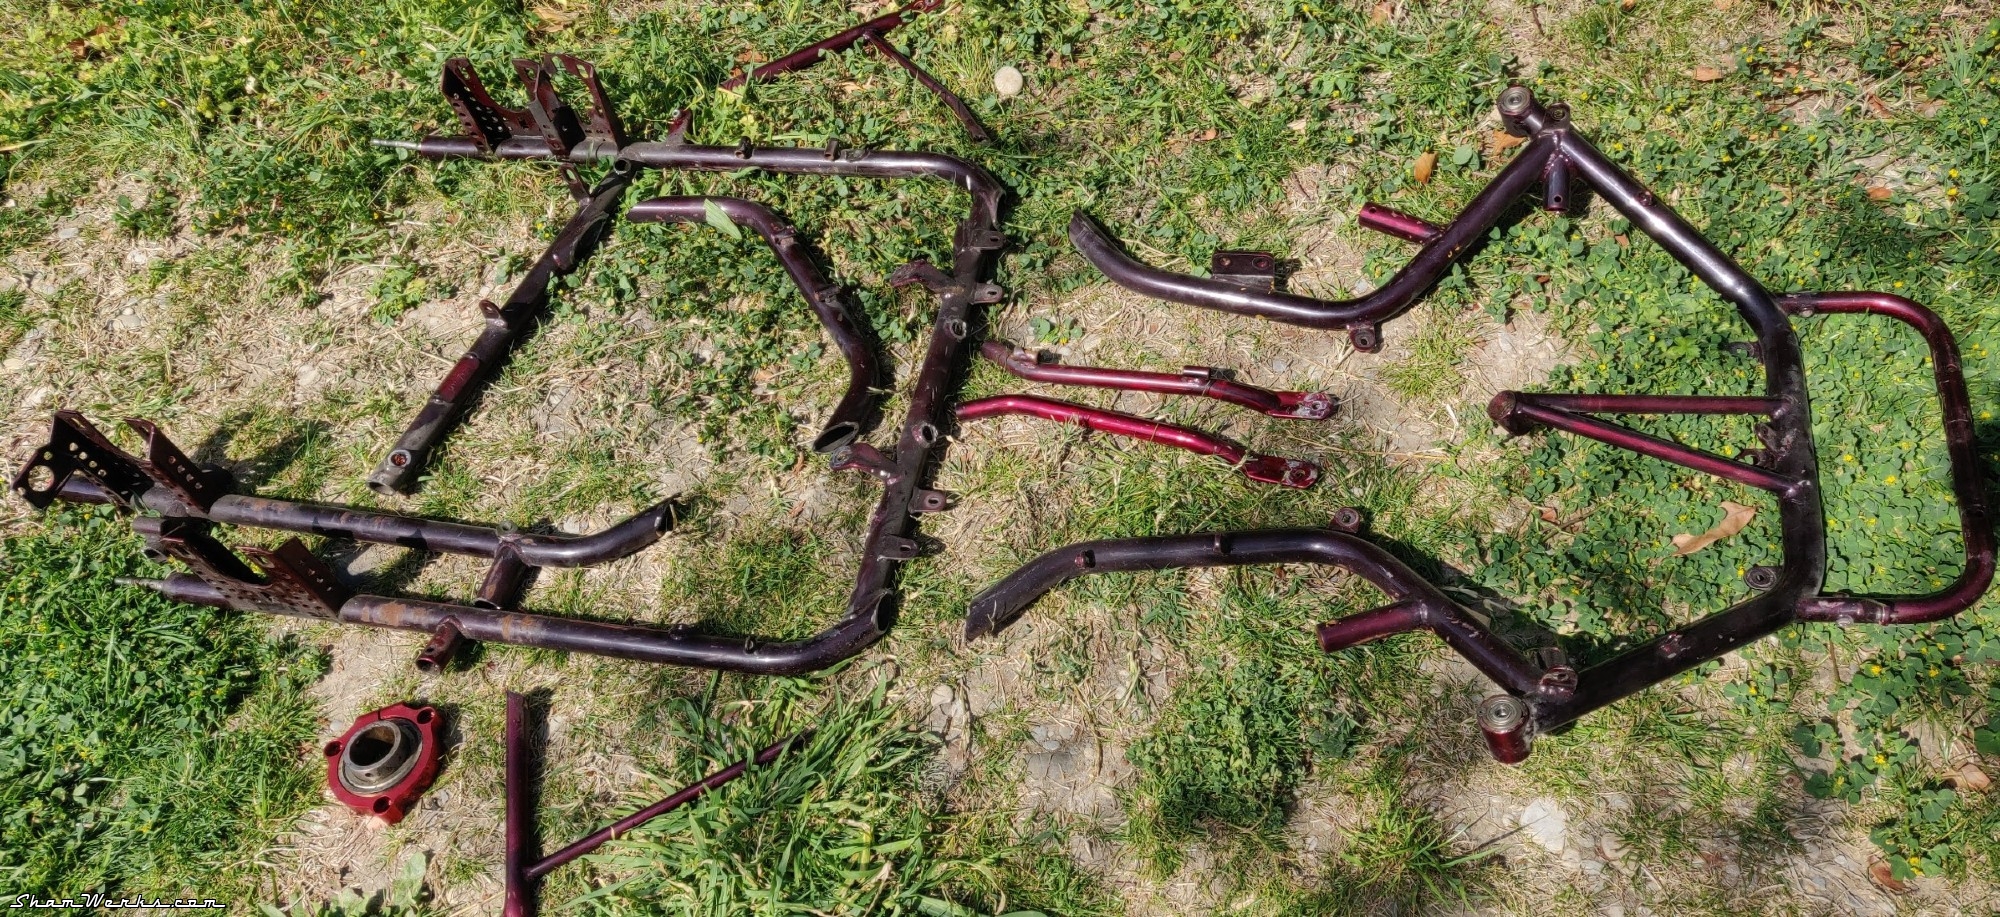


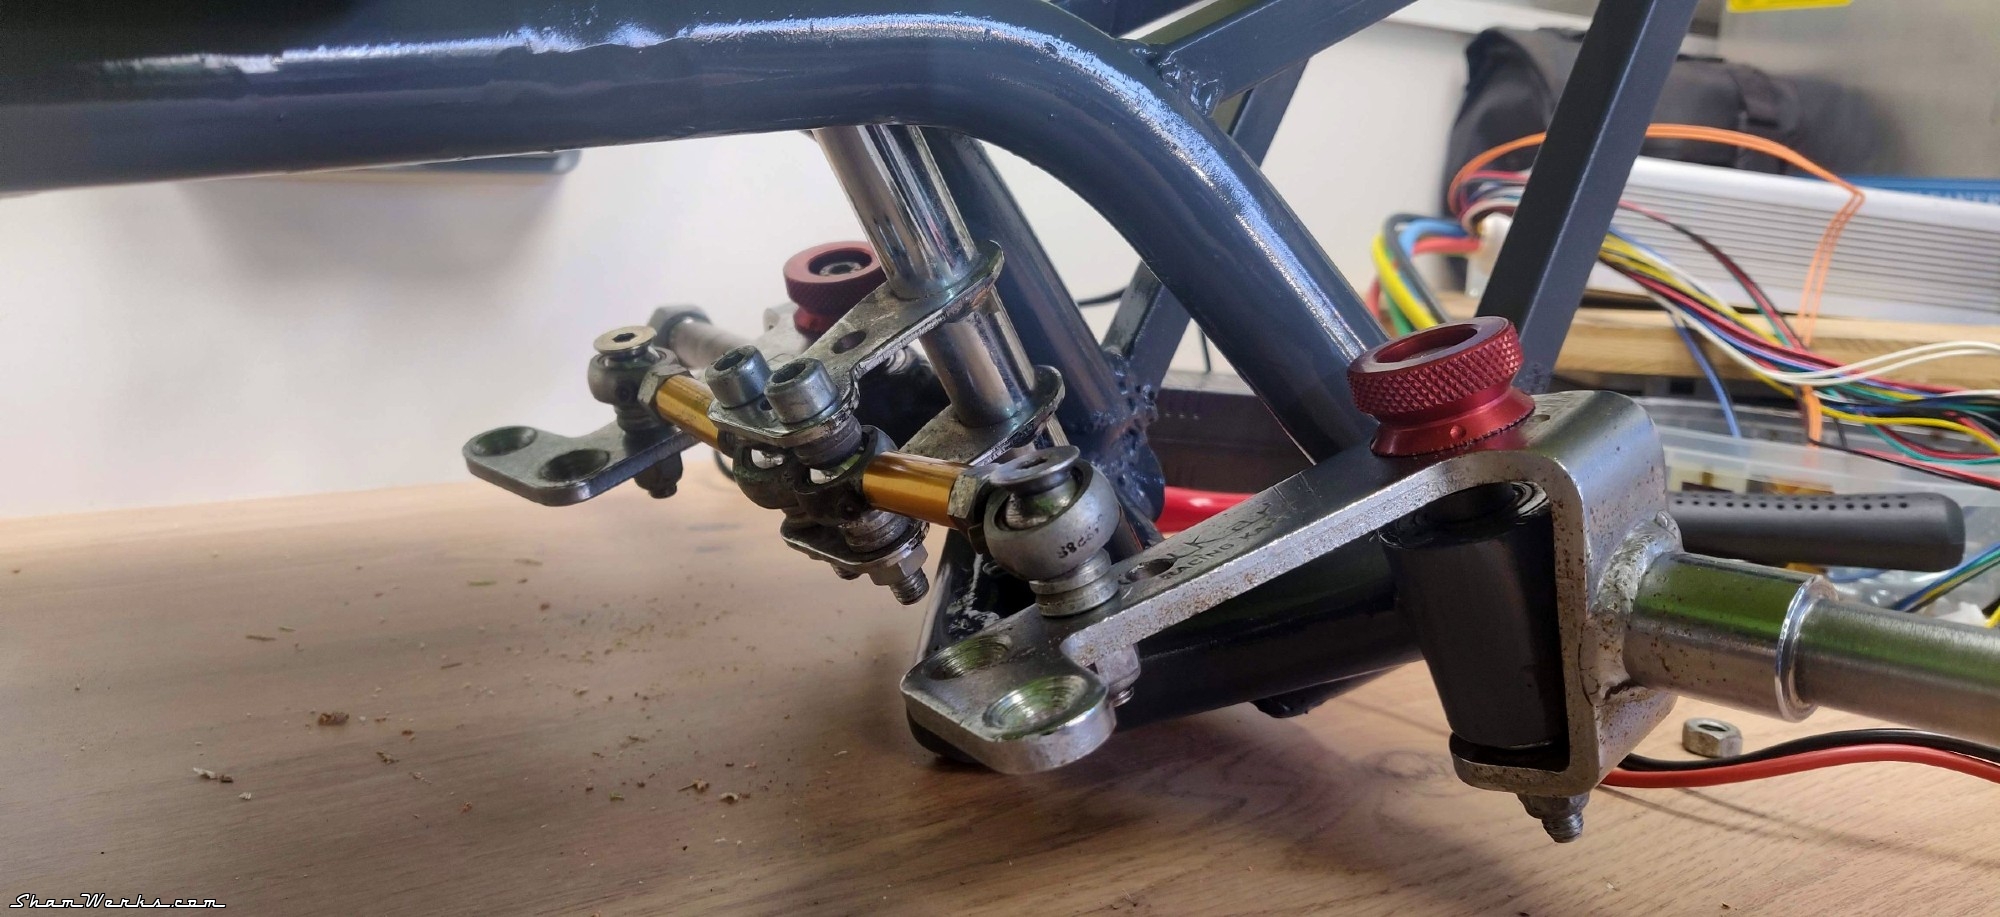
I make temporary little brackets/mounts to keep the geometry of the front axle while I cut everything, not that I intend to drive it very fast, but to ensure the steering wheel will go back to neutral on its own. Said brackets were actually cut out of the first chassis I made back in 2007, which I dug out of its rusty grave - at least it will have served a purpose! (in the end I'll have recycled most of it in this project! 😁)

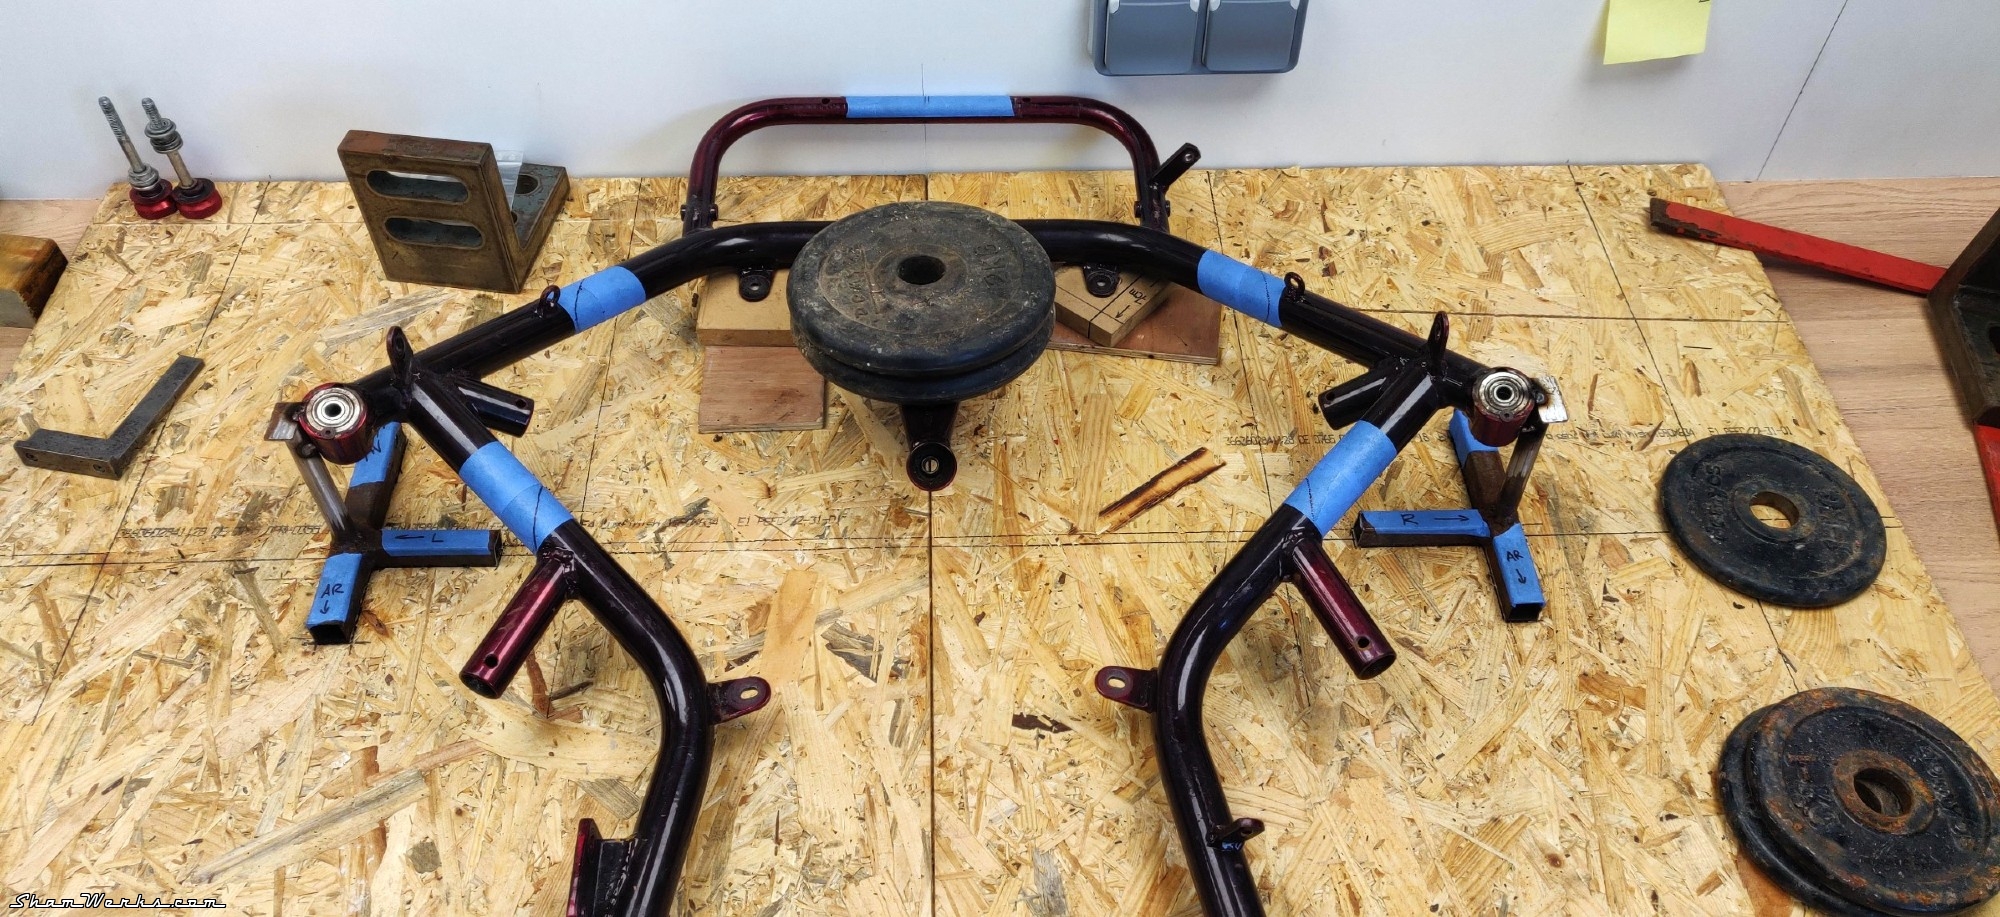
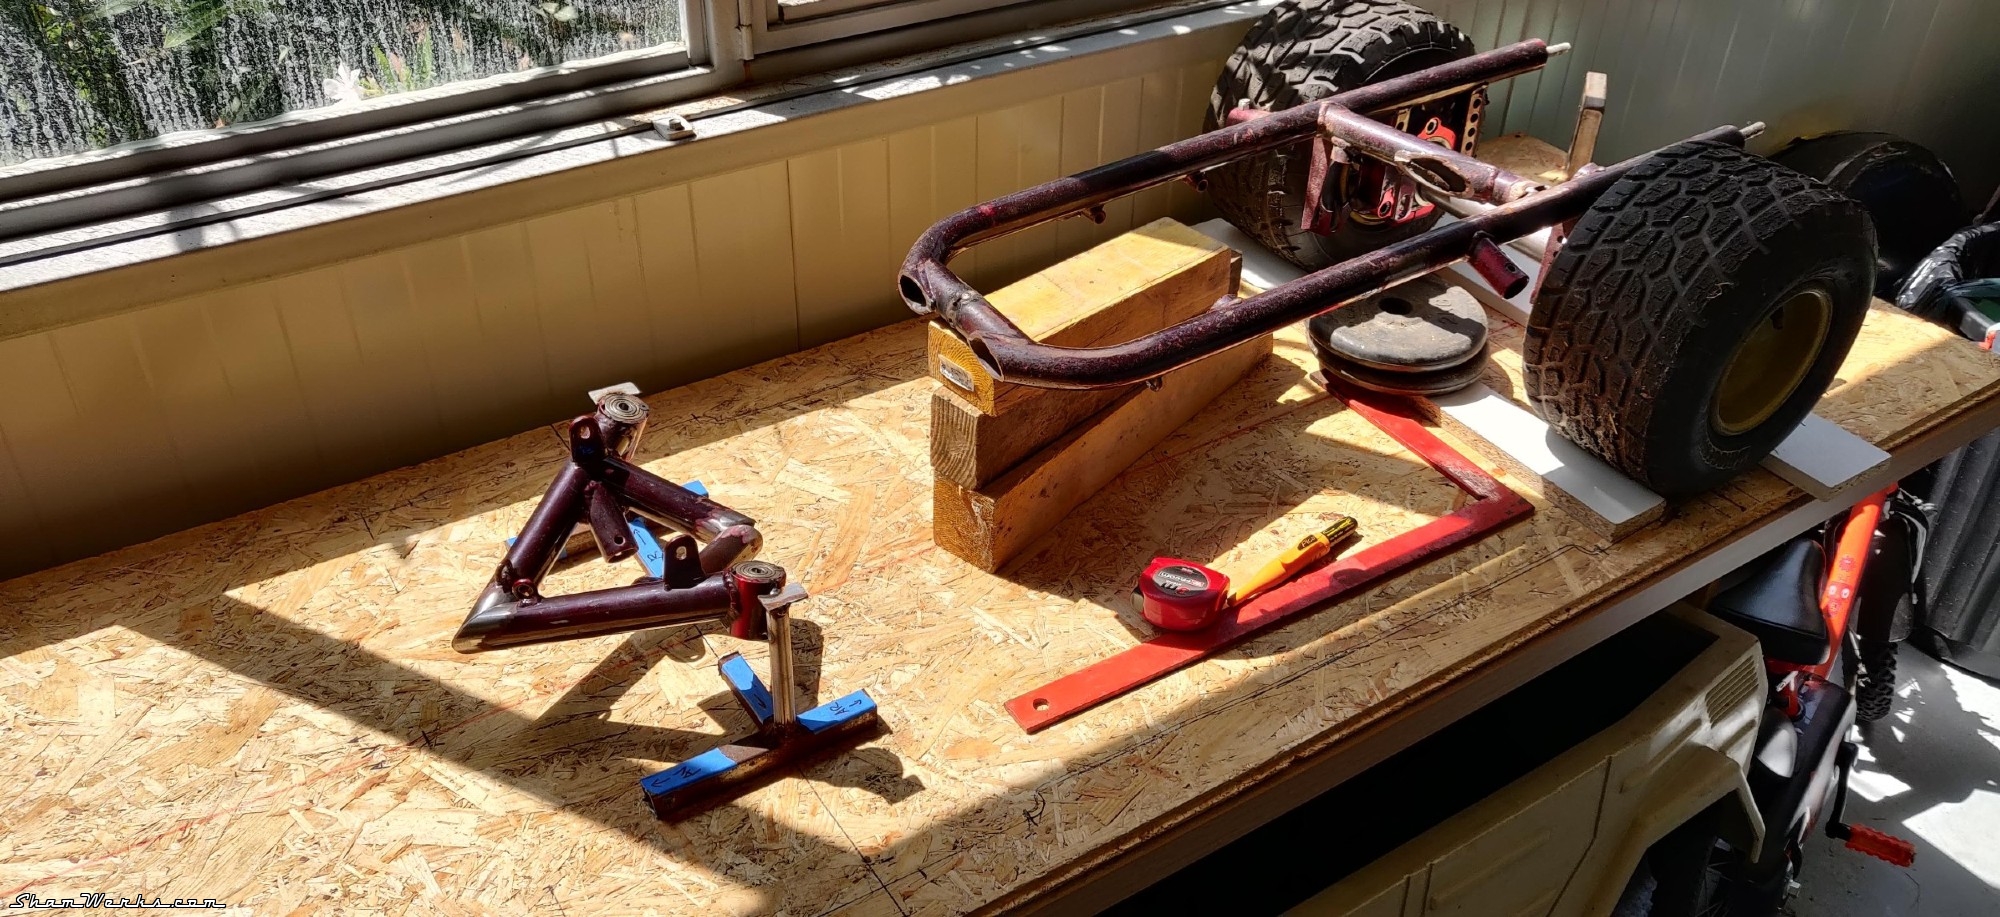
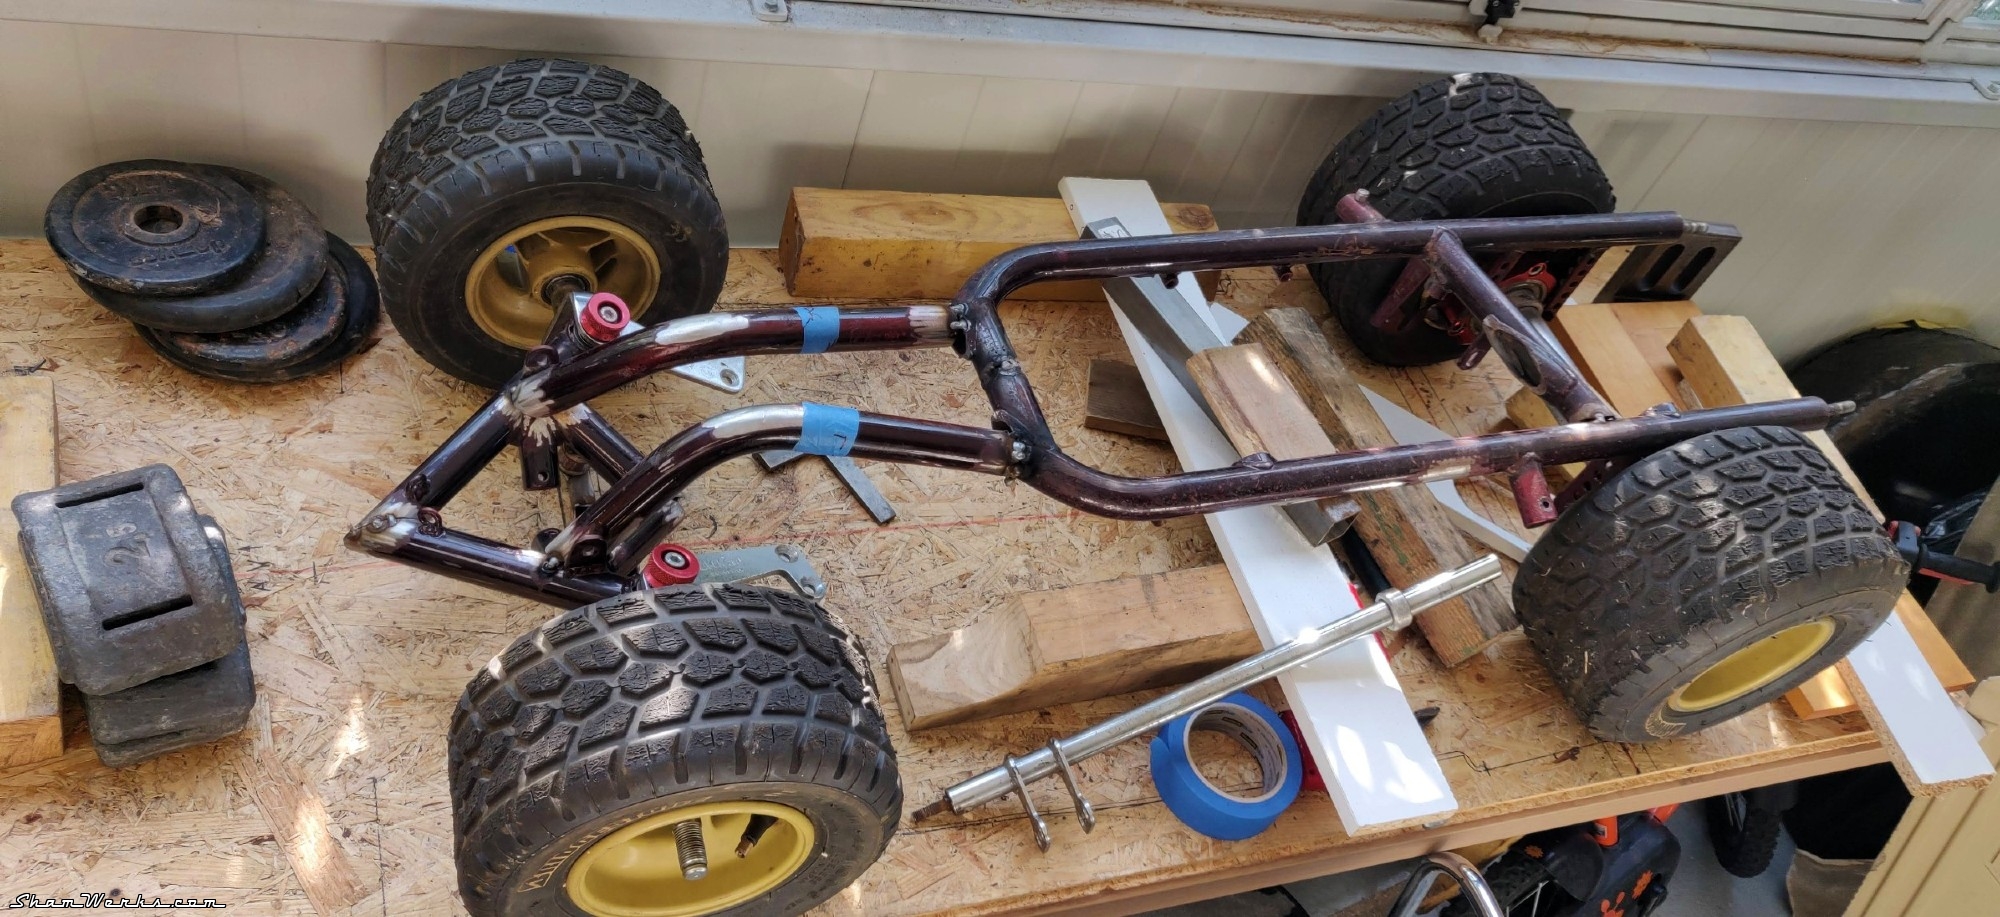
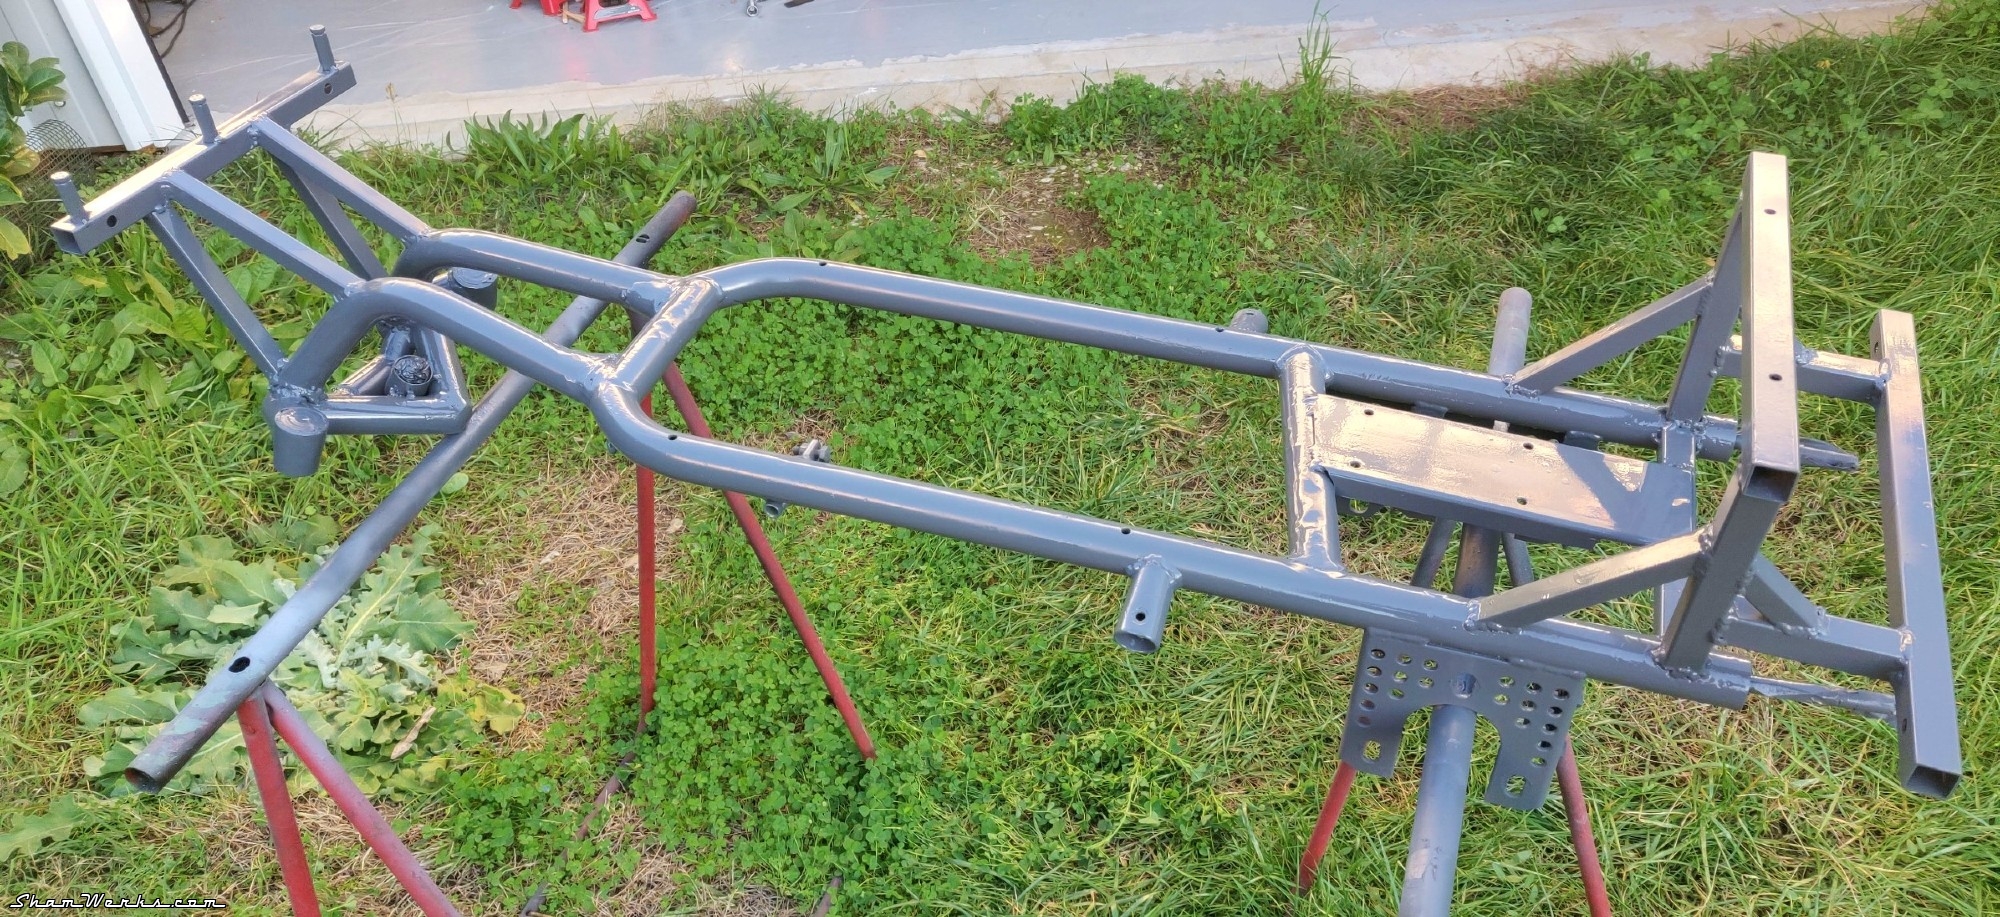
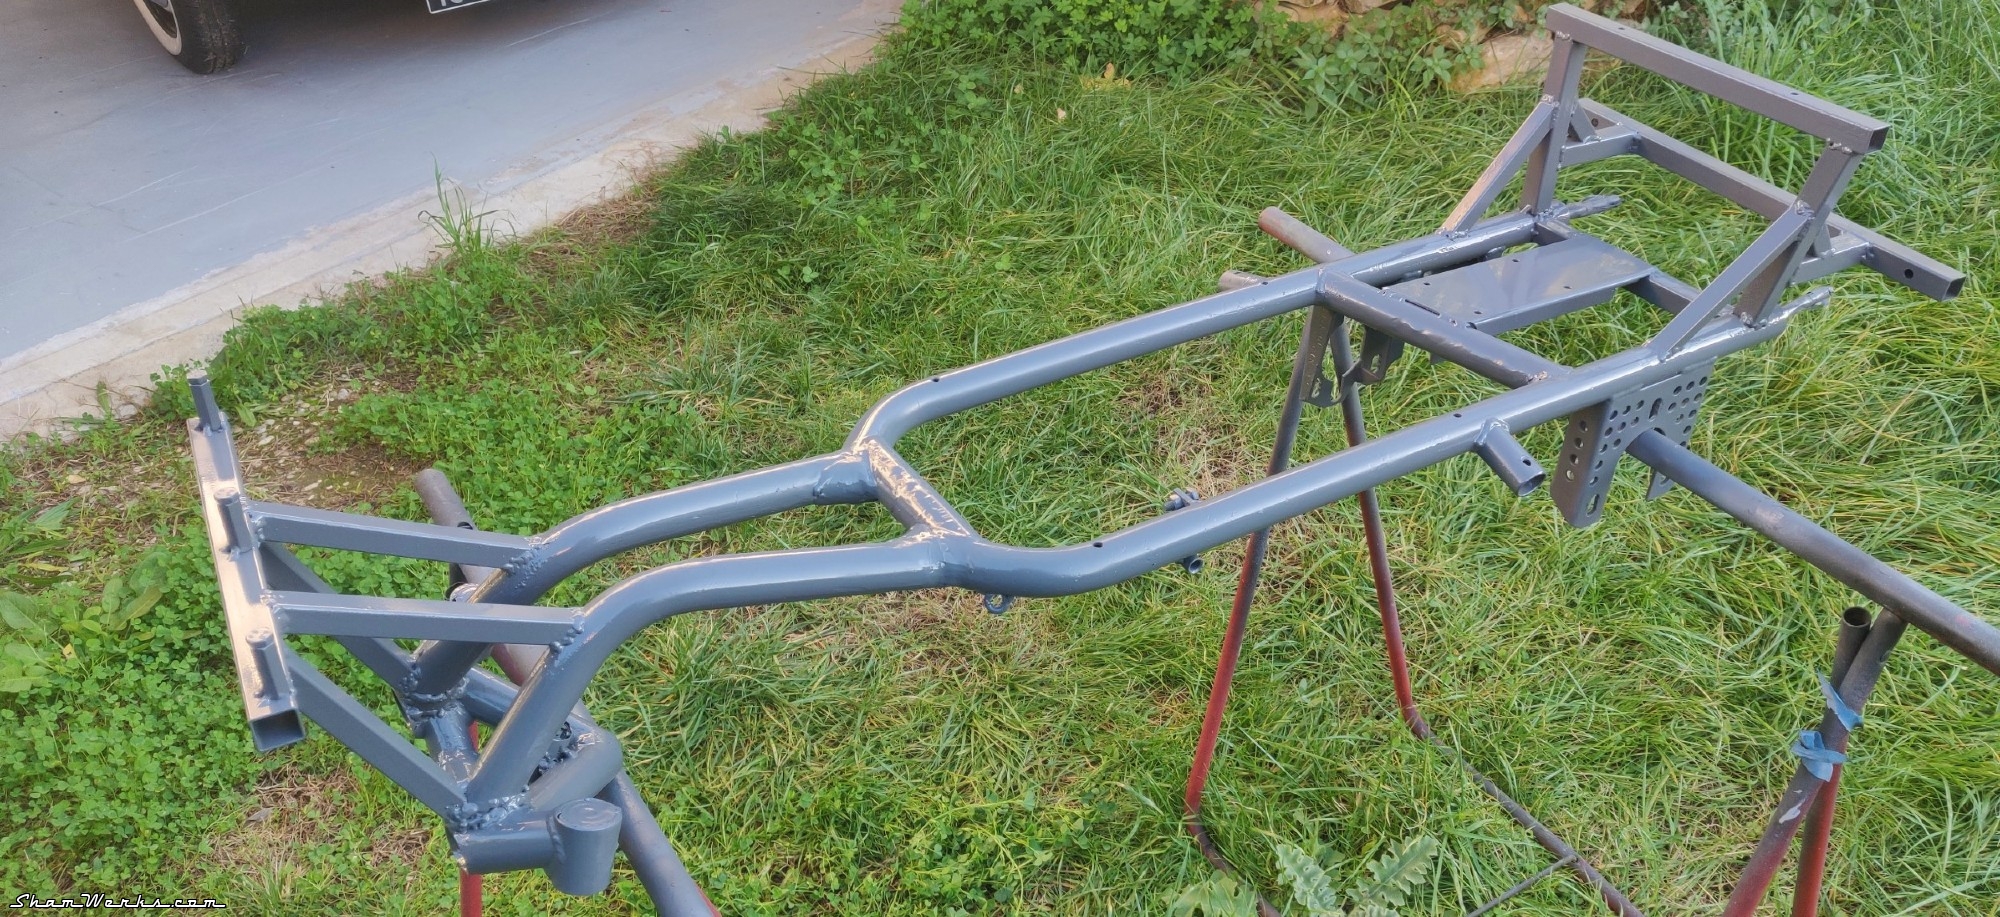
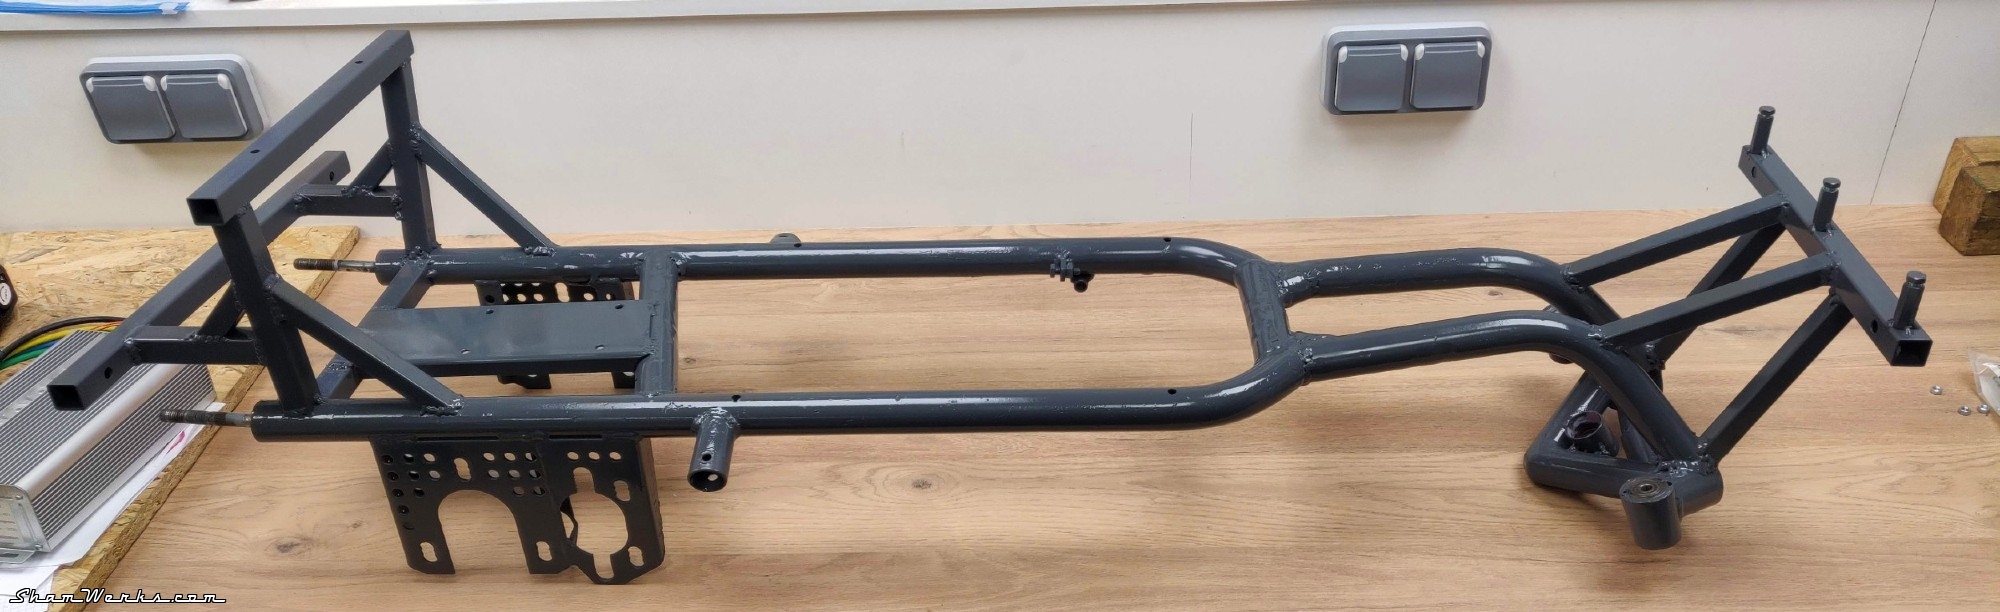
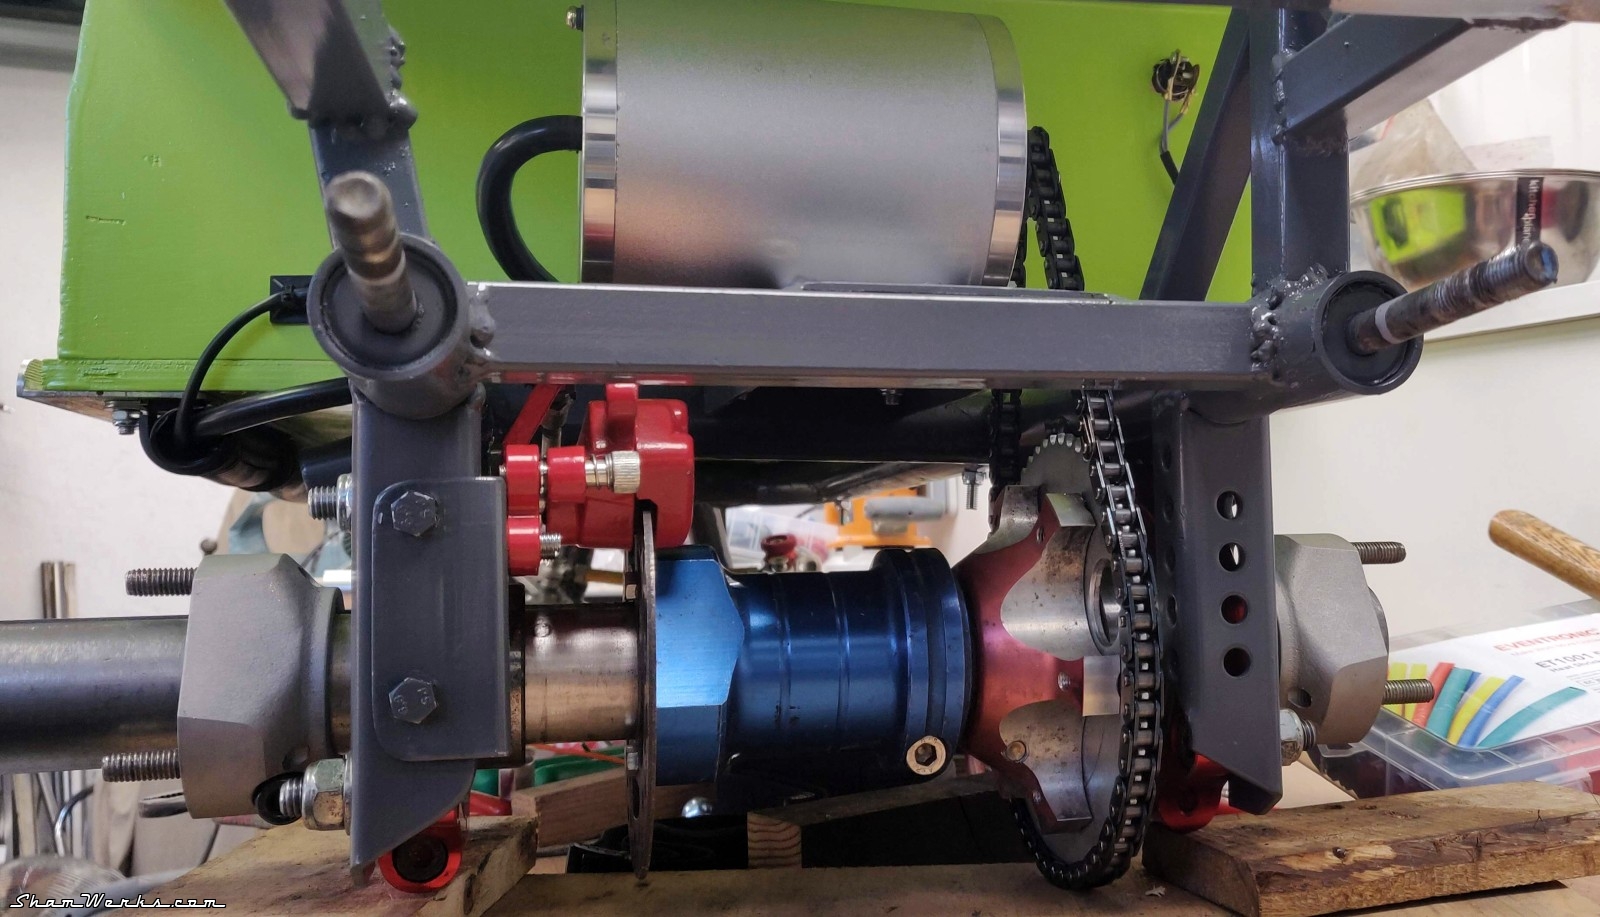
In the back and the front, I build stands/brackets to hold the body shell, and later on attach the bumpers. Never underestimate the destruction power of an overexcited 5 yo. 😉 I add a plate to bolt the motor on, then it's primer, two coats of dark gray, and the chassis is ready.


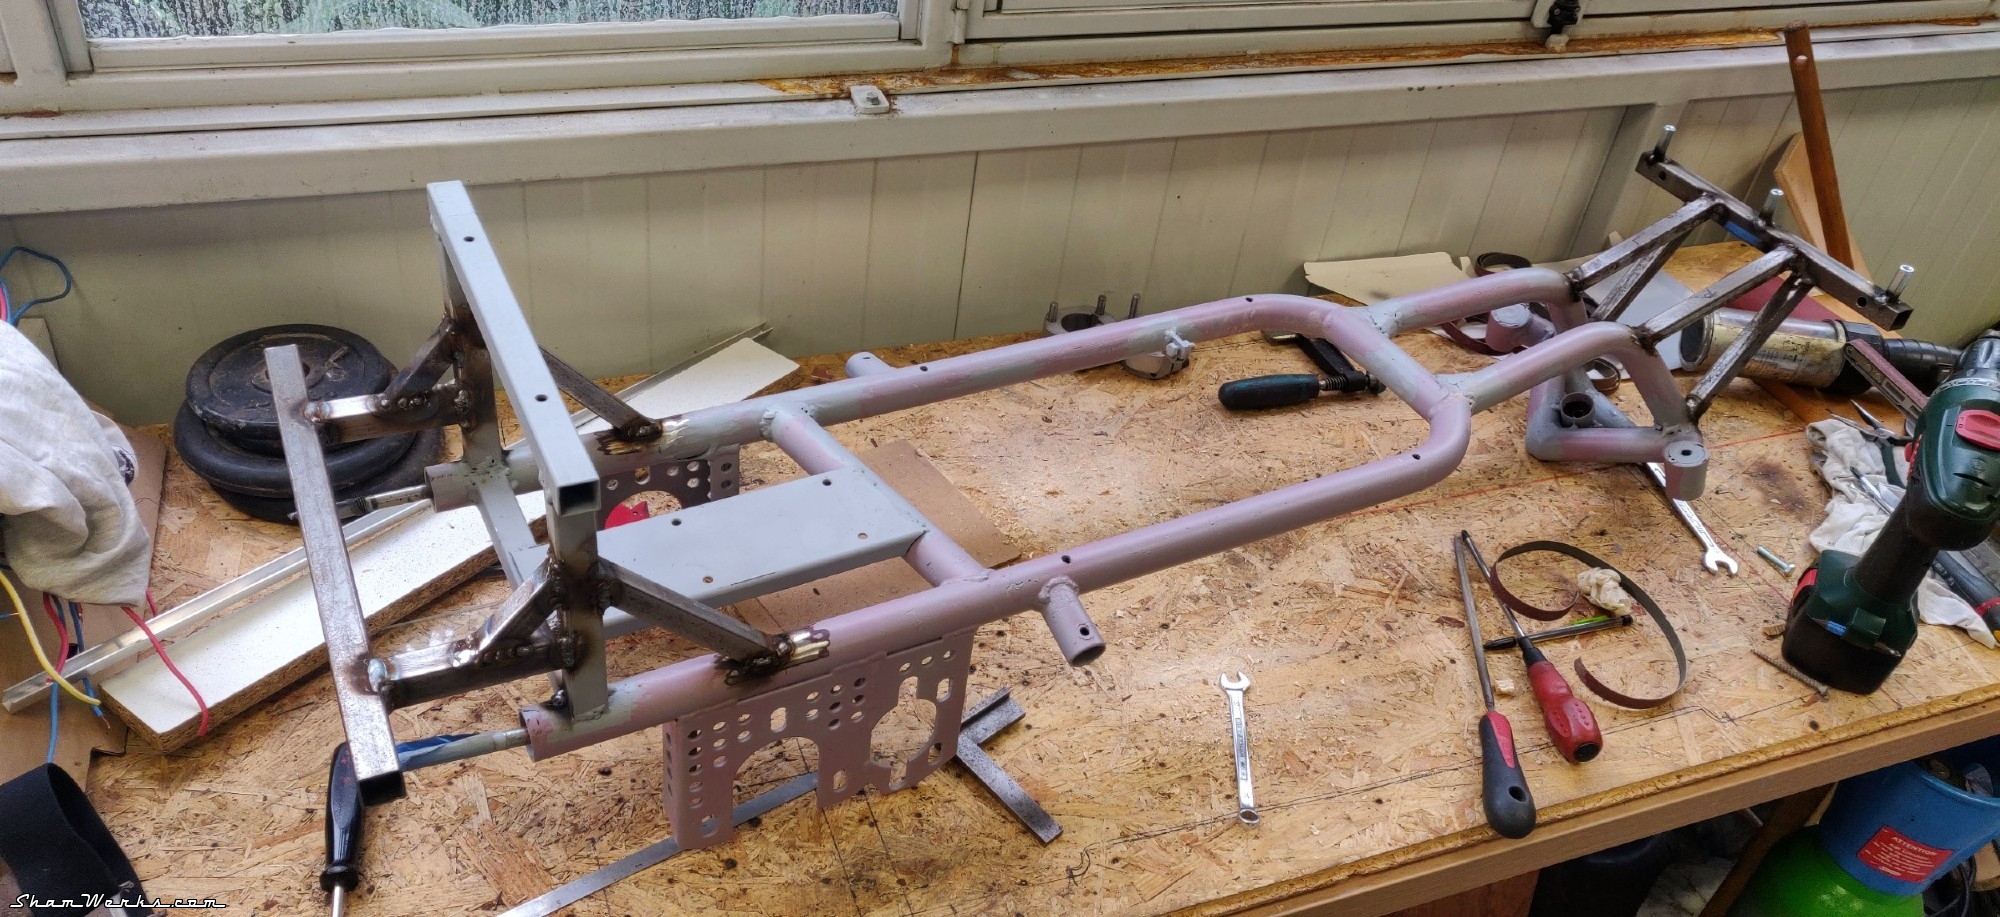
As for the steering parts, I pick in the stock of go kart parts I've accumulated along the past 15 years. I turn down on the lathe the aluminium steering links, leaving the left-handed thread on one end and re-threading the other, to keep the adjustment like on the original go kart. I also drill new holes in the spindles to increase the steering angle.

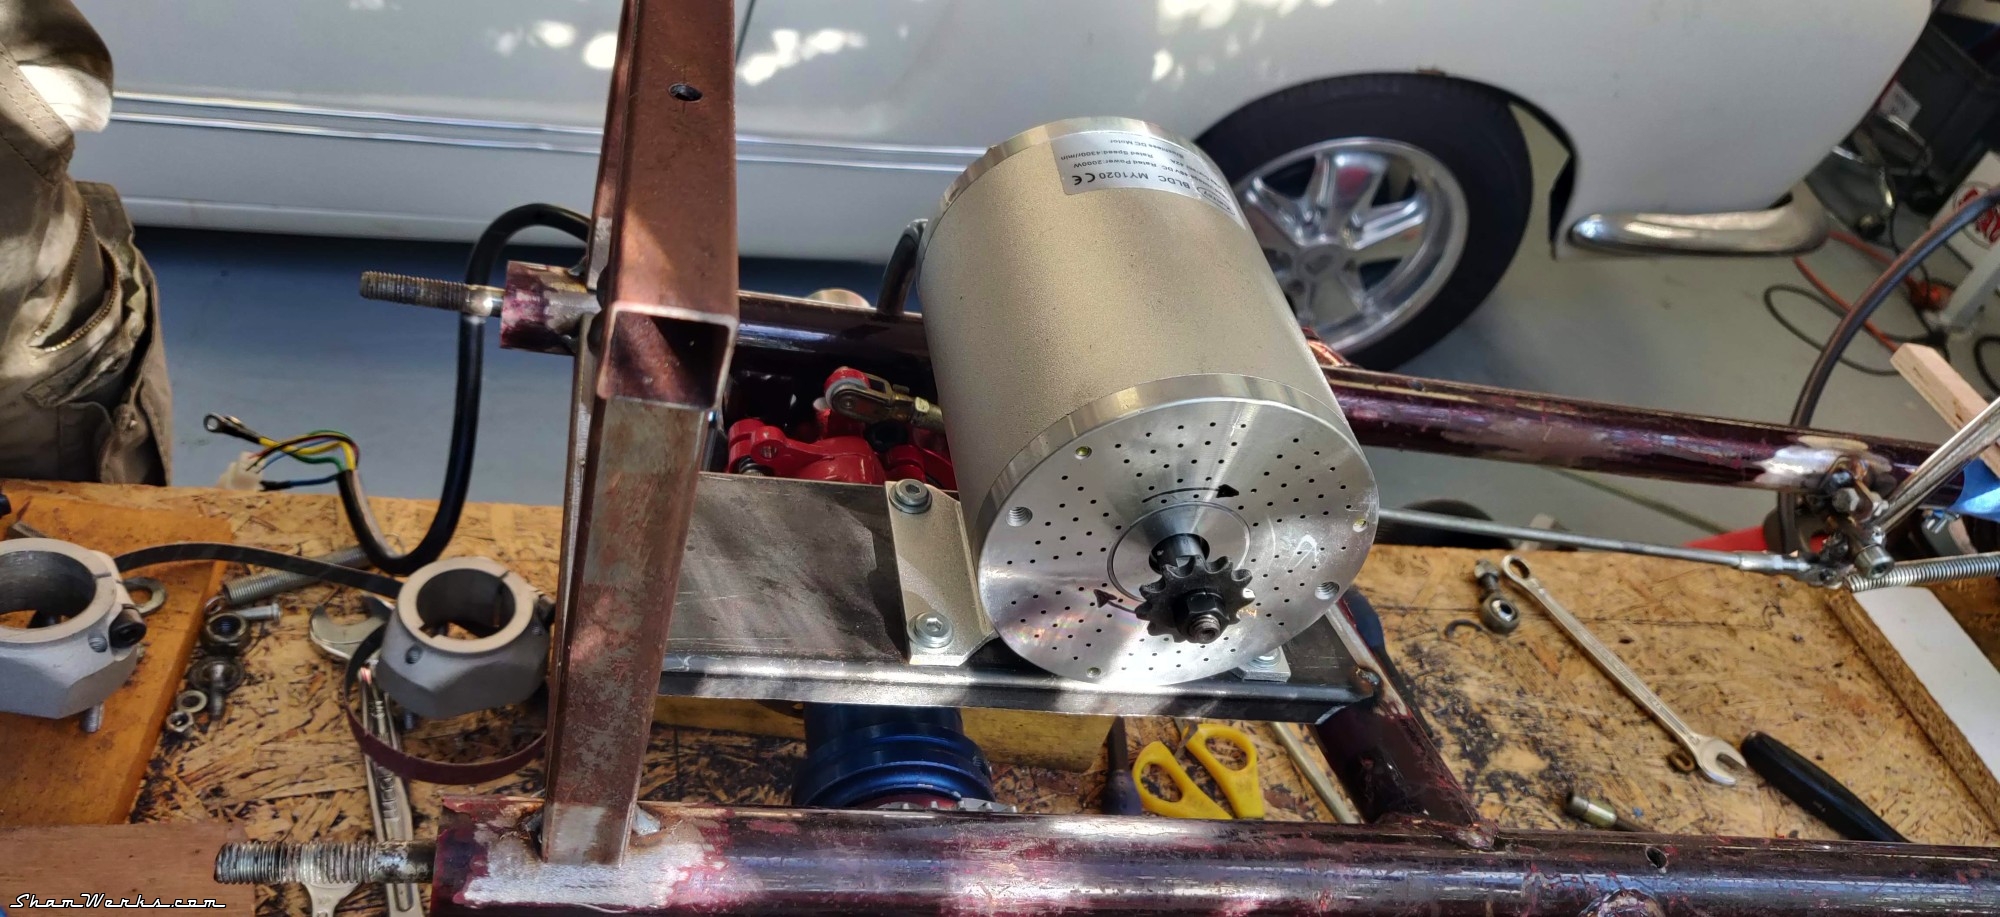
Motor
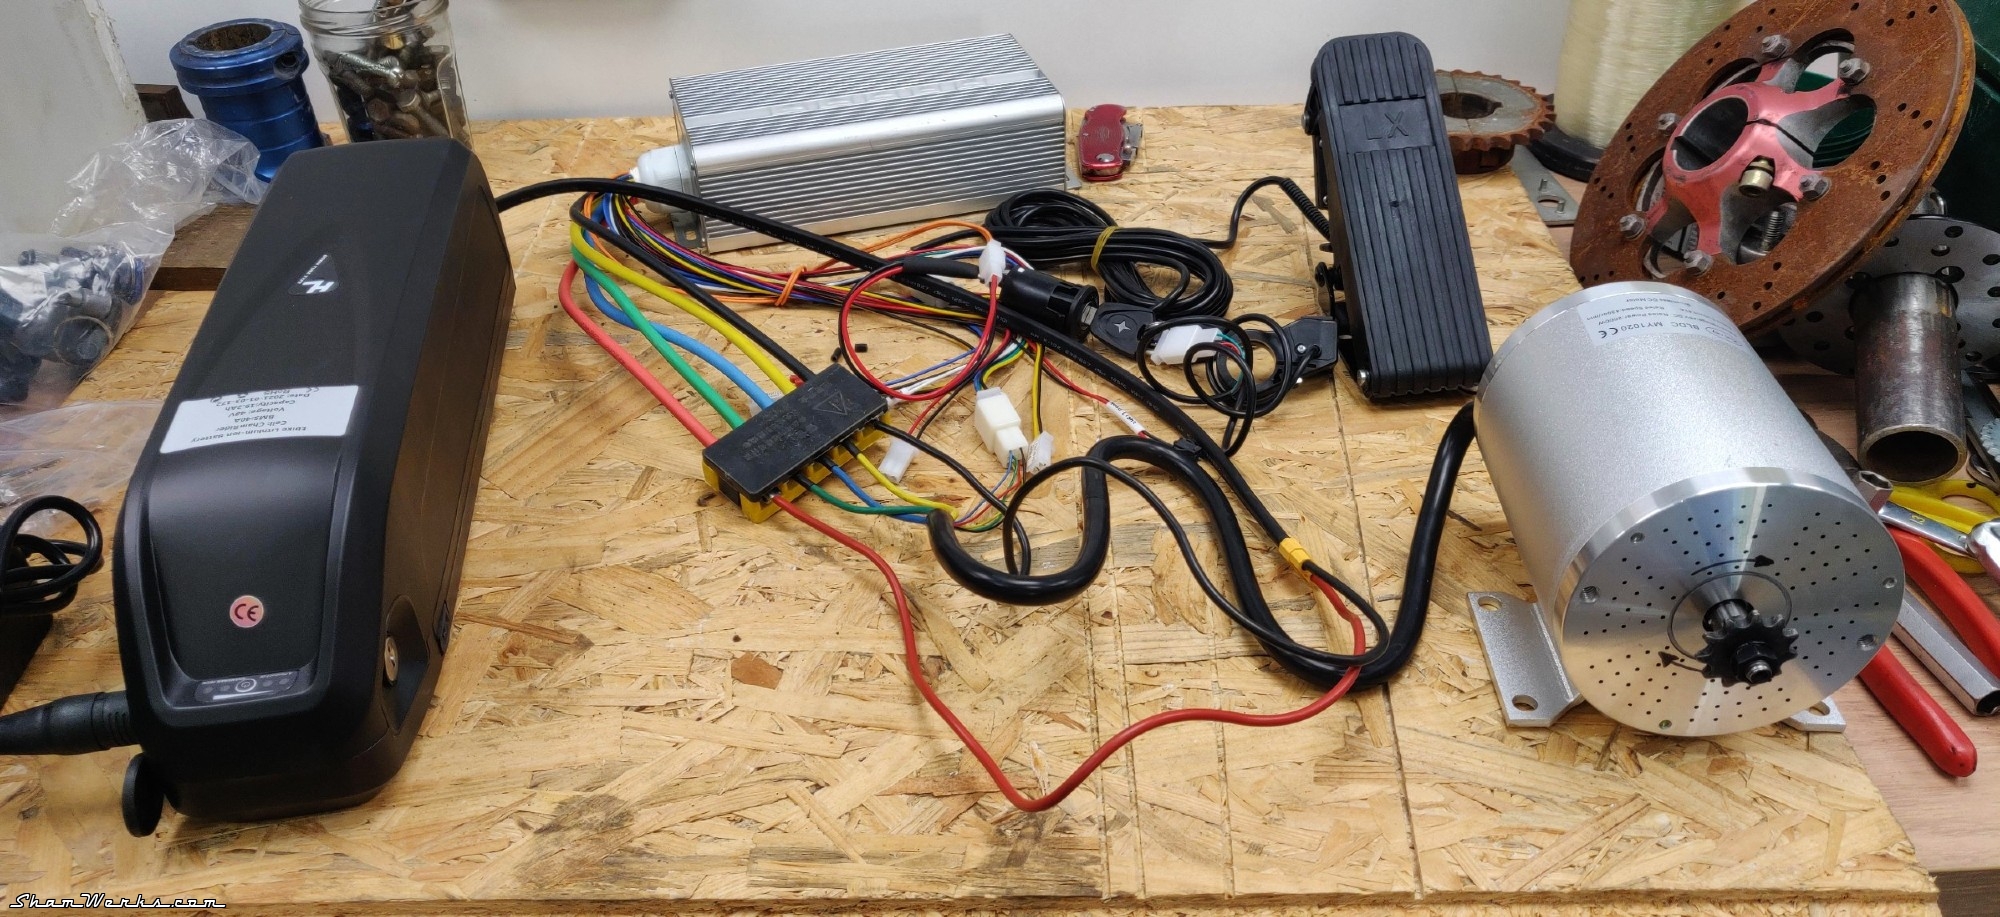
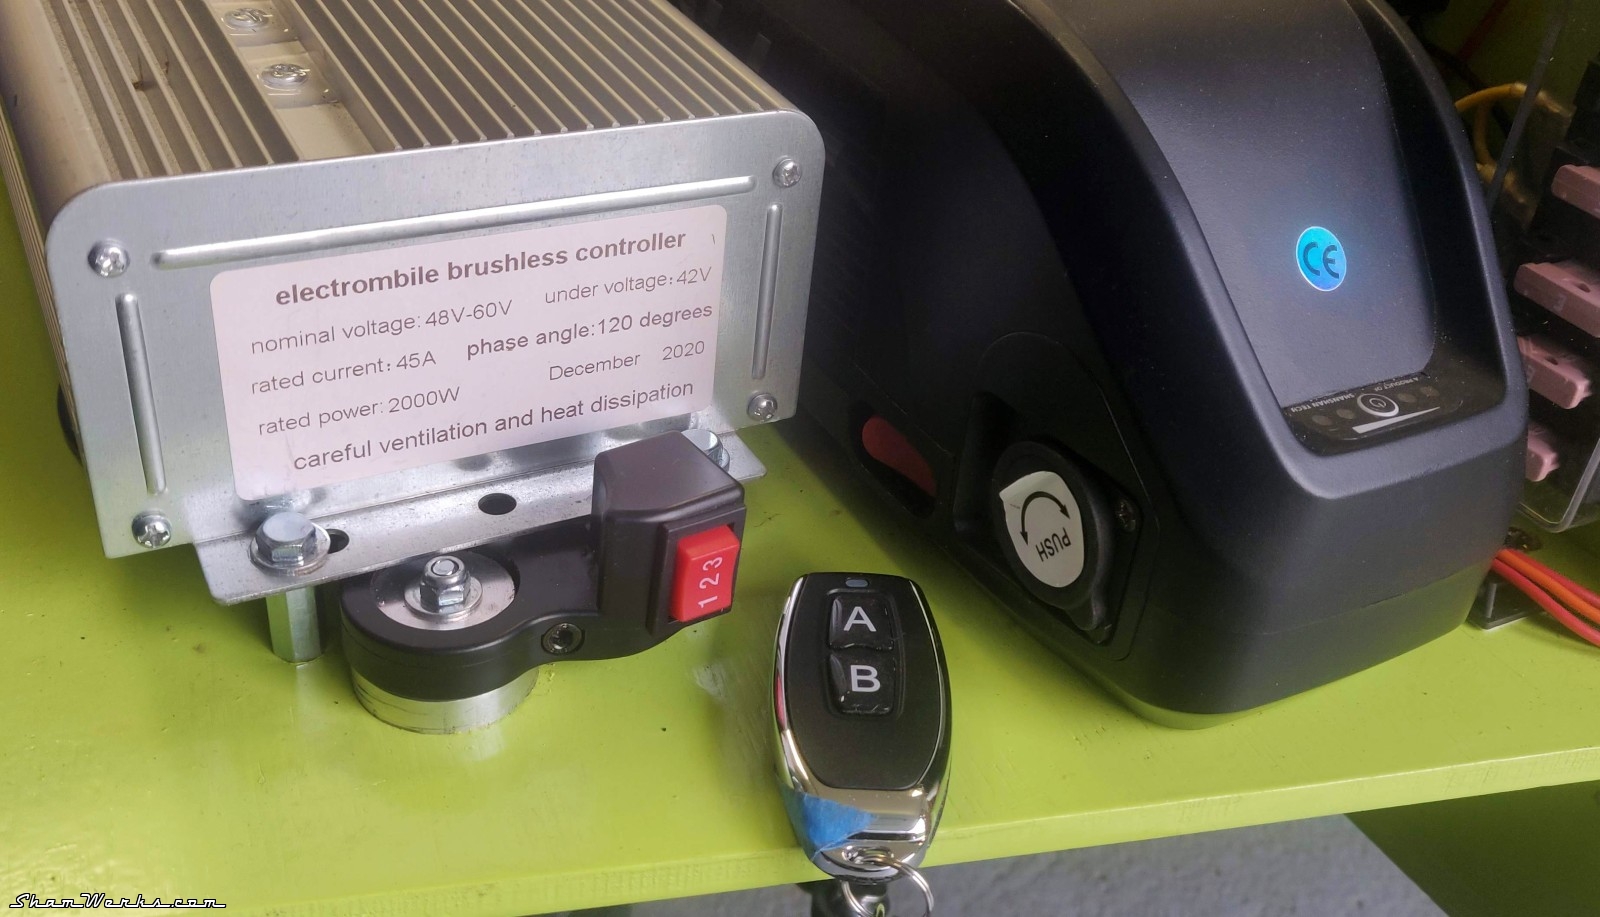
I dropped the initial idea of a gas-powered engine, not suitable for a kid, noisy... I switched to an electric brushless motor 2000W, bought on AliExpress (159€).The motor kit comes with a controller, a throttle pedal, a key-activated main switch, a 3 positions selector to limit the speed (not a bad thing to have when giving the bloody thing to a little boy), the sprocket and chain...
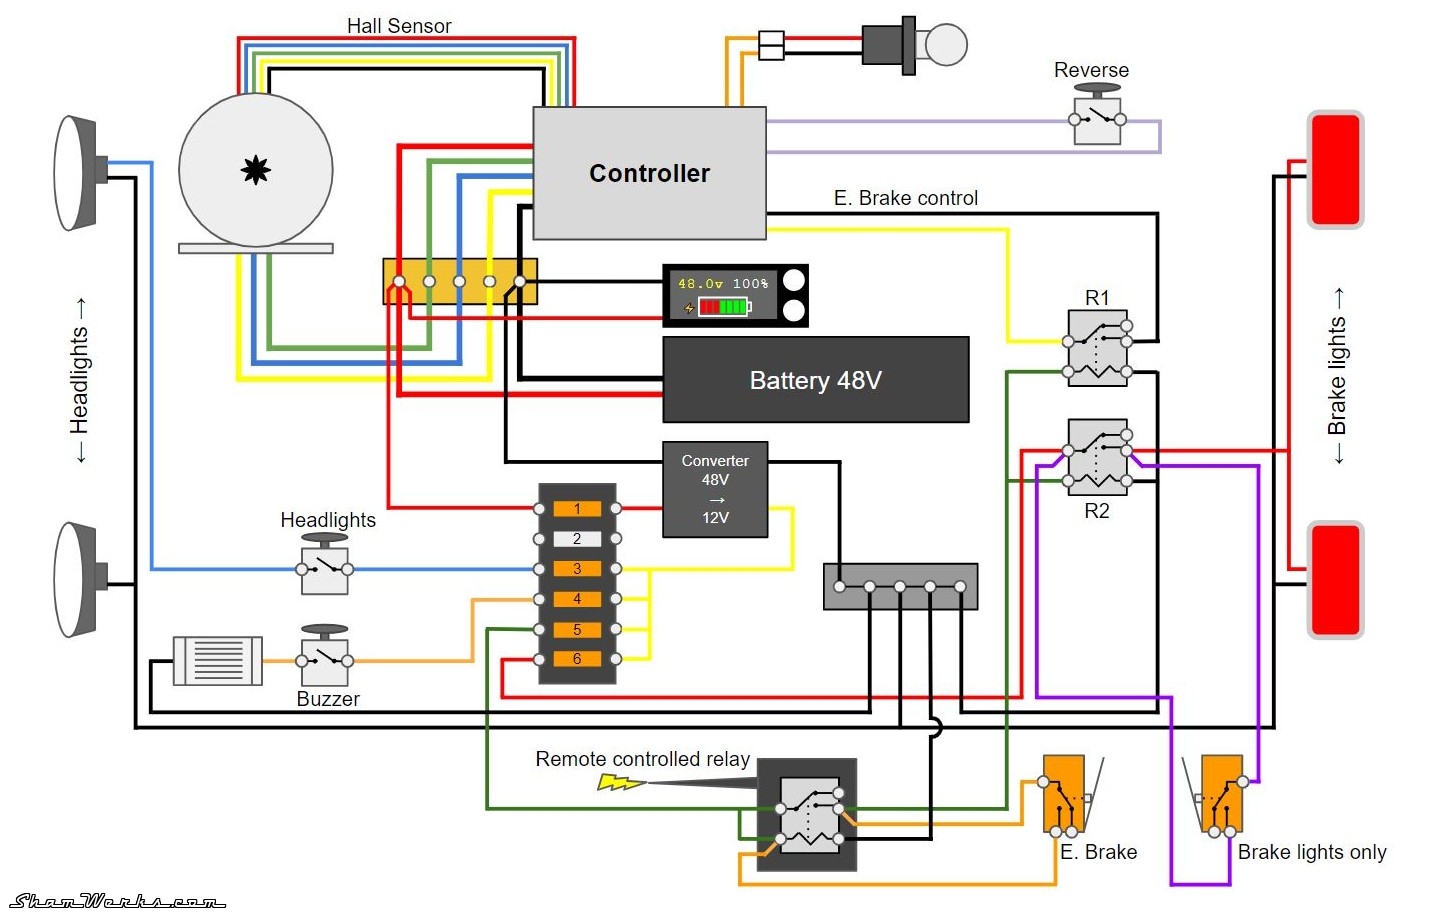
The controller comes with an input to activate the motor electric braking, which gives me the opportunity to add a remote control to stop the car at a distance, in case the little one gets a bit too enthusiastic behind the wheel. 😉
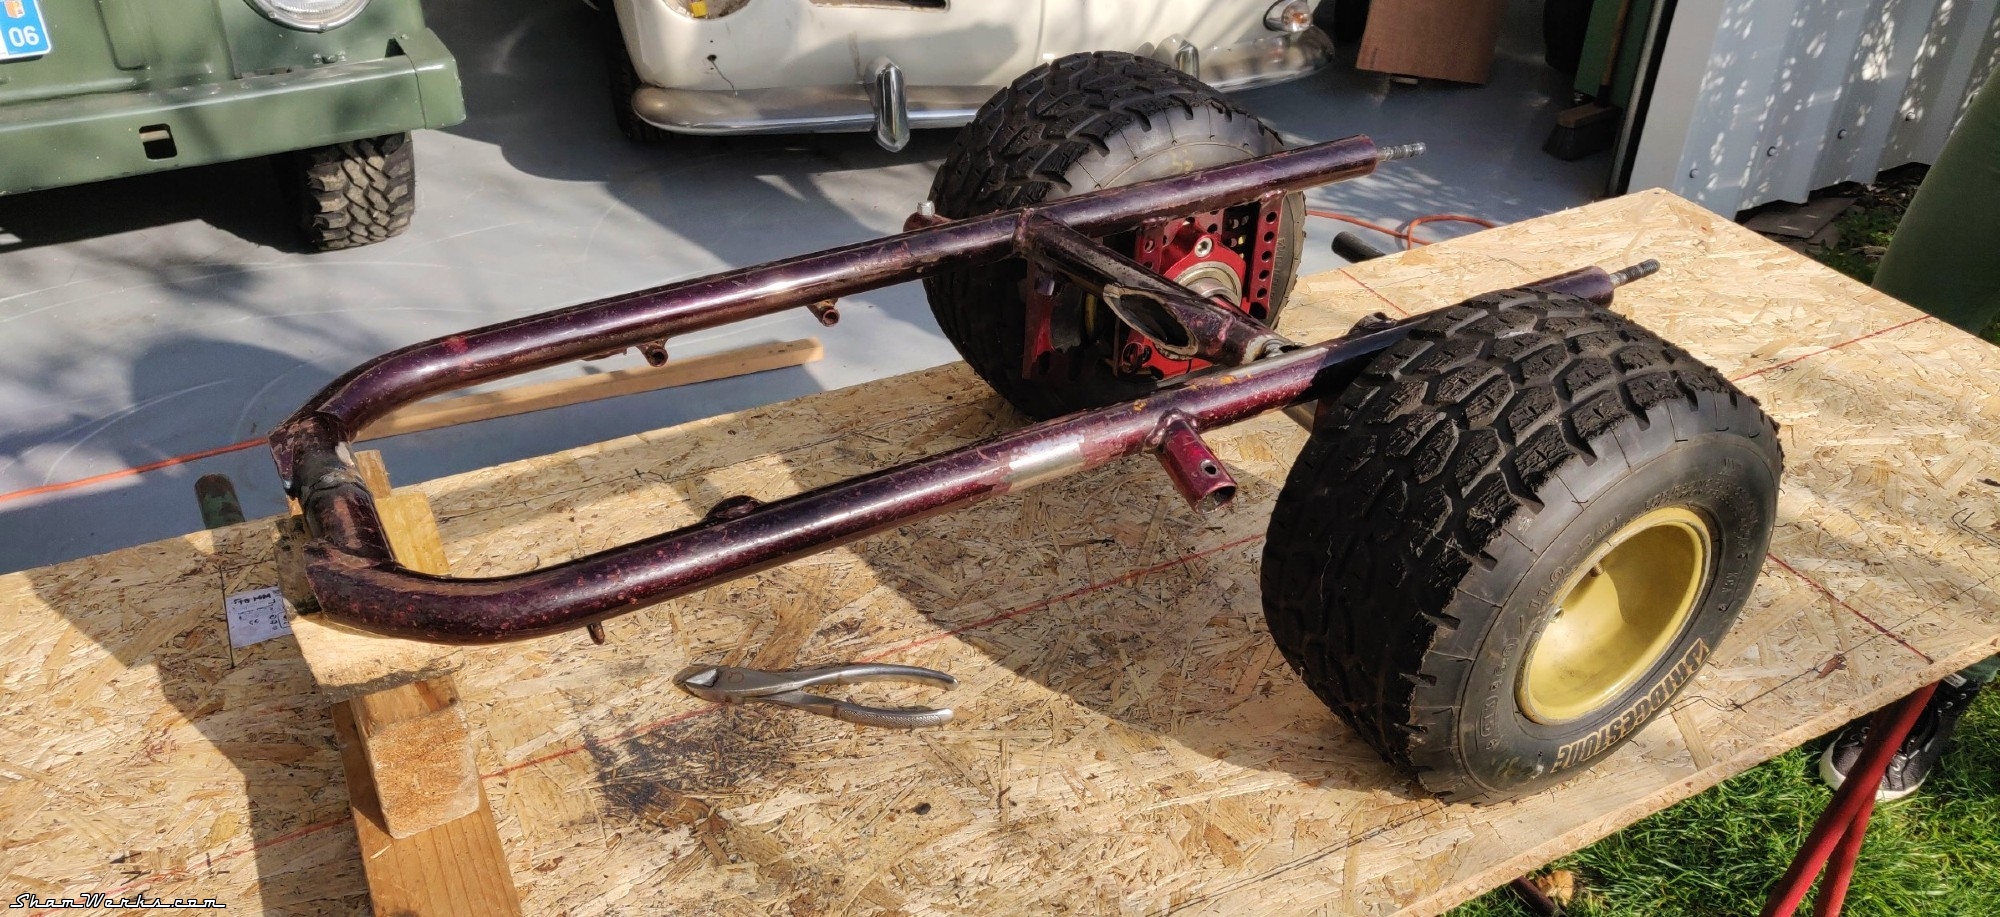
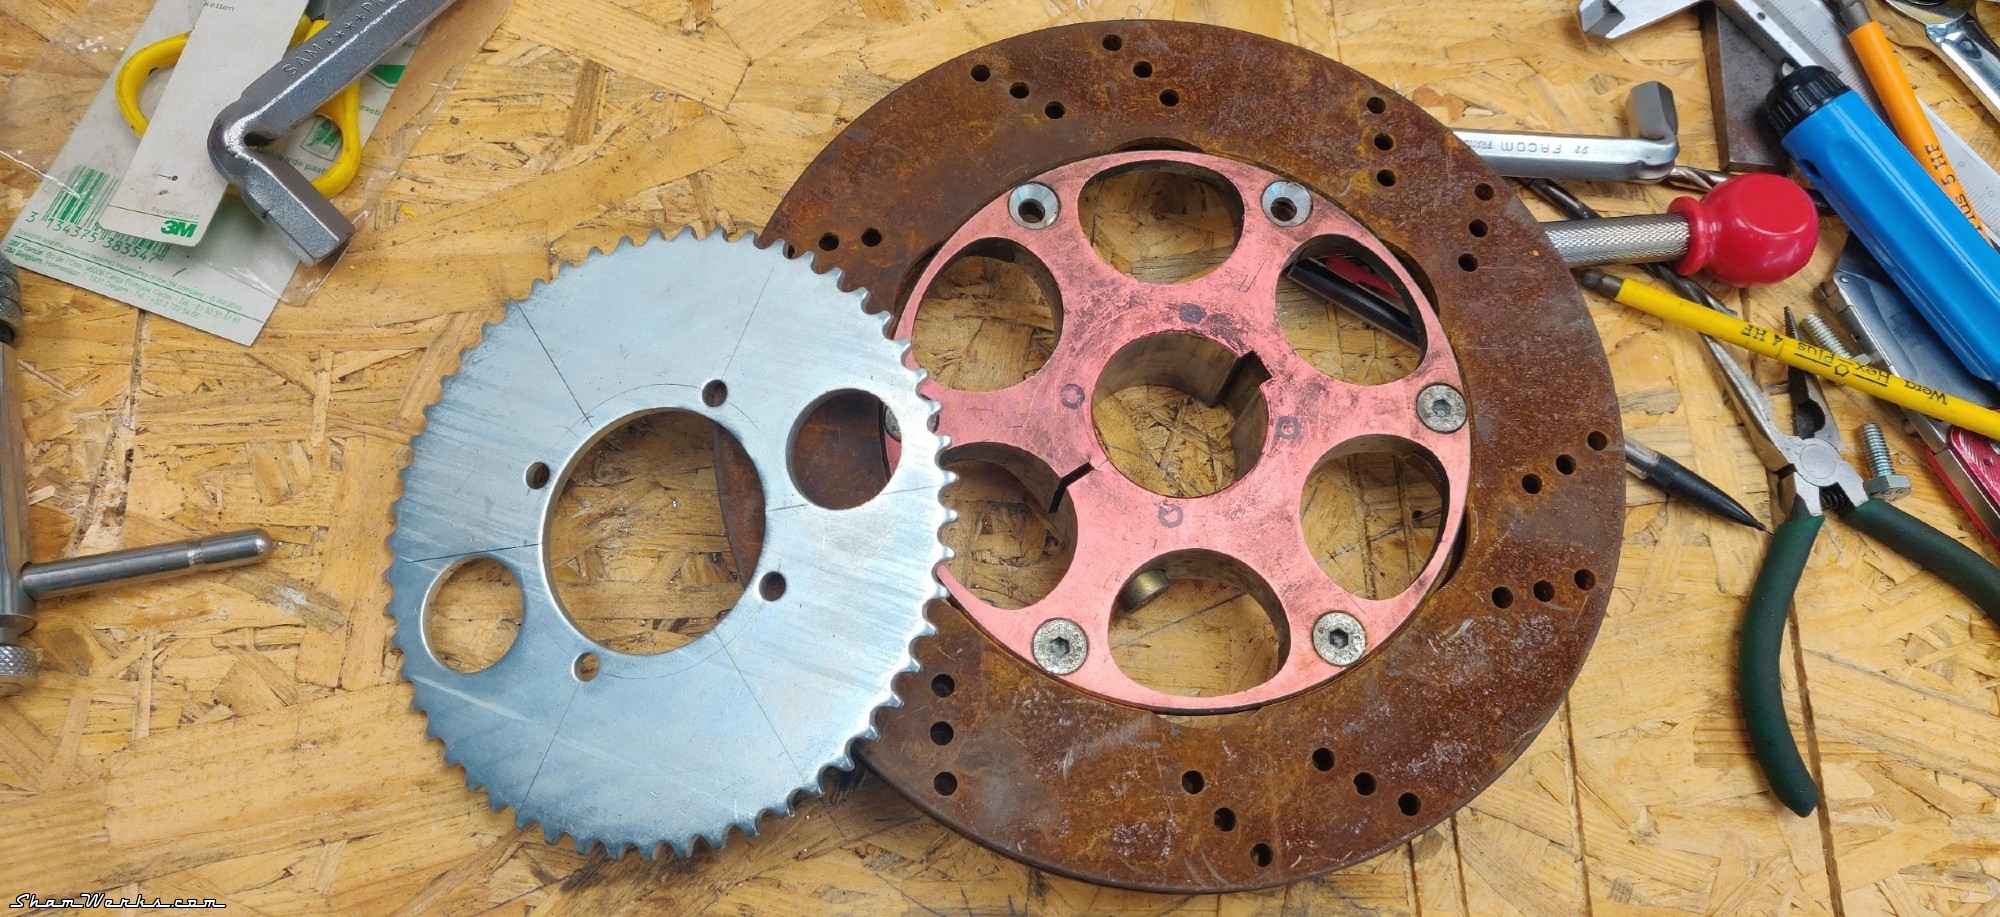
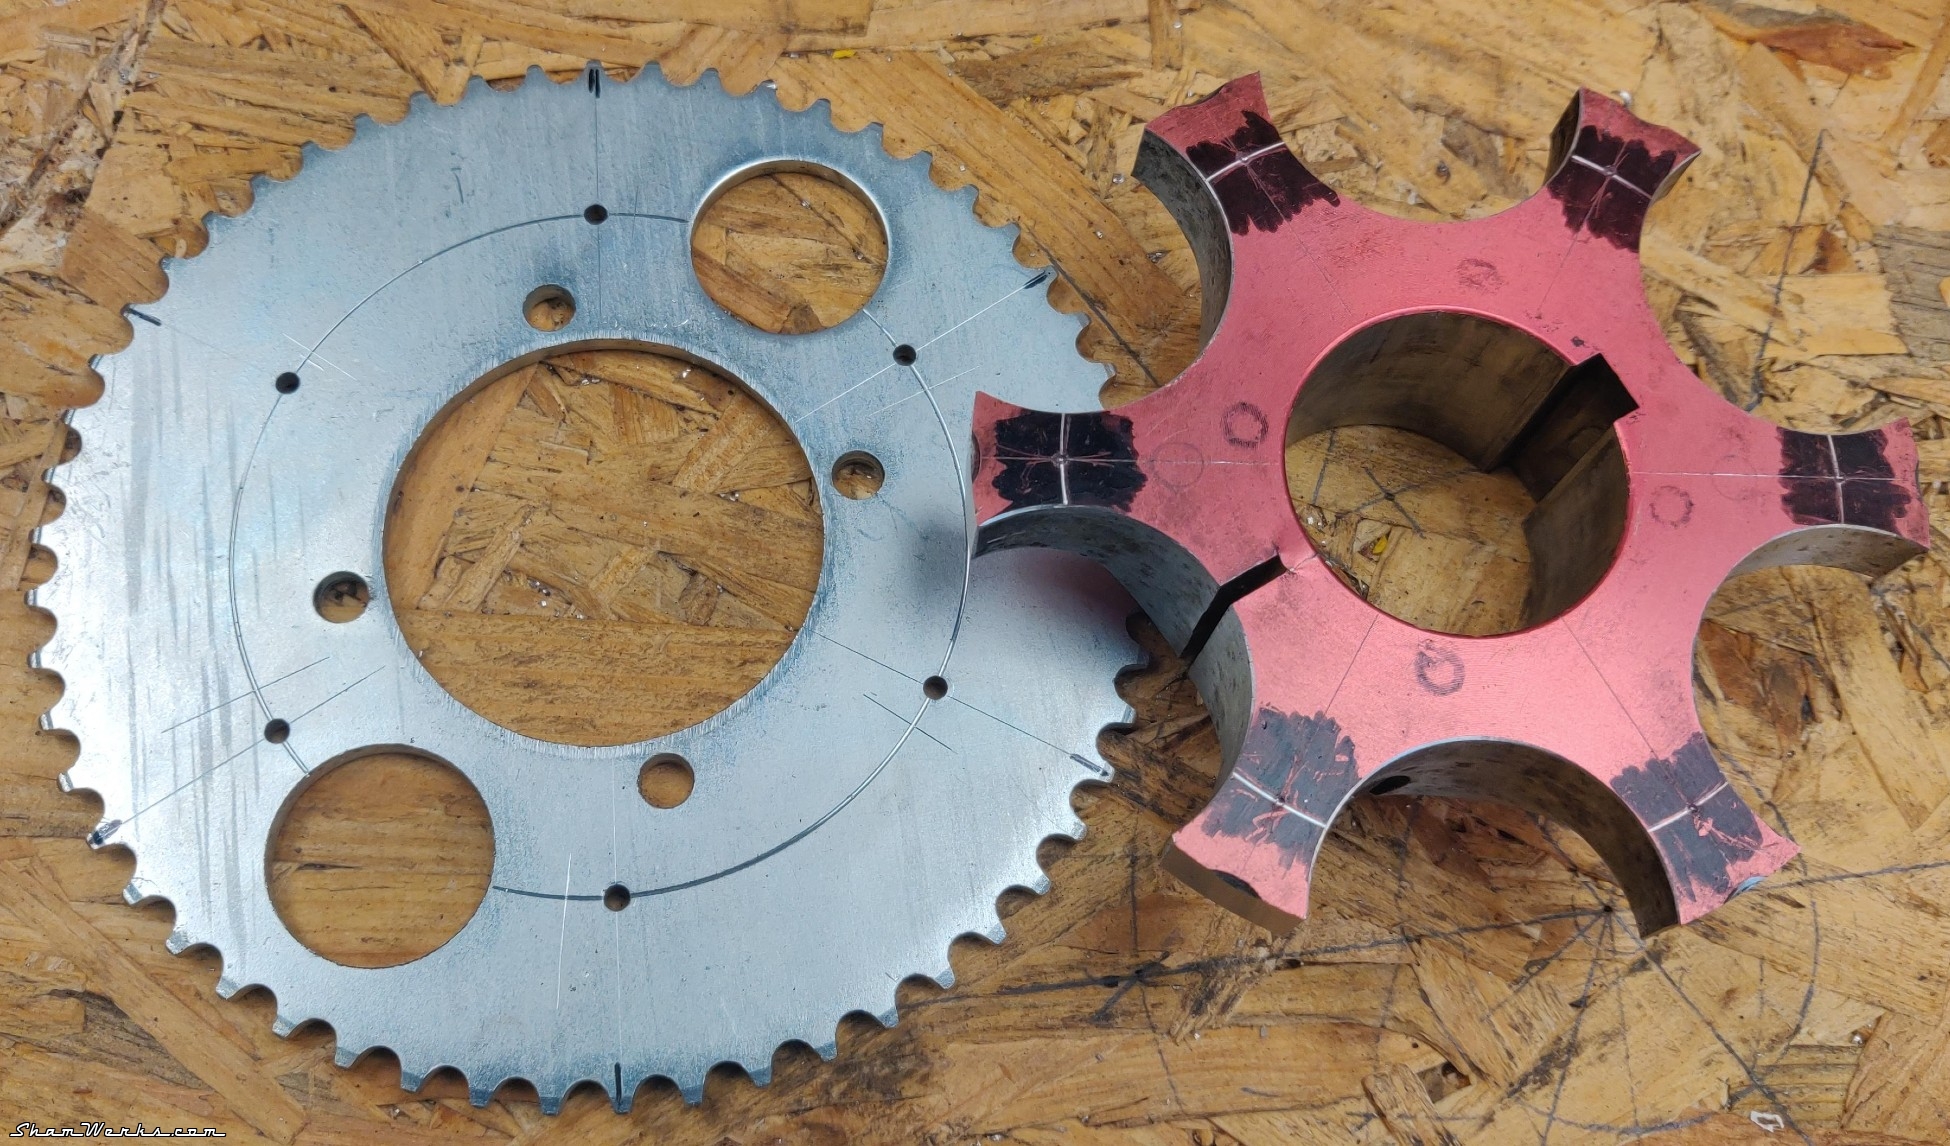
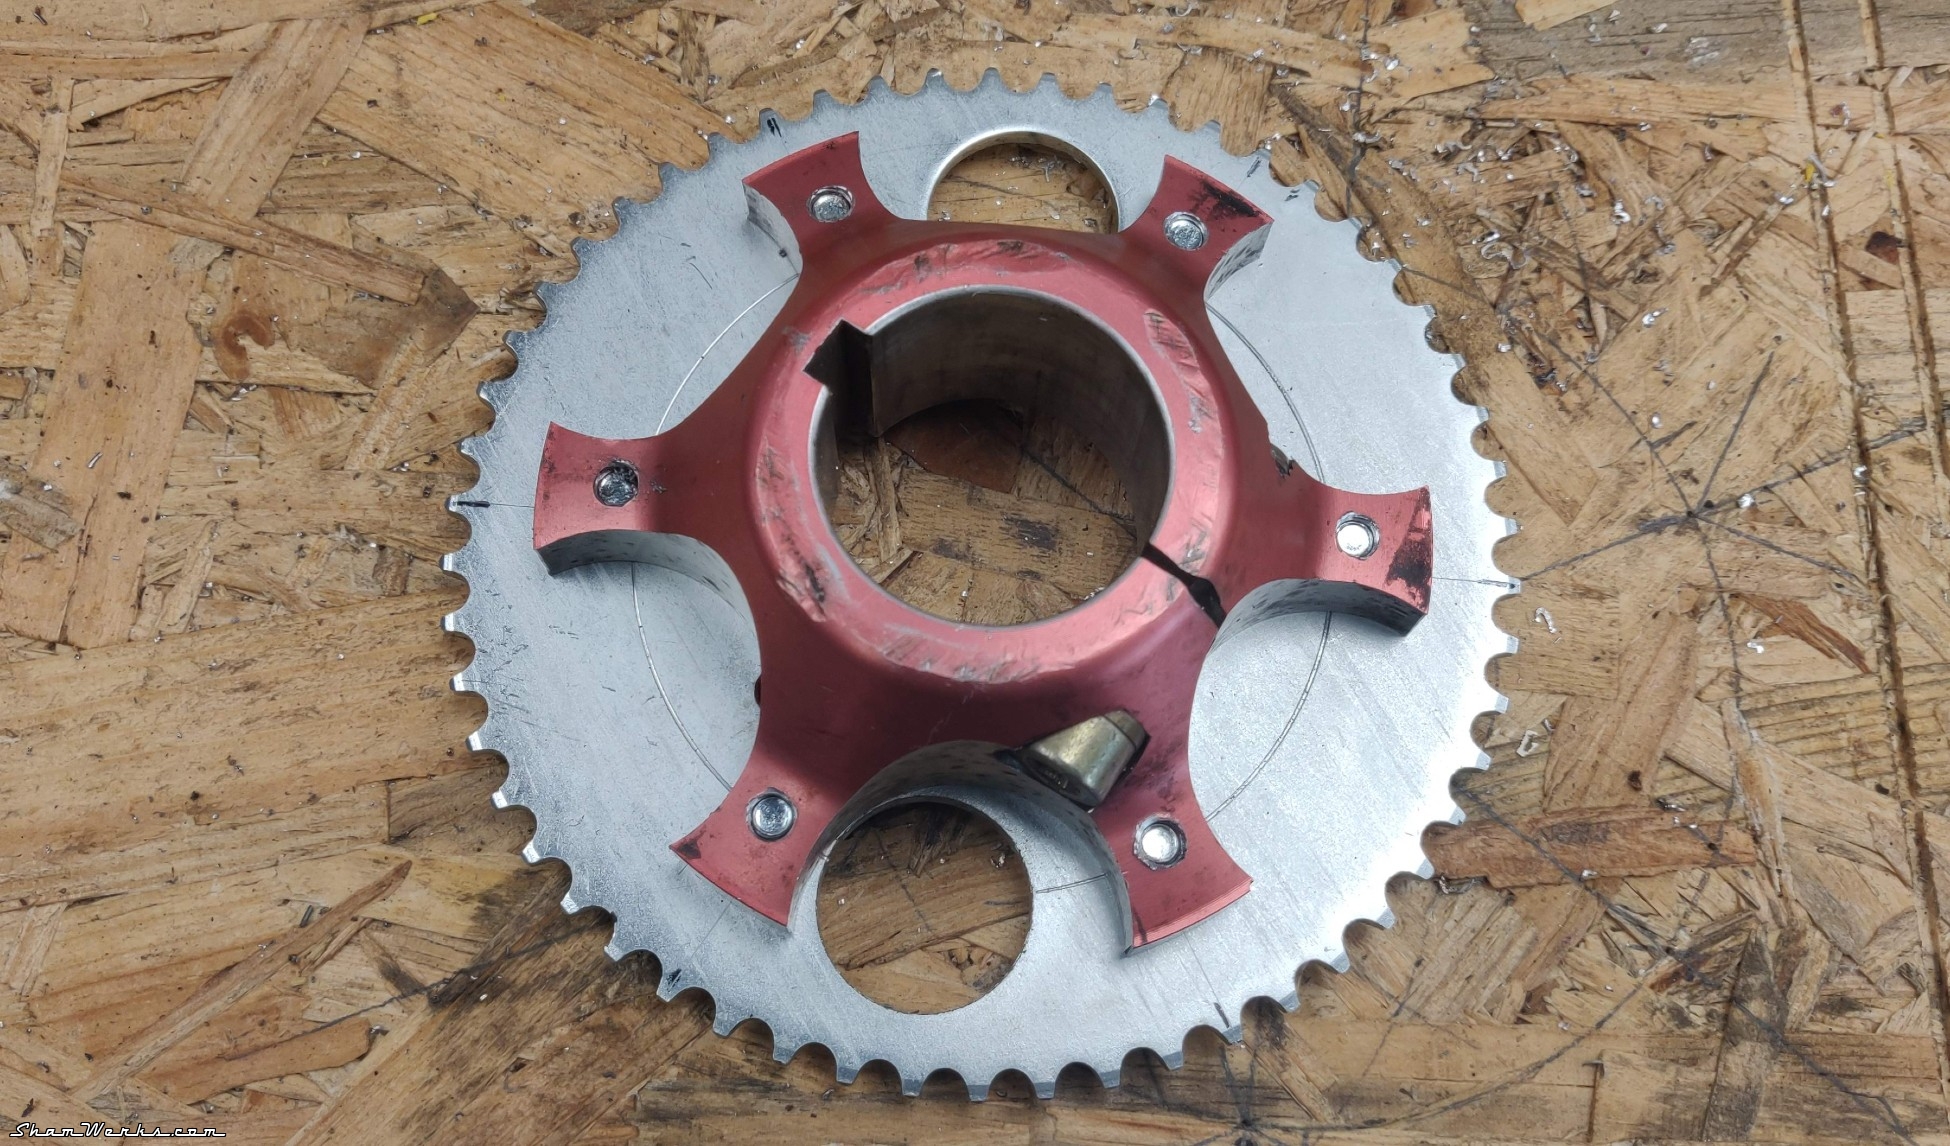
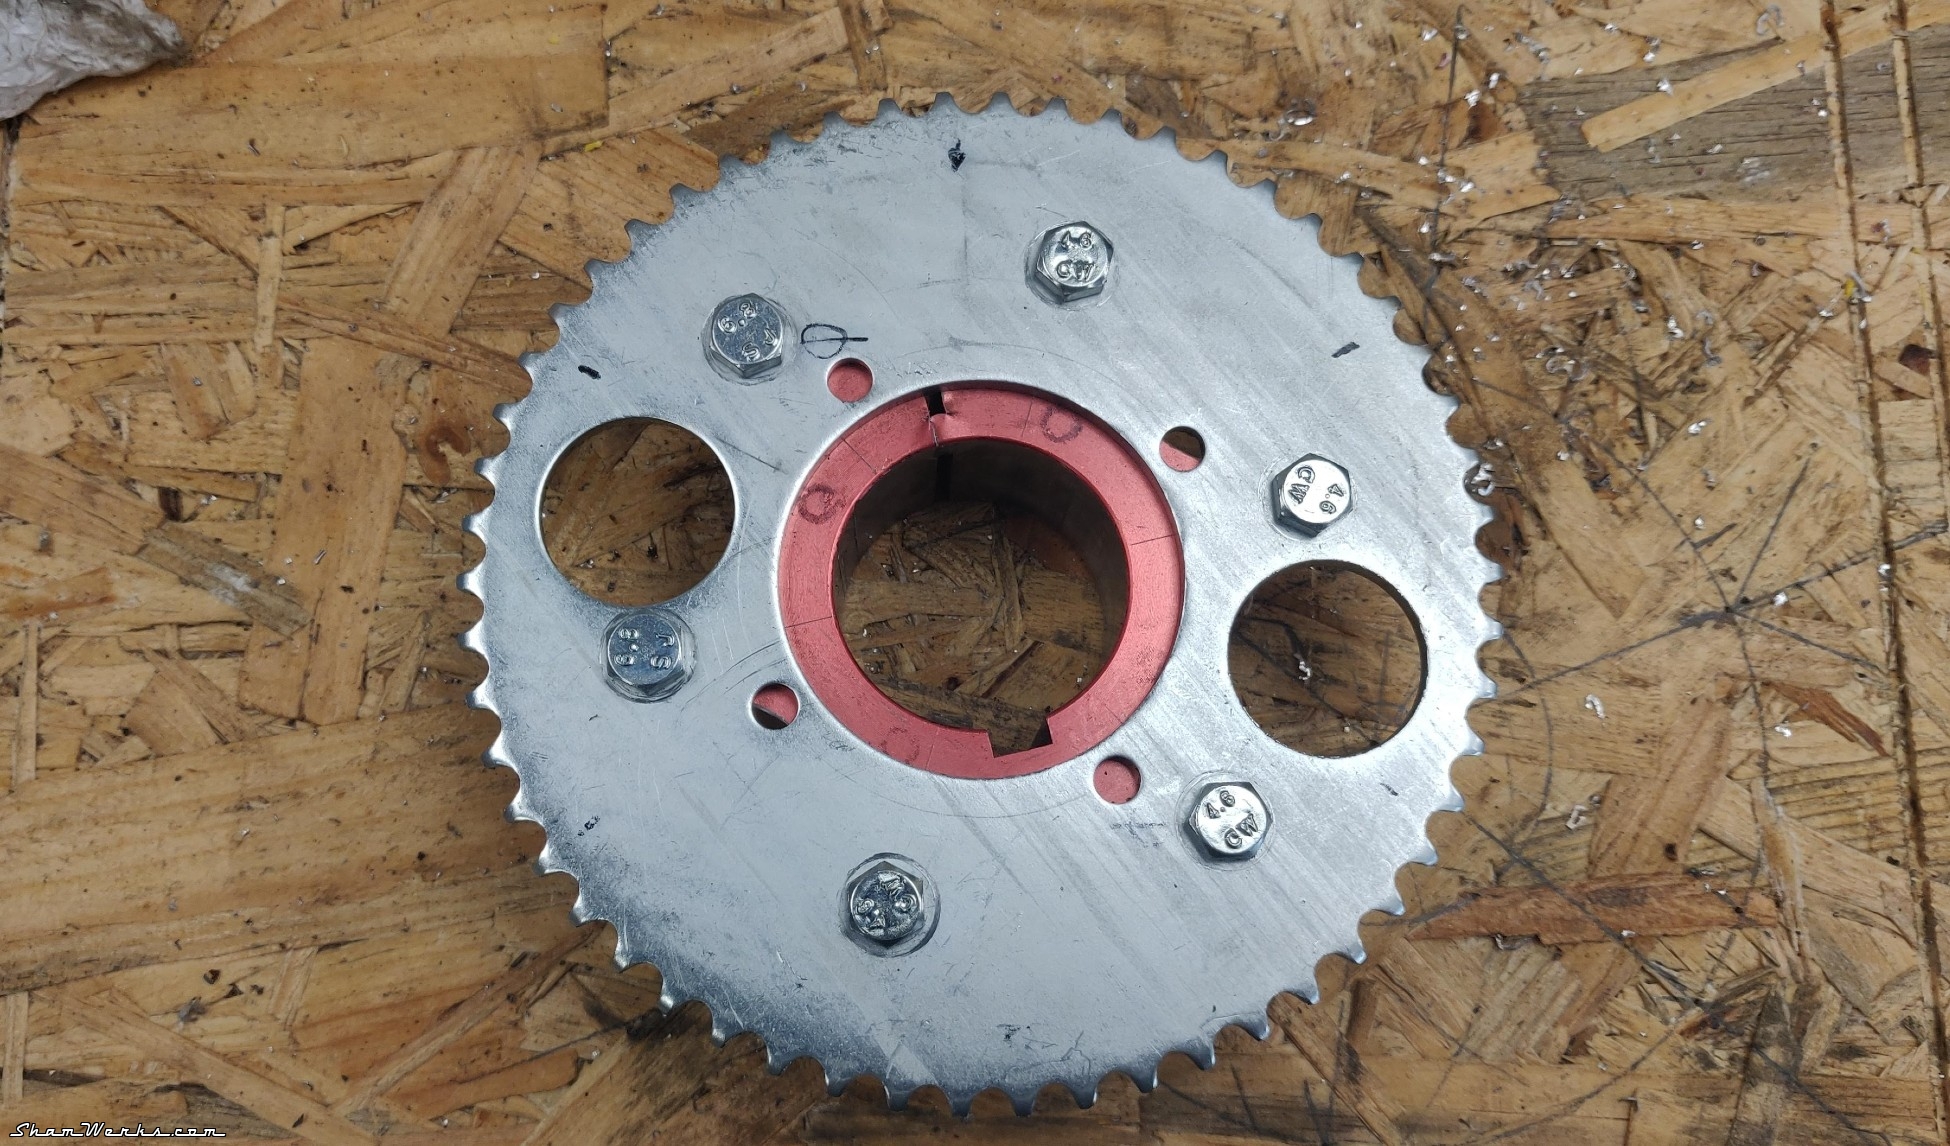
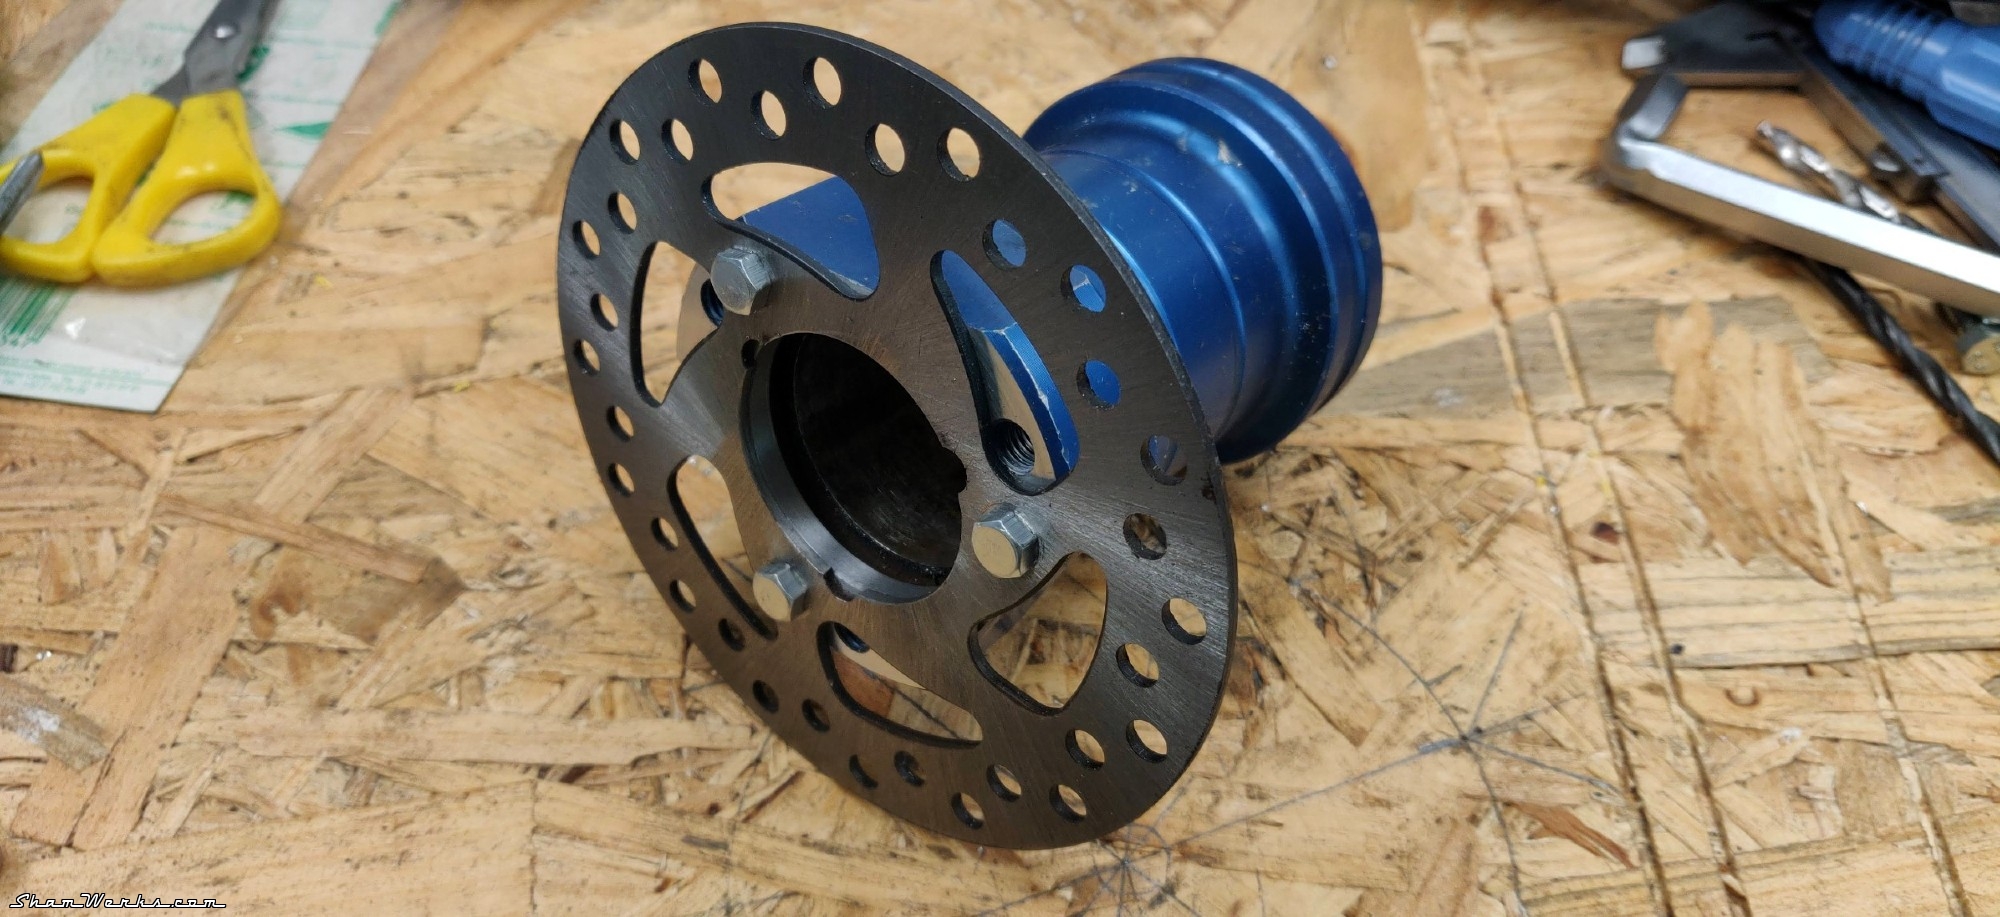
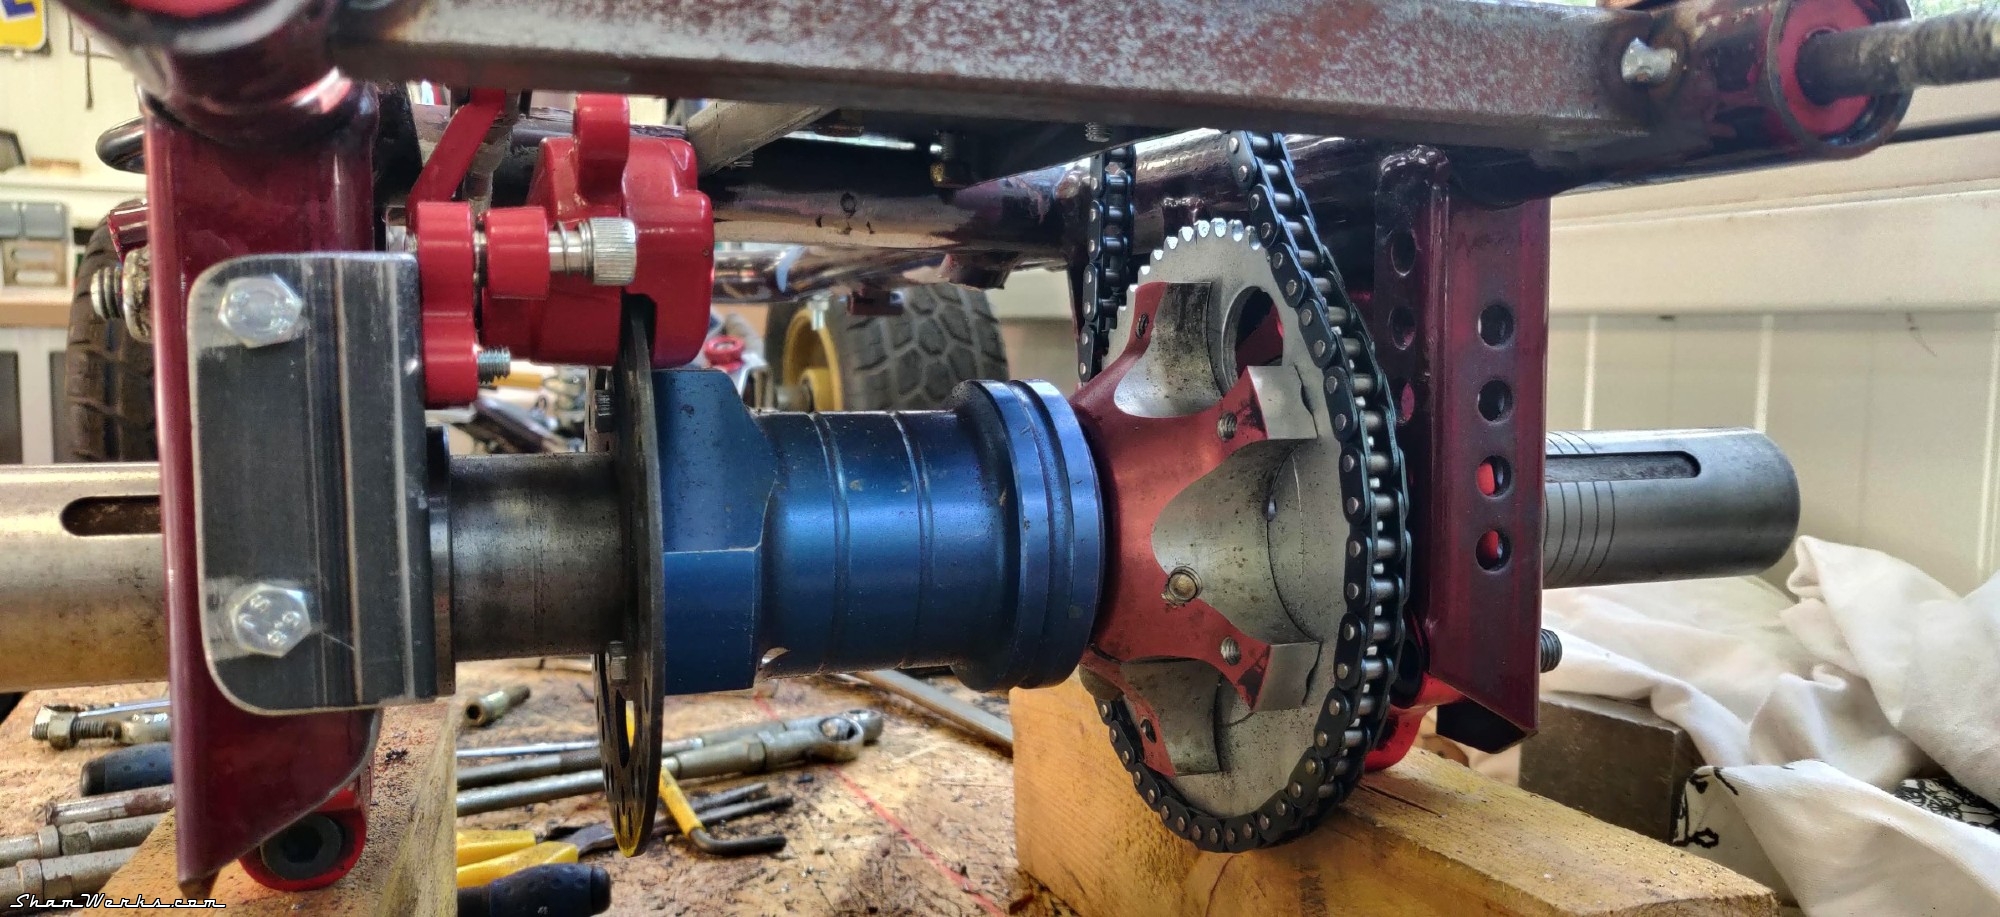
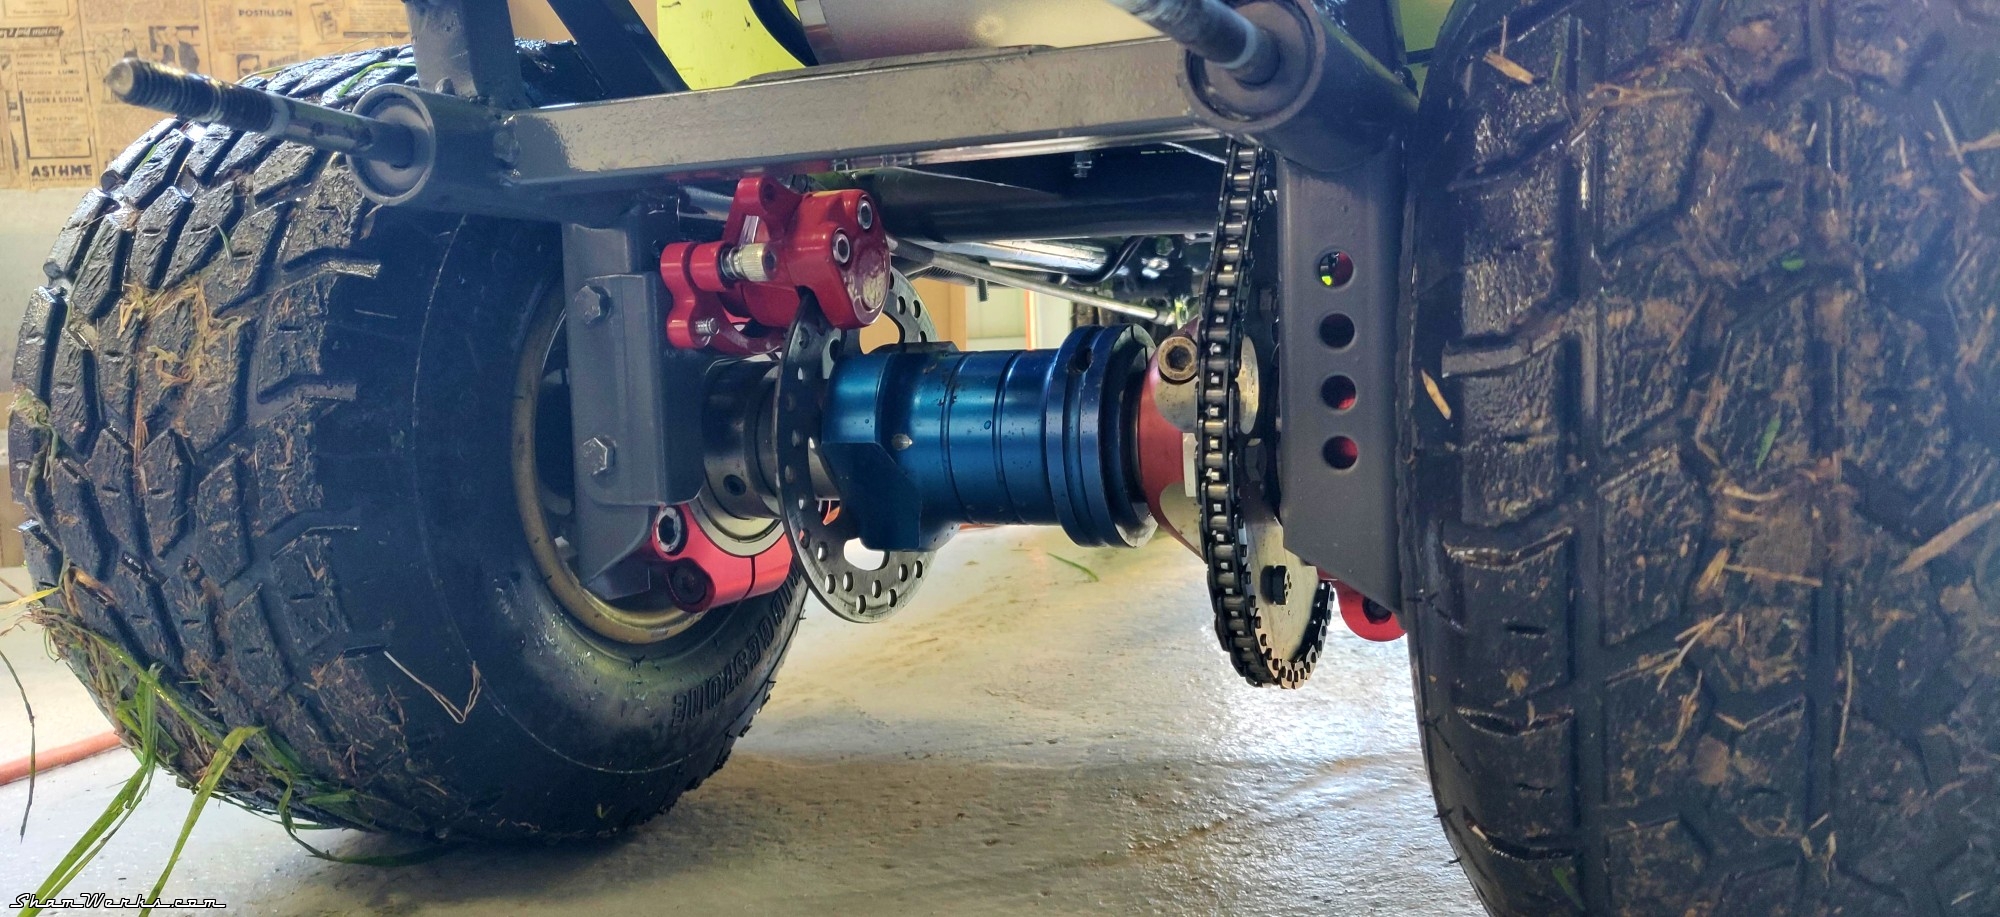
To adapt the sprocket on the rear axle, I used a brake hub I found on one of my sacrificial chassis. Turned it down on the lathe, 6 M6 threads, and done.
Brakes
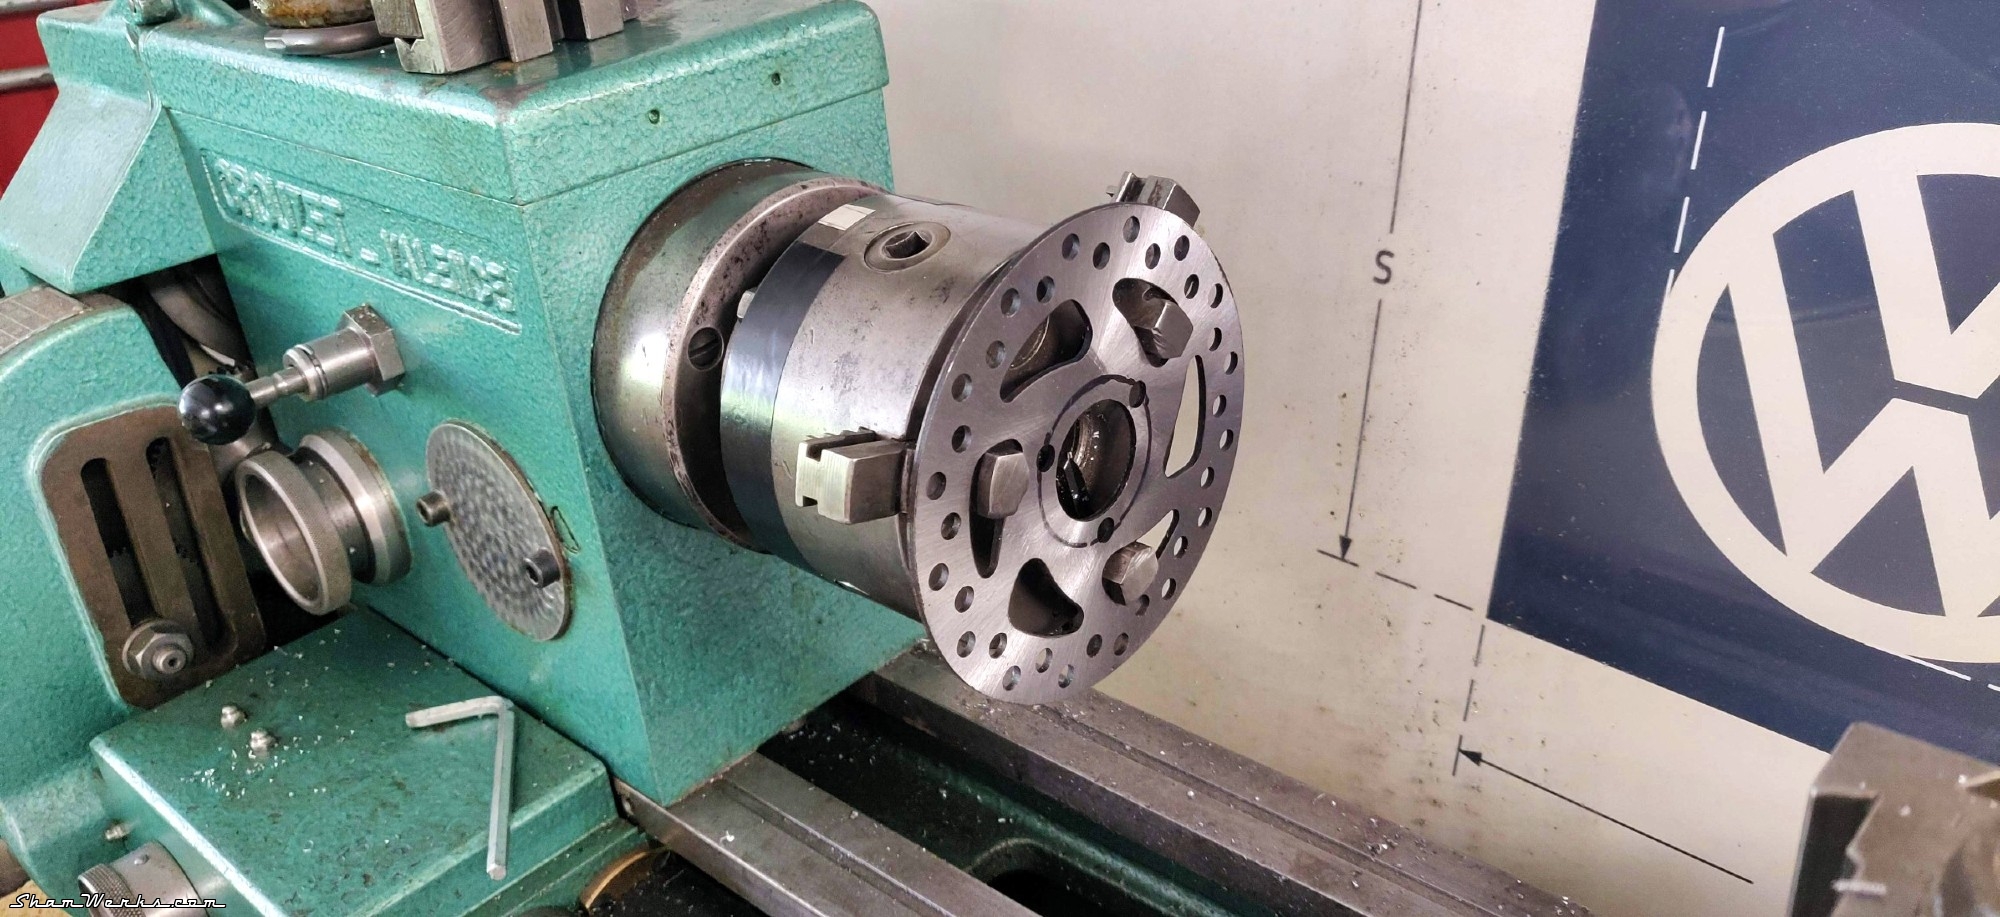
I start with a 20€ disc-brake kit for bikes, mechanically actuated, not hydraulically. First because again, I'm not making a racing go-Kart, but also the maintenance will be much easier, limiting the risks of seizing (not even mentioning cost).I modified and moved the original go-kart brake pedal, with a linkage rod to action the lever on the caliper. The caliper got modified as well to adapt it to the kinematics of the movement. The disc is secured on the axle using a wheel hub I modified on the lathe.
The brake works fine, but it doesn't have the "bite" I was hoping for, due to the linkage rod buckling under the effort, which reduces the power transferred to the caliper.
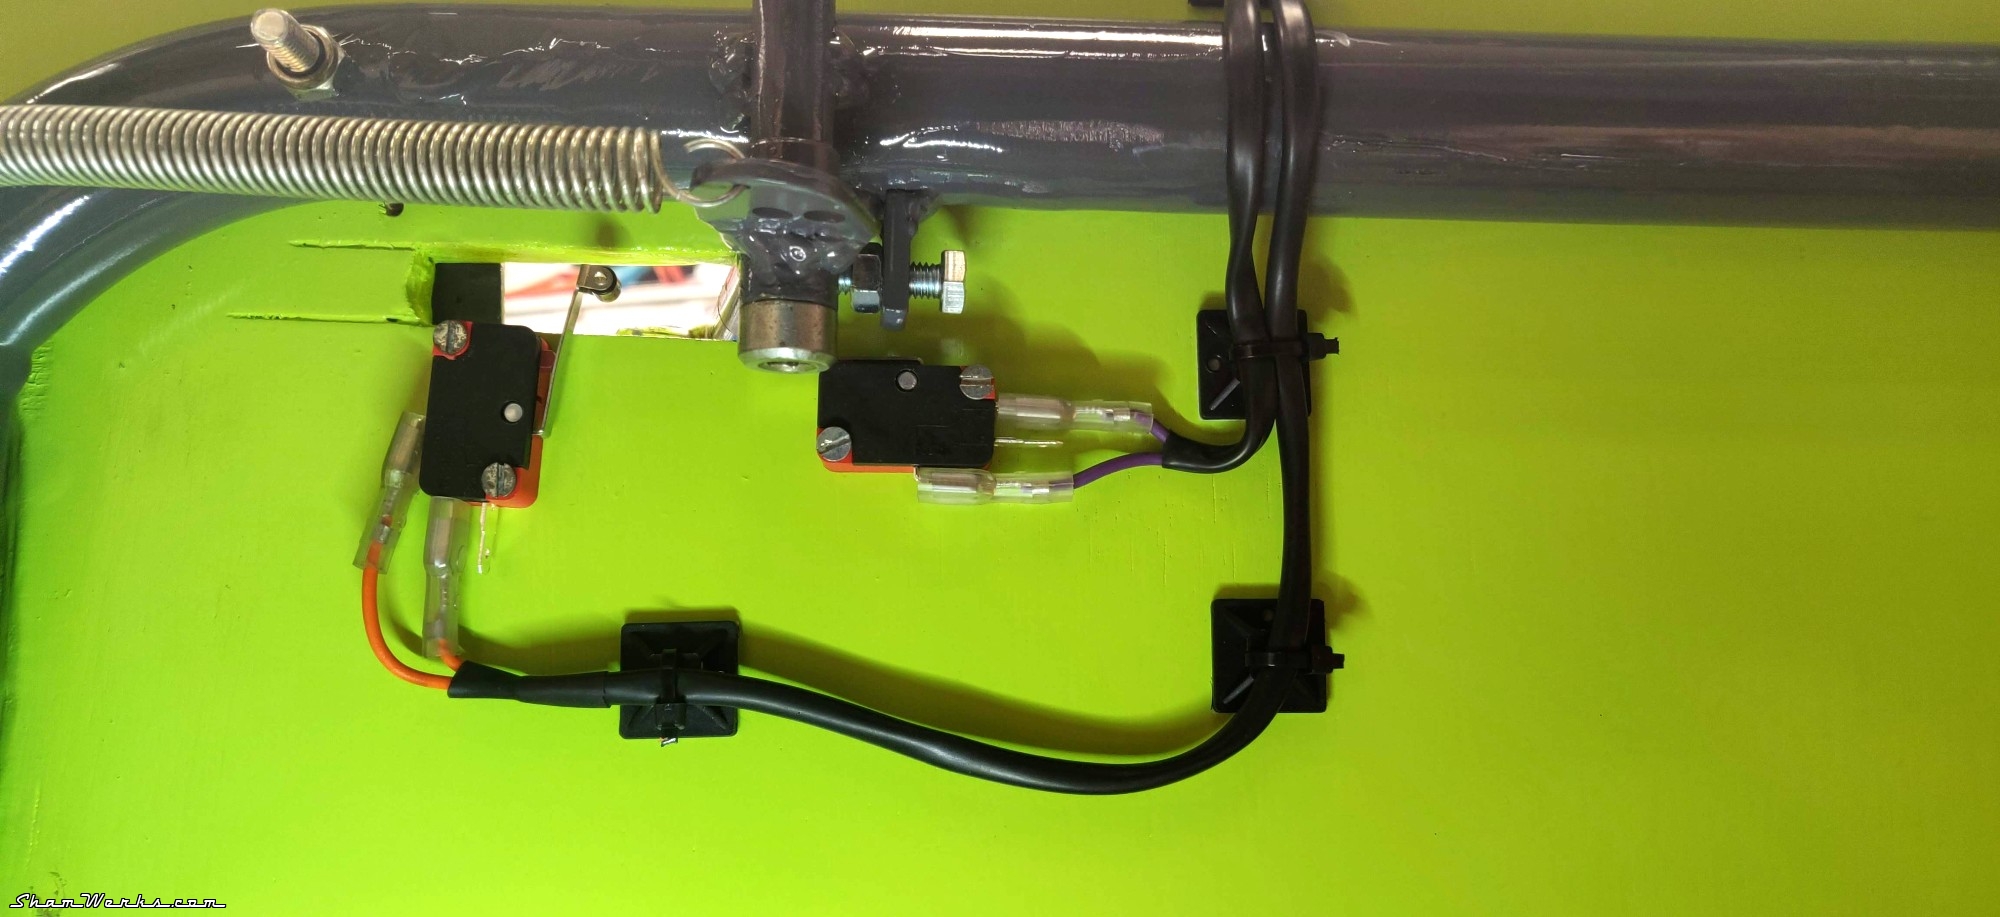
To compensate for that, I have added a micro switch on the brake pedal to activate the electric braking of the motor (which recharges the battery as well!). This will do until I modify the system, so the linkage would be pulled instead of pushed, or maybe replace it with a cable... Room for improvement.


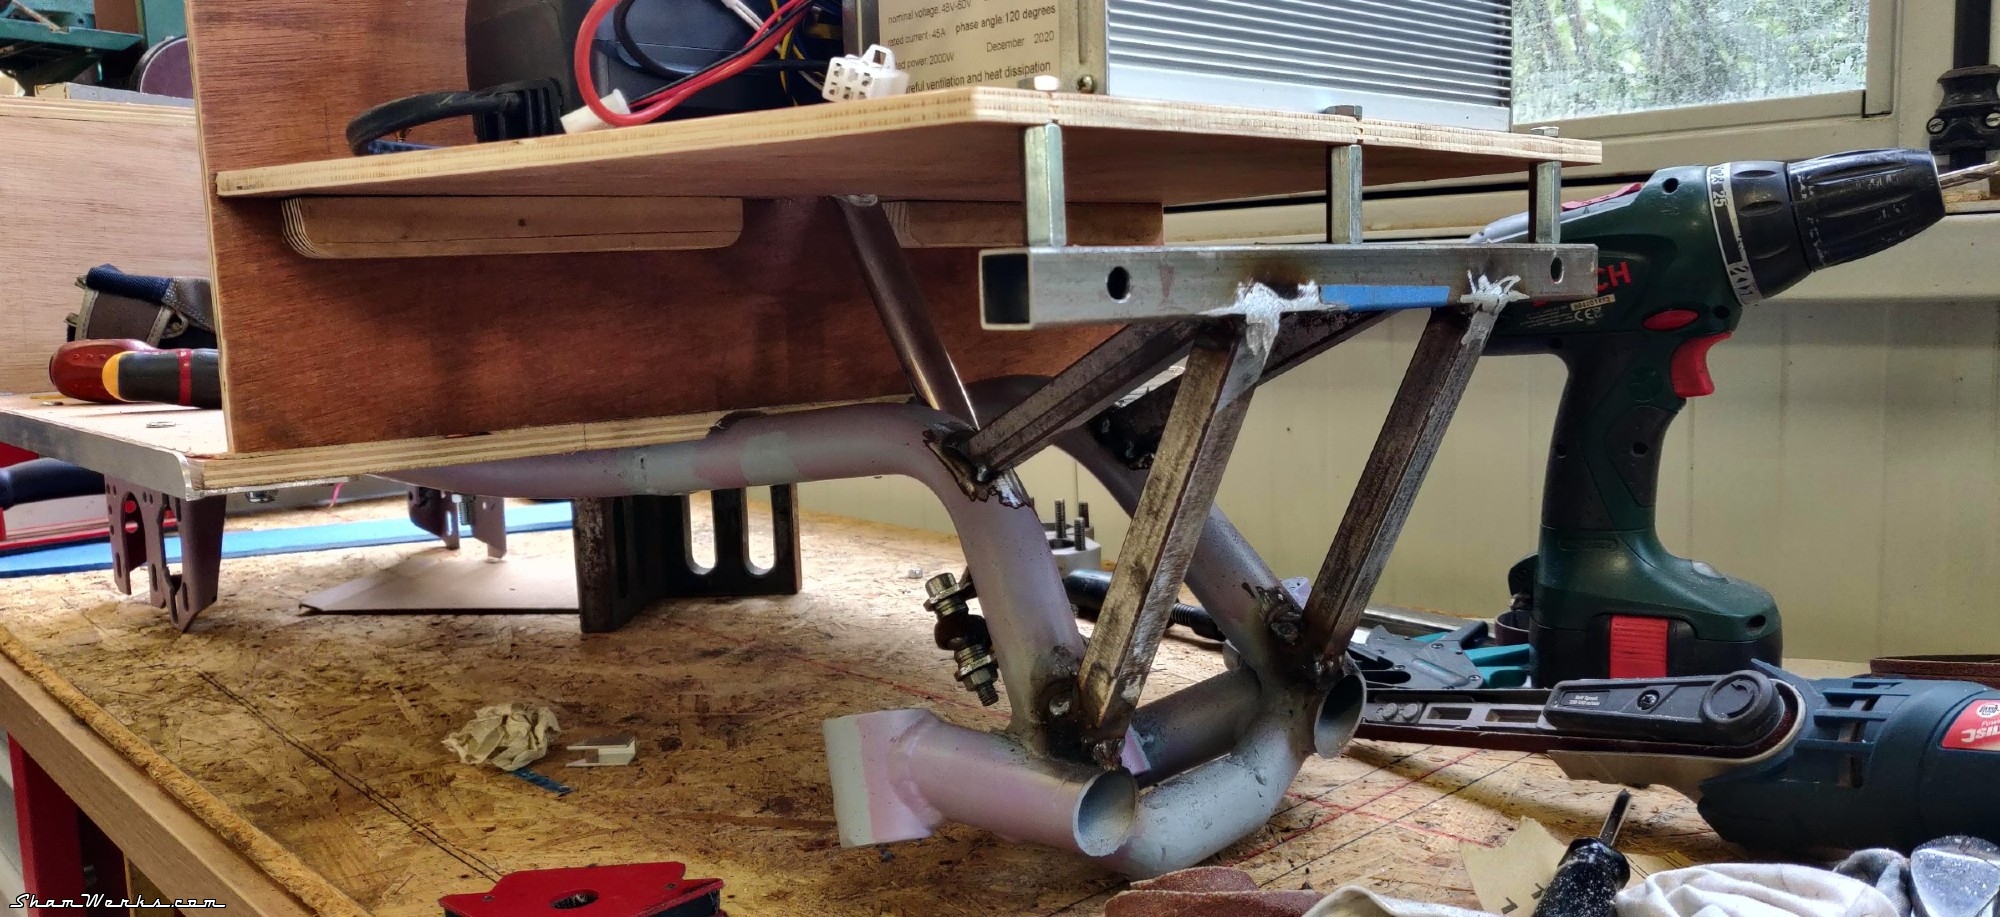
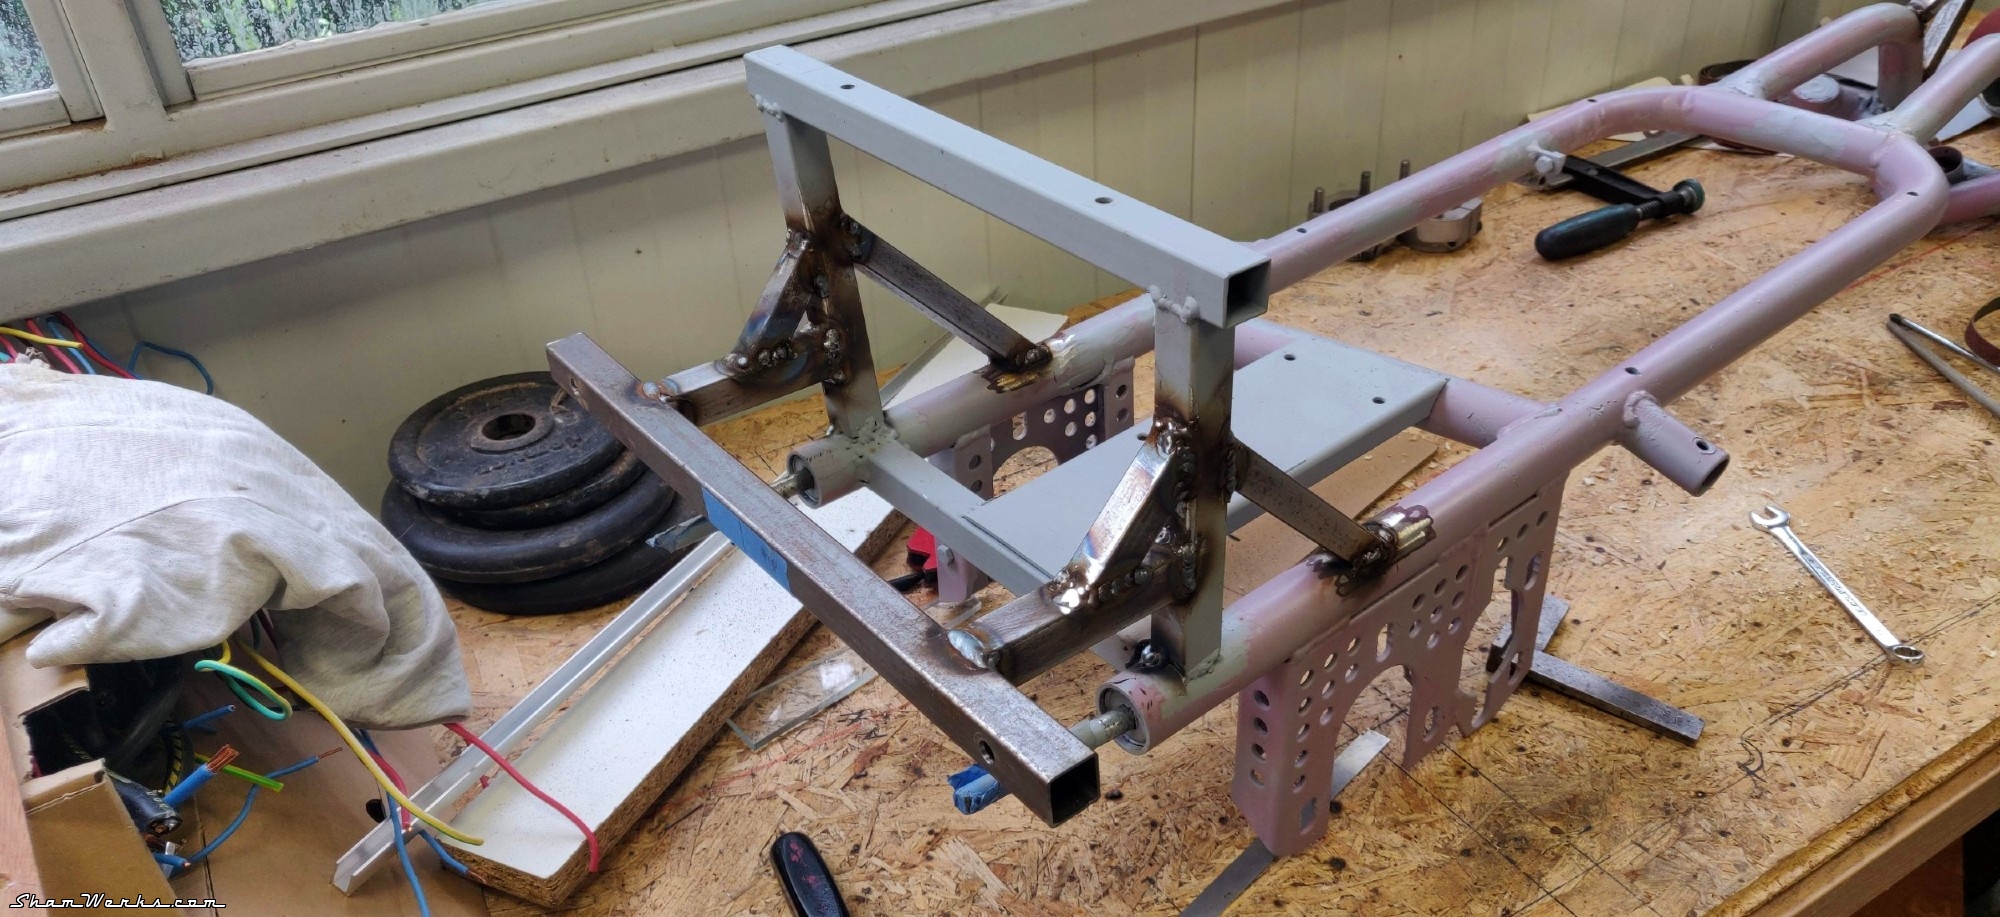
Interior
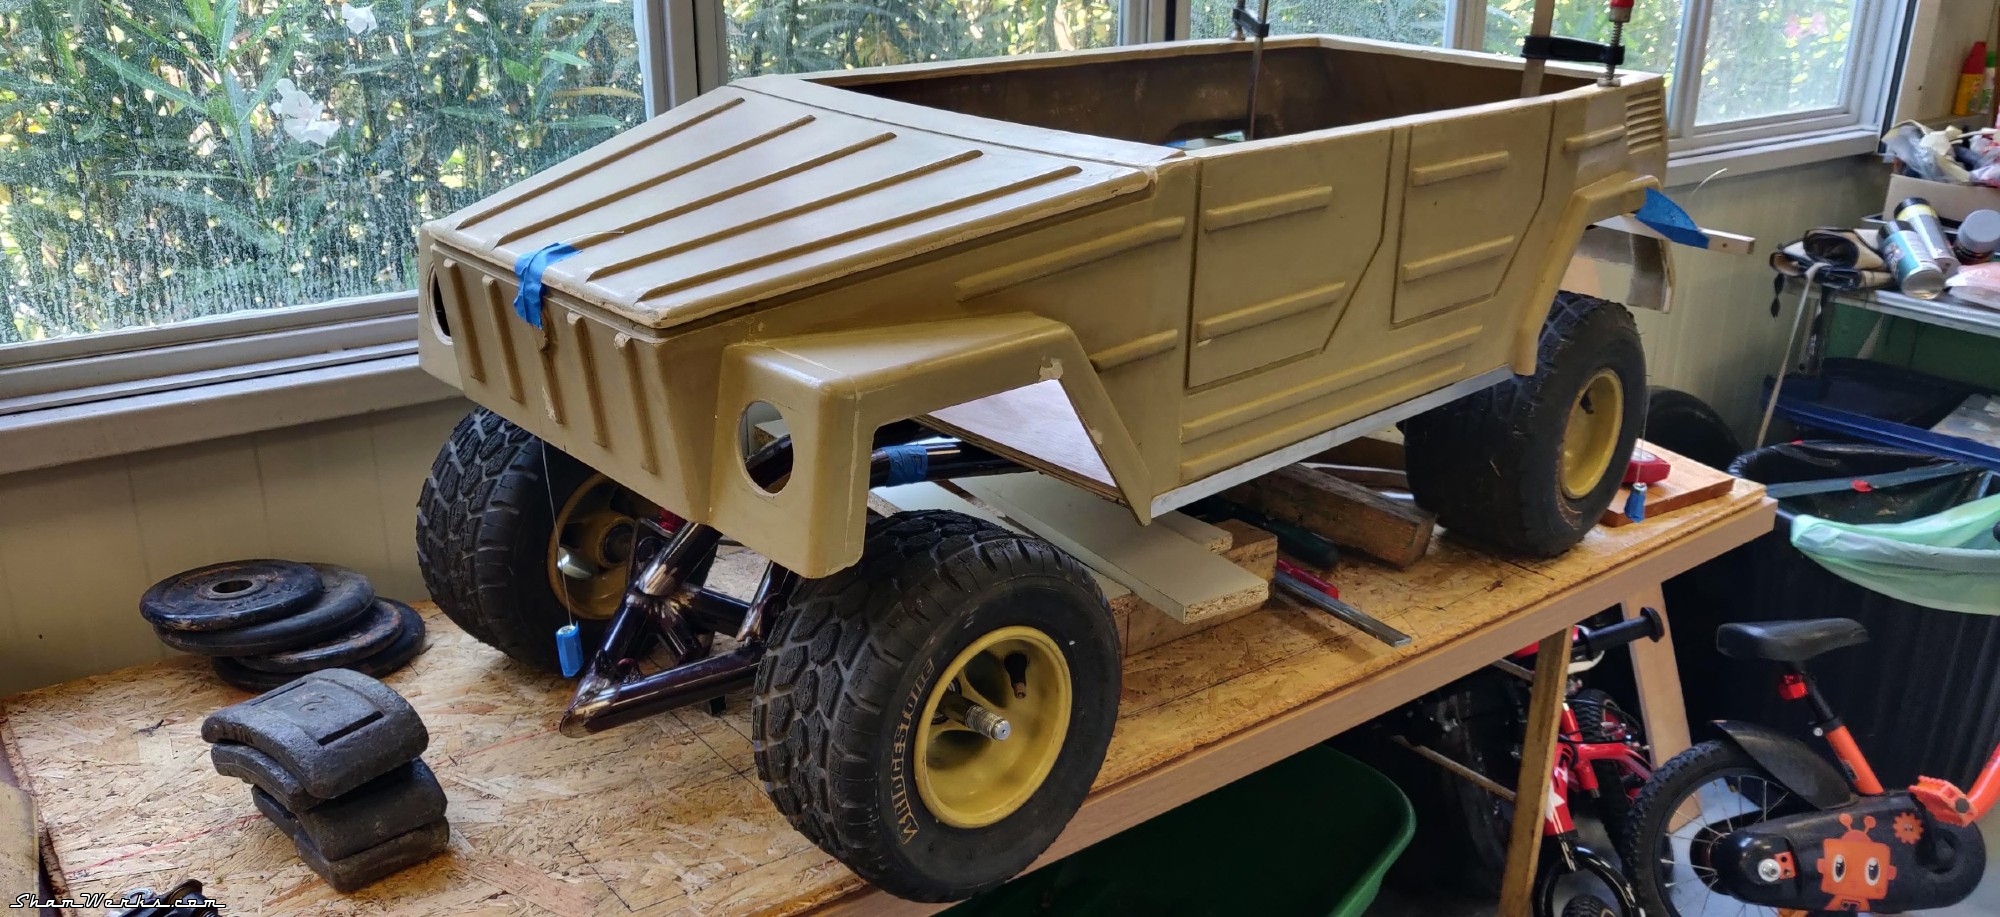
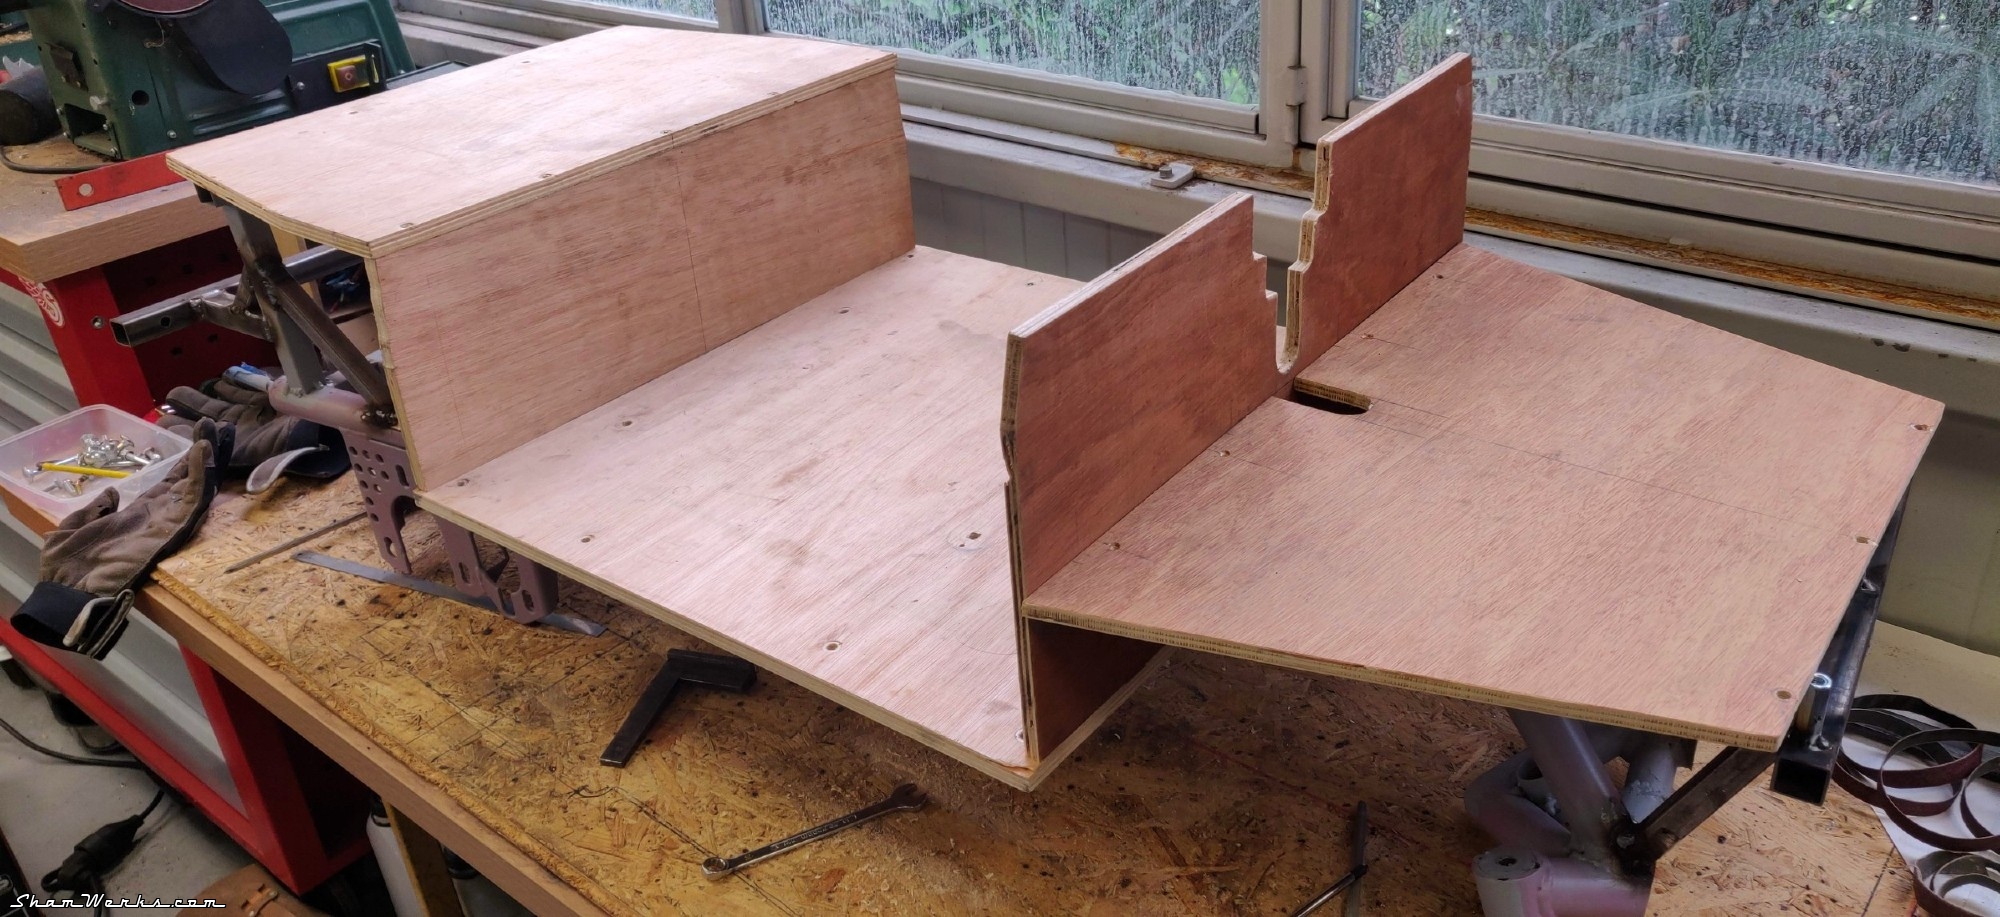
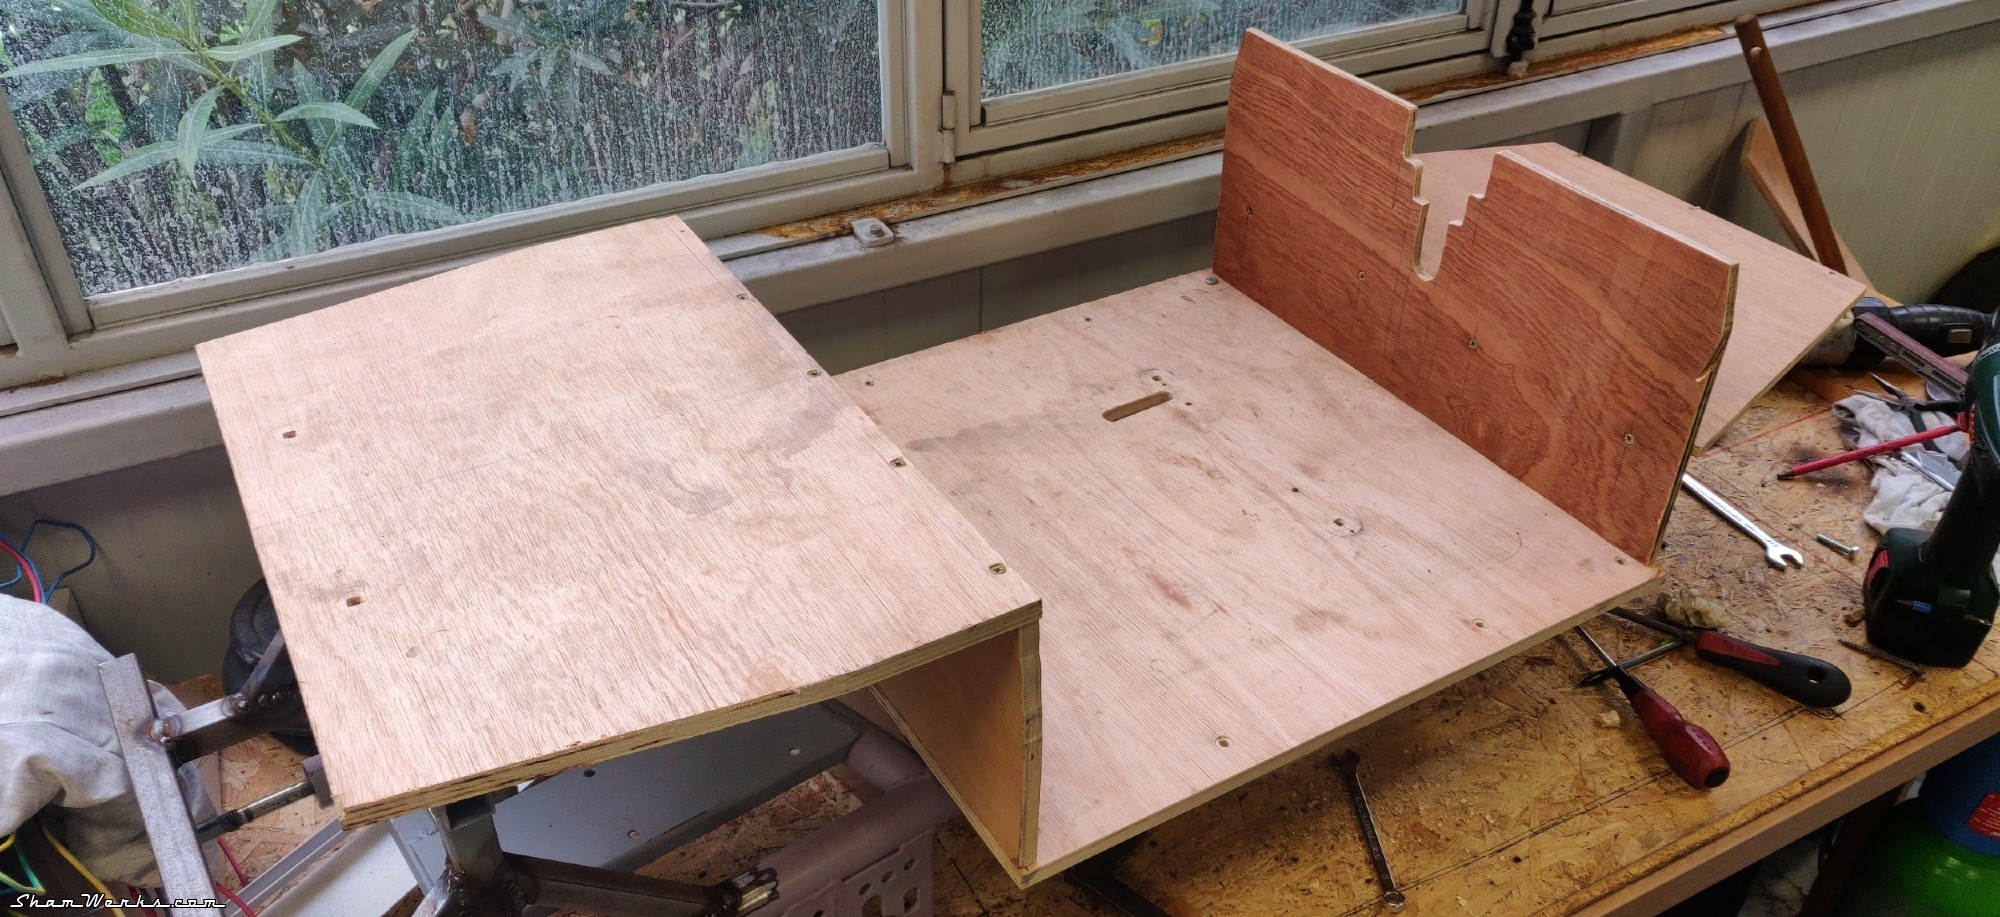
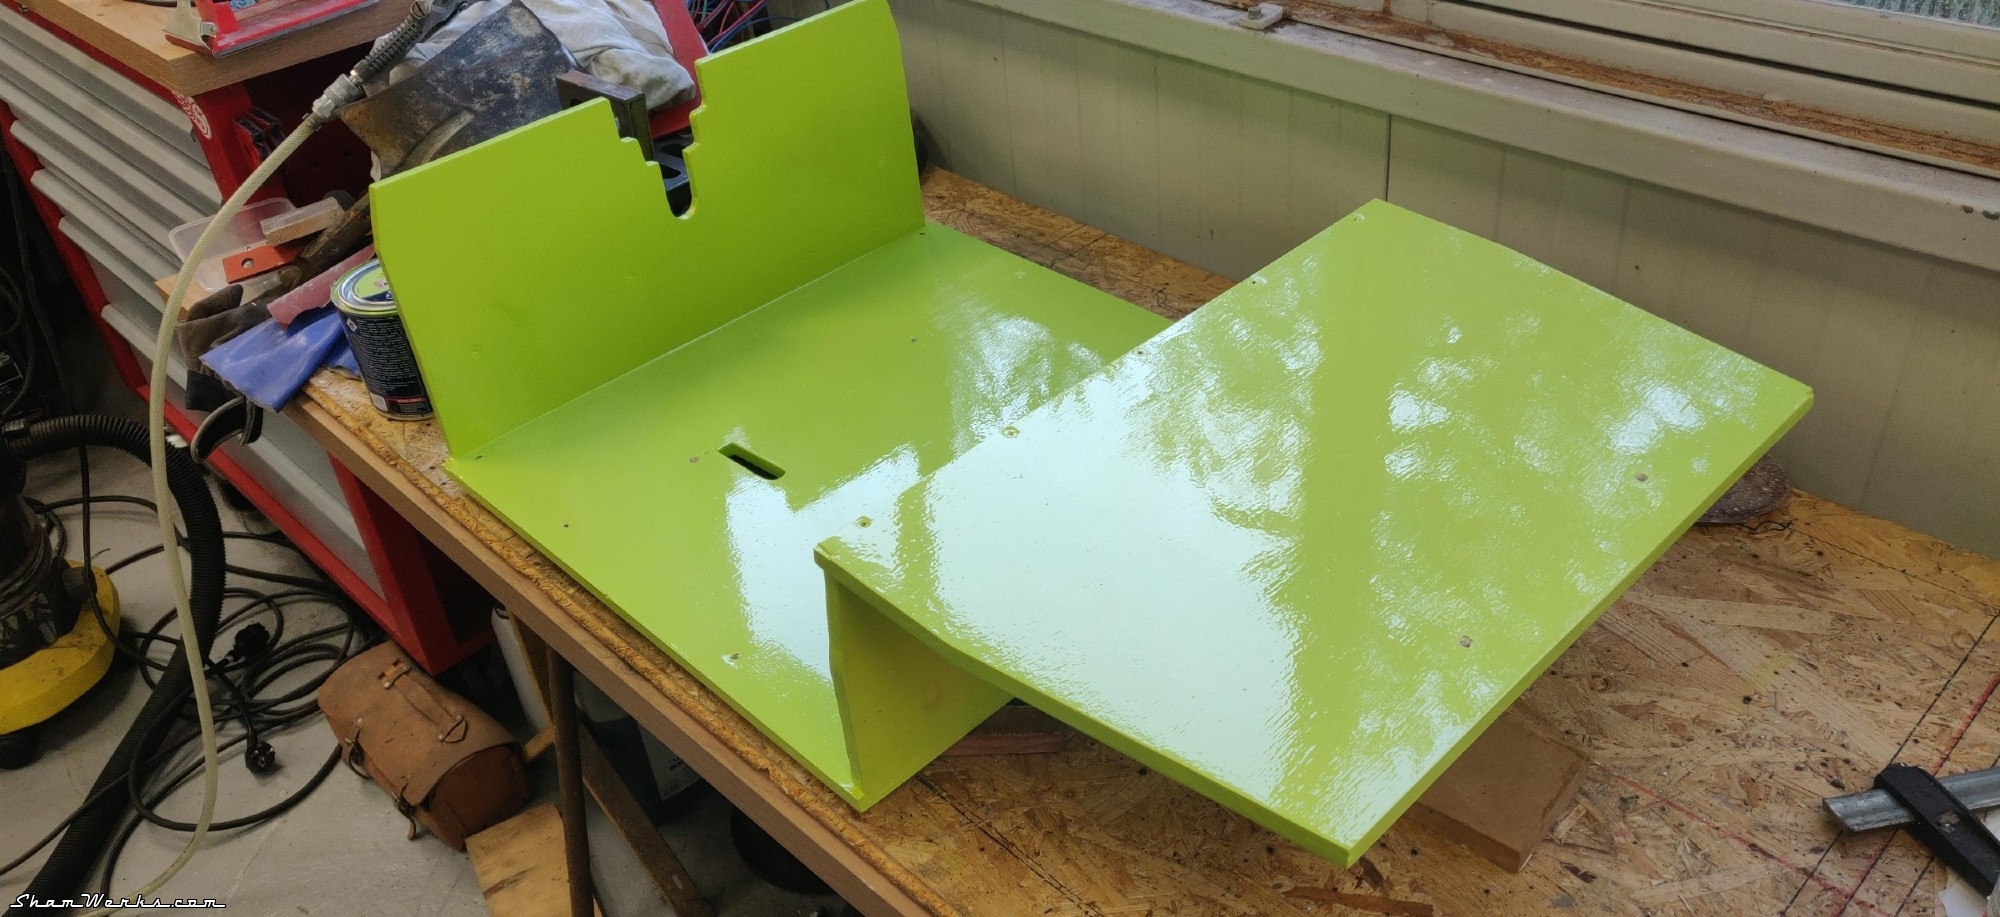
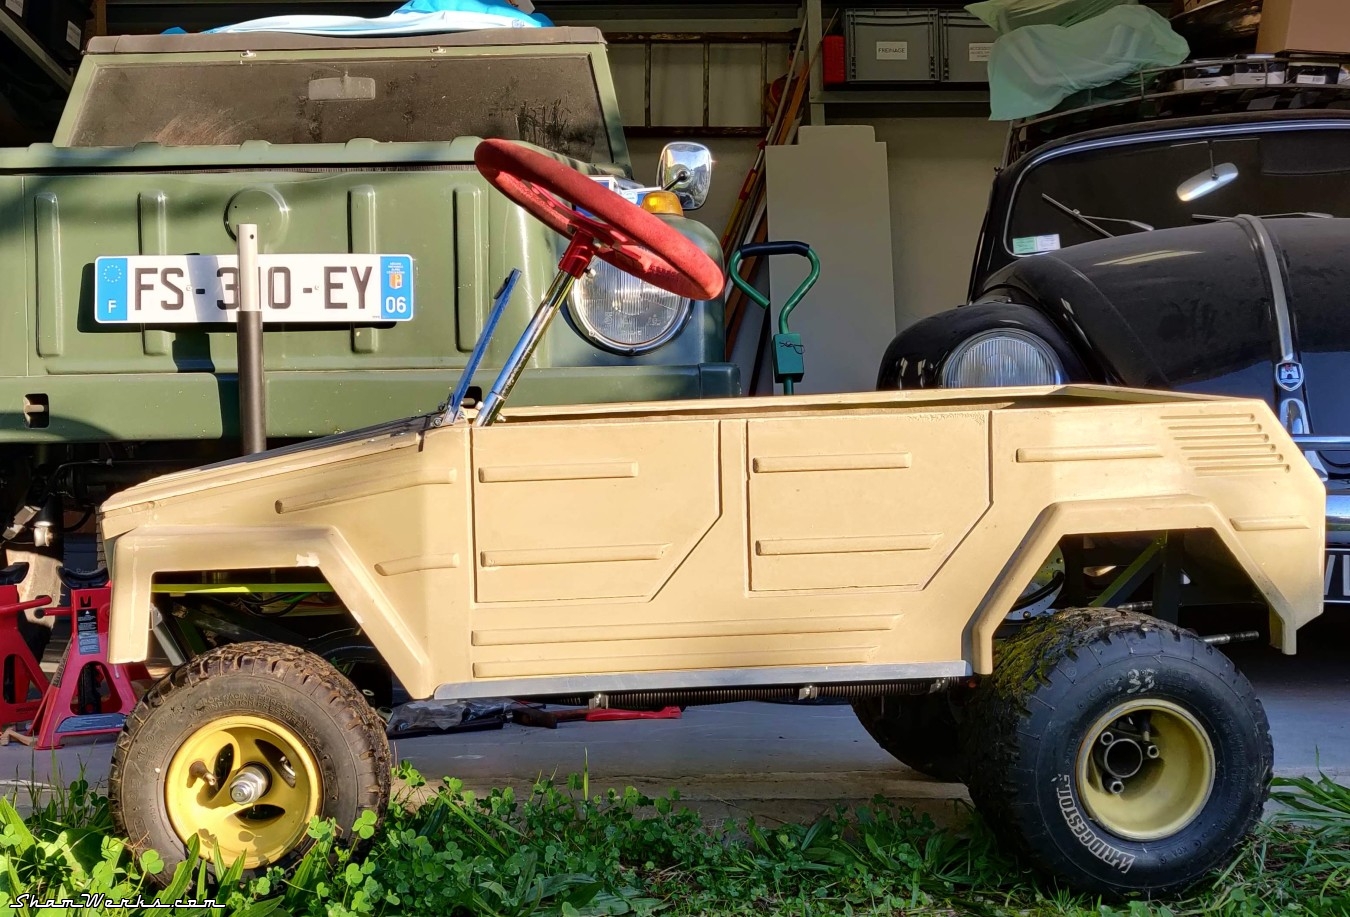
OK, "interior" might be a bit of a stretch, but anyway, I wanted a "child safe" place for my son.So I build a floor, seating area and dashboard out of 10 and 12mm thick plywood ; this will prevent the little one from putting his fingers in the rear chain and sprockets, or his feet in the steering in the front.
Sanding, gesso, some more sanding, and two coats of glycerophtalic paint using a foam roller (flashy green, but I had the pot left on a shelf).
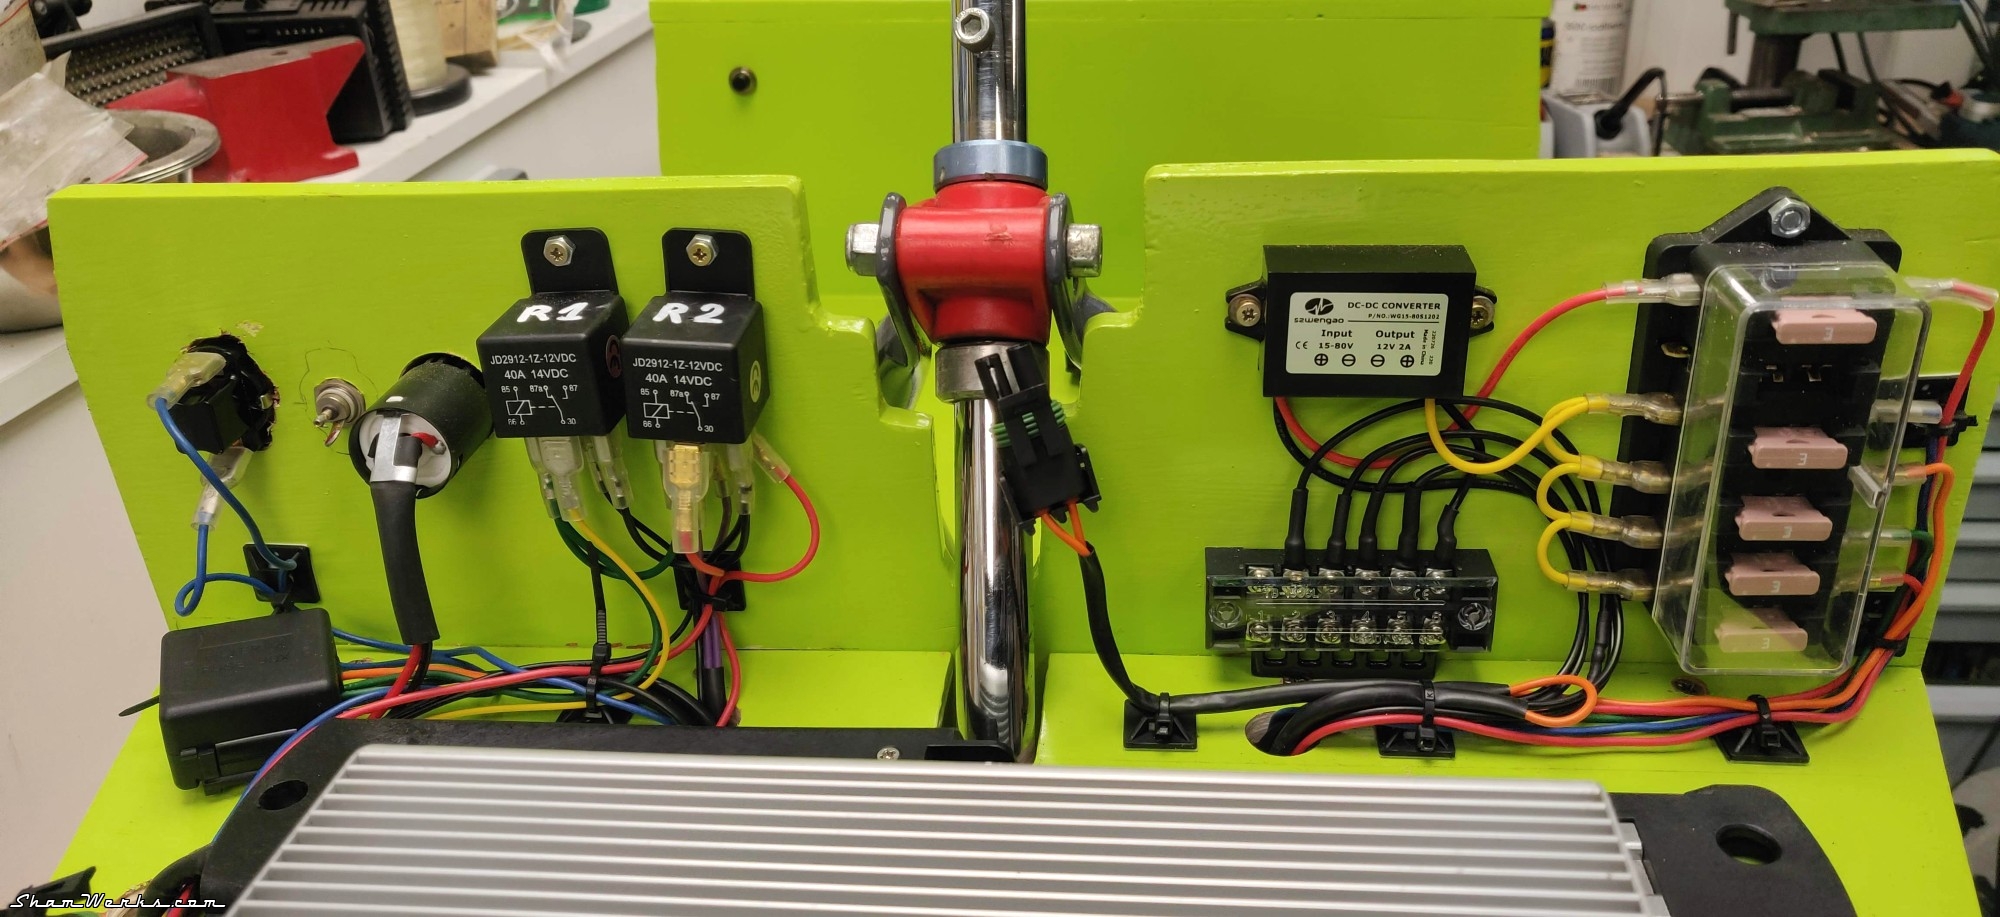
The board in the front under the hood will hold the battery, controller, and most of the electrical circuit. Two pieces of aluminium angle on the sides will hold the body shell in place.

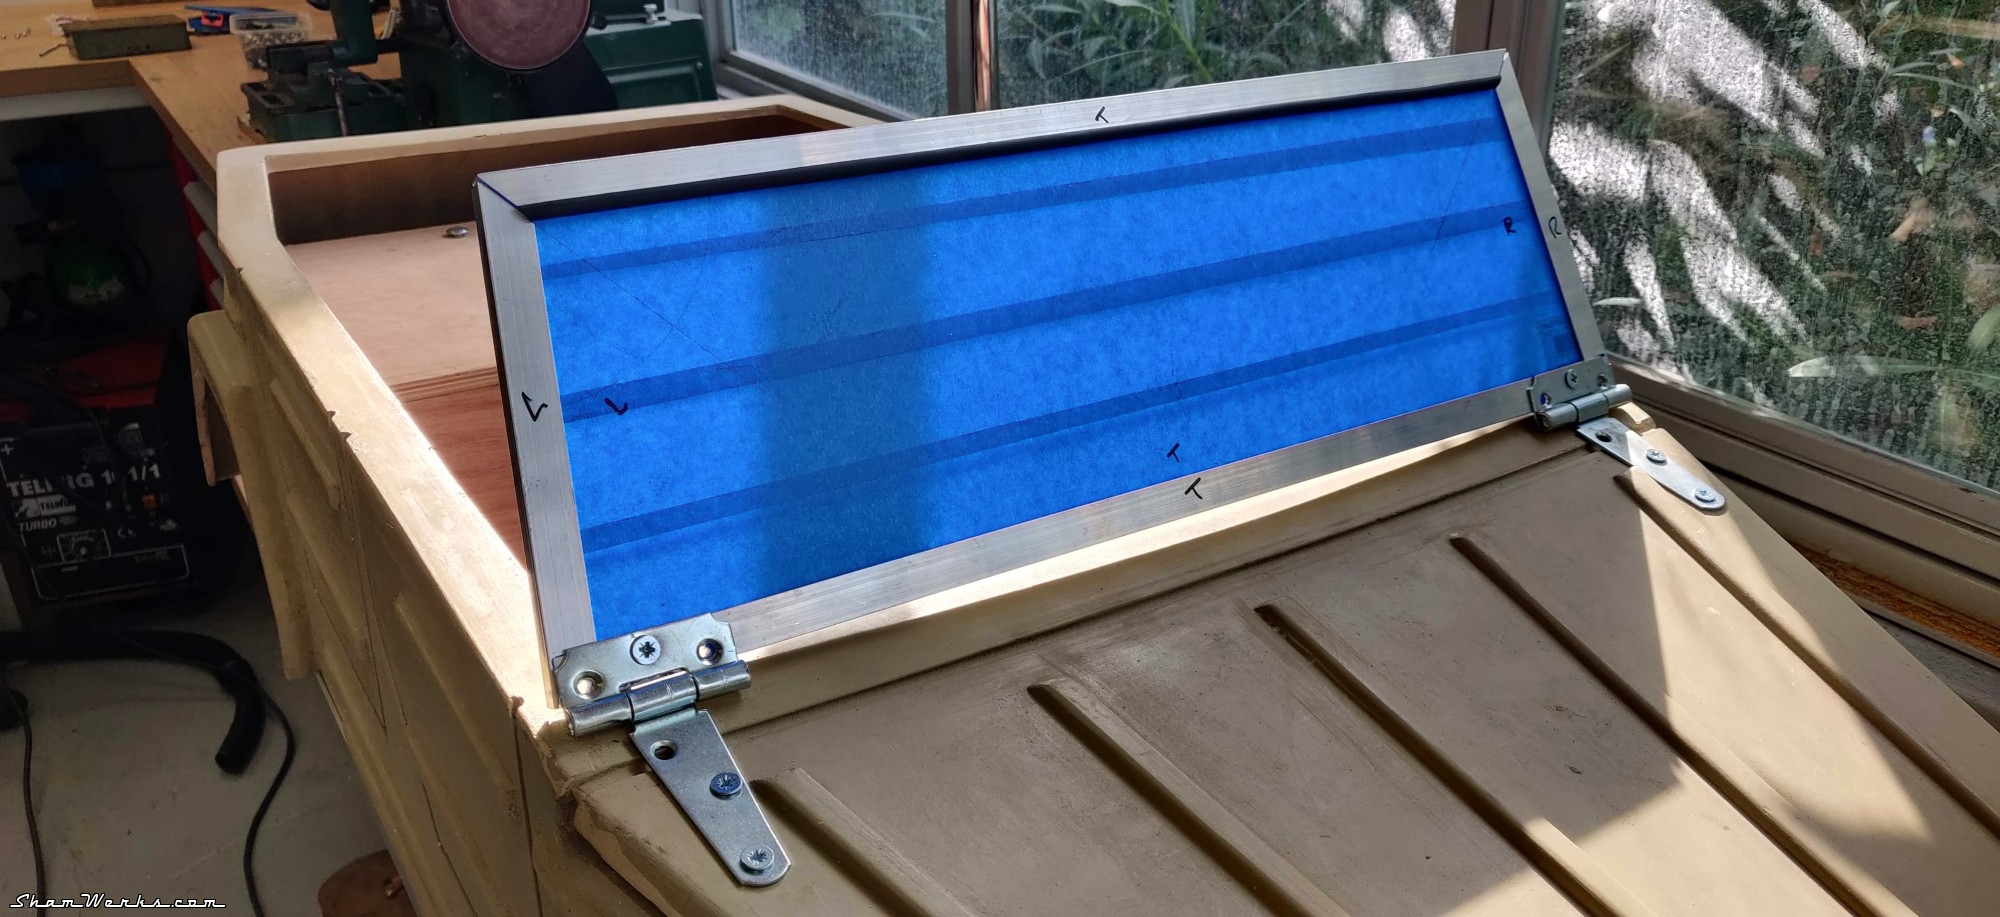
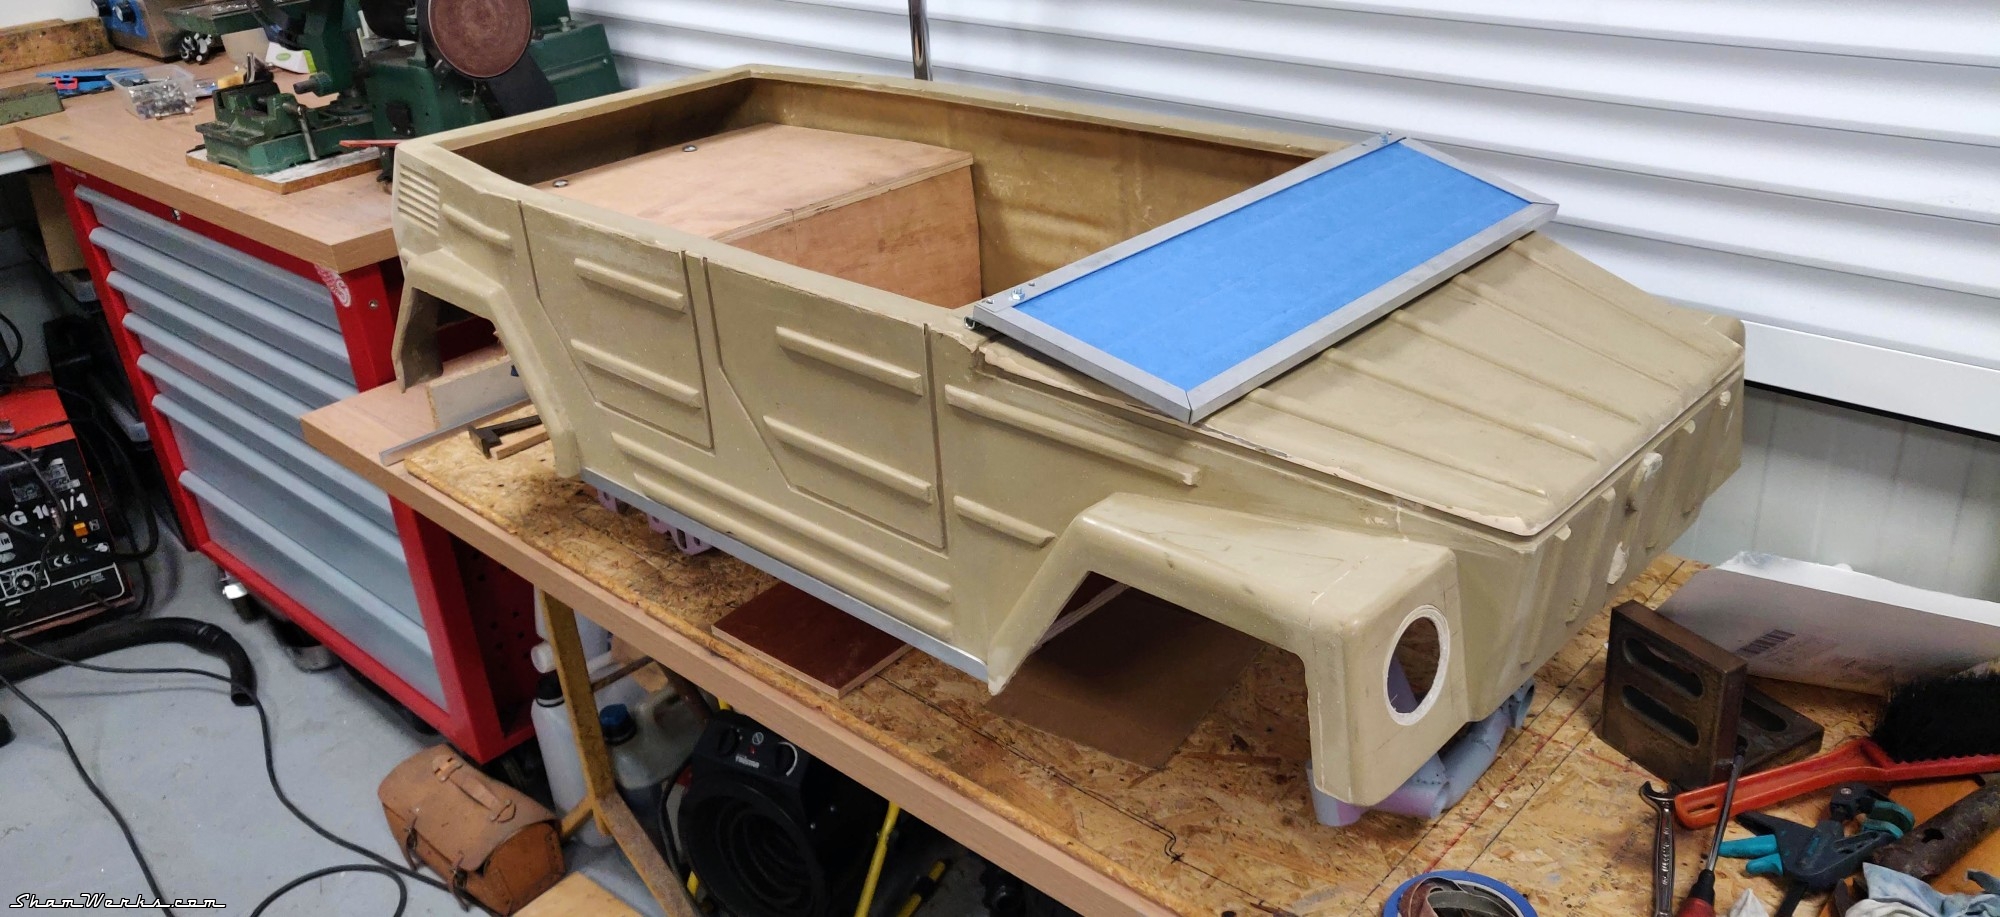
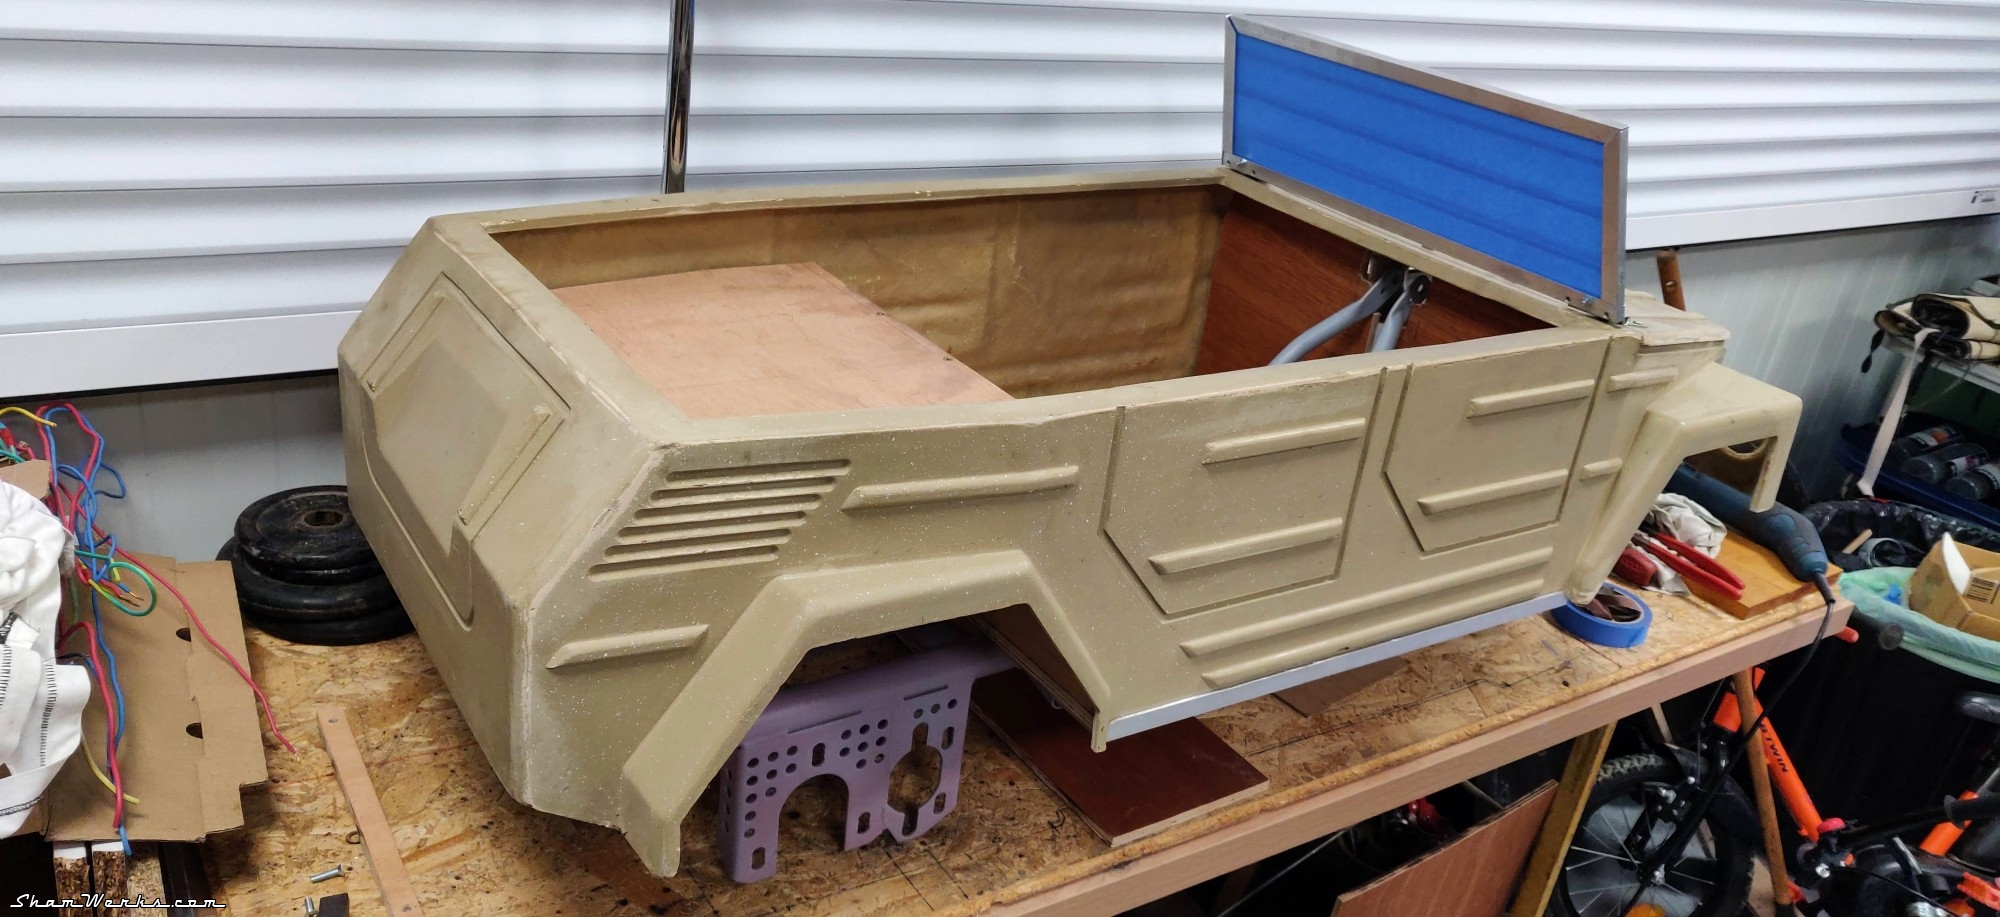
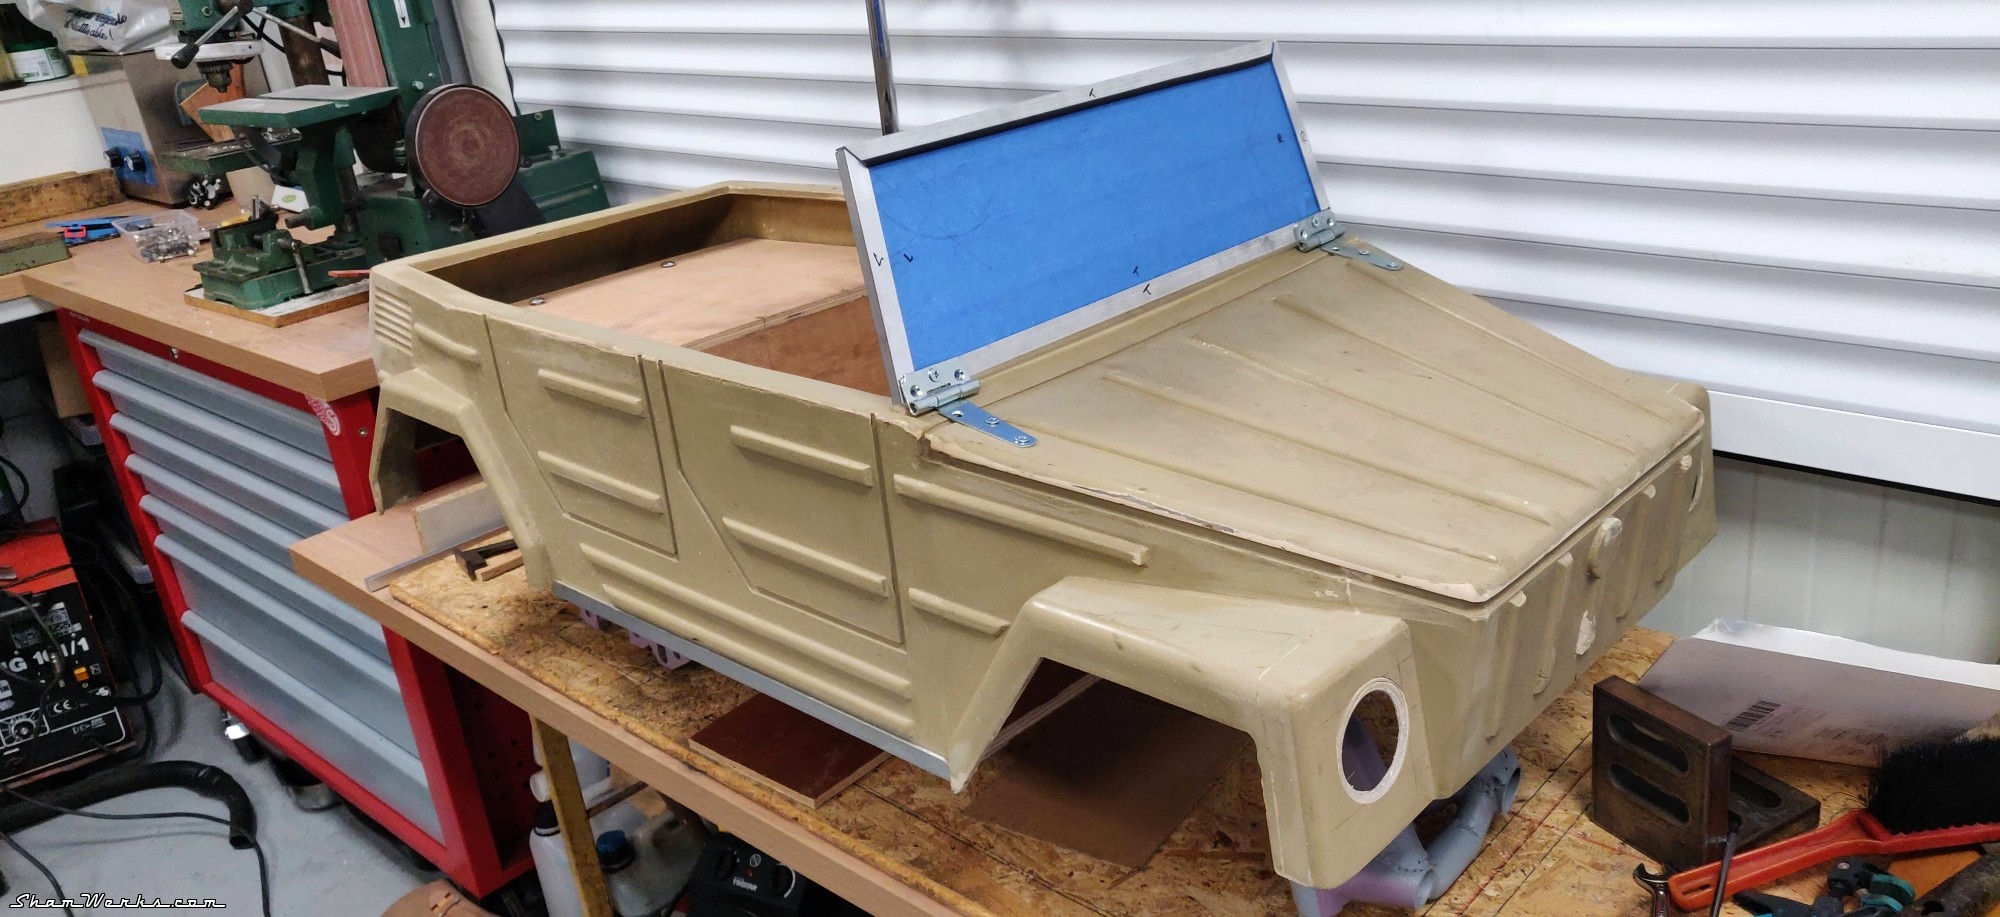
Windshield
I found at my local DIY store 2 hinges that look a lot like those of the original VW Thing...So with a bit of acrylic glass, and a length of aluminium U profile, I got myself a scaled version of the windshield! I even have some rubber seal (initially intended to be put on your car's doors to protect them from impacts/scratches) that will look great around it once everything is painted. I'll keep the blue tape on the glass until everything is painted too.
Assembly and electrical circuit
Time to put everything together!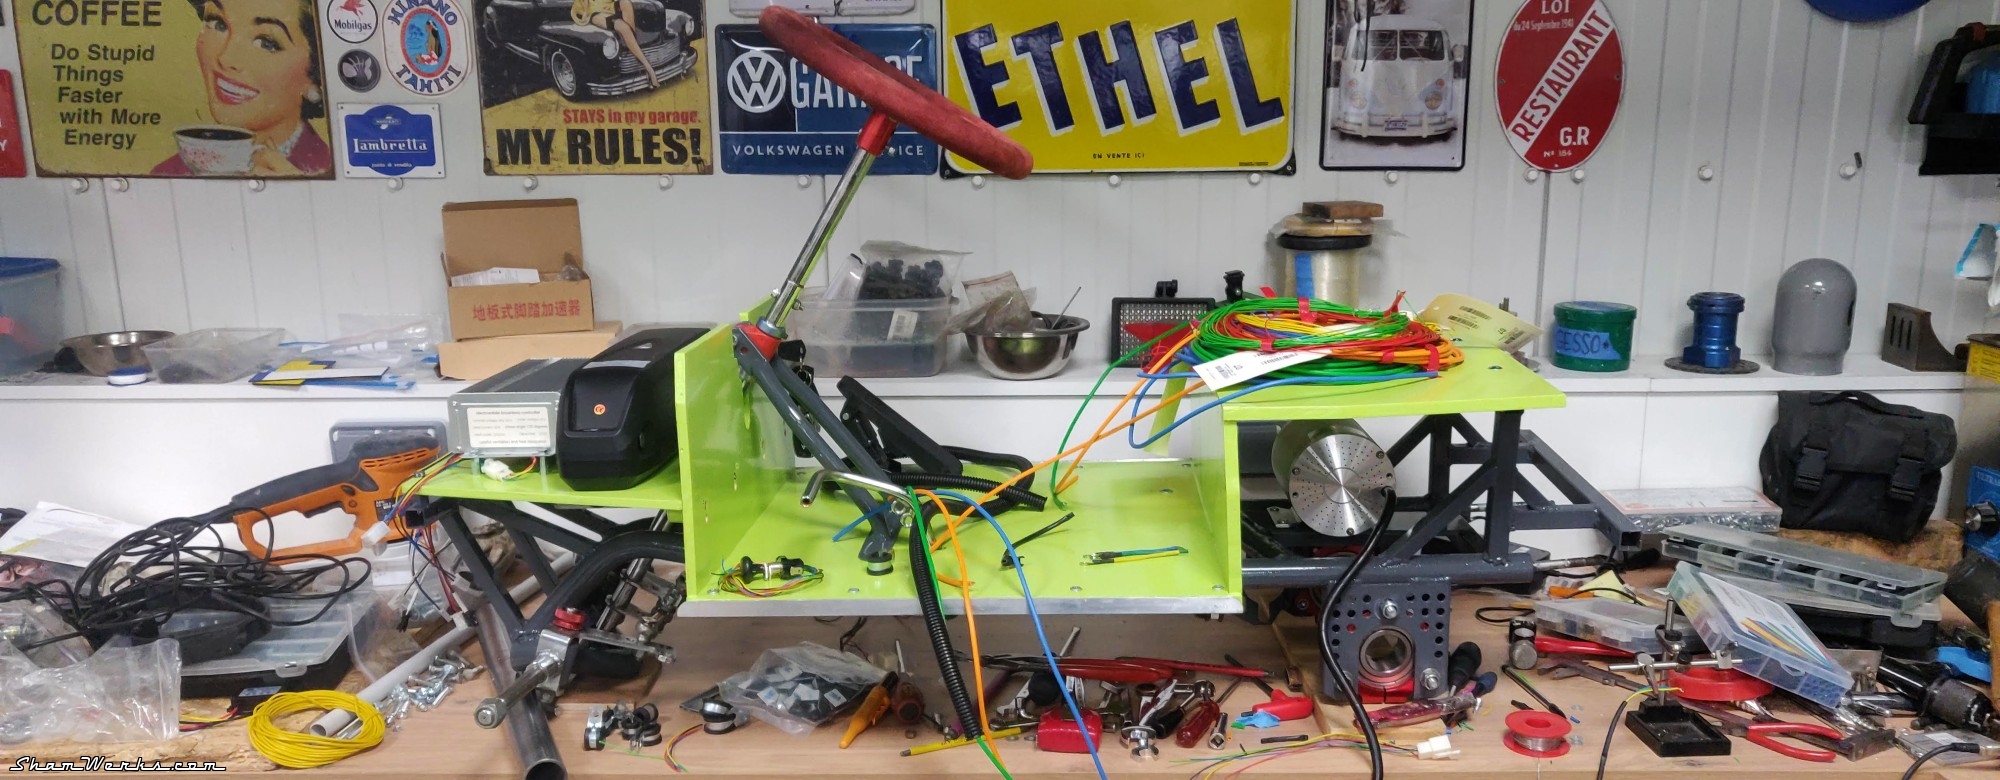
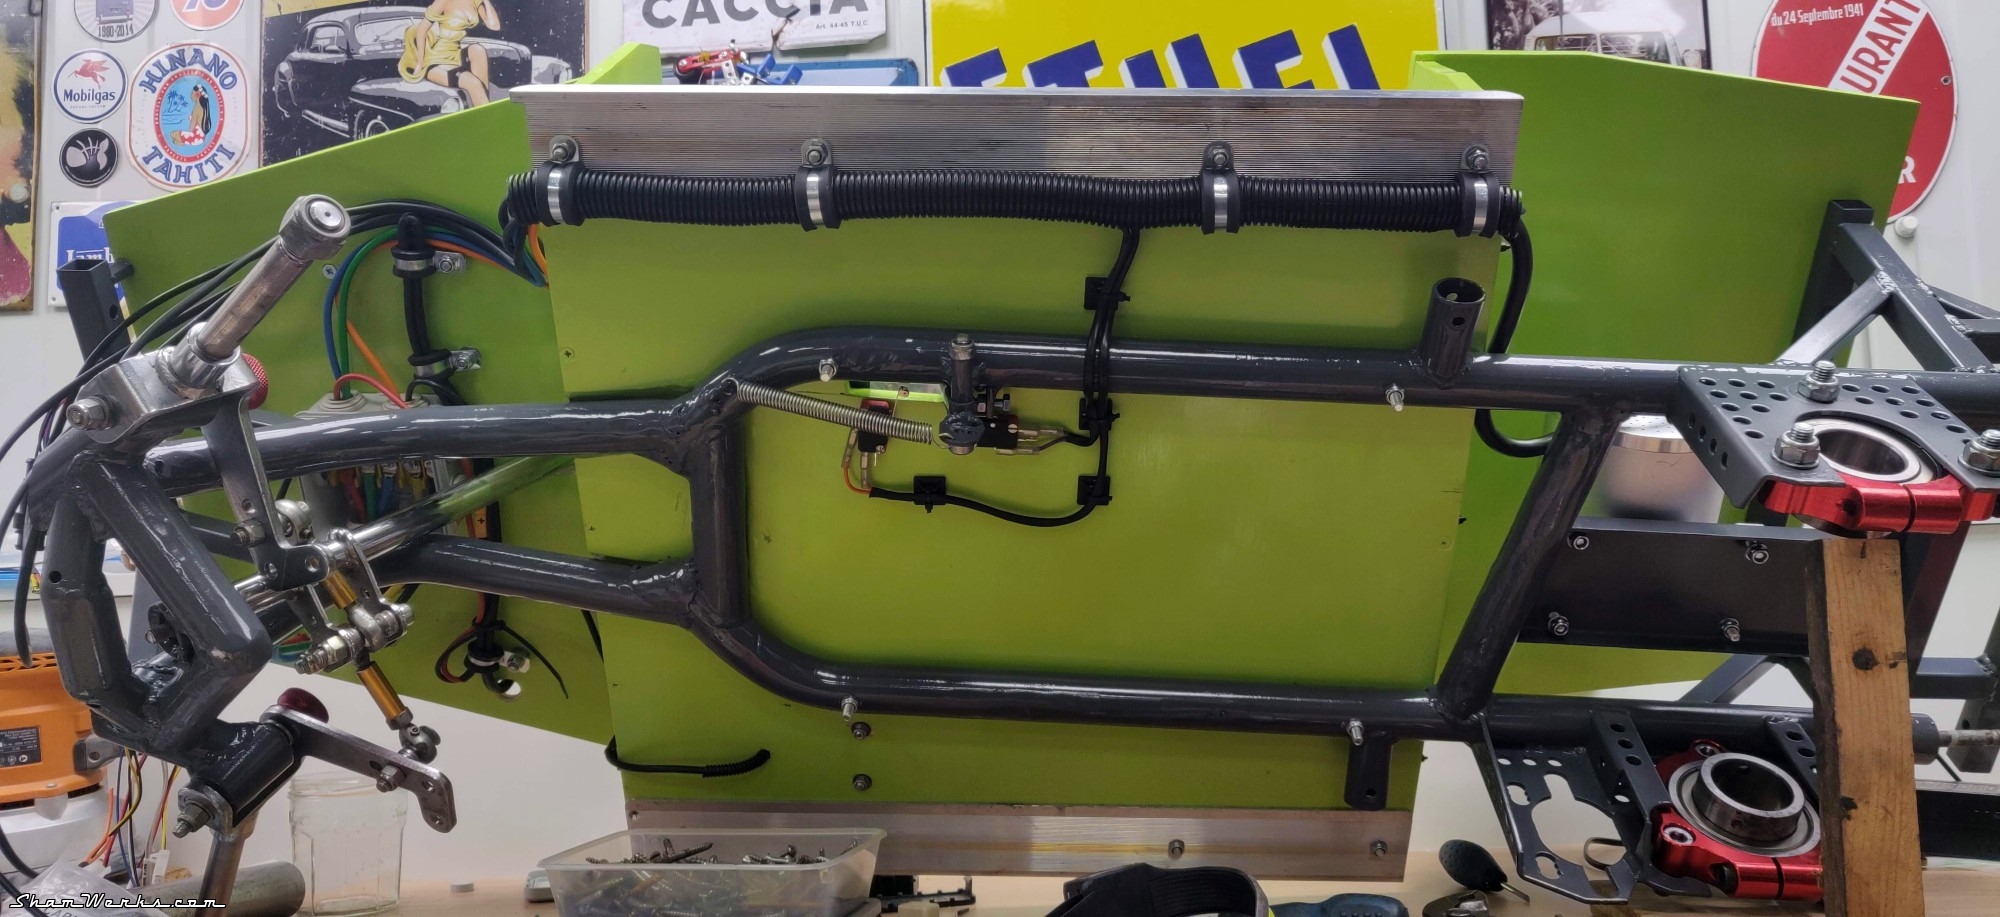
I install a voltage reducer to get 12V from the battery 48V, and put a fuse box to power each of the elements :
- a buzzer as horn (activated from a push button on the steering wheel)
- LED headlights in the front (T10 LED lamps)
- rear brake lights (48 smd LEDs boards), activated by a micro switch on the start of the travel of the brake pedal)
- A remote controlled relay, to activate the electric brake (security when the little one is driving) - with 2 relays behind so that the brake lights turn on as well.


First ride!
The project is finally on its wheels, 16 years after starting it! Yeah, I know, I'm not exactly fast... 😁


- 2000W accelerates hard! I had to put a piece of wood underneath the throttle pedal for my son to be able to drive the thing. And the 3 speed selector is a blessing!
- When giving it full throttle, the front axle loses grip and the steering becomes nothing more than a recommendation... 😁 The lack of differential on the rear axle doesn't help, for sure.
- Boy am I glad I included the remote control to stop the Mini Thing at a distance, it has effectively prevented many accidents from happening to my son. In his defense, he's constantly improving his driving skills, and keeps beating his own time on the Nürbur-Green (aka our garden 😁)
- High stance + reduced track width + high speed = if you try to steer too tight, the wheels on the inside of the turn will lift... And, yes, admittedly, I did manage to end up on the side myself. 😁
- I need to shorten the steering links by a few millimeters ; right now, even adjusted at their minimum, the front wheels have a pretty massive toe-in, giving some random behaviors when steering on mixed-grip terrain.
- In hindsight, I should have reduced the caster angle on the spindles, it makes the steering a bit hard for the little one.
- I should have made a more serious frame/jigs, as the geometry of the chassis is off by quite a bit... I managed to compensate with some adjustments, but it could have been much better.
- The tires, at over 15 years old, are dead dry, and don't hold pressure any longer. I'll swap them shortly.
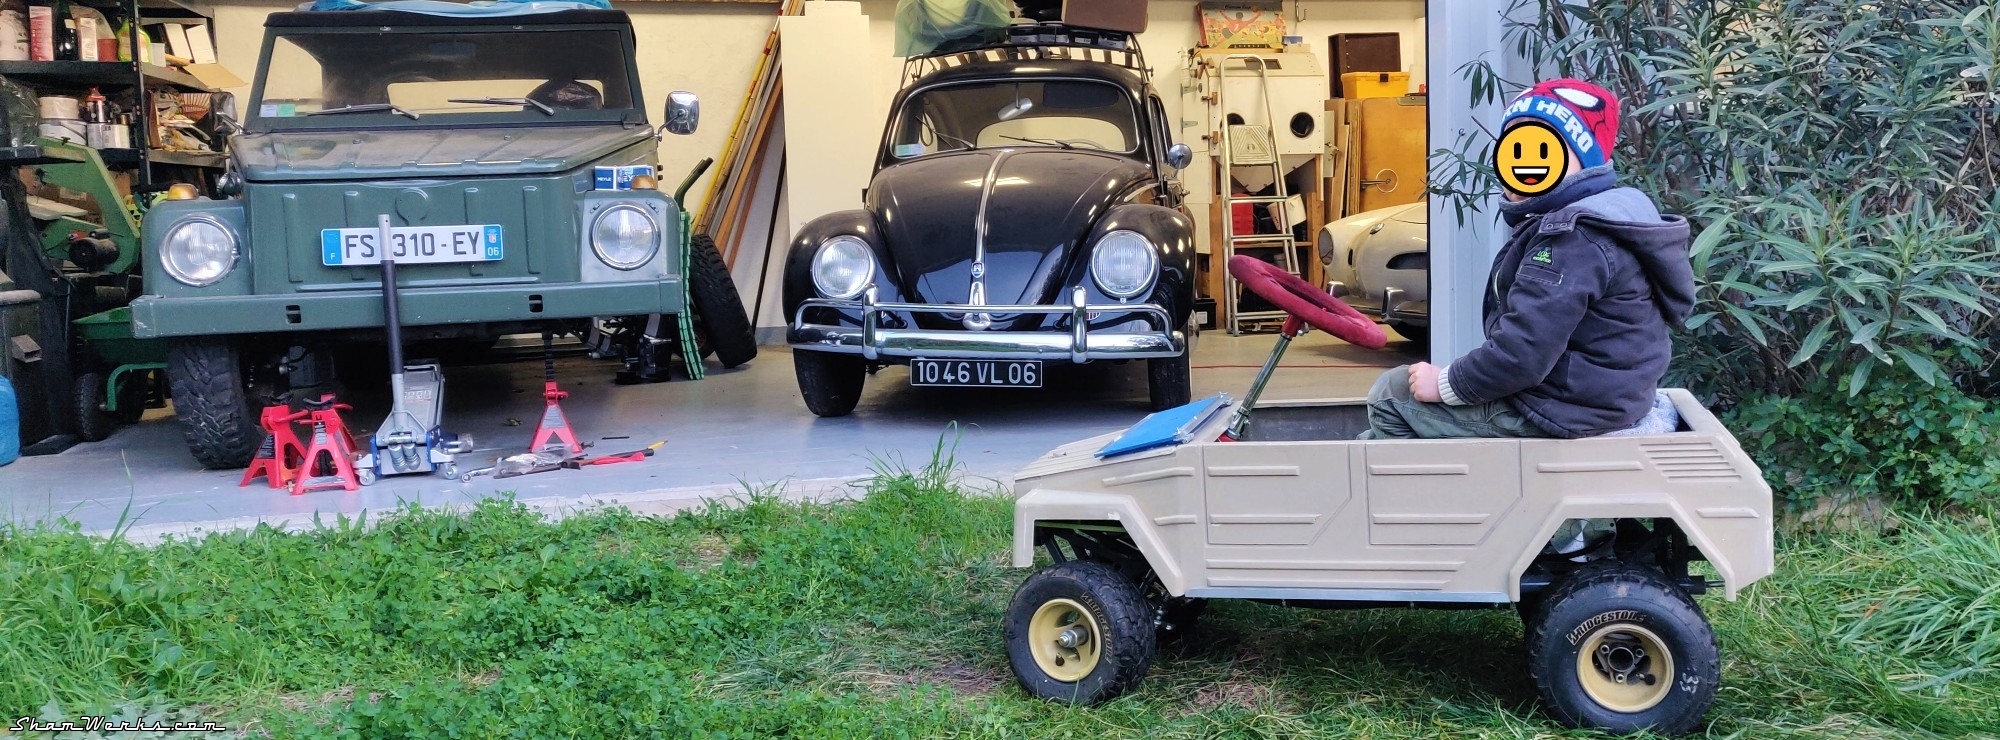
I still have quite a few things to do on this project before I can consider it complete : paint, bumpers, headlights, brake lights, seating, battery gauge... But the little one was able to drive it for Christmas, and that's all that matters!
Stay tuned for the finishing touches... Soon! Published on 14/02/2023 / 3 commentaires