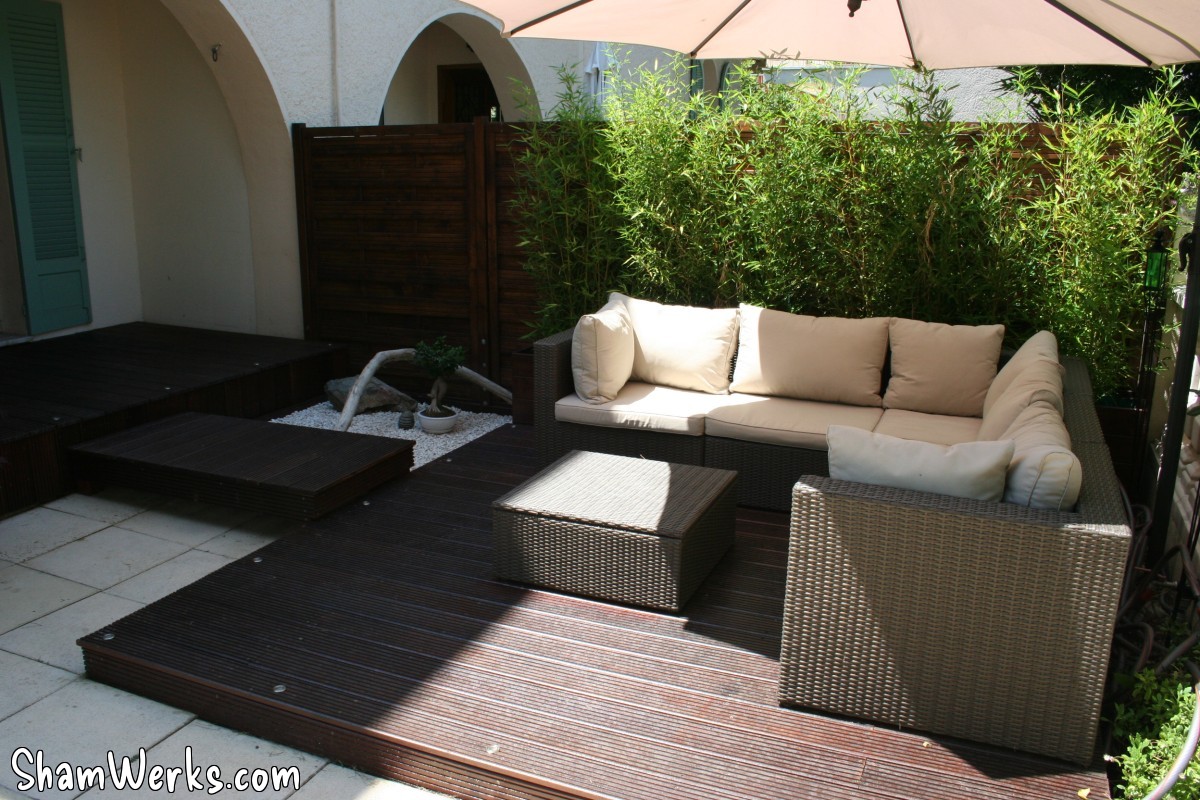
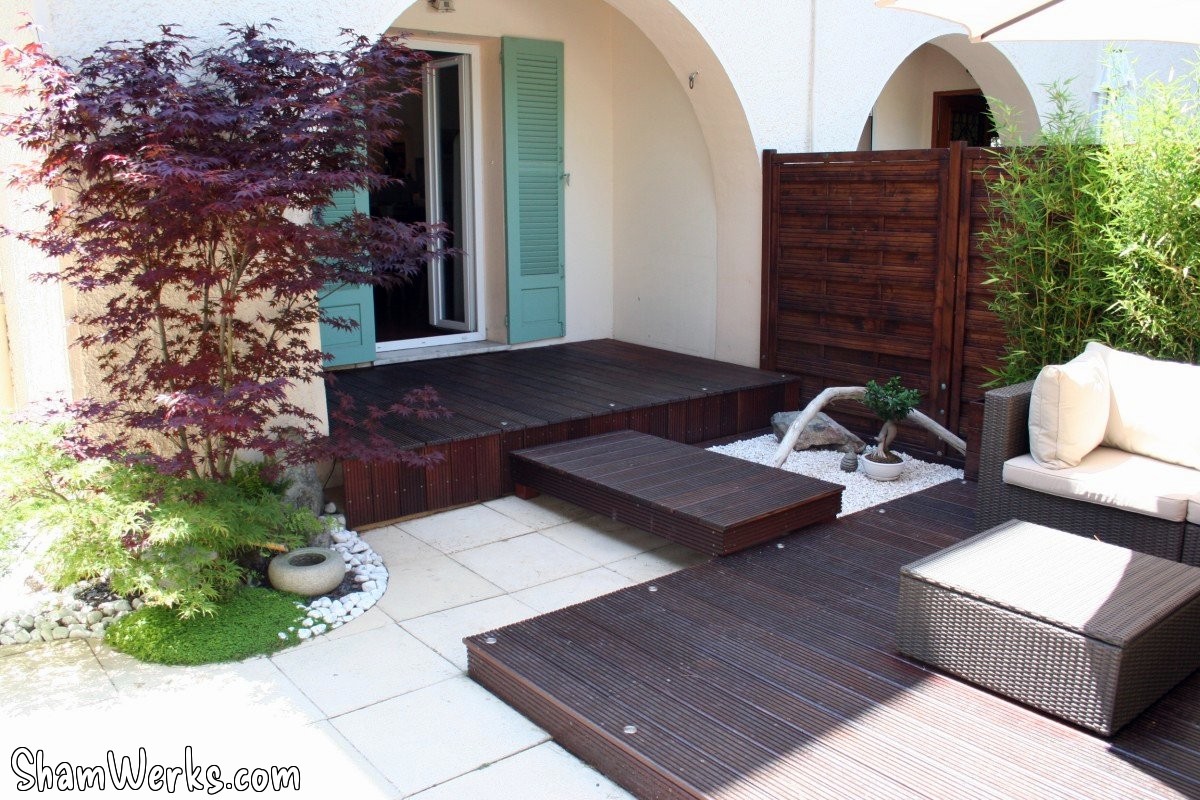
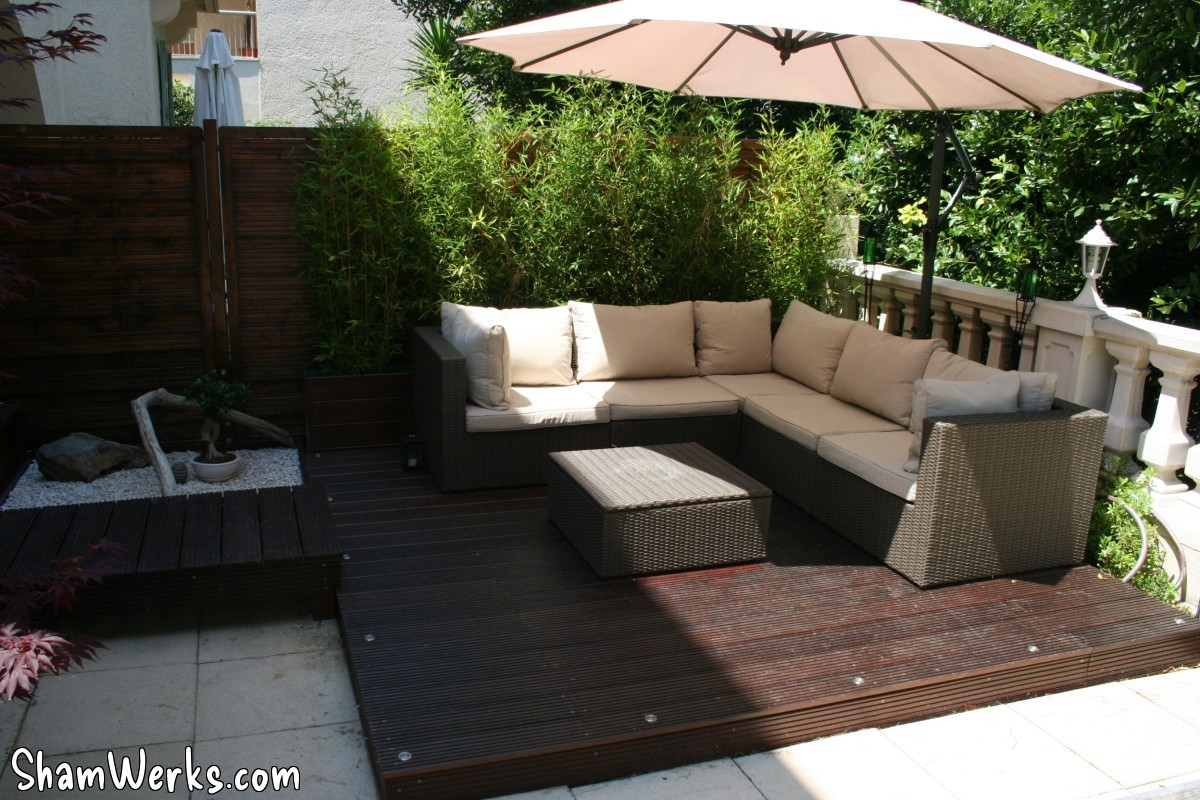
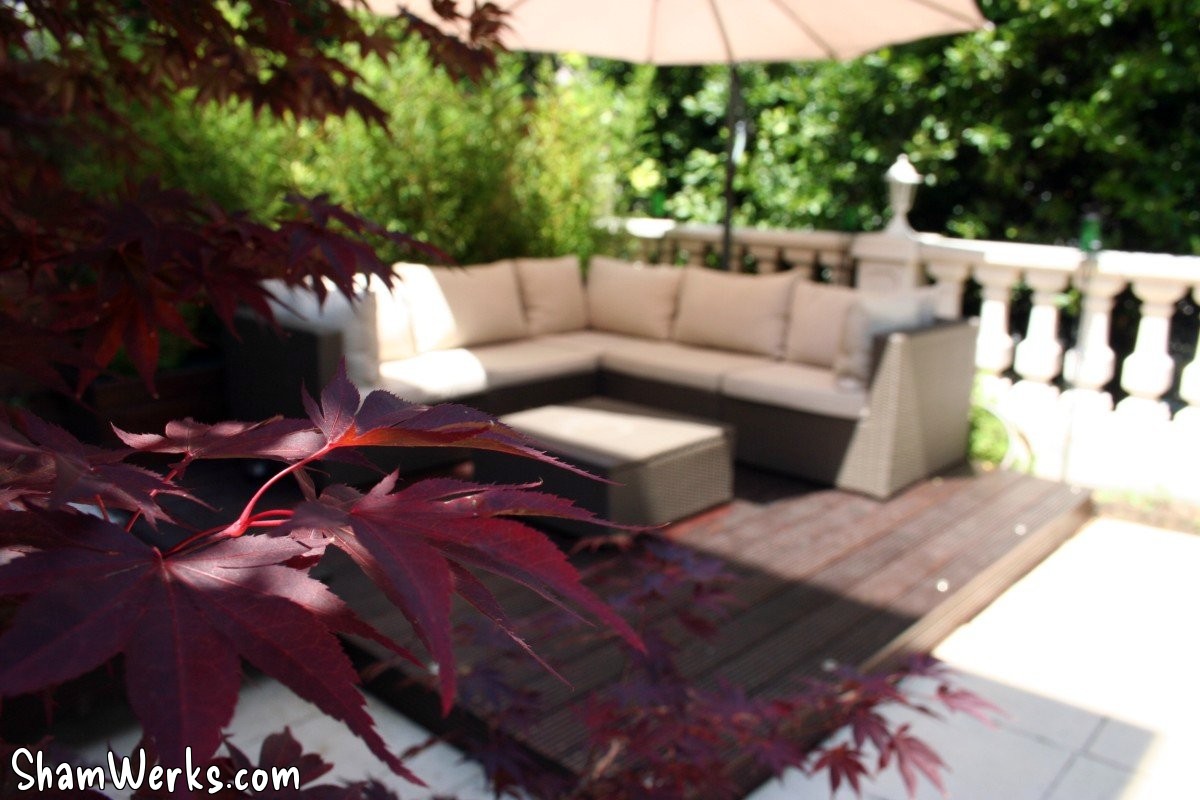
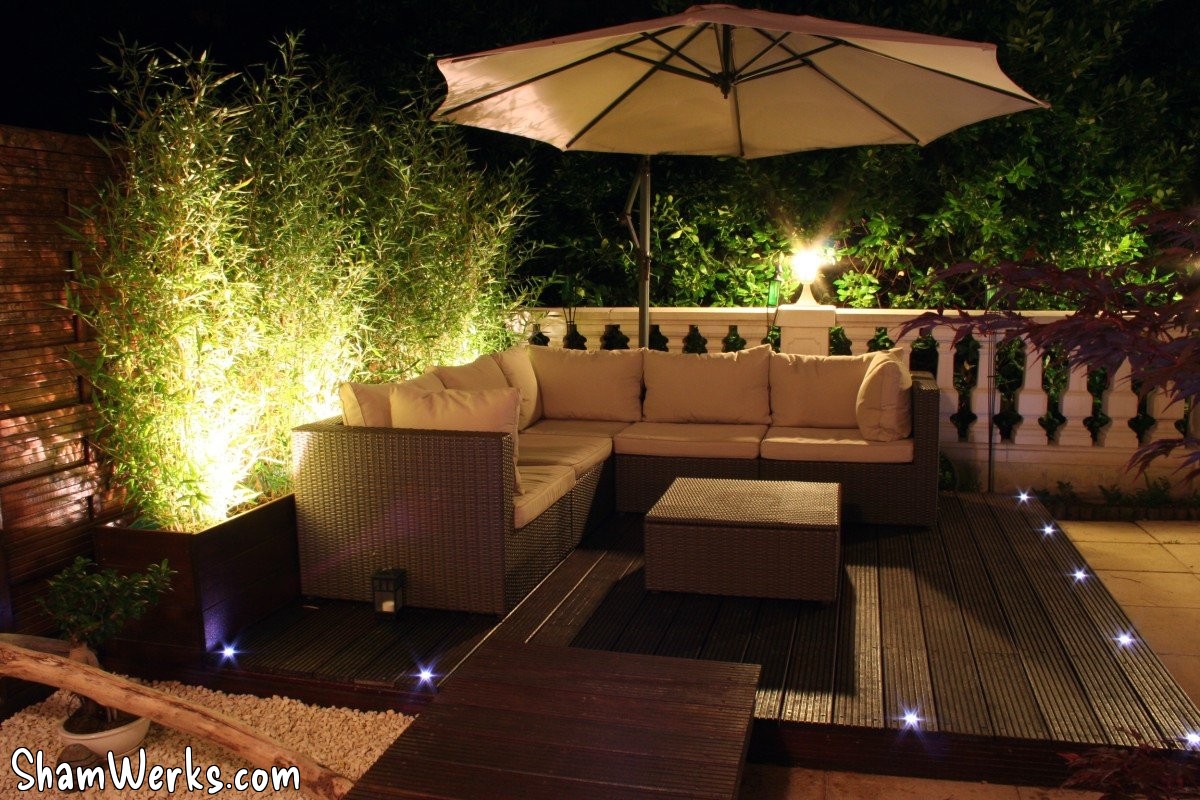
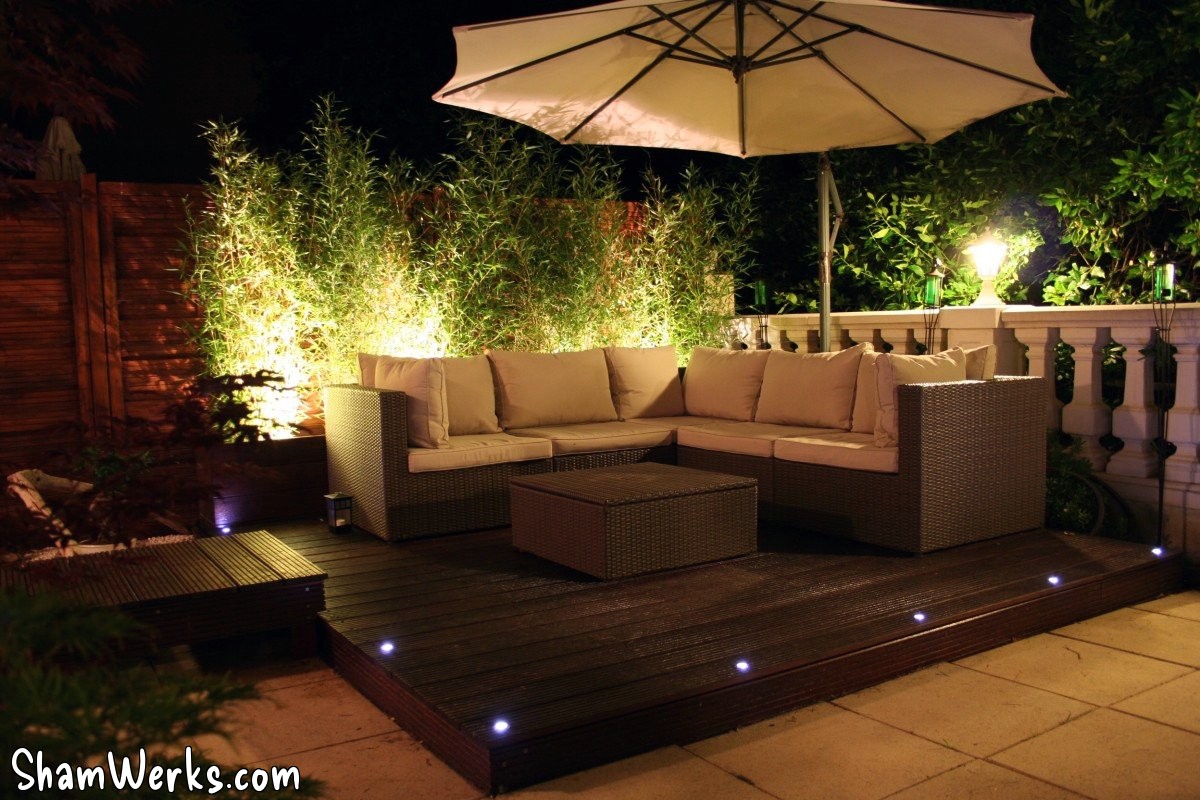
Final Result and Conclusions
Well, even though I still have a few minor things to finish, it's time to take a look at the completed Terrace Project ...
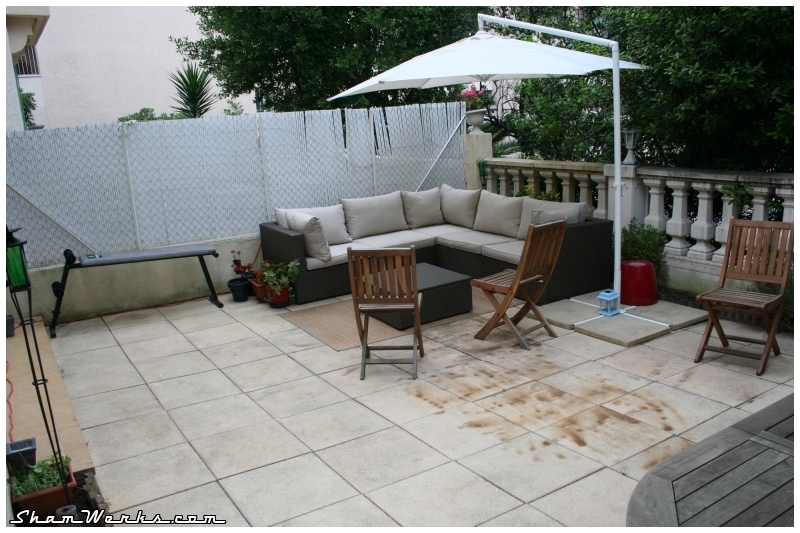
So here, in photos, is the final result! ( click here to see the "before" state).
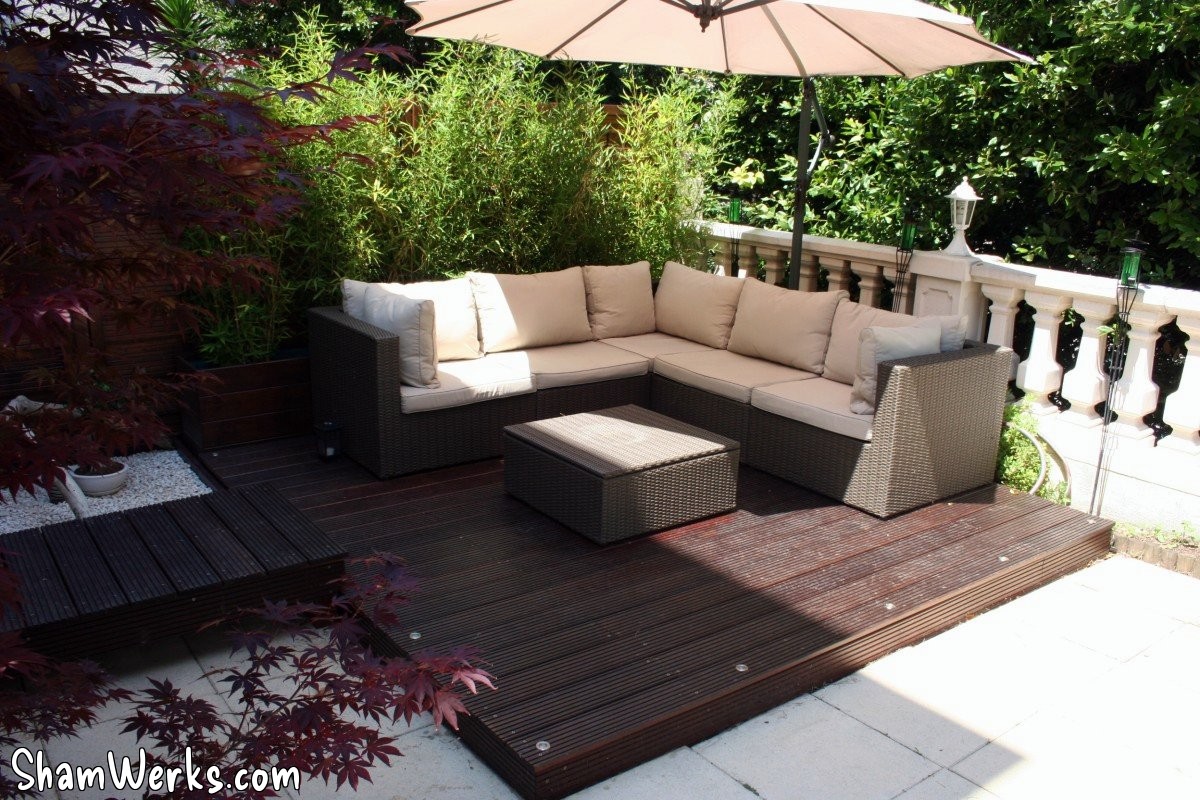
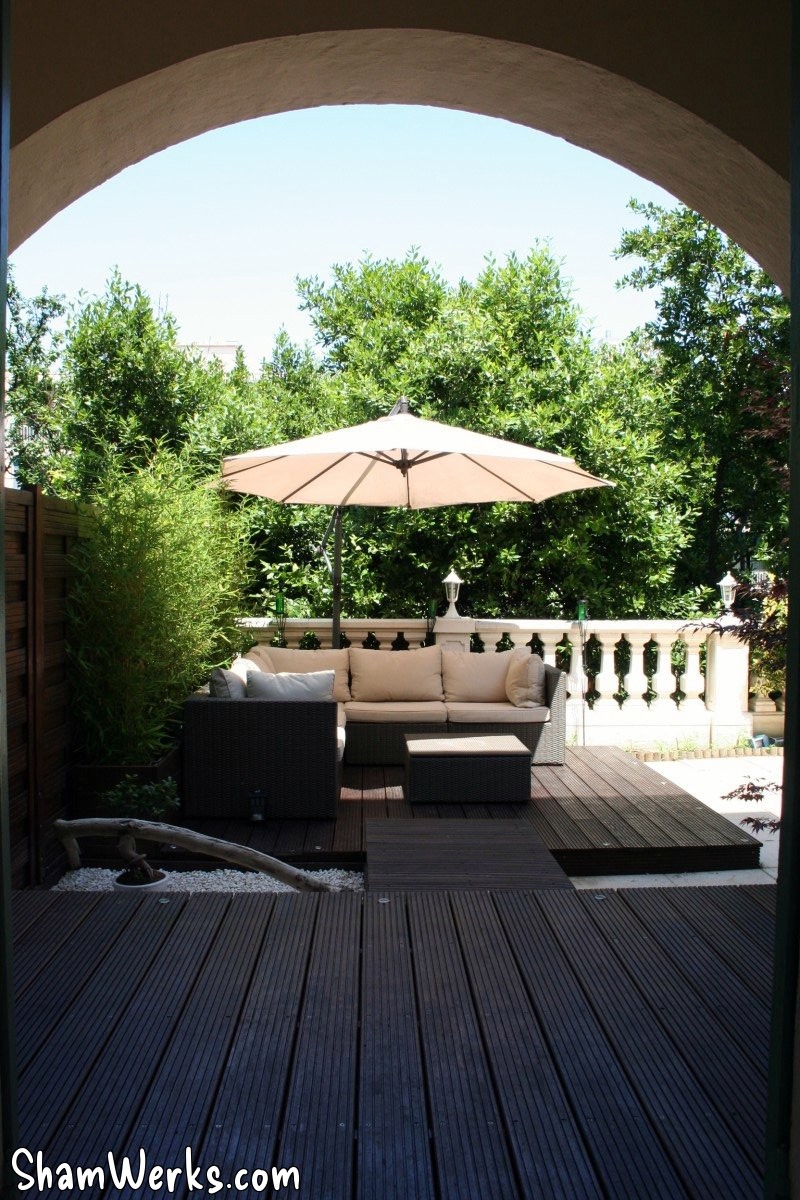
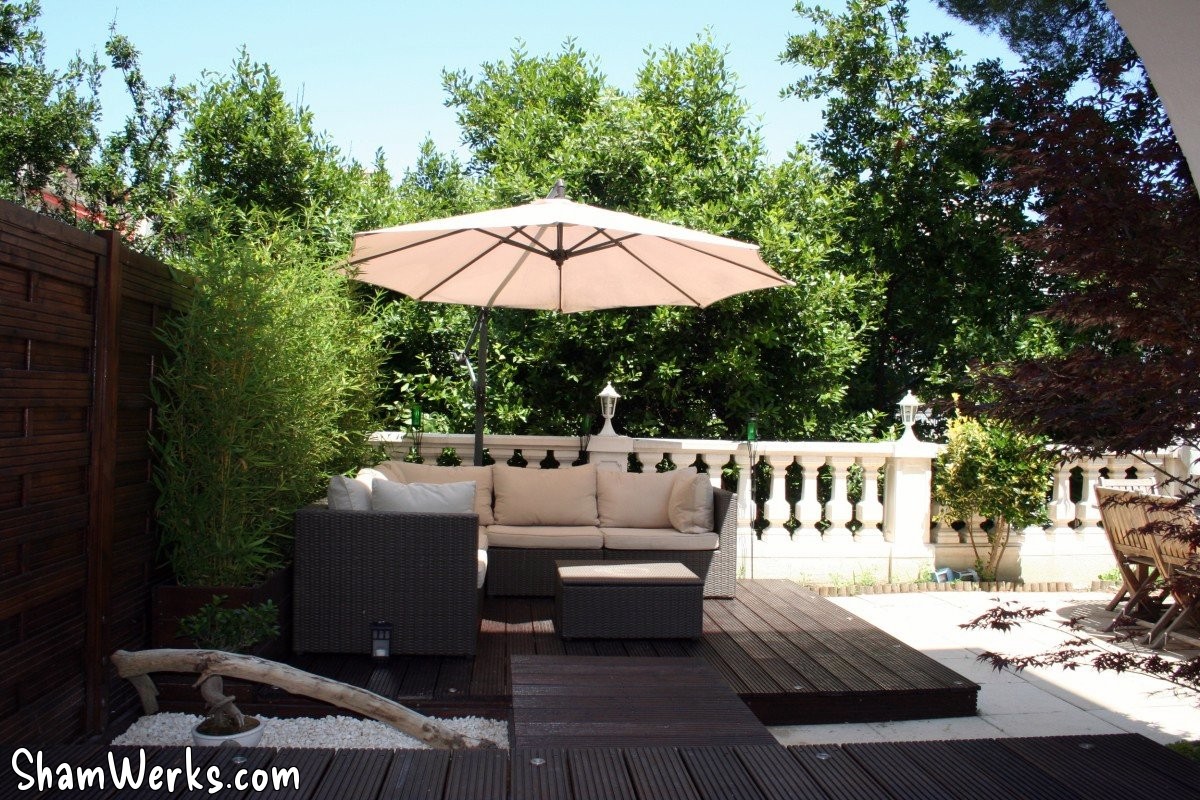
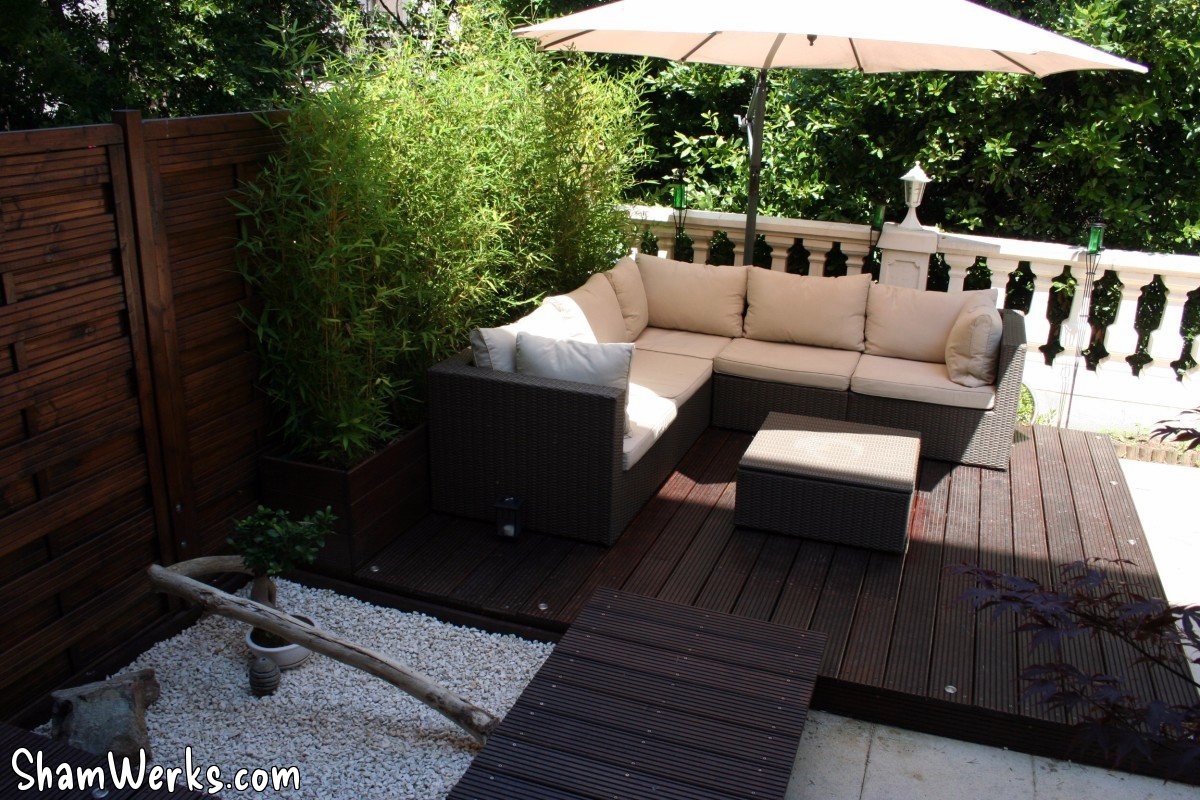
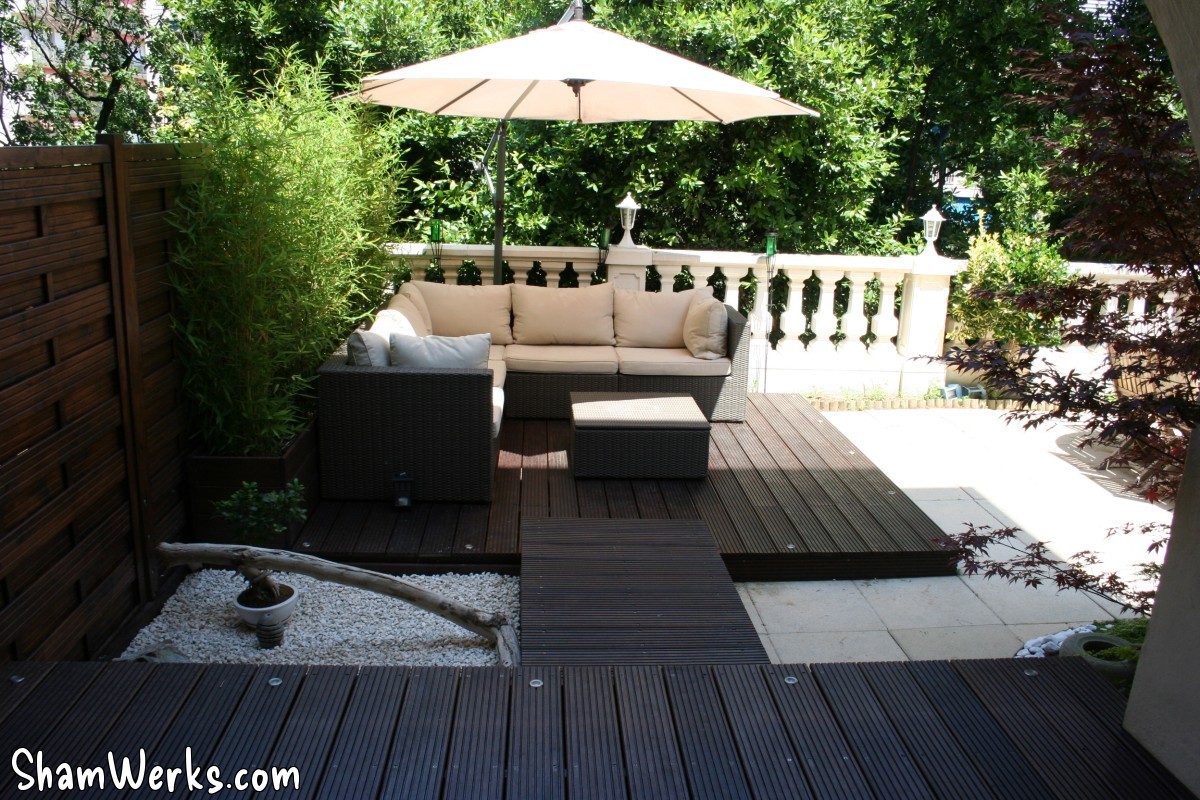
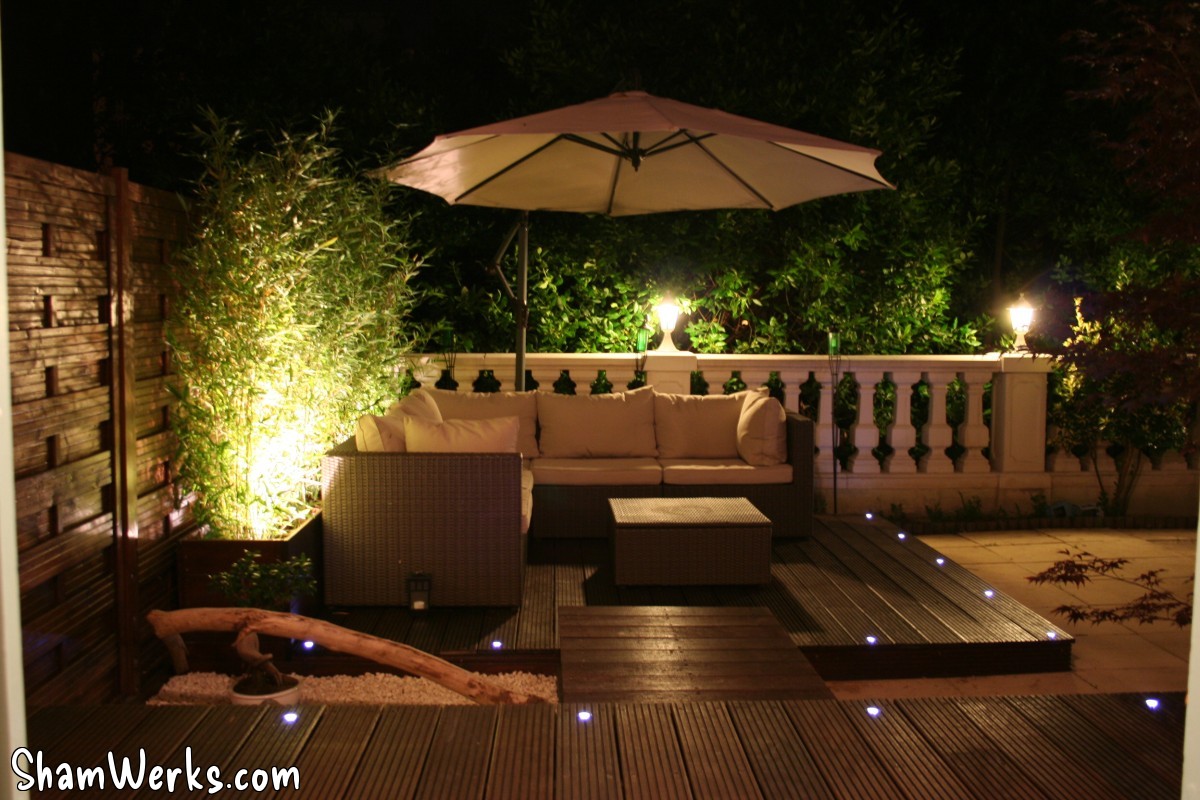
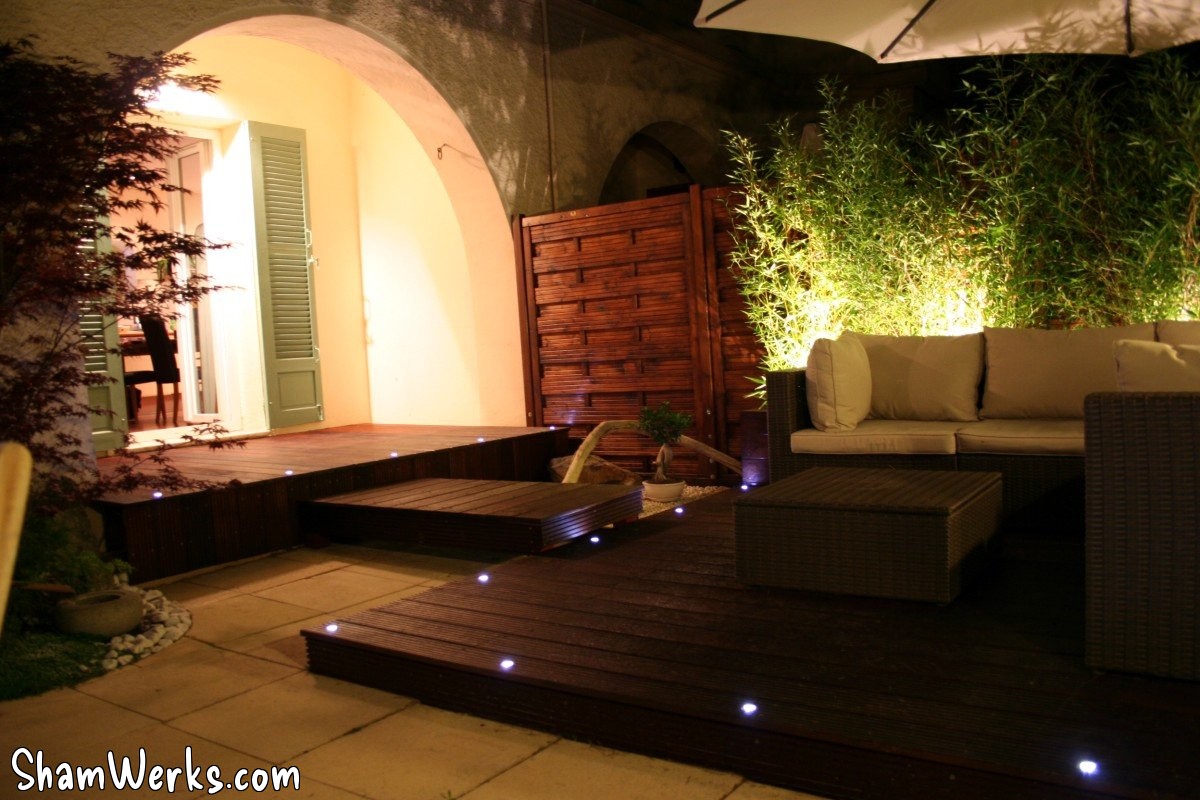
It has now been several months since the terrace was finished, the decks have already gone through a full winter and summer... So I have some perspective on the choices I made.
Construction
It turned out to be more work than I initially imagined! 😉
If you are tackling a project of this type, and you are a bit meticulous like me, don't expect a " weekend project ".
Just for the assembly alone: in total, nearly 1000 screws were used! The vast majority of which required a countersunk hole beforehand, adjusted to the millimeter for a perfect finish... All this does not require enormous skills, and is within the reach of any DIY enthusiast with a few tools; however, it takes time, a lot of time, to get everything aligned correctly.
About installing the boards with grooves facing upward
Exotic hardwood decking boards generally have two sides. One side is either smooth or slightly textured to make it non-slip. The other side has deep grooves running lengthwise, the primary purpose of which, to my knowledge, is to facilitate the drying of the wood throughout (and thus reduce the " time to market ," the delay between when the tree is felled and the finished product is sold) and to prevent the board from splitting.
Although it wasn't designed this way, I chose to install my boards with the "back" side facing up. A purely aesthetic choice, as the deep grooves have a more graphic look in my opinion.
I was worried about two things: firstly, the risk of splinters, because of the right angle at the edge of the grooves... But after a year exposed to the elements, everything is fine, no splinters in sight, phew!
I also thought the grooves might be difficult to clean (like pine needles, etc.). Not at all, they clean very well with a hose, as long as the grooves are properly aligned from one board to the next.
However, what I hadn't anticipated was the difficulty of applying the protective products (oil or saturator). For a flawless finish with these products, you have to wipe off the excess with cloths after a short soaking period... And wiping deep into the grooves is no easy task! 😉
I don't regret my choice, though, as this type of treatment is only done once or twice a year...
Treatment / finishing
I did the first treatment with Starwax oil: I was satisfied with the result, matte/oily appearance and good resistance to rain which beads on the surface of the wood.
But a specialist told me that for terraces (horizontal surfaces), it was better to use a saturator, and reserve oil for wooden furniture... So be it, in spring 2010, I treated everything with V33 terrace saturator.
The result is much less warm than with oil, with a glossy, "plasticky" look. The protection is impeccable, it's true, but I think I'll go back to oil next year...
About the use of exotic wood
It's a choice I made, which I understand is ecologically questionable; the Western trend for exotic woods exacerbates the devastation caused by deforestation of primary forests...
Inquiries made with the seller, this wood would come from forests managed for sustainable exploitation (FSC label, supported in particular by Greenpeace and WWF), with all felled trees being replanted - the GSB where I obtained my supplies paying particular attention to the origin of these products.
So I tried to take precautions... But I'm not fooled either, I know how much corruption in these emerging countries (BRIC) allows you to obtain the official papers for exporting these essences.
The problem of using products from the other side of the world, whose transport has a significant carbon footprint, remains; but I didn't really see an alternative...
I could have used "composite wood", but I doubt it is produced in Europe; not to mention the disgusting "plastic" feel of these products.
Alternatively, there are European wood species that are also rot-resistant; unfortunately, they are not distributed to the general public, and it's very difficult to get hold of them... 😔
In short, I did my best, trying to limit the damage, but I am well aware that my solution is not perfect.
Cost
I didn't keep all the invoices (I should have!), but I estimate the cost of the entire project to be around €2300 , for materials only (excluding tools). The biggest expense is, of course, the wood: at €17 per almendrillo slat, it adds up quickly...
Here, roughly speaking, are the most significant expense categories:
- 960€ : Almendrillo board
- 200€ : Joists
- 150€ : Hardware
- 240€ : Bamboo planters
- 230€ : 6 bamboo plants
- 180€ : 3 wooden panels for the privacy screen
- 240€ : 2 maple trees
- 120€ : Japanese garden equipment
If you're tackling this kind of project, budget generously; things are always overlooked, and the costs can add up quickly (e.g., hardware, geotextile, treatment products, etc.)...
About the safety on this type of project
A word about safety: wearing safety glasses and gloves goes without saying, of course. But this type of worksite, where circular saws are used extensively (especially in hardwood), produces large quantities of very fine sawdust. Dust you definitely don't want to breathe!
Personally, I use a 3M cartridge mask , which is comfortable to wear (not too heavy, you eventually forget you're wearing it) and whose rubber skirt provides a good seal on the face. Forget about those little paper masks with two elastic bands; they offer absolutely no protection. The hardest part, in the end, is finding a pair of safety glasses that can be worn at the same time as the mask!
For those of you who speak English, there is an excellent video on the subject at TheWoodWhisperer.com .
One last detail: I use disposable foam earplugs to protect my eardrums. The comfort while working is incomparable: the noise of the circular saw no longer assaults your ears, allowing you to work comfortably and take your time. And you also avoid that high-pitched whistling in your ears at the end of the day!
I know, I'm very "safety first", but keep in mind that circular saws and routers belong to that family of tools that will take a finger or two off your hand in less than two seconds, without a second thought; these machines don't have a brain, use yours. Your best ally is common sense: don't do anything reckless with these toys, take a deep breath before starting a circular saw (and don't do it if you're tired, that's when accidents happen), check where the cord is, where your fingers are, if the piece to be cut is stable and will remain so at the end of the cut, etc... We only have 10 fingers, 2 eyes, and just as many eardrums, right?
Learn more
Some links to consult before getting started:
- Autoconstruction.info : this site offers various downloadable (paid) guides. I spent €24 on the one about wooden decks. Very well-documented, full of information, a real goldmine of resources; I didn't regret my purchase (free advertising! 😉)
- TheWoodWhisperer.com : (in English) A general website about woodworking/cabinetmaking. Lots of well-made videos on furniture construction, tools, safety... Plenty of techniques to learn. Essential.
- WoodGears.com : (in English) another general woodworking website, with lots of videos. Techniques, machines and mechanisms for woodworking, new article every Monday.
I'll leave you now, I have a sofa waiting for me outside.
Published on 07/11/2010 / 6 commentaires